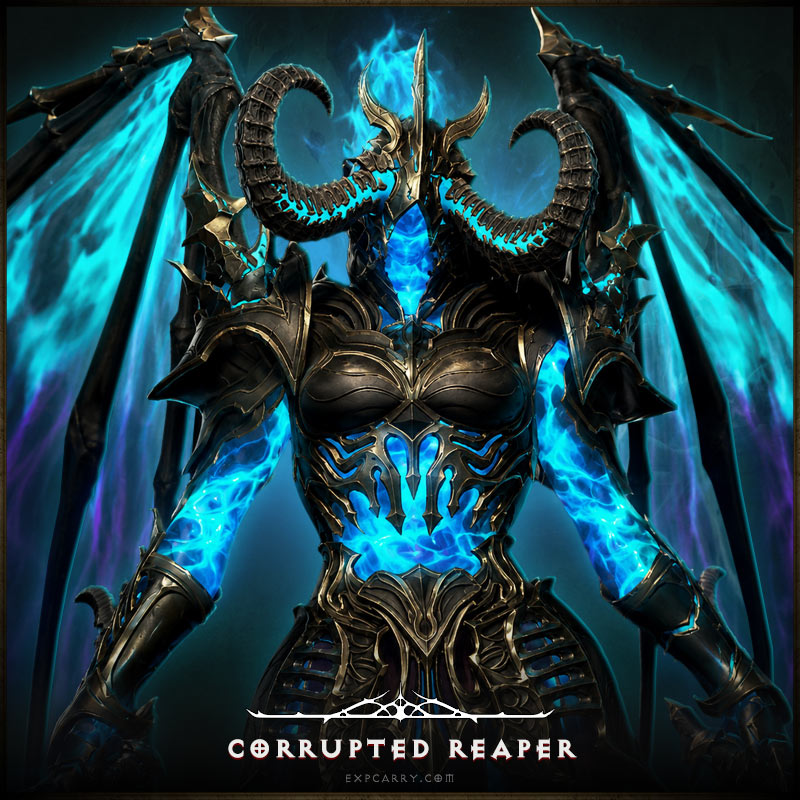
Season 14 of Diablo 4, titled Season of Death Awakening, brought a fresh face to the Superior Lair Key roster: the Corrupted Reaper. Belial used to be the only name on that list, and now she shares it. Her payout backs that up too, since clearing her Hoard right now beats every other repeatable activity in the season for pulling Mythic Uniques and Pandemonium Fragments. Below: where she spawns, what it takes to fight her, how each of her three health stages plays out, the safest way to deal with her trap mechanic, which builds are worth bringing this patch, and what actually comes out of her chest once you crack it open.
Corrupted Reaper Location and How to Unlock the Fight
Zarbinzet, in Hawezar, is where you'll find her lair: the Pandemonium Threshold, set up right beside the zone's original world boss arena. That lair runs on its own instanced space, so nothing wandering the overworld interferes once you cross the threshold. Getting your first shot at her isn't automatic. You need Torment I unlocked, and you need the Season 14 story wrapped up through Rising Tide, Setting Sun, and The Looming Night, a sequence Blizzard laid out in its Season of Death Awakening announcement. Finishing that quest chain is functionally your first kill. One wrinkle for anyone who tested her early: the 3.1 PTR build only gated her behind Torment I, but Blizzard tacked the campaign requirement on top before the season went fully live on June 30, 2026.
Clear that questline once and she stops being a scripted encounter. From then on, she's just a Lair Boss you can summon whenever, no strings attached beyond walking up to the altar inside the Pandemonium Threshold. Every attempt is free; nothing about fighting her costs anything. What costs something is opening what she drops afterward, which the loot section further down covers. Solo play holds up fine here as long as your character can output steady single-target damage over the whole fight, and running with a group doesn't unlock anything new mechanically, it just gets everyone to the kill faster, since each person still has to bring a key to open their own personal Hoard.
Is There an Uber or Tormented Version of the Corrupted Reaper?
No, and there isn't one waiting in the wings either. Diablo 4's Uber Boss Ladder, Echo of Duriel, Echo of Andariel, Grigoire, Echo of Varshan, Lord Zir, The Beast in the Ice, Urivar the Harbinger of Hatred, and Belial, is its own separate system, and a handful of those fights get a harder Tormented version through Stygian Stones once you're pushing level 200 content for better odds. None of that touches the Corrupted Reaper. She's classified purely as a Season 14 Superior Lair Boss, which means the only lever controlling her difficulty is your Torment tier, not some alternate summon or a Stygian Stone sink. That same lever also controls your Mythic Unique odds against her, and a fair number of current farming write-ups land on Torment 12 as the point where drop chances and survivability line up best, though that number should flex with your own build strength. Keep an eye on future patch notes too; if Blizzard ever pulls her into the permanent Uber lineup or bolts on a Tormented version, this section stops applying.
Boss Phases, Soul Traps, and the Trap Rush Combo
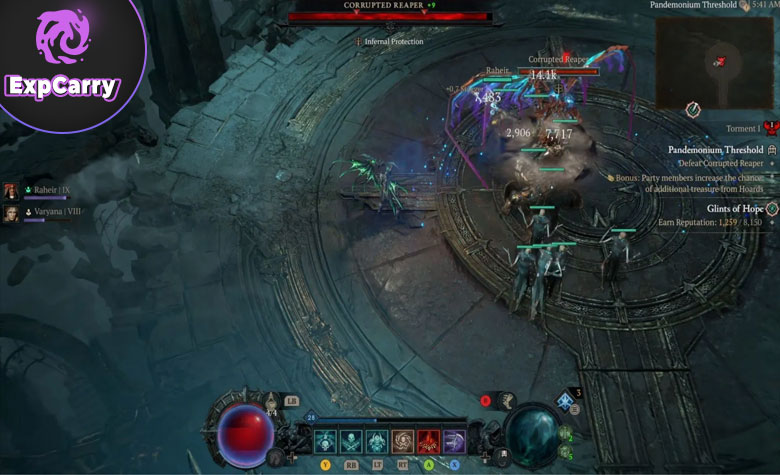
You won't get a breather anywhere in this encounter. There's no immunity window, no scripted stop, nothing that lets you back off and reset, so how consistently you deal damage matters just as much as how well you dodge. What changes is which attacks she leans on as her health drops:
| Phase | HP Range | Primary Threat | How to Handle It |
| Phase 1 | 100% to 66% | A set of four slow-moving projectiles fired in a straight line, plus one Soul Dash | Step sideways out of the projectile path and clear the dash lane |
| Phase 2 | 66% to 33% | Projectile count jumps to six and spreads in a fan; the dash gets faster and now bounces between two fixed points | Watch for the dash coming back and give any nearby Soul Traps a wide berth |
| Phase 3 | Below 33% | Projectiles disappear for good; the Trap Rush combo becomes the main danger | Pop your biggest cooldown here and hug the outer edge of the room |
Here's a detail worth planning your build around: those projectile volleys only fire when you're at range. Fight her in melee for most of the encounter and you'll barely see them, which leaves the dash and the traps as basically your only real problems. A crouch animation always comes before her teleport slam, a hard-hitting hit centered on the middle of the arena, so treat that crouch as your cue to sprint for the outer ring.
Handling Soul Traps and the Trap Rush
Three Soul Traps drop somewhere in the arena at random over the course of the fight. Walk onto one and it arms itself, then blows after a short beat, slowing whoever's standing in the blast. Ignore them and the count keeps climbing, and once she's under 33 percent, she starts laying multiple traps in a straight line before charging through the entire row in one motion, setting off every explosion together as the Trap Rush. The instant you spot that line forming, cut sideways toward the arena's edge, moving perpendicular to wherever she's about to charge. Better habit overall: pop traps on your own schedule instead of leaving them to pile up, or force a stagger, which wipes every live trap off the map in one shot. Most deaths at higher Torment come from exactly this, a messy floor full of unlit traps clustered near her, since a single dash through that mess chains enough blasts to gib even a tanky build.
Best Tactics and Class Picks for Season 14
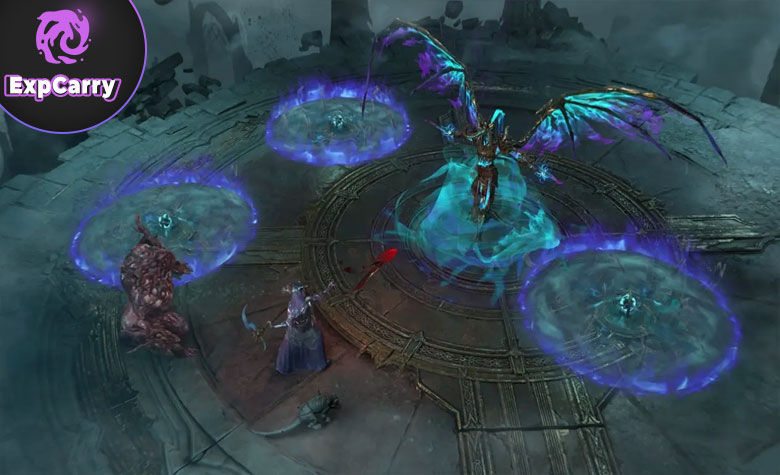
Damage numbers matter less here than where you're standing. Don't let Soul Traps stack up near the boss; walk into them yourself while it's safe instead, since a Soul Dash through an unlit cluster can set off a chain reaction. Hold your strongest cooldown, offensive or defensive, for the exact second she crosses under 33 percent, because that's when Trap Rush hits and a fast arena clear counts for the most. If early attempts feel rough, cooldowns gone, health bar scraping the floor, read that as a build issue rather than rotten luck, and sort it out before burning through a full stack of Superior Lair Keys on runs that aren't going cleanly. Once a build clears without drama, teaming up is purely about pace: matchmaking splits the trap load across more people and gets everyone to the kill sooner, though each person still needs a key of their own for their own Hoard.
Strongest and Weakest Classes This Season
Exact rankings shift depending on the source, but the same few builds keep turning up near the top across current write-ups. Blood Wave Necromancer puts out wide, sustained single-target pressure that fits an encounter with zero immunity windows, and Bone Spirit slots in well as a secondary skill in that same setup. Mighty Throw Barbarian isn't far behind as the top burst pick, and burst- or AoE-heavy kits in general have an edge here simply because there's no dead time waiting out an immunity phase. Rogue's Penetrating Shot and Death Trap setups hold their own too, for anyone who'd rather stay mobile and ranged instead of leaning into melee sustain. On the other side of the list, Hydra, Frozen Orb, and Meteor Sorcerer, the old-school elemental builds, all slid to D-tier once the 3.1.0 balance pass landed, so leaning on any of those three makes this fight's sustained health pool a much longer grind.
Explore services related to this guide, selected from our Diablo IV catalog.
View All Diablo IV Services


Superior Lair Keys and Hoard Cache Rewards
Landing the kill doesn't put anything in your inventory by itself. Her Hoard Cache shows up after she's dead, and cracking it open costs Superior Lair Keys, the same currency Belial's chest uses. Back during the 3.1 PTR this was called Betrayer's Husks before getting its final name at launch, something Blizzard's own PTR preview confirms. Most write-ups currently put the price at two Superior Lair Keys per Hoard, though it's worth confirming the live cost yourself before sinking a whole session into farming, since these numbers move with hotfixes.
Superior Lair Keys start dropping at Torment I, and your best shot at farming them is the Deathtoll Chamber, a short mini-dungeon you unlock by either killing a Realmwalker or clearing a Nightmare Dungeon that's rolled the Rupture affix. Crack the Hoard and it pulls from three separate pools at once: the general Unique pool, the account-wide Mythic Unique pool, and Pandemonium Fragments, the material you feed into the Horadric Cube to push a regular Unique up into Mythic. Season 14 reworked how Mythic works too: it's no longer its own rarity tier but a quality any Unique can roll into or get upgraded to, which locks in maxed affixes and a 30 percent bump to the item's Unique Power. Reward quality climbs with Torment as well, so pushing difficulty as far as your build can safely handle raises both item power and Mythic odds on every cache you crack.
Final Thoughts
What separates a clean Corrupted Reaper kill from a chaotic one isn't gear score, it's how you handle her traps and when you save your cooldown. Her base attacks barely register next to what Trap Rush does if you let the arena get cluttered, so a rough first run is a signal to tighten positioning or swap builds, not a reason to write the fight off. She's worth keeping on repeat for the rest of Season 14 simply because nothing else currently matches her Hoard for Mythic Unique and Pandemonium Fragment output. Don't have the hours to spend farming Superior Lair Keys and grinding out clean pulls yourself? We'll clear the Corrupted Reaper for you, fast and without the trial-and-error of learning Trap Rush the hard way. Take a look at our Corrupted Reaper carry service: expcarry.com/diablo-4-corrupted-reaper