Star Citizen Alpha 4.7 introduced QV Breaker Stations, a new multi-stage industrial activity in Nyx that many players simply call Rock Breaker. You may also see some UI and patch-note references to Rock Cracker, which is part of the same activity naming mess rather than a separate event. Whatever label you use, this is one of the most involved loops in the patch: a station run that combines FPS combat, hand mining, object hauling, terminal interaction, tram routing, and a final ship-mining phase.
This is not a simple contract where you scan a rock, crack it, and leave. Rock Breaker is closer to a facility operation with several linked objectives that need to be completed in sequence. If you want the clean version of what the event gives you, how to unlock it, what reputation is required, how many players make it smoother, and how to run it from start to finish, this guide covers the full loop without overstating the parts that are still mostly understood through live player testing.
What Rock Breaker Gives You in Star Citizen Alpha 4.7
Rock Breaker matters because it sits right in the middle of Alpha 4.7's broader Mining Resources and crafting ecosystem. During the mission, you mine Sadaryx and use it to fabricate lenses that are needed for the station laser sequence. Once the station is fully restored and the beam fires, the final phase opens into a ship-mining payoff. That alone makes the activity important for players who want more than another basic FPS bunker or one-step mining contract.
In practical terms, Rock Breaker offers several layers of value:
- Mission-critical materials, especially Sadaryx, used during the station run itself.
- Access to the final fractured rock and the ship-mining stage that follows the laser sequence.
- Loot from hostile NPCs, containers, and optional side areas inside the facility.
- A direct connection to Alpha 4.7's larger mining and industrial progression loop.
Some players also tie the activity to the patch's wider crafting and blueprint economy, but that part is better described as ecosystem relevance rather than a guaranteed direct blueprint payout from every run. The safe takeaway is simple: Rock Breaker is one of the headline Alpha 4.7 industrial activities, and it matters because it blends combat, mining, logistics, and progression in one mission chain.
How to Start Rock Breaker and What You Need First
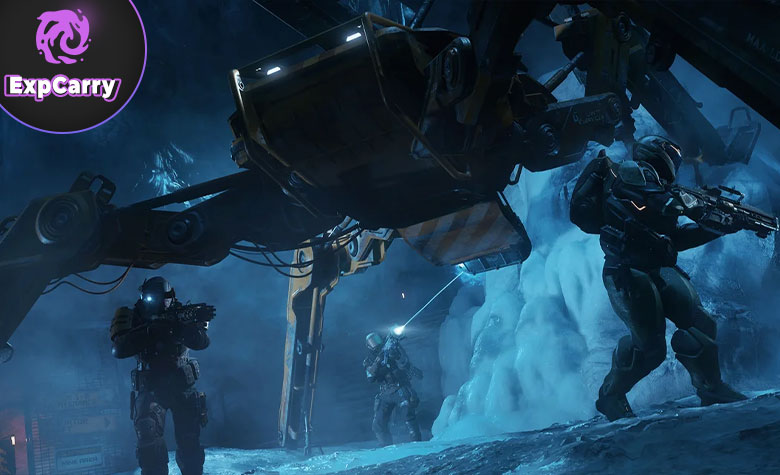
You do not unlock Rock Breaker by flying to Nyx and waiting for the contract to appear. First, you need to build Shubin Interstellar mining reputation. Current live player routing consistently points to the purchase order chain as the fastest practical path, rather than treating the whole thing like a random mining grind.
The usual starting point is Small Purchase Order: Hand Mined Materials. That mission leads into the ship-mining purchase order chain, and those repeatable contracts are what push your Shubin reputation high enough to open the Nyx station activity. The current live consensus is that shared access appears at Jr. Contractor, while exclusive access opens at Contractor.
| Unlock stage | What to do | What it opens | Why it matters |
|---|---|---|---|
| Step 1 | Run Small Purchase Order: Hand Mined Materials | Mining contract chain | This starts Shubin mining progression |
| Step 2 | Repeat Small Purchase Order: Ship Mined Ore | Jr. Contractor | Unlocks shared Rock Breaker access |
| Step 3 | Repeat Medium Purchase Order: Ship Mined Ore | Contractor | Unlocks exclusive Rock Breaker access |
If your goal is just getting into the activity quickly, Jr. Contractor is enough. If your goal is more controlled learning runs with less interference, Contractor is the better stopping point because it opens the exclusive contract.
Required Reputation, Contract Types, and Shared vs Exclusive
Rock Breaker currently matters in two contract formats: shared and exclusive. Shared is the lower-entry version and the more contested one. Exclusive costs much more, but it is usually the better choice for a group that wants to learn the station, keep the flow cleaner, and reduce unnecessary chaos during early clears.
Live community guides commonly place the shared contract at around 175,000 aUEC and the exclusive version at around 850,000 aUEC. Those figures are widely repeated in current guides, but they are still best treated as live practical pricing rather than a permanent official promise that can never shift. What matters more than the exact number is the difference in use case: shared is the messier version, while exclusive is generally the cleaner one for organized groups.
You will also see community claims that shared can offer better material quality. That may reflect current player experience, but it should be treated as an observed live pattern rather than a hard rule that has been cleanly formalized everywhere. For most first clears, exclusive remains the smarter pick because the reduced interference matters more than squeezing theoretical upside out of a run you are still learning.
Explore services related to this guide, selected from our Star Citizen catalog.
View All Star Citizen Services


How Many Players You Should Bring
Rock Breaker is playable with a small team, and experienced groups will inevitably push it with fewer bodies because this community cannot resist turning every group activity into a self-imposed suffering contest. Still, the station runs much more smoothly with a proper crew instead of a loose pile of people improvising every hallway.
A practical team usually lands in the 4-6 player range. That is not a strict requirement from the game, but it is the range that makes the station feel manageable without overcomplicating coordination.
- 2 combat-focused players to clear hostile interiors and hold angles.
- 1 utility-focused player for tractor work, salvage interactions, fuses, and object handling.
- 1 player focused on hand mining and mission materials.
- 1 or 2 ship miners ready for the final extraction phase in a Prospector or MOLE.
If you only have four players, combine roles instead of trying to mirror a perfect squad layout. What matters is not roleplay precision. What matters is that someone is always pushing the objective instead of the whole team stacking in one room while nobody remembers which console matters next.
Best Loadout Before You Enter the Station
Most failed runs collapse because the team arrives with weapons, ammo, and optimism, but not the tools the station actually expects. Rock Breaker includes combat pressure, cold sections, object movement, power gating, and environmental blockers. If your group shows up like this is just another corridor shooter, the station will punish that stupidity fast.
Bring the following every run:
- Heavy armor or proper cold-resistant armor such as Pembroke or Morozov.
- A close-range FPS weapon with enough ammo for repeated interior fights.
- A multitool setup that covers mining, tractor, and salvage needs across the team.
- At least 10 fuses for power-gated progress.
- Medpens and proper medical support.
- A respawn-capable or support-oriented ship if your group can field one.
- A Prospector or MOLE ready for the final mining phase.
The single best quality-of-life upgrade is strong tractor coverage. A basic weak setup technically works, but heavy mission objects are much less annoying when one player is built for logistics instead of pretending dragging large components across a station is somehow a minor detail.
Fastest Unlock Route Before You Travel to Nyx
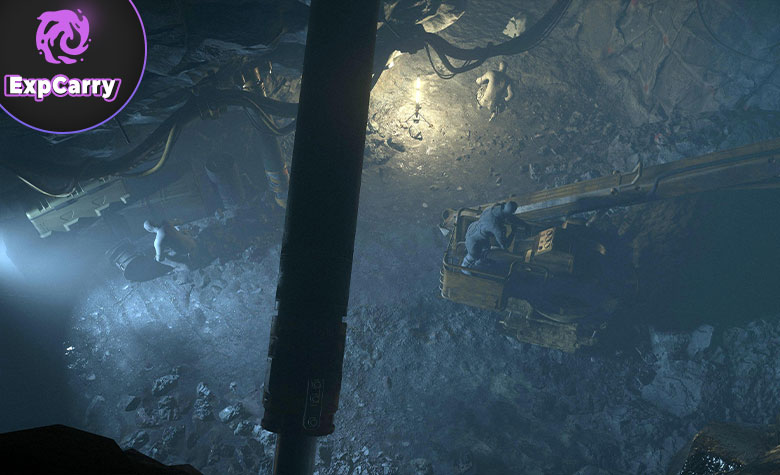
If you are starting from zero Shubin reputation, the fastest route is not glamorous. It is a contract grind. Start with the hand-mining purchase order chain, then push into ship-mined ore deliveries as soon as possible. That is where progression starts moving in a more practical way.
The rough sequence looks like this:
- Complete the first hand-mining purchase order to enter the chain.
- Push through the larger hand-mining requirement only until ship-mining orders open.
- Repeat Small Purchase Order: Ship Mined Ore until Medium Purchase Orders appear.
- At that point, you should be at Jr. Contractor and able to access shared Rock Breaker.
- Repeat Medium Purchase Order: Ship Mined Ore until you reach Contractor.
- That unlocks exclusive Rock Breaker contracts.
Some current player routes recommend speeding this up by purchasing and delivering required materials rather than extracting every needed resource yourself. That can save time, but it also turns the unlock path into a more expensive rep push. Either way, the important truth is simple: Shubin rep is the gate, and you need to clear it before Nyx matters.
Rock Breaker Step-by-Step Walkthrough
Once unlocked, relocate to Nyx, stage out of Levski or another practical support point, and watch the contract list in the Ship Mining section. For the cleanest first learning run, exclusive is usually the better option.
The station itself makes more sense when treated as several linked phases rather than one giant objective blob.
Phase 1: Restore Power and Gather Sadaryx
Land near the station, enter, and move toward the Power Core. Early progress revolves around installing the required capacitors and getting the station back online. While moving through this phase, mine Sadaryx from the distinctive deposits around the facility. You need at least 12 total to complete the lens crafting requirement later, because the station needs three lenses and each one consumes four Sadaryx.
Environmental blockers matter here. Some routes are closed by ice walls that need mining-tool interaction, while some damaged panels need salvage-tool handling. Clear threats first, then work the objective. Trying to do delicate utility interactions in the middle of active contact is how people create their own recovery mission.
Phase 2: Reboot the Station and Track the Codes
After restoring power, move toward Operations and trigger the facility reset. Refractor codes become important during this part of the mission flow, and they need to be logged as you move. Current live guidance consistently treats code tracking as one of the most important habits in the run, because forgetting a code means pointless backtracking later through areas you already fought through once.
Have one player record every code immediately. That alone makes the entire station flow cleaner.
Phase 3: Clear Storage and Move the Catalysts
Progress toward the laser side of the station and then into Storage. This is one of the heavier combat sections, so let the players built for FPS lead. In Storage, trigger the release mechanism and collect the required catalysts. You need all four. Tractor them back through the transport route and return them to the laser system.
This stage is less about elegance and more about logistics under pressure. Move fast, keep the route clear, and do not turn it into five separate trips because nobody planned object handling in advance.
Phase 4: Craft the Lenses and Align the Refractors
Once you have the required Sadaryx, craft the three station lenses. The minimum requirement is 12 Sadaryx total, but bringing extra can save a run if the station or fabrication process becomes unreliable. After crafting, install the lenses into the laser assembly and complete the refractor alignment sequence using the codes your team logged earlier.
The facility uses three refractors, and all of them must be correctly aligned before the beam can fire. This is one of the places where the station stops feeling like a basic dungeon and starts feeling like a real industrial operation with interlocking systems.
Phase 5: Final Check, Fire the Laser, and Move Into Ship Mining
Before ignition, make sure the full checklist is complete: power restored, station rebooted, three lenses installed, three refractors aligned, and all four catalysts loaded. When the system is ready, fire the laser and transition into the final ship-mining phase once the target rock opens.
Have your mining ships staged before ignition if possible. The final payoff starts after the beam sequence, and the cleanest groups are the ones that transition immediately instead of wasting time reorganizing only after the station work is already done.
What You Actually Get at the End
A successful run gives more than a completion tick. The end value comes from the whole chain working together.
- Completion of one of Alpha 4.7's core industrial mission loops.
- Access to the final opened rock and its follow-up mining opportunity.
- Loot and materials collected during the interior run.
- Useful progression for players engaging with Nyx and the new industrial side of the patch.
The final mining phase is the real payoff most groups care about. If your team reaches the beam sequence but then fumbles the transition into ship mining, you technically finished the mission but still wasted the part that made the whole thing worth doing.
Best Strategy for First Clears and Repeat Runs
For first clears, the safest pattern is simple: choose exclusive if you can afford it, bring a real set of tools instead of a half-prepared loadout, assign one player to code tracking, and keep the team focused on objective flow rather than side chatter and random wandering. The goal on an early run is not speed. The goal is reducing confusion.
For repeat runs, role ownership matters more. One player should handle code discipline, one should own logistics, combat players should stay ahead of the route, and ship miners should be ready to capitalize on the final phase as soon as the station is complete. That separation is what turns a long first clear into a repeatable loop instead of another messy story about how everyone definitely knew what they were doing right before the plan fell apart.
Shared becomes more attractive once your group already knows the station and can deal with interference. Early on, exclusive is usually the better training ground because learning the layout is hard enough without extra chaos layered on top.
Final Thoughts
Rock Breaker is one of the most important Alpha 4.7 activities because it ties combat, mining, logistics, and station systems into a single mission loop. The entry gate runs through Shubin Interstellar mining reputation, shared access opens at Jr. Contractor, and exclusive access opens at Contractor. Once you are in, the run itself revolves around restoring power, gathering Sadaryx, tracking refractor codes, moving catalysts, fabricating three lenses, aligning the station, firing the beam, and then converting that success into a final ship-mining extraction.
If you want the shortest practical version, it is this: grind Shubin rep first, bring a properly equipped team, gather at least 12 Sadaryx, track every code the first time you see it, move all four catalysts without wasting time, install the three lenses, align the refractors, fire the laser, and transition into ship mining immediately. That is the real Rock Breaker loop. Everything else is just the amount of disorder your group adds to it on the way.