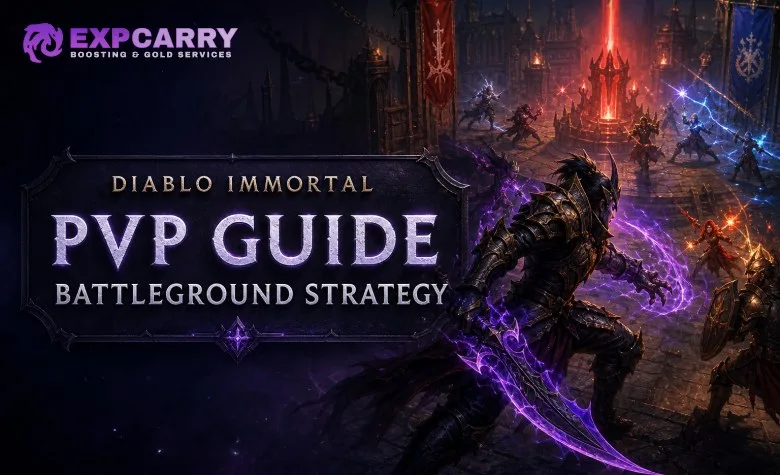
Diablo Immortal Battlegrounds are objective-based 8-player-versus-8-player matches in which one team attacks and the other defends. Attackers must defeat Guardians, escort Zealous Idols, and destroy the Ancient Heart; defenders win by stopping the assault before the timer expires or by eliminating enough attackers. The strongest Battleground build is rarely the highest-damage PvE setup: successful PvP builds prioritize survivability, crowd control, mobility, disruption, and the ability to remain near an objective without wasting cooldowns.
What This Battleground Guide Covers
The main search intent is current Diablo Immortal PvP strategy: how to adapt a class for Battlegrounds, which skills and gear traits matter, how attackers and defenders should play differently, and how F2P and lower-Resonance players can contribute against stronger accounts.
Battlegrounds are not decided by kills alone. A high damage score is useful only when it creates space for an Idol push, prevents a revive rotation, protects a teammate, or opens a path to the Ancient Heart. Build and playstyle recommendations should therefore be judged by objective pressure rather than by the end-of-match scoreboard.
How to Enter Battlegrounds and Understand the Objectives
Travel to Westmarch and speak with the Battleground Captain. Battlegrounds are available as a dedicated PvP activity, and newer characters receive an introductory quest that explains the basic flow of the mode. The match assigns players to the attacking or defending side unless a selection option is available.
| Match phase | Attacker objective | Defender objective | Best tactical priority |
|---|---|---|---|
| Guardian phase | Defeat the objective Guardians | Delay or eliminate attackers | Fight around the Guardian instead of chasing kills across the map |
| Idol phase | Escort at least one Zealous Idol | Stop Idol progress and force attackers away | Control the Idol area and protect the player applying pressure |
| Ancient Heart phase | Destroy the Ancient Heart | Prevent access or eliminate enough attackers | Save major control and defensive cooldowns for the final push |
Defenders should not abandon an Idol to chase a retreating opponent. Attackers should not leave both Idols unattended to pursue a low-health enemy. The team that controls the objective usually wins the exchange even when it loses the kill count.
Build Priorities for Battleground PvP
Use a separate Armory loadout for Battlegrounds. A PvE build normally maximizes sustained damage, movement speed, or area clear. A PvP loadout must account for enemy control effects, burst damage, displacement, and the time required to return from the graveyard.
- Equip reliable defensive or escape skills. One immunity, invulnerability, movement, or damage-reduction tool is usually worth more than a small increase in theoretical damage.
- Use at least one source of crowd control. Stuns, roots, knockbacks, slows, fears, pulls, and displacement effects create time for an Idol to move or for a teammate to finish a target.
- Protect your primary damage window. Do not activate every offensive cooldown at the first sight of an enemy. Wait until the target has used an escape or defensive skill.
- Favor beneficial magic attributes. Cooldown reduction, beneficial-effect duration, resistance, potency, movement speed, attack speed, and damage reduction are generally more useful in PvP than a pure PvE damage line.
- Keep gear quality current. Combat Rating, item ranks, attributes, Legendary Gems, and Resonance still influence performance. A clever build cannot completely remove a large account-power difference.
Secondary attributes also matter. Armor and Armor Penetration influence how efficiently damage is dealt and received, while Resistance and Potency affect control interactions. Do not confuse Combat Rating with Resonance: Combat Rating helps determine the strength of your character against content and opponents, while Resonance primarily increases the attributes supplied by Legendary Gems.
Explore services related to this guide, selected from our Diablo Immortal catalog.
View All Diablo Immortal Services
Recommended Battleground Skill Roles by Class
Every class can contribute in Battlegrounds, but each class should enter the match with a clear job. The skill names and Legendary Essences available to you may change as you collect newer items, so use the in-game build recommendations and leaderboard loadouts as a current reference when a balance update changes a class.
| Class | Strong Battleground role | Skills to prioritize | Common mistake |
|---|---|---|---|
| Barbarian | Front-line initiator and disruption | Whirlwind, Sprint, Undying Rage, Leap or another control tool | Entering alone without an escape or support |
| Crusader | Objective escort and team protection | Draw and Quarter, Conjuration of Light, falling-sword control, and a reliable defensive skill | Using team protection away from the Idol |
| Demon Hunter | Back-line pressure and target finishing | Daring Swing, knockback or immobilization tools, and ranged damage skills | Standing still and firing while enemies collapse on the back line |
| Monk | Peel, engage, and mobility | Shield of Zen, mobility skills, Seven-Sided Strike, and control or shielding effects | Spending every movement skill on the opening engage |
| Necromancer | Area denial and team utility | Bone Wall, Bone Pillars, wraith-based movement, and summon or control tools | Placing control effects where no objective fight is occurring |
| Wizard | Ranged control and zone denial | Teleport, Black Hole, Ice Crystal, and a protected ranged damage option | Using Teleport offensively and losing the only escape |
| Blood Knight | Disruption, dive pressure, and anti-back-line play | Swarm of Bats, Sanguinate, skewer or control skills, and a defensive transformation option | Diving before allied damage is ready |
| Tempest | Mobile pressure and target disruption | Movement skills, shields, displacement, and short burst windows | Chasing targets beyond the objective area |
| Stormcaller | Ranged damage and battlefield control | Long-range attacks, area control, mobility, and an emergency defensive skill | Building only for damage and having no answer to melee divers |
| Druid | Front-line disruption and team support | Form-based mobility, summons or control, defensive tools, and close-range pressure | Remaining in an unsuitable form after the fight changes location |
The exact class roster and balance environment can change with major updates. Treat the class role as a build framework rather than a permanent tier ranking. A well-positioned support Necromancer, Crusader, or Monk can provide more value than a poorly positioned damage dealer, especially in a coordinated objective fight.
Barbarian Battleground Setup
Barbarian is strongest when used to begin or absorb a fight rather than to duel indefinitely. Build around mobility, damage reduction, control resistance, and a way to re-enter combat after the first engagement. Whirlwind remains useful for pressure and objective contact, but it should not replace a defensive cooldown.
Use Leap or another gap-closer to reach the enemy back line only when allied players can follow. Undying Rage is most valuable when timed for an Idol contest, a revive recovery, or a final Ancient Heart push. Avoid activating it after you are already isolated and surrounded.
Crusader Battleground Setup
Crusader should play close to the objective and use defensive effects to create a safe window for teammates. Draw and Quarter is valuable for rotation and pressure, while Conjuration of Light can deny a burst attempt when several allies are contesting an Idol or Ancient Heart.
Do not spend every defensive skill to save one teammate in the open field. The same cooldown may protect the entire team during the next Idol checkpoint. Crusader damage is useful, but objective control and team protection are usually the class’s larger contribution.
Demon Hunter Battleground Setup
Demon Hunter should attack from the edge of the fight, pressure vulnerable targets, and retreat before melee classes reach the back line. Daring Swing or an equivalent mobility tool is not merely an offensive gap-closer; preserve it for escape whenever the enemy has multiple divers.
Use knockback, immobilization, or slowing effects to punish opponents who commit to the Idol. Focus targets that are already controlled or separated from their team instead of switching constantly between full-health enemies.
Monk Battleground Setup
Monk provides mobility, shielding, and disruption. Shield of Zen can protect an ally during an engage or help a teammate remain on the Idol, while mobility skills allow Monk to peel for ranged allies or reach enemy damage dealers.
Seven-Sided Strike and similar commitment skills should be used after enemy control has been spent whenever possible. Monk is powerful but timing-sensitive: entering first without a plan for retreat often turns a strong engage into an unnecessary death.
Necromancer Battleground Setup
Necromancer excels at controlling the space around an objective. Bone Wall and Bone Pillars can divide a team, block access routes, interrupt a chase, or force defenders away from an Idol. Wraith Form gives Necromancer a valuable escape and rotation tool.
Summons can add pressure, but a Battleground Necromancer should not treat the match like open-world farming. Place control effects on the path enemies must use, not behind the fight. A well-timed wall that delays a rotation can be more valuable than a small damage increase.
Wizard Battleground Setup
Wizard should combine long-range damage with battlefield control. Black Hole and Ice Crystal-style control tools can disrupt an approach, expose a back-line target, or deny a narrow route near the objective. Teleport should normally be held until enemy divers commit.
Wizard is vulnerable when crowd control is unavailable. Fight from an angle rather than directly in front of the enemy team, and change position after revealing your major ranged cooldowns. Do not remain in the same location simply because the first spell rotation was successful.
Blood Knight Battleground Setup
Blood Knight is designed to disrupt formations and pressure fragile targets. Swarm of Bats and Sanguinate-style mobility can create aggressive openings, but both should be used with a clear exit route. The class is most effective when it attacks a back line already occupied by another ally.
When defending, Blood Knight can punish attackers who overextend beyond the Idol. When attacking, do not chase a retreating player past the objective; force the defender to choose between disengaging and abandoning the Idol.
Tempest, Stormcaller, and Druid Setups
Mobile and newer classes should be built around controlled engagements rather than constant movement without purpose. Tempest can rotate quickly and disrupt a target, Stormcaller can apply ranged pressure while controlling space, and Druid can combine forms, summons, and defensive effects to contest the front line.
These classes benefit from flexible Armory pages: one setup for objective defense, one for open-field skirmishing, and one for survival against heavy melee pressure. If a class has multiple forms or stance-like options, change form according to the fight’s location rather than using the same form for every phase.
Legendary Essences and Set Items for PvP
Do not copy a PvE Essence page into Battlegrounds without testing it. The best PvP Essence is usually the one that adds control, protection, displacement, cooldown reliability, or a safer way to deliver damage.
- Helm: prioritize defensive effects, crowd-control resistance, improved mobility, or a skill that protects your first engagement.
- Shoulders: look for cooldown improvements, stronger control, or effects that increase the reliability of your main defensive skill.
- Chest: prioritize area denial, team protection, damage reduction, or an effect that makes the objective fight harder to enter.
- Pants: choose mobility, control duration, escape reliability, or an effect that helps you remain active after being focused.
- Main-hand and off-hand: use the offensive effects that improve your chosen damage window, but avoid sacrificing every defensive option for a small increase in burst.
Set items should support the same goal. Movement, beneficial-effect duration, control reliability, damage reduction, and skill uptime are often more useful in PvP than a set bonus designed solely for clearing monsters. If a set bonus requires you to remain stationary or repeatedly hit one target, consider whether the effect can survive the movement and interruptions of Battleground combat.
Set-item drops remain random. Farm the dungeon and difficulty that gives efficient runs for your current account, but do not delay all PvP participation while waiting for one perfect item. Replace a missing set piece with a functional alternative and continue upgrading the rest of the build.
Legendary Gems for Battlegrounds
There is no universal Legendary Gem list for every class or budget. High-investment accounts can use premium damage and control gems, while F2P and low-spending players should favor reliable effects that remain useful at lower Resonance.
| Gem priority | Best use | Budget guidance |
|---|---|---|
| Defensive and damage-reduction effects | Surviving burst and remaining near objectives | High value for melee classes and lower-Resonance accounts |
| Control or control-resistance effects | Starting fights and resisting enemy lockdown | Choose reliable, upgradeable options before chasing expensive gems |
| Damage-over-time effects | Maintaining pressure while repositioning | Useful for ranged and sustained-damage builds |
| Burst damage effects | Finishing controlled or isolated targets | Best when the rest of the build already provides survival |
| Movement or utility effects | Rotations, escapes, and objective access | Particularly useful for support and low-damage builds |
Upgrade gems that you can realistically maintain. A lower-cost gem at a useful rank can be more practical than an expensive five-star gem that remains underdeveloped. Do not spend all Platinum on a theoretical endgame setup if your equipment ranks, normal gems, and defensive attributes are still behind.
How F2P and Low-Resonance Players Should Play
F2P players cannot assume that skill alone will erase a major Resonance or gear difference. The practical goal is to create value without taking unnecessary deaths. Play a support, control, or objective-focused role when direct burst trades are unfavorable.
- Stay near allies. Two moderate players using control and damage together can defeat targets that neither player could eliminate alone.
- Fight from cover and corners. Reduce the number of opponents who can target you at the same time.
- Use cooldowns defensively. Surviving a fight preserves objective pressure and avoids a long return trip from the graveyard.
- Attack weakened targets. Do not open on the healthiest enemy simply because that player is visible.
- Build for utility. A root, wall, shield, slow, or displacement effect can remain valuable even when your damage is reduced by PvP scaling.
- Upgrade consistently. Equipment ranks, normal gems, Helliquary progression, and higher-quality gear improve the account over time without requiring one lucky drop.
Low-spending players should maintain at least two Battleground loadouts: a general objective build and a defensive build for matches containing several melee divers. Higher-investment players can add specialized builds for ranged pressure, anti-control, and final Ancient Heart pushes.
Attacker Strategy: Win the Map, Not the Scoreboard
Attackers should treat every death as lost objective time. During the Guardian phase, group enough players to secure the Guardian while sending only the minimum necessary pressure to prevent defenders from freely setting up.
During the Idol phase, assign roles before the push begins. Front-line classes should clear the route and absorb control, support classes should protect the player applying pressure, and ranged classes should attack defenders who are trying to stand directly on the Idol.
- Push one Idol decisively when the enemy team is split.
- Use the second Idol as pressure rather than abandoning both objectives.
- Do not chase defenders into their spawn area while the Idol is stopped.
- Save immunity, shields, and major crowd control for the final Ancient Heart approach.
- When the Heart becomes vulnerable, stop farming kills and commit to the objective.
The most common attacking mistake is fighting everywhere except on the route that advances the match. If your team has control of an Idol, stand on the objective, protect the push, and force defenders to approach you.
Defender Strategy: Delay, Rotate, and Force Bad Engagements
Defenders do not need to win every fight. They need to interrupt progress, force attackers to retreat, and create enough deaths or delays to end the assault before the Ancient Heart is destroyed.
- Contest the active objective first. Do not rotate toward a distant skirmish while an Idol is moving freely.
- Attack the escorting support. Removing the shield, healer, or control player can stop the entire push.
- Use terrain and choke points. Narrow routes make area control and displacement more effective.
- Rotate before the Idol arrives. Waiting until the last moment gives attackers free progress.
- Preserve defensive cooldowns for the Heart. A final coordinated defense is more valuable than an isolated kill earlier in the match.
Defenders should avoid overextending after a successful defense. If the attackers are retreating, reset near the next objective rather than giving them easy counter-kills and losing the defensive formation.
Matchmaking, Resonance, and PvP Scaling
Battleground matchmaking uses several account and performance considerations, but no matchmaking system can guarantee equal class compositions, equal coordination, or equal investment. Recent updates have expanded cross-region matchmaking and adjusted how Resonance is considered when assembling matches, yet players can still encounter uneven teams and difficult power differences.
PvP scaling reduces the impact of some account advantages, but it does not make Combat Rating, Resonance, gem ranks, equipment ranks, secondary attributes, and experience irrelevant. A lower-power player should select fights carefully and contribute through objectives, control, scouting, and coordinated focus fire.
Paragon Specializations should be selected before entering the match. They cannot be changed during an active Battleground, so check the loadout, skills, Essences, Gems, and Paragon choice before queueing.
Common Battleground Mistakes
| Mistake | Why it hurts | Better approach |
|---|---|---|
| Chasing a nearly dead enemy | The Idol or Heart advances without resistance | Return to the active objective after forcing the enemy away |
| Using every cooldown at the start | You have no answer to the counterattack | Reserve one escape and one defensive tool |
| Copying a PvE loadout | The build lacks control and survivability | Create a dedicated PvP Armory page |
| Fighting alone | Enemy control chains you before help arrives | Move with at least one damage or support partner |
| Ignoring the scoreboard objective | Kills do not automatically win the match | Track Idol progress, Heart access, and defender deaths |
| Standing in the same location | Enemies pre-aim control and burst skills | Reposition after every major spell rotation |
A Practical Battleground Routine
Before queueing, switch to your PvP Armory page, confirm your Paragon Specialization, and inspect whether your skills work with the equipped Essences. Enter the match with one clear role: initiate, protect, control, pressure, or finish.
At the start of each phase, identify the enemy’s most dangerous cooldowns and the teammate who needs protection. During combat, prioritize the active objective, use control after enemy mobility is committed, and retreat before your defensive tools are exhausted. After the match, review deaths caused by poor positioning rather than changing the entire build after one defeat.
The most reliable Battleground improvement is not a single “best” class or Legendary Gem. It is a PvP loadout that keeps you alive long enough to use control, a team that rotates toward the objective, and a decision to stop chasing kills when the Idol or Ancient Heart needs protection.