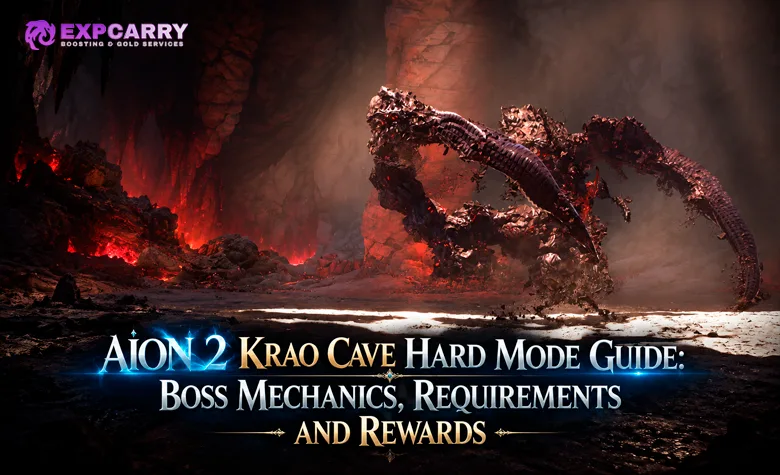
Krao Cave is one of the first Expeditions AION 2 players learn, but its new Hard Mode is a different challenge. The route and bosses are familiar; the room for mistakes is not. Added to the Global version on October 21, 2026, Krao Cave Hard requires 2,600 Item Level, features level-68 bosses, gives each player only three revives, and introduces a four-minute boss Frenzy timer. Ultimate Berk is still the real test: positioning behind rocks, saving Stagger for the right moment, and handling his close-range attacks matter much more than simply meeting the entry requirement. The rewards make the challenge worthwhile, particularly Rupture weapons, Berk accessories, Ariel Fragments and the chance to obtain Philosopher's Stone: Revelation. Here's how to prepare, get through the cave and spend your limited reward resources wisely.
Short answer: AION 2 Krao Cave Hard Mode is a level-45 Expedition requiring 2,600 Item Level. It supports 1–5 players, features level-68 bosses and a four-minute boss Frenzy timer, and allows three revives per player. Defeat the cave's encounters, avoid Ultimate Berk's arena-wide attack by hiding behind a rock, and save Stagger abilities for Extinction for Eternity. Hard Mode offers Rupture weapons, Berk accessories, Ariel Fragments, crafting materials and a chance at Philosopher's Stone: Revelation. The October 21 Global-client data lists a guaranteed item selection after 28 eligible Hard Mode reward-cube claims.
Krao Cave Hard Mode Requirements and Rules
Hard Mode launched alongside Draupnir Hard in the October 21 Global update. It is a separate Conquest difficulty, not a higher-level version of the original Exploration dungeon. NC confirmed the entry threshold, Frenzy timer and revival restriction in its official October 20–21 patch notes. Those numbers are important because older Korean and Taiwanese guides may list different requirements.
| Requirement | Exploration | Conquest Normal | Conquest Hard |
|---|---|---|---|
| Character level | 20 | 45 | 45 |
| Required Item Level | 200 | 700 | 2,600 |
| Party size | 1–5 | 1–5 | 1–5 |
| Dungeon time limit | 60 minutes | 60 minutes | 60 minutes |
| Boss Frenzy | No Frenzy in Exploration | Final boss after 5 minutes | 4-minute Hard Mode timer |
| Revive limit | No Hard Mode restriction | No Hard Mode restriction | 3 per player |
| Odyle Energy per reward-cube claim | 20 | 40 | 40 |
The dungeon's overall 60-minute limit and the boss Frenzy timer are two different things. You can have plenty of time left in the instance and still reach Frenzy during a boss fight. Treat four minutes as your practical damage deadline, especially on Ultimate Berk. Frenzy makes an already dangerous encounter considerably less forgiving, so a group that barely survives until the timer expires is not really ready to farm it. The final boss's four-minute Frenzy is reflected in the current client data; individual miniboss encounters should not be assumed to have identical timing.
One player can technically enter because the Expedition supports parties of one to five, but that does not make a solo Hard clear realistic for most characters. A five-player group with dependable damage, healing and someone comfortable controlling the boss is the sensible starting point. If you need a broader explanation of Expedition tiers before attempting Hard, the existing AION 2 Dungeons Guide covers the overall progression system.
How to Prepare for Krao Cave Hard
The biggest trap is treating 2,600 Item Level as a recommended power level. It's the entry gate. Two players can both qualify at 2,600 while having noticeably different damage, defensive stats and skill setups. Before queuing, check whether your weapon, Stigmas, enhancements and Daevanion progression actually support a sustained boss fight. If you are still working toward the threshold, focus on the upgrades that raise your useful combat stats alongside Item Level; the gear progression route is most relevant at this stage.
Movement also deserves some attention. Ultimate Berk can punish players who have spent every dash just before a dangerous telegraph appears. Bring the healing consumables you normally use for difficult Expeditions, check your defensive cooldowns and decide who will call the rock mechanic and the Stagger phase. A short discussion before the pull saves more time than repeated wipes.
- Confirm the difficulty. Select Krao Cave Conquest Hard, not the Normal version, and check that every party member meets the 2,600 Item Level requirement.
- Assign responsibilities. Decide who keeps Berk positioned, who handles dangerous adds and who calls the Stagger check.
- Keep burst damage available. Four minutes is a short window when players are forced to move or stop attacking.
- Reserve Stagger abilities. Using all of them as soon as they become available can leave the party without enough control for Berk's most important cast.
- Check reward resources. Make sure you have enough Odyle Energy and available Expedition reward counts before planning repeated clears.
Krao Cave Hard Route: Which Bosses Should You Kill?
The Hard version keeps Krao Cave's familiar split-path layout. Enhanced Harcon and Neglected Gadioton occupy the side routes, while Ultimate Berk waits beyond the sealed passage. If you already know Normal Conquest, you do not need to relearn the map. You do need to stop treating every enemy as harmless trash. The cave contains stationary Croka enemies, pursuing test subjects, traps and a guardian that blocks access to the final area.
- Enter the cave and follow Phazkhi. Watch the ground for traps and avoid unnecessary fights with stationary Croka enemies. Pursuing test subjects are a different matter; leaving them alive can turn a clean pull into a mess.
- Choose a side path. Take on Enhanced Harcon or Neglected Gadioton first. The order is flexible, so use whichever route your party knows best.
- Decide whether to clear the second side boss. The miniboss encounters contribute to the dungeon's available reward pools. Skipping them may save time, but it can also mean giving up their associated rewards.
- Defeat the Krao Seal Guardian. This encounter opens the sealed passage and activates the Windstream. Be careful near the following drop: falling can be fatal, so use Glide to cross it safely.
- Bind the nearby Kibelisk. Activate the Sealed Cave Entrance checkpoint before the final encounter. A Berk wipe is unpleasant enough without a long run back.
- Fight Ultimate Berk. Save your strongest coordinated damage for safe windows and make the major mechanics your priority.
NC's Krao Cave Exploration walkthrough provides a useful visual reference for the path and checkpoint locations. It describes the lower difficulty and carries a notice that its guidance was AI-generated, so treat it as a navigation aid rather than definitive Hard Mode combat documentation.
For progression attempts, I would clear the minibosses and get comfortable with the entire route. Once your group can kill Berk consistently, you can judge whether a shorter route is worth the rewards you leave behind. Don't make that decision based on clear time alone: a fast run with a disappointing reward pool is not automatically efficient.
Explore services related to this guide, selected from our Aion 2 catalog.
View All Aion 2 Services


Enhanced Harcon Hard Mode Mechanics
Enhanced Harcon is the more straightforward of the two side encounters, although its Hard Mode damage makes careless positioning expensive. The boss can jump toward a target, place an area attack around its target and summon a Krao Giant Test Subject. That summoned enemy is particularly annoying when it reaches the healer while the rest of the group is focused on the boss.
The best approach is to keep Harcon in a predictable position, move out of marked attacks and assign someone to pick up the summoned test subject immediately. Melee players should watch for the close-range slam rather than trying to finish a rotation inside the marker. Ranged players need enough space to react if the boss suddenly leaps toward them.
- Move out of targeted ground attacks. Don't stack on a marked player and force several teammates to dodge the same hit.
- Control the summoned test subject. One damage dealer should be ready to switch targets before it disrupts the backline.
- Reposition after a leap. Give the tank time to re-establish the boss's direction before everyone moves back into melee range.
- Maintain steady damage. Avoid unnecessary downtime and wasted cooldowns, even on an otherwise manageable encounter.
Harcon is a good place to test whether your group is genuinely ready. If players repeatedly die to its marked attacks, the problem is unlikely to disappear at Ultimate Berk. Practice clean movement here instead of relying on revives to push through.
Neglected Gadioton Hard Mode Mechanics
Neglected Gadioton is more punishing when players react late. Its main threats are a repeated-hit line attack and a pull followed by a close-range knockdown. The line attack can strike the same lane multiple times, so stepping out and then immediately running back through it is a good way to get hit again.
When Gadioton begins the pull, expect to be dragged toward the boss. The dangerous part is what follows: an area close to its body can knock down players who fail to move away. Keep a movement ability ready, escape the center and only return once the follow-up attack has resolved. If the party gets knocked down together, the lost damage time can be almost as painful as the damage itself.
- Leave the line attack sideways. Moving backward along the marked lane is less reliable because the attack covers a long distance and hits repeatedly.
- Save movement for the pull. As soon as the boss draws players inward, dash out of the close-range knockdown area.
- Watch for ground damage. Avoid standing in overlapping effects while trying to maintain damage uptime.
- Reset your positioning after each major attack. Keep the boss facing away from the group wherever possible.
The encounter is not complicated once the group recognizes the sequence. The trouble usually comes from players reacting to the pull but forgetting that the second hit is still coming. Don't burn a defensive cooldown on the initial movement and then stand in the knockdown.
Ultimate Berk Hard Mode: Every Mechanic That Matters
Ultimate Berk is where Hard Mode earns its name. He combines large frontal attacks, charging lanes, dangerous close-range pressure and two mechanics that demand a specific response from the entire party. The NC Krao Cave boss-pattern overview describes the core Conquest encounter, including the rock and Stagger mechanics. Its AI-generated guidance is useful as a reference, but the live encounter should take priority wherever mechanics differ.
The safest general position is behind or to the side of the boss, while the tank controls his facing. That doesn't mean you can stand still. Berk has wide attacks that punish players trying to finish one more cast, and the group needs to move decisively when a major mechanic begins.
| Mechanic | What happens | What your group should do |
|---|---|---|
| Wave of Fury | Large arena-wide attack; four rocks provide cover | Move into the green safe area behind a rock before the shockwave resolves |
| Extinction for Eternity | Dangerous arena-wide cast with a Stagger check, usually near 50% HP | Use saved Stagger abilities together to break the gauge before the cast finishes |
| Rush | Long charging attack along a marked lane | Dodge sideways out of the lane; don't retreat along its length |
| Wrathful Blade | Successive line and wide cone attacks; can apply Bleed | Stay away from the boss's front, react to each part of the sequence and watch injured players |
| Roar of Fury / Roar of Madness | Large attacks around Berk, including a possible stun | Leave the marked area early and keep an escape or defensive option available |
| Drana Wave | Cross-shaped attacks extending across the arena | Stand between the marked arms instead of directly in front of the boss |
| Spinning pursuit | Berk releases red particles before spinning after a target | The targeted player creates distance and leads the danger away from teammates |
| Croka Light Beam | Additional enemies can place damaging circles and reduce defense | Move out of the circles and deal with disruptive adds quickly |
Wave of Fury: Hide Behind the Rocks
When Wave of Fury begins, don't try to outrun the attack across the arena. Its coverage is too large for that to be a dependable strategy. Four rocks rise around the outer edges of the arena, and the group has roughly five seconds to get into cover. The safest response is to stop attacking immediately, identify the nearest rock and move fully into the green safe zone behind it.
Players often fail this mechanic because they react only when the final attack animation starts. By then, a slow character or someone standing on the wrong side of the arena may have no time left. Watch for Berk leaping into the air, the warning and Phazkhi's instruction to take cover. Failing to hide can be lethal. After the shockwave resolves, regroup before committing to another damage window.
Extinction for Eternity: Save Your Stagger
Extinction for Eternity is the mechanic that turns an uncoordinated group into a failed run. At approximately 50% HP, Berk begins a dangerous cast, and the previously locked Stagger Gauge becomes active. Phazkhi calls for the party to use special skills that increase Stagger. This is not the moment to discover that everybody used their Stagger abilities ten seconds earlier. Agree beforehand that players will hold the necessary skills for this phase, then use them together when the gauge becomes available.
A successful Stagger interrupts the mechanic and creates an opportunity for heavy damage. Failing to break the gauge in time can wipe the entire party, particularly in Hard Mode where revives are limited. Watch the actual cast and gauge rather than relying entirely on a fixed health percentage. The precise timing can feel different depending on your group's damage and encounter pacing.
Positioning and the Four-Minute Frenzy
The remaining attacks are manageable individually, but they become dangerous when players lose their formation. Berk's Rush covers a long lane, so everyone should leave it sideways. His wide cones make the area directly in front of him a poor place for damage dealers. If red particles signal the spinning pursuit, the targeted player should move the danger away from the group rather than running through the healer.
Four minutes does not mean four minutes of uninterrupted attacking. Every dodge, rock phase and Stagger mechanic eats into your available damage time. Good groups recover that time by keeping the boss positioned consistently and using burst windows after successful mechanics. If Berk regularly enters Frenzy with substantial health remaining, work on damage uptime and equipment before attempting to brute-force more pulls. Groups looking for help with repeated Hard clears can also check the available Expedition runs for the appropriate difficulty.
Krao Cave Hard Mode Rewards and Loot
Krao Cave's main equipment appeal is its weapon and accessory pool. Draupnir serves as the corresponding armor-focused Expedition, so repeatedly farming Krao Cave when your biggest weakness is armor may not be the smartest use of your limited rewards. The October 21 update added important reasons to run Hard even after obtaining a usable weapon: Ariel progression materials, additional Kina, Unique crafting materials and special cosmetic rewards.
| Reward | Examples | How it is obtained |
|---|---|---|
| Rupture weapons | Rupture Claymore, Sword, Knife, Longbow, Tome, Jewel, Warhammer and Rod | Hard Mode reward pool; also available through the guaranteed selection |
| Berk accessories | Berk Ring, Earrings and Necklace | Reward pool; also available through the guaranteed selection |
| Philosopher's Stone | Philosopher's Stone: Revelation (Bound) | Chance-based reward or guaranteed-selection choice |
| Ariel progression | Ariel Fragment: Krao (Bound) | Hard Mode rewards; used to develop the Ariel Daevanion Board |
| Unique crafting materials | Wrathful Mind, Wrathful Will and Wrathful Ego | Available through the Hard Mode material pools |
| Other progression items | Gear Change Voucher: Krao Cave, Amplify Stone Fragments, enhancement materials and Kina | Reward pool or guaranteed selection, depending on the item |
| Collectibles and cosmetics | Expedition Hero Artwork and Unique skins | Artwork has a chance to appear; Unique skins are tied to Hard Mode achievements |
There is an important difference between an item being listed as a possible reward and receiving it after every clear. Rupture weapons, accessories and special materials belong to reward pools; a successful run does not promise your chosen item. NC's Hard Mode reward announcement specifically identifies Philosopher's Stone: Revelation as both a possible drop and a guaranteed-reward option. It also confirms additional Kina, Ariel Fragments, crafting materials, artwork and achievement skins.
If you are chasing a particular class weapon, don't judge your progress only by random drops. The guaranteed-reward system is the reason a long-term farming plan makes sense. It gives you a defined target even when individual cube openings aren't especially exciting.
Odyle Energy, Reward Cubes and the 28-Claim Guarantee
Opening Expedition reward cubes requires Odyle Energy. For Krao Cave Hard, the October 21 Global-client data lists a cost of 40 Odyle Energy per eligible cube claim. Defeated side bosses contribute to the available reward pools, so clearing them can matter for loot even when your group is capable of reaching Ultimate Berk without doing every encounter. Check the reward interface to see which boss rewards are available before spending Energy.
The Hard Mode guaranteed-reward counter fills through eligible cube claims. The October 21 client data lists 28 claims before you can select one item from the guaranteed list. This is a cube-claim requirement, not a promise that the desired weapon will randomly drop within 28 kills or that you must necessarily complete 28 full runs. At 40 Energy per claim, filling that counter represents 1,120 Odyle Energy spent across the required openings. Your actual calendar time also depends on the weekly Expedition counter, available Energy and how successfully your group clears the dungeon.
| System | October 21 Global-client value | Why it matters |
|---|---|---|
| Odyle Energy cost | 40 per Hard cube claim | Limits how many rewards you can open with your available Energy |
| Passive Energy regeneration | 15 every 3 hours | Equivalent to 120 Energy over 24 hours before considering other sources |
| Base Energy storage | 560 | Energy stops accumulating passively when the storage limit is reached |
| Hard guaranteed reward | Choose one after 28 eligible claims | Provides a predictable long-term target |
| Weekly Hard entry/reward counter | Client records indicate a cap of 10 | Check the live Expedition interface; entries, reward claims and resets are not interchangeable |
One detail is worth checking in the actual reward interface before spending Energy: available community databases describe individual boss cubes and combined boss loot differently. The safest approach is to inspect which reward cubes and boss pools the completed run presents, then claim the rewards you actually want. Do not assume that defeating three bosses automatically means three free rewards or that every boss pays out the same items. Clearing and leaving without claiming rewards may still consume the relevant weekly entry or reward allowance.
Once the guaranteed selection becomes available, choose with a plan. A Rupture weapon that fits your class and build will often be more valuable than taking another accessory simply because it is familiar. On the other hand, Philosopher's Stone: Revelation may be the better choice if your weapon progression is already sorted. The separate Odyle Energy Guide explains how to manage the resource across different activities instead of using all of it on one dungeon by habit.
Ariel Fragments and the New Daevanion Board
Ariel Fragments are one of the strongest reasons to revisit Krao Cave Hard after you have collected the gear you need. The October 21 update introduced the Ariel Daevanion Board and connected its progression to fragments earned from Hard Expeditions. Krao Cave and Draupnir provide their own dungeon-specific fragments, so keep track of which one you are collecting.
- Earn Ariel Fragments. Claim eligible Hard Mode rewards to collect the fragments associated with that dungeon.
- Open Substance Morph. Under Special and then Daevanion, convert 100 Ariel Fragments into one Daevanion Crystal: Ariel (Bound).
- Respect the conversion limits. NC lists a maximum of 30 Ariel Crystals per character through this conversion and also notes a dungeon-specific acquisition limit.
- Use surplus fragments. The patch also allows one Ariel Fragment to be converted into five Enhance Stones through Substance Morph under Special and Consumables, without a conversion-count limit.
This makes Hard Mode more than a weapon lottery. Even when you do not receive a rare piece of equipment, the fragments can contribute to permanent progression through the Ariel board. Just avoid converting fragments thoughtlessly before checking how much board progress you still need. Current client reward data indicates 60–90 Krao Ariel Fragments from the final boss reward, but confirm the quantity in the live reward preview because packages and balance values can change.
Is Krao Cave Hard Worth Farming?
For a character who needs a Rupture weapon, a Berk accessory or Ariel progression, yes. The catch is that a worthwhile reward pool does not make an inefficient run worthwhile. A group that spends forty minutes wiping on Berk, then struggles to finish before Frenzy, is not farming effectively. It is still learning the fight, and that is fine, but the plan should reflect it.
I would approach Krao Cave Hard in three stages. First, learn a consistent route and clear every important encounter. Second, stabilize Ultimate Berk: survive the rocks, hit the Stagger check and kill him before the fight deteriorates. Third, start optimizing your path and reward spending. Only at that point does it make sense to compare the extra time spent on side bosses against the additional loot opportunities.
Keep the rest of your gearing plan in mind, too. Krao Cave is primarily the weapon-and-accessory side of the early Hard Expedition pair, while Draupnir is relevant for armor. If your main limitation is insufficient equipment power, farming the complementary dungeon may help more than repeating Krao Cave. If you are spending too much regular currency on enhancements and preparation, organize your Kina resources around actual upgrades instead of improving pieces you are about to replace.
One more thing: don't chase only the rarest result. If your character can use several items from the Hard reward pool, the dungeon has immediate value. If you already own everything you need except one low-probability drop, the guaranteed-selection counter and Ariel Fragments become the real reasons to keep running it.
Krao Cave Hard Mode FAQ
Most confusion about Krao Cave Hard comes from mixing its entry rules with Normal Conquest or from assuming that every listed reward is guaranteed. These are the details worth checking before you queue.
What Item Level Do You Need for Krao Cave Hard?
You need 2,600 Item Level and a level-45 character in the Global version. Normal Conquest requires only 700 Item Level, so make sure you have selected the correct difficulty. Being exactly at the threshold allows entry but does not guarantee an easy clear.
Which Bosses Are in Krao Cave Hard?
The named bosses are Enhanced Harcon, Neglected Gadioton and Ultimate Berk, all level 68 in Hard Mode. Harcon and Gadioton occupy the side routes, while Berk is the final encounter. The Krao Seal Guardian is an additional route encounter needed to open the sealed passage.
Are Rupture Weapons Guaranteed to Drop?
No. Rupture weapons are part of the Hard Mode reward pool, but an individual cube does not guarantee a specific weapon. The October 21 Global-client system lets you select a guaranteed reward after 28 eligible Hard Mode cube claims, with Rupture weapons among the available choices.
How Do You Get Philosopher's Stone: Revelation?
Philosopher's Stone: Revelation (Bound) is available as a chance-based Hard Mode reward and as an option from the guaranteed-reward selection. If it does not drop naturally, building toward the guaranteed selection is the more predictable approach.
Conclusion
Krao Cave Hard is a test of execution as much as equipment. Reaching 2,600 Item Level gets you through the door, but understanding Ultimate Berk's rock and Stagger mechanics is what gets you through the fight. Once your group can beat the four-minute pressure consistently, the combination of Rupture equipment, Berk accessories, Ariel Fragments and guaranteed-reward progress makes the dungeon a meaningful part of AION 2's endgame routine.