Season 14, Death Awakening, reworked itemization far more aggressively than it touched raw skill numbers, and Spiritborn ended up in an unusual middle position as a result. Mythic Unique 3.0 lets any base Unique of the right slot become a Mythic through the Horadric Cube, which matters enormously for a class whose top setups all lean on Rod of Kepeleke and Ring of the Midnight Sun working together. Add guaranteed affixes on every dropped Unique, a pass on a couple of mobility skills, and a trim to the Aspects behind Touch of Death that still left the skill on top of the class rankings, and Spiritborn opens the new season with several builds capable of clearing everything the endgame throws at them. What follows covers the Touch of Death build anchoring Spiritborn this season, its skill bar, stat priorities, gems and runewords, four other build families worth running, and where the class's Mythic gear should go first.
Where Spiritborn Sits in the Season 14 Meta
Most trackers place Spiritborn between the top and middle of the Season 14 class field rather than at the very peak, a real shift from earlier seasons where the class dominated outright. Touch of Death, run through its Erupting Swarm upgrade, still leads the internal Spiritborn list even though the Aspects supporting it took a damage cut during testing, though the gap between it and the builds chasing it has narrowed compared to Season 13. Rod of Kepeleke remains the backbone of nearly every serious build in the class, since turning a Core skill into a free Basic skill and rewarding a full Vigor spend with a guaranteed critical strike is a pattern the entire resource system was built around this season. A couple of rough spots are worth watching before committing to a setup: some Evade-heavy configurations have reported inconsistent rank bonuses from the secondary Spirit Hall passives once certain thresholds are hit, and high Movement Speed builds have picked up reports of characters getting stuck in terrain, so treat the season's most aggressive speed numbers as provisional until a hotfix lands. Where the agreement holds firm is on itemization: guaranteed affixes plus Mythic crafting through the Cube removed most of the randomness that used to keep a finished Spiritborn kit out of reach for weeks at a time.
| Change | Type | What It Does for Spiritborn |
|---|---|---|
| Mythic Unique 3.0 (Horadric Cube crafting) | New system | Lets any dropped Unique be upgraded into a Mythic version through the Cube, turning Rod of Kepeleke and Harmony of Ebewaka into realistic crafting targets instead of pure boss drop luck |
| Unique guaranteed affixes | New system | Every Unique now carries two fixed affixes alongside two random ones, smoothing out early gearing on Ring of the Midnight Sun and the class's Talisman sets |
| Rushing Claw mobility upgrades | Mixed | One upgrade path was tuned down while another leans further into Ferocity-fueled charge recovery, so mobility-focused kits need to check which node they are running before assuming a buff or a cut |
| Touch of Death supporting Aspects | Nerf | Damage trimmed on both Aspects behind the Erupting Swarm setup, though the skill still leads the class overall |
| Defensive Talisman sets | Nerf | Tuned down alongside other defensive tools that some Evade-adjacent setups leaned on |
The net effect favors a Core skill converted into a Basic skill through Rod of Kepeleke, then spent at maximum Vigor for the guaranteed crit that skill grants. Touch of Death fits that description as cleanly as any skill in the class, which is why its Erupting Swarm setup absorbed the season's itemization changes better than the more mobility-dependent lines. Poison scaling did not get left behind either, since Stinger and Withering Fist both still apply damage over time efficiently despite the season's poison-focused trims, and Quill Volley picked up genuine Lightning scaling through Harmony of Ebewaka and the Beru of the Multitude set without needing a full Mythic checklist to feel functional.
Best Spiritborn Builds for Death Awakening
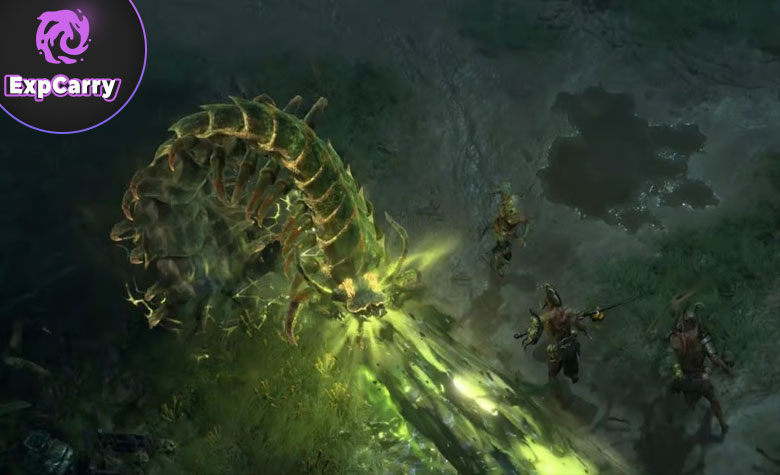
Touch of Death sits at the top of nearly every Season 14 Spiritborn list, but four other build families remain genuinely worth running depending on what a given piece of content demands. Stinger and Quill Volley both lean on Rod of Kepeleke for a Poison and Lightning specialist pair built around Pit and Tower pushing respectively. Crushing Hand offers a Gorilla-themed alternative that needs almost no Mythic investment to feel complete. Rock Splitter Thorns remains the class's standard leveling pick, and Withering Fist still clears Torment content comfortably without a fully optimized item set.
Touch of Death Spiritborn (Erupting Swarm)
Touch of Death's Erupting Swarm upgrade spreads Poison damage through swarms that build toward a large delayed payoff rather than a clean instant hit. Rod of Kepeleke converts the skill into a free Basic cast below maximum Vigor, then rewards a full bar with a guaranteed critical strike and a critical damage bonus tied to how much Vigor was spent. Ring of the Midnight Sun keeps that Vigor bar refilled by returning a large share of what was spent over the previous couple of seconds on every crit, and Harmony of Ebewaka, a Unique Helm rather than a charm, layers the secondary Spirit Hall's tag onto every skill for extra damage per Spirit type carried. A supporting Charm slot rounds the kit out with a defensive buffer and passive recasts of Touch of Death, which is a large part of why the build survives melee range against dangerous enemies as comfortably as it hits.
Stinger and Quill Volley Spiritborn (Pit and Tower Push)
Stinger runs the class's Poison Bomb combo, using repeated hits of Withering Fist to spread Poison to nearby enemies before slamming Stinger to consume Vigor and detonate everything at once, and it is widely treated as the sharper choice for pushing Pit depth. Quill Volley instead leans on Harmony of Ebewaka paired with the two-piece Beru of the Multitude bonus to give the skill several Spirit tags at once, turning it into the preferred pick for Tower content. Both builds need Rod of Kepeleke and Ring of the Midnight Sun working together to keep Vigor cycling fast enough for either skill to stay free to cast, and both benefit from Resource Cost Reduction, since it tricks Rod of Kepeleke into treating a larger pool of Vigor as spent, which raises the resulting damage bonus. The heavier gearing checklist on both means most players level on something else first and switch in once the resource engine is fully assembled.
Crushing Hand Spiritborn (Gorilla Speedfarm)
Crushing Hand pairs with The Devourer to generate overlapping shockwaves that flatten packs and bosses alike, and it is one of the few endgame-viable Spiritborn setups that needs essentially no Mythic gear to start clearing content. Rod of Kepeleke still guarantees a critical strike at maximum size once Ring of the Midnight Sun keeps Vigor refilled, and Aspect of Plains Power adds stationary mystic circles that boost damage and defense for anyone standing inside them. A dedicated cooldown Paragon node removes most of the build's cooldown concerns outright, and switching between the Beru of Rezoka's Rage and Beru of the Multitude Talisman sets lets the build lean further into either offense or Spirit-type stacking depending on what a player already has equipped.
Rock Splitter Thorns Spiritborn (Leveling)
Rock Splitter Thorns is built around a Basic Skill loop that stacks large amounts of Thorns, a mechanic that received a direct buff in the Lord of Hatred expansion and still carries over cleanly into Season 14. Jaguar as the Primary Spirit Hall adds bonus damage and converts every skill into a Jaguar skill, while a Jaguar Secondary Hall generates Ferocity and raises the character's Ferocity cap. A dedicated Aspect stacks a large damage buff from repeated Ultimate casts, which asks for a healthy amount of Cooldown Reduction to maintain against single targets. It remains the class's default leveling route into Torment difficulty before most players transition into Crushing Hand or Touch of Death for the true endgame grind.
Withering Fist Spiritborn (Poison Spin)
Withering Fist spreads an unlimited number of individually ticking Poison stacks onto enemies, and Widow's Web consumes every one of those stacks on a critical strike to deal their remaining damage all at once, amplified by its own damage bonus. A supporting Aspect then echoes the killing blow from any single hit onto a nearby enemy, which keeps the detonation chain rolling through a pack. The build only needs a modest amount of Critical Strike Chance to trigger Widow's Web reliably, and it holds up in Torment content without a fully optimized item set, making it a comfortable starting point for anyone farming toward one of the class's heavier Mythic checklists.
Touch of Death Build Breakdown: Skills, Stats, Gems and Runewords
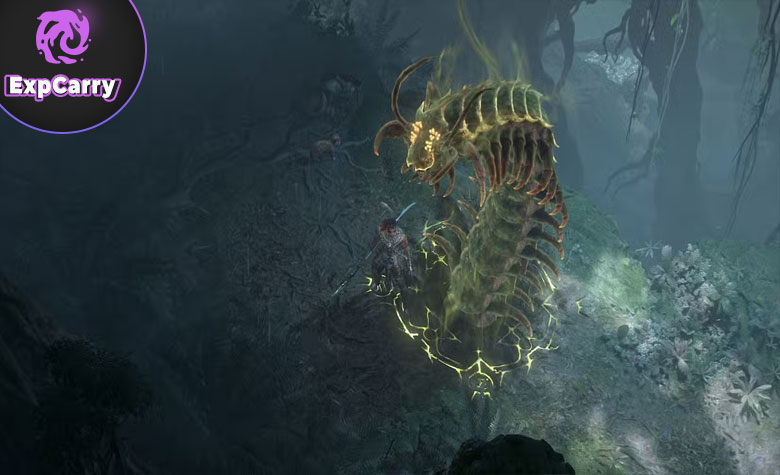
Touch of Death is worth covering in full since it remains the build most Spiritborn players will land on this season, offering a natural transition from an early leveling build into a high War Plans and Pit ceiling once the core Mythic pieces are in hand. Below covers the class's general leveling milestones, the endgame six-skill bar, stat priorities, and the runewords the build depends on.
Skill Bar and Leveling Path
Touch of Death has no dedicated leveling path of its own, so most players level through Rock Splitter Thorns or one of the Poison basic-attack builds and respec once the class's core systems and Level 70 Paragon board are available. The milestones below apply to the Spiritborn class generally and shape when a full switch into Touch of Death becomes realistic.
| Level | What Unlocks |
|---|---|
| 1 to 3 | Only Basic Skills can be invested before the rest of the tree opens up |
| 15 | The class quest completes and unlocks the Hall of Spirits, granting the Primary Spirit Hall choice |
| 19 | The Ultimate skill slot becomes available, though it is often better saved for later |
| 30 | The Secondary Spirit Hall unlocks, setting up Harmony of Ebewaka's full potential later on |
| 70 | The Paragon board opens up, and this is where a respec into full Touch of Death becomes worthwhile |
By endgame, the visible bar settles into six skills split between the poison engine and the survivability layer that keeps the build alive in melee range.
| Skill | Job on the Bar |
|---|---|
| Touch of Death (Erupting Swarm, converted to a Basic Skill by Rod of Kepeleke) | Main Poison damage engine, delivers the build's large delayed payoff |
| Ravager | Cooldown reduction and a flat damage buff on cast |
| Scourge | Fear, Weaken application, and a steady source of damage reduction |
| Counterattack | Raises Dodge Chance and cuts down damage taken from damage over time |
| Toxic Skin | Healing, Vigor generation, and Unhindered uptime between fights |
| The Devourer (Ultimate) | Burst damage and enemy debuffs, plus healing over time through its own upgrade |
Stat and Affix Priorities
Resource Generation leads every other stat, since Ring of the Midnight Sun needs a large enough pool to fully refill Vigor after every critical strike and keep Rod of Kepeleke's free-cast loop from stalling. Poisoning Damage and Overpower Damage back that up directly, since they scale Touch of Death's core payoff rather than a secondary source. Cooldown Reduction keeps Ravager, Toxic Skin, and The Devourer cycling often enough to maintain uptime on their buffs, while Maximum Life and Armor round out a defensive floor for a build that spends most fights standing in melee range.
| Priority | Source | Notes |
|---|---|---|
| 1. Resource loop | Resource Generation | Needed to fully refill Vigor off Ring of the Midnight Sun so Rod of Kepeleke's free-cast window never runs dry |
| 2. Damage consistency | Poisoning Damage and Overpower Damage | Scales Touch of Death's core payoff directly rather than a secondary source |
| 3. Cooldown engine | Cooldown Reduction | Keeps Ravager, Toxic Skin, and The Devourer cycling for uptime on their buffs |
| 4. Survivability | Maximum Life and Armor | Baseline defense for a build that spends most fights at melee range |
Gems and Runewords
Runewords pair a Ritual rune with an Invocation rune, and Touch of Death gets the most value from a pairing that lets skills already sitting on a cooldown passively trigger the class's Vortex ability, quietly pulling enemies together through normal skill use rather than a dedicated cast. A second pairing built around a five-skill trigger sets off a knockdown effect that keeps anything left standing after the swarm detonation off balance. Stinger and Quill Volley players lean on a similar Vortex-triggering setup for the same passive grouping, while Withering Fist typically swaps in a rune pair built around sustaining Barrier uptime once Barrier Generation affixes are available on gear.
| Runeword | Effect | Best Use |
|---|---|---|
| Kry | Passively triggers Vortex off cooldown skill casts, pulling nearby enemies together without slotting the skill directly | Touch of Death, Stinger, general endgame farming |
| Cir plus Tzic | Triggers a knockdown effect after five skill casts, keeping surviving enemies off balance | Touch of Death, high Pit and War Plans pushing |
| Moni plus Kry | Chains mobility skill casts into the Vortex trigger for grouping and burst damage | Rock Splitter Thorns leveling |
Explore services related to this guide, selected from our Diablo IV catalog.
View All Diablo IV Services

Gear, Mythic Uniques and Mercenary Priorities

Mythic Unique 3.0 lets a player feed any base Unique of the correct slot into the Horadric Cube alongside Pandemonium Fragments and walk out with a Mythic version, which is what turns Touch of Death's short Mythic list into something realistic within a normal season instead of months of drop farming. Rod of Kepeleke anchors the entire loop, Ring of the Midnight Sun keeps that loop fed, and Harmony of Ebewaka is what pushes the build's damage past what its base kit alone could reach.
| Item | Slot | Effect |
|---|---|---|
| Rod of Kepeleke | Quarterstaff (Mythic-capable) | Turns Core skills into free-to-cast Basic skills, and consumes the full Vigor bar at maximum resource to guarantee a critical strike with bonus critical damage per point spent |
| Ring of the Midnight Sun | Ring | Refunds a large share of Vigor spent over the last couple of seconds on every critical strike, and grants Counterattack's passive effect permanently |
| Harmony of Ebewaka | Helm (Mythic-capable) | Applies the secondary Spirit Hall's tag to every skill, adding damage for each Spirit type a skill carries |
| Supporting defensive Charm | Charm | Adds a large defensive buffer and can trigger automatic recasts of Touch of Death |
| Ring of Starless Skies | Ring (Iconic Mythic) | Provides a straightforward damage bonus alongside Resource Cost Reduction, which increases Rod of Kepeleke's effective Vigor spend and total damage |
| Beru of the Multitude (Talisman set) | Charm set | Grants an extra Spirit type tag at higher piece counts, stacking with Harmony of Ebewaka for more damage per tag |
| Beru of Rezoka's Rage (Talisman set) | Charm set | Builds stacks that scale both offense and defense, strongest once the full set bonus is active |
Mercenary choice matters for a class that spreads its defense across skill uptime rather than a dedicated shield. Raheir remains the safer pick thanks to the resistances from his Aegis and the damage bonus his passive grants whenever he uses Ground Slam or Bastion, covering for the class's thinner baseline defense. Aldkin adds a further layer of group-wide protection by applying a reduced damage debuff to nearby enemies. Subo is worth hiring for Poison-focused builds instead, since his Molotov applies a Scorched Earth effect that boosts damage over time, and Varyana is a simple pick for anyone who just wants a flat Attack Speed bonus.
| Mercenary | Key Ability | Why Hire Them |
|---|---|---|
| Raheir | Aegis resistances, damage bonus on Ground Slam or Bastion | Covers for the class's thinner baseline defense with resistances and a reliable damage bonus |
| Aldkin | Group-wide reduced damage debuff | Adds a further layer of party-wide damage mitigation |
| Subo | Molotov Scorched Earth effect | Boosts damage over time output, pairing naturally with Poison-based builds |
| Varyana | Bloodthirst | Straightforward Attack Speed bonus for builds that do not need the other mercenaries' utility |
Choosing between the five builds mostly comes down to how much gearing effort a player wants before a build feels complete, whether Pit or Tower pushing suits their goals specifically, and how much they value an easy starting point over the class's absolute damage ceiling.
| Build | Best For | Playstyle Difficulty | Endgame Ceiling |
|---|---|---|---|
| Touch of Death | Overall class-leading damage and bossing | Medium, needs the Vigor and Cooldown loop set up correctly | Very high, still the class's top build even after its Aspects were trimmed |
| Stinger and Quill Volley | Specialized Pit and Tower pushing | Hard, heavy Mythic and resource-generation requirements | High, each build leads its respective specialty content |
| Crushing Hand | Accessible area farming from a starter setup | Easy to start, scales further with better Talismans | Medium to high, comfortably clears Torment 12 without a full Mythic kit |
| Rock Splitter Thorns | Leveling and early Torment content | Easy | Medium, transitions into Crushing Hand or Touch of Death at endgame |
| Withering Fist | Comfortable Torment clearing without top-tier gear | Easy | Medium, held back relative to Mythic-heavy builds at the very top |
Final Thoughts
Spiritborn's Season 14 standing came less from raw skill buffs and more from Blizzard clearing away the gearing wall that used to keep Rod of Kepeleke and Ring of the Midnight Sun out of a normal player's reach until deep into a season. Both becoming realistic Horadric Cube crafting targets, alongside Harmony of Ebewaka, means the Vigor loop behind Touch of Death is achievable within the first couple of weeks rather than the last, even though the build's supporting Aspects came out lighter than before. The wider takeaway is that class balance this season is being driven by itemization access rather than skill tuning, so a build that reads as mid-pack on paper can still clear the same content as a top-ranked one once its Mythic pieces are in hand. Stinger and Quill Volley cover anyone chasing Pit depth or Tower content specifically, Crushing Hand is the fastest route to a complete kit without a long Mythic checklist, Rock Splitter Thorns remains the standard way to level a fresh character, and Withering Fist holds up for comfortable Torment farming without top-tier support. Whichever build gets picked, prioritizing Resource Generation and Cooldown Reduction pays off across most of the class this season, and full itemization details are covered in Blizzard's official Season of Death Awakening patch notes.