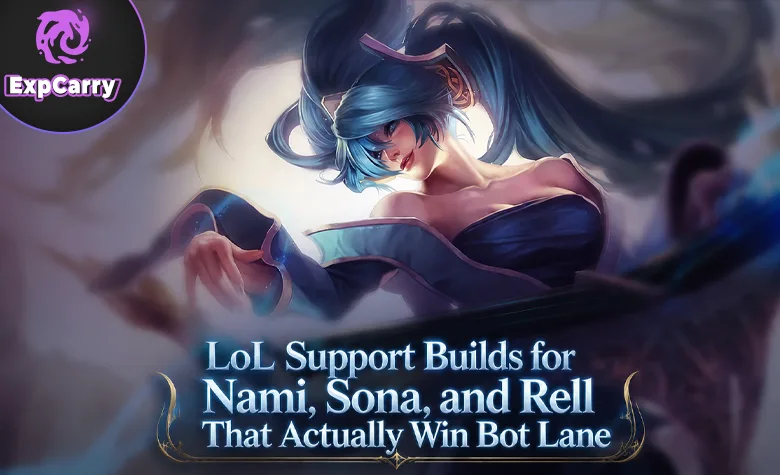
LoL Patch 26.9 changed enough runes, items, and role systems that support builds should not be copied from old guides like the bot lane meta agreed to stay polite. Nami, Sona, and Rell are three of the most practical support champions for ranked games because they cover different ways to win from bot lane. Nami brings lane pressure, sustain, poke, peel, and engage setup. Sona brings scaling healing, shielding, movement speed, and teamfight value. Rell brings hard engage, crowd control, durability, and the ability to make one bad enemy position become a five-player disaster.
This guide covers full LoL support builds for Nami, Sona, and Rell in Patch 26.9, including runes, items, skill order, summoner spells, ADC synergy, counters, matchups, lane plans, roaming rules, vision control, and teamfight priorities. The goal is not to list every support item that exists in the shop. The goal is to give practical ranked support builds that make sense in real solo queue games, where the ADC may or may not understand wave states, the jungler may or may not visit bot lane, and the support still gets blamed for everyone discovering fog of war.
Best LoL Support Builds in Patch 26.9
Nami, Sona, and Rell cover three different support jobs. Nami is the strongest all-around enchanter for lane pressure and flexible teamfighting. Sona is the scaling enchanter who becomes stronger when fights last longer and allies can group around her auras. Rell is the engage support who starts fights, locks enemies down, and gives teams a direct way to punish bad positioning.
The best pick depends on draft. Nami is the cleanest default when your ADC wants lane support and your team needs both poke and peel. Sona is best when your team can survive early lane and wants stronger mid-to-late teamfighting. Rell is best when your team needs engage or when your ADC can follow hard all-ins. In normal ranked language: Nami wins trades, Sona wins scaling fights, and Rell wins by pressing the issue before the enemy team has time to pretend they were ready.
| Champion | Best role in draft | Main rune | Core support item | Best use case |
|---|---|---|---|---|
| Nami | Lane enchanter and pick setup support | Summon Aery | Dream Maker | Best when your ADC wants trading power, sustain, and engage setup |
| Sona | Scaling enchanter and teamfight support | Summon Aery | Bloodsong or Dream Maker | Best when your team can protect her early and group for scaling fights |
| Rell | Hard engage support and frontline initiator | Aftershock | Celestial Opposition | Best when your team needs engage, lockdown, and reliable fight starts |
LoL Nami Support Build for Patch 26.9
Nami is one of the strongest support champions in LoL Patch 26.9 because she gives bot lane almost everything it wants: sustain, poke, movement speed, disengage, engage setup, and strong trading through Tidecaller's Blessing. She works with aggressive ADCs, scaling marksmen, and poke lanes because her kit can adapt to the game instead of locking the lane into one narrow plan.
The best Nami support build focuses on lane pressure, healing, shielding, movement, and ally damage amplification. Her standard setup uses Summon Aery, Dream Maker, Ionian Boots of Lucidity, Imperial Mandate, Moonstone Renewer, and Redemption or Ardent Censer. She is strongest when she plays actively in lane, controls brush, punishes enemy cooldowns, and uses Tidal Wave to start or stop fights. Healing alone is not a playstyle. It is a symptom of standing too far back.
Nami runes for support
| Tree | Rune | Reason |
|---|---|---|
| Sorcery | Summon Aery | Best default keystone for poke, shielding, and trade support |
| Sorcery | Manaflow Band | Helps Nami manage mana through repeated W and E usage |
| Sorcery | Transcendence | Ability haste improves spell uptime in trades and fights |
| Sorcery | Scorch | Stronger early poke and lane pressure |
| Resolve | Bone Plating | Protects Nami from burst trades and engage attempts |
| Resolve | Revitalize | Boosts healing and shielding across the game |
| Shards | Adaptive Force / Adaptive Force / Health Scaling | Best general setup for lane pressure and safer scaling |
Summon Aery is the cleanest Nami rune because she can trigger it through both damage and ally support. Manaflow Band keeps her lane from becoming a mana apology, while Scorch improves early trades. Resolve secondary is strong because Nami is fragile and often has to stand close enough to actually influence lane. If the enemy bot lane has heavy poke instead of all-in, Second Wind can replace Bone Plating.
Nami items and full build path
| Order | Item | Purpose |
|---|---|---|
| Start | World Atlas + Health Potions | Standard support start for quest progress, gold, and lane sustain |
| Support upgrade | Dream Maker | Best enchanter upgrade for shielding, healing, and ally damage trades |
| Boots | Ionian Boots of Lucidity | Ability haste for more frequent heals, bubbles, and ultimates |
| First item | Imperial Mandate | Strong with Nami slows, bubbles, and ally follow-up damage |
| Second item | Moonstone Renewer | Improves healing and shielding in extended fights |
| Third item | Redemption | Teamfight healing, objective control, and long-range utility |
| Fourth item | Ardent Censer or Staff of Flowing Water | Ardent for attack-speed carries, Staff for AP and spell-focused allies |
Mikael's Blessing is valuable when the enemy team has one key crowd control effect that decides fights. Shurelya's Battlesong can work when your team needs engage speed or disengage. Ardent Censer is better with Ashe, Jinx, Kog'Maw, Twitch, and other auto-attack carries. Staff of Flowing Water is better with AP carries or teams that use spell rotations heavily. Nami should not buy the same items every game unless the enemy team also kindly agrees to draft the same threats every game.
Nami skill order and lane plan
Nami should usually max W first, E second, and Q last, while taking R whenever possible. Ebb and Flow is her main lane sustain and poke tool. Tidecaller's Blessing makes ADC trades much stronger and helps apply slows for Imperial Mandate. Aqua Prison is a powerful crowd control spell, but its value comes from landing it at the right time, not from maxing it early and praying harder.
| Skill priority | Ability | Use |
|---|---|---|
| Max first | W - Ebb and Flow | Main lane sustain, poke, and trade tool |
| Max second | E - Tidecaller's Blessing | Ally damage boost, slow setup, and stronger trades |
| Max third | Q - Aqua Prison | Crowd control and pick setup after core lane tools are online |
| Take whenever possible | R - Tidal Wave | Engage, disengage, and teamfight control |
Nami's lane plan is to use W for controlled trades, apply E before the ADC commits, and save Q for predictable enemy movement or allied crowd control. Throwing Aqua Prison randomly into open space is not pressure. It is donating cooldown information. After level 6, Nami can start fights with Tidal Wave, peel divers, or layer her ultimate after ally engage. She is strongest when she plays slightly forward with brush control, not when she stands behind the ADC providing moral support and decorative bubbles.
Nami ADC synergy and support counters
| Best ADC pairs with Nami | Why the lane works |
|---|---|
| Lucian | Classic burst-trade pairing with strong E-enhanced damage windows |
| Ashe | Slows, poke, and arrow setup make Nami bubbles easier to land |
| Jinx | Sustain and peel help Jinx scale, while E improves chase after resets |
| Miss Fortune | Nami poke and Tidal Wave help create Bullet Time windows |
| Ezreal | Safe poke lane with strong trading and disengage tools |
| Harder matchups | Why they are difficult | Nami answer |
|---|---|---|
| Blitzcrank | One hook can punish Nami's low durability and lane positioning | Control minion cover, ward brush, and do not step forward without wave safety |
| Pyke | Strong kill pressure, roaming, and reset threat punish fragile lanes | Track roams, hold Q defensively, and avoid river fights without vision |
| Leona | Hard engage can punish Nami before she can win longer trades | Respect level 2, save bubble for engage, and punish missed Zenith Blade |
| Zyra | Plant poke and root pressure can out-damage Nami's sustain | Dodge through side angles, avoid standing in plants, and call jungle on pushed waves |
| Seraphine | Long-range poke, shields, and teamfight scaling can outpace Nami if lane stays even | Force short trades early, dodge through side angles, and avoid grouped ultimate angles |
LoL Sona Support Build for Patch 26.9
Sona is the scaling enchanter of this support trio. Her early lane can be fragile, but once she gets levels and support items, she gives huge value through healing, shielding, movement speed, poke, and Crescendo. Sona does not need to win lane by brute force. She needs to survive lane cleanly, stack Accelerando value, and reach grouped fights where her auras can make the whole team harder to kill.
The best Sona support build focuses on scaling utility, ability haste, healing, shielding, and teamfight uptime. Her standard setup uses Summon Aery, Bloodsong or Dream Maker, Boots of Swiftness, Echoes of Helia, Moonstone Renewer, and Dawncore. Bloodsong gives stronger poke and damage amplification when Sona can safely use Power Chord, while Dream Maker is the safer enchanter upgrade when the lane is too dangerous to walk forward. Sona is strongest when her team can group and fight around her. She is weakest when the enemy bot lane can repeatedly engage before she has the items and levels to answer.
Sona runes for support
| Tree | Rune | Reason |
|---|---|---|
| Sorcery | Summon Aery | Best default keystone for poke, healing, shielding, and repeated aura value |
| Sorcery | Manaflow Band | Helps Sona manage mana through repeated spell casting |
| Sorcery | Transcendence | Ability haste improves Sona's scaling spell rhythm |
| Sorcery | Gathering Storm | Supports Sona's scaling identity in longer games |
| Resolve | Conditioning | Improves mid-game durability if Sona survives early lane |
| Resolve | Revitalize | Boosts healing and shielding across teamfights |
| Shards | Ability Haste / Adaptive Force / Health Scaling | Best general setup for scaling utility and safer teamfights |
Summon Aery is the best Sona rune because she constantly triggers it through both ally buffs and enemy poke. Manaflow Band is almost mandatory because Sona wants to cast often. Gathering Storm fits her scaling plan, while Revitalize makes her healing and shielding stronger. Bone Plating can replace Conditioning into brutal all-in lanes where surviving the first engage matters more than scaling elegantly into a future that may never arrive.
Sona items and full build path
| Order | Item | Purpose |
|---|---|---|
| Start | World Atlas + Health Potions | Standard support start for quest progress, gold, and lane sustain |
| Support upgrade | Bloodsong or Dream Maker | Bloodsong for poke and damage amplification, Dream Maker for safer shielding and protection value |
| Boots | Boots of Swiftness | Movement speed for safer positioning, roams, and teamfight spacing |
| First item | Echoes of Helia | Strong healing and damage value through repeated poke and support casts |
| Second item | Moonstone Renewer | Boosts healing and shielding in grouped fights |
| Third item | Dawncore | Scaling enchanter spike for stronger healing, shielding, and ability power |
| Fourth item | Staff of Flowing Water or Ardent Censer | Staff for AP and haste users, Ardent for auto-attack carries |
Bloodsong is strong when Sona can safely use Power Chord and keep trading without being instantly punished. Dream Maker is the better default when the enemy bot lane has heavy engage, long-range poke, or enough burst to make forward positioning unrealistic. Mikael's Blessing is valuable into hard crowd control. Redemption is strong in grouped fights and objective setups. Seraph's Embrace can be considered in longer games if mana and survival become major problems, but it is usually slower than direct support utility. Sona needs items that help the team live and keep fighting, not items that make her pretend she is a mid laner who got lost.
Sona skill order and lane plan
Sona should usually max W first, Q second, and E last, while taking R whenever possible. Aria of Perseverance is her main healing and shielding tool. Hymn of Valor gives poke, lane pressure, and better Power Chord damage after her survival tool is online. Song of Celerity is still important for rotations, disengage, and teamfight spacing, but it is usually maxed after her main sustain and poke tools.
| Skill priority | Ability | Use |
|---|---|---|
| Max first | W - Aria of Perseverance | Main healing, shielding, and lane survival tool |
| Max second | Q - Hymn of Valor | Poke, Power Chord damage, and stronger trading after core sustain is online |
| Max third | E - Song of Celerity | Movement speed for rotations, kiting, and teamfight spacing |
| Take whenever possible | R - Crescendo | Hard crowd control, engage follow-up, and anti-dive tool |
Sona's lane plan is to survive early, poke only when it is safe, protect her ADC with W, and avoid standing in engage range for no reason. She should use Power Chord carefully: Q Power Chord for damage, W Power Chord to reduce enemy damage, and E Power Chord to slow targets. After level 6, Crescendo gives her real fight control. Sona should not spend lane pretending she is immortal because she has healing. She is still fragile. The game will happily explain that with a hook.
Sona ADC synergy and support counters
| Best ADC pairs with Sona | Why the lane works |
|---|---|
| Jinx | Sona helps Jinx survive lane and scale into reset teamfights |
| Ashe | Ashe gives engage and slows while Sona adds sustain and scaling utility |
| Kog'Maw | Sona's healing, shielding, and movement speed help protect a scaling carry |
| Smolder | Both champions scale well if the lane survives early pressure |
| Miss Fortune | Crescendo can set up Bullet Time, while Sona covers sustain and movement |
| Harder matchups | Why they are difficult | Sona answer |
|---|---|---|
| Blitzcrank | One hook can destroy Sona before she scales | Stand behind minions, ward brush, and never give free hook angles |
| Amumu | Reliable engage and layered crowd control punish Sona's fragility | Respect level 2 and level 6, hold Crescendo for counter-engage |
| Leona | Hard all-ins can kill Sona before sustain matters | Keep wave safer, punish missed E, and avoid standing near the ADC for double engage |
| Renata Glasc | Can disrupt Sona's teamfight rhythm and punish grouped allies | Spread in fights and avoid using Crescendo into poor follow-up windows |
| Brand | High poke and burst damage can force Sona out before her scaling matters | Play outside spell angles, use W for controlled trades, and avoid grouped passive spread |
Explore services related to this guide, selected from our League of Legends catalog.
View All League of Legends Services


LoL Rell Support Build for Patch 26.9
Rell is the hard engage support in this trio. She is not picked to politely sustain lane. She is picked to start fights, punish bad positioning, break enemy formations, and give her team a reliable way to force combat. Her crowd control chain makes her especially strong with ADCs and teams that can follow instantly. If your team has damage but no way to start a fight, Rell gives the draft a spine. A rare medical miracle in champion select.
The best Rell support build focuses on durability, engage reliability, and team protection. Her standard setup uses Aftershock, Celestial Opposition, Plated Steelcaps or Ionian Boots of Lucidity, Zeke's Convergence, Locket of the Iron Solari, and Knight's Vow. She is strongest when she controls vision, uses fog of war, and starts fights from angles instead of slowly walking at five enemies through visible lane like a warning sign with a horse.
Rell runes for support
| Tree | Rune | Reason |
|---|---|---|
| Resolve | Aftershock | Best keystone for engage durability after landing crowd control |
| Resolve | Shield Bash | Works with Rell's defensive patterns and all-in trades |
| Resolve | Bone Plating | Helps survive burst after engaging or being focused |
| Resolve | Unflinching | Improves resistance to slows and crowd control in fights |
| Inspiration | Hextech Flashtraption | Creates fog-of-war engage angles and brush pressure |
| Inspiration | Cosmic Insight | Better Flash, item, and summoner spell uptime |
| Shards | Attack Speed / Move Speed / Health Scaling | Best general setup for smoother support trades and engage movement |
Aftershock is Rell's best rune because she must survive after committing. Hextech Flashtraption is extremely valuable because Rell's best engages often come from brush, fog, or river angles. Cosmic Insight improves Flash and item uptime, which matters because many Rell plays are built around Flash engage or Locket timing. Font of Life and Overgrowth can replace Shield Bash or Unflinching when you want more team utility or scaling durability. She is not an enchanter. She does not win by standing behind the ADC and hoping vibes stop a dive.
Rell items and full build path
| Order | Item | Purpose |
|---|---|---|
| Start | World Atlas + Health Potions | Standard support start for quest progress, gold, and lane sustain |
| Support upgrade | Celestial Opposition | Best durability upgrade for engage and frontline survival |
| Boots | Plated Steelcaps | Best into AD and auto-attack-heavy teams |
| First item | Zeke's Convergence | Strong engage follow-up damage and utility after Rell commits |
| Second item | Locket of the Iron Solari | Team shield for objective fights, dives, and burst protection |
| Third item | Knight's Vow | Protects your main carry and improves frontline support value |
| Fourth item | Thornmail or Bandlepipes | Thornmail into healing and AD, Bandlepipes when team utility is better |
Ionian Boots of Lucidity can replace Plated Steelcaps when ability haste and Flash uptime matter more than armor. Mercury's Treads are useful into heavy crowd control and magic damage. Solstice Sleigh is a viable alternative support upgrade when movement and ally sustain after engage are more important than raw damage reduction. Frozen Heart is excellent into attack-speed-heavy teams. Rell should buy items that let her start fights and keep carries alive, not random tank items because they look sturdy in the shop.
Rell skill order and lane plan
Rell should usually max W first, E second, and Q last, while taking R whenever possible. Ferromancy: Crash Down gives her main engage pattern, frontline commitment, and lane threat. Full Tilt is still extremely important because it gives movement speed and engage access, but it is usually maxed after Rell's main lockdown tool. Shattering Strike is useful for stun extension, shield breaking, and lane trades, but it is usually maxed after her main engage tools.
| Skill priority | Ability | Use |
|---|---|---|
| Max first | W - Ferromancy: Crash Down | Main engage, knock-up, and frontline commitment tool |
| Max second | E - Full Tilt | Movement speed, engage access, and stronger playmaking |
| Max third | Q - Shattering Strike | Stun extension, shield break, and follow-up utility |
| Take whenever possible | R - Magnet Storm | Teamfight lockdown, engage layering, and anti-disengage control |
Rell's lane plan is to threaten level 2 and level 3 all-ins, control brush, and punish enemy bot lanes that walk too far forward. She should not engage into huge enemy minion waves unless the kill is guaranteed or the jungler is there. Good Rell players wait for enemy cooldowns, use Hexflash angles, and coordinate with ADC damage. Bad Rell players press W from downtown and then discover that commitment is not the same as success.
Rell ADC synergy and support counters
| Best ADC pairs with Rell | Why the lane works |
|---|---|
| Miss Fortune | Rell crowd control creates excellent Bullet Time windows |
| Samira | Rell engage and knockups help Samira stack and follow all-ins |
| Kai'Sa | Reliable engage helps Kai'Sa access targets and follow with ultimate |
| Jinx | Rell can start fights that let Jinx secure the first reset |
| Ashe | Ashe arrow and slows combine well with Rell's engage chain |
| Harder matchups | Why they are difficult | Rell answer |
|---|---|---|
| Janna | Can interrupt engages, disengage fights, and deny Rell's all-in timing | Bait tornado and ultimate before committing, or roam instead of forcing lane |
| Zilean | Speed control, bombs, and Chronoshift punish Rell's commit pattern | Track ultimate, force cooldowns, and engage only when follow-up damage is ready |
| Morgana | Black Shield can deny key crowd control and punish predictable engages | Bait shield first or engage a different target |
| Poppy | Can stop dashes and disrupt Rell's engage path | Avoid straight-line engages and wait for Steadfast Presence cooldown |
| Seraphine | Long-range crowd control and disengage can punish grouped Rell engages | Attack from fog, avoid obvious front-to-back engages, and force cooldowns before committing |
Support Draft Guide for Nami, Sona, and Rell
The easiest way to choose between Nami, Sona, and Rell is to look at what your team needs from support. Nami is the best default when bot lane wants flexible trading, sustain, and pick setup. Sona is the scaling pick when your team can protect her and play grouped fights. Rell is the engage pick when your team has damage but no reliable way to start fights. They are all supports, but they do not solve the same problem, which is tragic news for anyone who drafts by vibes.
| Draft situation | Best pick | Reason |
|---|---|---|
| You need the safest all-around support | Nami | Sustain, poke, peel, and engage setup make her flexible |
| Your ADC wants to trade early | Nami | Tidecaller's Blessing and Ebb and Flow create strong short trades |
| Your team wants scaling teamfights | Sona | Healing, shielding, movement speed, and Crescendo scale well |
| Your team has no engage | Rell | Hard crowd control gives a direct way to start fights |
| Your ADC is Miss Fortune or Samira | Rell | Rell's lockdown creates strong ultimate and all-in windows |
| Enemy bot lane has heavy poke | Nami or Sona | Nami can fight back earlier, while Sona can scale if lane survives |
| Enemy team has strong disengage | Nami | Nami can peel, poke, and re-engage without fully committing like Rell |
Summoner Spells for Nami, Sona, and Rell
Flash is mandatory for all three supports because bot lane without Flash is just a public experiment in bad spacing. The second summoner spell depends on the lane. Nami usually wants Heal or Exhaust. Sona usually wants Heal, Exhaust, or Barrier depending on threat level. Rell usually wants Ignite for kill pressure or Exhaust when enemy divers and assassins are the main problem.
| Champion | Best summoner spells | Alternative | Use case |
|---|---|---|---|
| Nami | Flash + Heal | Flash + Exhaust | Heal for lane trades, Exhaust into assassins or dive-heavy teams |
| Sona | Flash + Heal | Flash + Exhaust or Barrier | Heal for team value, Exhaust into dive, Barrier for self-survival |
| Rell | Flash + Ignite | Flash + Exhaust | Ignite for kill lanes, Exhaust when protecting carries matters more |
Best Support Item Choices by Enemy Team
Nami, Sona, and Rell all need situational item choices after their core. Nami wants healing, shielding, and ally damage amplification. Sona wants scaling enchanter value and teamfight uptime. Rell wants durability, engage follow-up, and carry protection. The correct item depends on enemy crowd control, healing, dive, burst, and whether your carry is an auto attacker or spell caster. This does require looking at the enemy team, a brutal burden for the modern shop enjoyer.
| Enemy problem | Nami answer | Sona answer | Rell answer |
|---|---|---|---|
| Hard crowd control | Mikael's Blessing | Mikael's Blessing | Mercury's Treads or Locket of the Iron Solari |
| Heavy burst | Redemption or Locket if needed | Redemption or Moonstone Renewer | Locket of the Iron Solari and Celestial Opposition |
| Auto-attack carry on your team | Ardent Censer | Ardent Censer | Knight's Vow to protect the carry |
| AP or spell-focused carry on your team | Staff of Flowing Water | Staff of Flowing Water | Zeke's Convergence or Locket utility |
| Enemy healing | Oblivion Orb into Morellonomicon only if nobody else buys anti-heal | Oblivion Orb only if needed | Thornmail |
| Enemy attack speed carries | Peel with slows and shields | Position around carry protection | Frozen Heart |
| Need engage speed | Shurelya's Battlesong | Shurelya's Battlesong situationally | Hexflash angles and movement boots usually matter more |
Support Vision and Roaming Plan for Ranked
Support is not just standing behind the ADC and hoping the lane becomes playable through emotional support. Nami, Sona, and Rell all need different map habits. Nami can move with her jungler after pushing bot wave and use bubble or Tidal Wave to start river fights. Sona should roam carefully because she is fragile and scales better when she does not donate herself to fog. Rell should use brush control, Hexflash, and sweeper to create engage angles around dragon, mid lane, and jungle entrances.
Vision should follow the next objective, not random curiosity. Before dragon, control river brush, tri-brush, and enemy jungle entrances if your team has pressure. Before Baron, support should help clear vision with teammates, not walk alone into darkness like the map personally invited them. Enchanters should ward from safe angles with allies nearby. Rell can face-check slightly better than Nami or Sona, but even she is not immune to five enemies and poor life choices.
| Game phase | Nami plan | Sona plan | Rell plan |
|---|---|---|---|
| Early lane | Trade with W, empower ADC with E, control brush | Survive lane, poke safely, protect ADC with W | Threaten level 2 and level 3 all-ins from brush |
| First recall | Buy control wards and return to lane with mana control | Buy control wards and avoid greedy river movement | Buy control wards and swap to sweeper when quest timing allows |
| Dragon setup | Use Tidal Wave for engage or disengage around river | Group with team and keep carries healthy before fight starts | Clear vision and threaten Hexflash engage from fog |
| Mid game | Move with jungler and protect carry rotations | Group around carries and scale through teamfights | Force picks with Flash, Hexflash, and fog-of-war angles |
| Late game | Peel priority carries and re-engage with ultimate | Stay alive, stack auras, and hold Crescendo for divers | Start decisive fights or peel divers off the main carry |
Best LoL Support Champion Pool for Ranked
Using Nami, Sona, and Rell as a three-champion support pool gives you answers to most ranked drafts. Nami is the main pick when you want the safest mix of lane pressure, sustain, peel, and engage setup. Sona is the scaling enchanter when your team wants grouped fights and your ADC can survive lane. Rell is the engage support when your team has damage but no clean way to start a fight.
The cleanest ranked approach is to main Nami, use Sona when the team can scale and protect you, and use Rell when your team needs engage or your ADC pairs well with all-ins. This pool gives you enchanter utility, scaling teamfight power, hard crowd control, vision pressure, and enough draft flexibility to avoid panic-locking a random support because it worked in one highlight video. A rare victory for restraint.
LoL Support Builds Final Setup for Patch 26.9
The best Nami support build is Summon Aery with Manaflow Band, Transcendence, Scorch, Bone Plating, and Revitalize. Build Dream Maker, Ionian Boots of Lucidity, Imperial Mandate, Moonstone Renewer, Redemption, and Ardent Censer or Staff of Flowing Water. Max W first, E second, and Q last. Use Nami as the safest ranked support pick for lane trades, sustain, peel, and engage setup.
The best Sona support build is Summon Aery with Manaflow Band, Transcendence, Gathering Storm, Conditioning, and Revitalize. Build Bloodsong or Dream Maker, Boots of Swiftness, Echoes of Helia, Moonstone Renewer, Dawncore, and Staff of Flowing Water or Ardent Censer. Max W first, Q second, and E last. Use Sona when your team can survive early lane and wants scaling healing, shielding, movement speed, poke, and grouped teamfight value.
The best Rell support build is Aftershock with Shield Bash, Bone Plating, Unflinching, Hextech Flashtraption, and Cosmic Insight. Build Celestial Opposition, Plated Steelcaps, Zeke's Convergence, Locket of the Iron Solari, Knight's Vow, and Thornmail or Bandlepipes. Max W first, E second, and Q last. Use Rell when your team needs hard engage, frontline control, and reliable crowd control around objectives.
Nami, Sona, and Rell are strong support choices because they give clear ways to affect bot lane and teamfights. Nami wins through flexible lane pressure and utility. Sona wins through scaling auras and sustain. Rell wins through engage and lockdown. Pick the champion that fits your ADC, enemy bot lane, and team composition, then build against the actual threats instead of copying one item path like support items are sacred scripture.
If you want the cleanest ranked support pool, use Nami as the main pick, Sona as the scaling enchanter, and Rell as the engage answer. That gives you a practical Patch 26.9 support setup without turning champion select into a therapy session about bot lane identity. Support already has enough invisible work. At least make the build visible and useful.