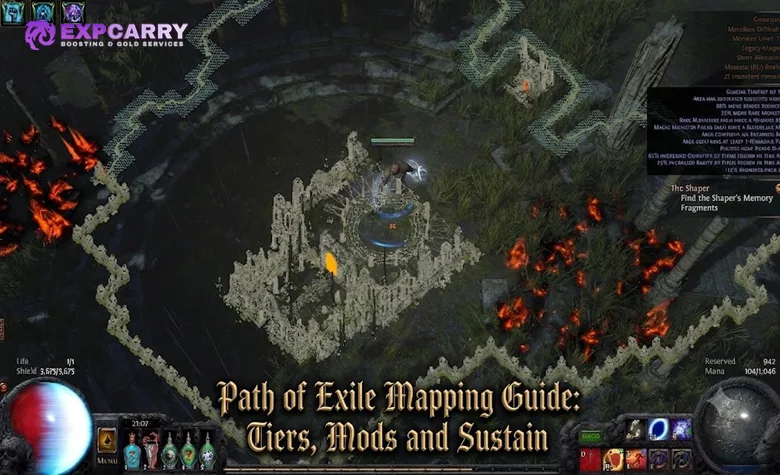
Path of Exile mapping is easiest when you treat Atlas progression, modifier safety, and Map sustain as one system. Use the highest Map Tier your build can finish reliably, complete each Atlas node under its Bonus Objective conditions, reroll modifiers that disable your recovery or damage mechanics, and spend early Atlas Passive Points on increased Maps found and higher-tier Map chance. In the current Atlas, normal Map items are defined by tier rather than by a specific layout, so the Map item supplies the tier and modifiers while the Atlas node supplies the area and boss.
Pre-release note: This guide reflects the announced Path of Exile 3.29 rules. The league is not live at the time of verification, so changes described in the patch notes should be treated as announced rather than live-tested. The current in-game Atlas and Map item text remain the final reference.
PoE Mapping Checklist for Fast Atlas Progression
A reliable mapping routine prioritizes completion before expensive investment. The goal is to reveal connected Atlas nodes, earn Bonus Objectives, build a reserve of usable Maps, and avoid losing portals to modifiers your build cannot handle.
- Choose an uncompleted Atlas node that can be opened with your highest safe Map Tier.
- Craft the Map to the rarity required for its Bonus Objective.
- Read every modifier before activating the Map Device.
- Reroll any modifier that disables the build's recovery, damage, or defensive engine.
- Defeat the Map boss to complete the area and reveal connected nodes.
- Collect Map drops and keep a reserve one or two tiers below your current progression.
- Spend early Atlas Passive Points on Map drop chance and higher-tier Map chance.
- Use Kirac's Gold shop, vendor upgrades, Scarabs, or trade only when the natural supply becomes insufficient.
How Maps and the Current Atlas Work
The Atlas begins in the center and expands through four quadrants. Defeating the boss of an accessible Map reveals connected nodes. Normal Map items are no longer tied to names such as Mesa or Dunes; they are generic items such as Map Tier 7 or Map Tier 16. Select the desired revealed area on the Atlas, then insert a Map item whose tier is at least the tier required by that node.
This system was introduced with the major Atlas rework documented in the official Path of Exile 3.28 patch notes. Because a generic Map item can be used to run an eligible normal Atlas area, the old Favoured Map system is no longer part of the current Atlas. Layout selection and tier sustain are now separate decisions.
| Map Category | Tiers | Area Levels | Typical Progression Goal |
|---|---|---|---|
| White Maps | Tier 1 to Tier 5 | 68 to 72 | Reveal paths, establish basic Map sustain, and earn early Atlas Passive Points. |
| Yellow Maps | Tier 6 to Tier 10 | 73 to 77 | Run Rare Maps, improve defenses, and continue endgame quest progression. |
| Red Maps | Tier 11 to Tier 16 | 78 to 83 | Complete Rare Corrupted Bonus Objectives, obtain Voidstones, and establish Tier 16 sustain. |
| Nightmare Maps | Tier 17 | 84 | Challenge optimized endgame builds and earn the Atlas Skill Point tied to each Nightmare Map. |
The color terms White, Yellow, and Red describe tier groups, not item rarity. A White-tier Map can still be Magic, Rare, or Corrupted, and a Red-tier Map can be Normal if no currency has been applied to it.
Map Completion and Atlas Bonus Objectives
Map Completion and Bonus Completion are related but not identical. Defeating the area boss completes the node and reveals connected paths. Meeting the node's additional rarity requirement also completes its Bonus Objective and awards an Atlas Passive Skill Point.
| Map Tier | Bonus Objective Requirement | Recommended Preparation |
|---|---|---|
| Tier 1 to Tier 5 | Defeat the Map boss in a Magic or higher rarity Map. | Use an Orb of Transmutation and reroll any dangerous modifier. |
| Tier 6 to Tier 10 | Defeat the Map boss in a Rare or higher rarity Map. | Use an Orb of Alchemy or Orb of Binding, then check all modifiers. |
| Tier 11 to Tier 16 | Defeat the Map boss in a Rare Corrupted Map. | Make the Map Rare, make it safe, apply a Vaal Orb, and check the resulting item again. |
Hover over an Atlas node to confirm its exact objective and completion status. When viewing the Atlas, holding a Map item also highlights nodes that the item can complete under its current tier and rarity. This is especially useful when several connected areas are available.
Bonus Objectives provide more than points for the Atlas tree. Every four completed Bonus Objectives also grant 1% increased Map Item Quantity, so progressing the Atlas directly improves long-term Map sustain. Unique Maps provide one Atlas Skill Point each for the first ten different Unique Maps completed, while each of the five Nightmare Maps provides another point on completion.
Explore services related to this guide, selected from our Path of Exile catalog.
View All Path of Exile Services


How to Craft and Roll Maps by Tier
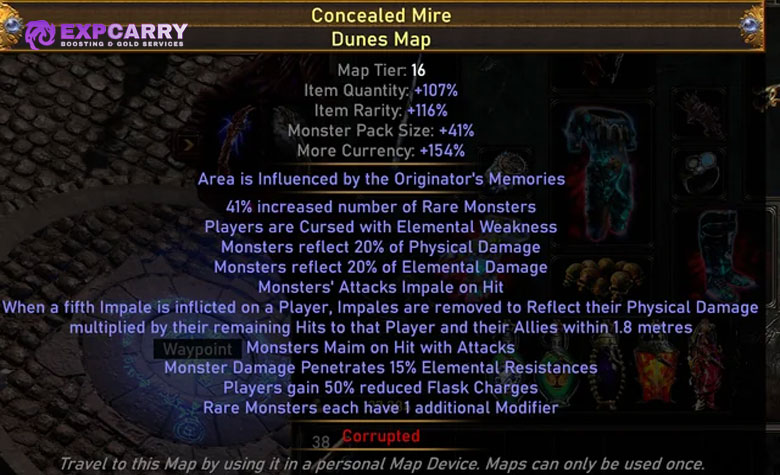
Map modifiers improve Item Quantity, Item Rarity, and Pack Size, but they can also make the area impossible for a particular build. The correct amount of investment is the highest difficulty that can still be completed consistently without wasting portals.
| Map Stage | Basic Rolling Method | When to Reroll |
|---|---|---|
| Early White Maps | Use an Orb of Transmutation. Add a missing modifier with an Orb of Augmentation if desired. | Use Orbs of Alteration, or use an Orb of Scouring to return the Map to Normal when a modifier is unsafe. |
| Yellow Maps | Use an Orb of Alchemy or Orb of Binding to create a Rare Map. | Use a Chaos Orb, or scour and craft again, when the Rare modifiers are incompatible with the build. |
| Red Maps for Bonus Completion | Roll a safe Rare Map first, then corrupt it with a Vaal Orb. | Prepare a second Map because corruption can reroll the item or create a dangerous result that cannot be changed with ordinary currency. |
| Farmed Tier 16 Maps | Roll for useful quantity and pack size without accepting build-breaking combinations. | Reroll when the expected reward does not justify the death risk or clear-speed loss. |
Ordinary Cartographer's Chisels no longer drop in the current game, although existing copies in Standard can still function with reduced values. Map Device crafting options and Kirac Missions were also removed. Current Map investment instead relies on the Map's own modifiers, Atlas Passives, Scarabs, Fragments, influence, and other systems that explicitly affect the selected area.
Dangerous PoE Map Modifiers
A modifier becomes dangerous when it attacks a required build mechanic or combines with other modifiers to multiply incoming damage. Create a personal list of modifiers that must always be rerolled, modifiers that require a gear or Pantheon swap, and modifiers that are merely slower. The official Path of Exile 3.29 patch notes also replace old global reflect modifiers with the Thorns system explained below.
| Modifier or Combination | Builds Most Affected | Recommended Response |
|---|---|---|
| Players cannot Regenerate Life, Mana, or Energy Shield | Regeneration builds, mana sustain setups, Righteous Fire, and Energy Shield recharge alternatives that depend on regeneration. | Reroll unless another recovery source can fully support skill costs and incoming damage. |
| Monsters cannot be Leeched from | Attack and spell builds that use Life or Mana Leech as their primary sustain. | Reroll or equip a reliable recovery method that does not require leech. |
| Players have less Recovery Rate of Life and Energy Shield | Leech, regeneration, recharge, and recovery-heavy builds. | Check the final value after Map modifier effect; reroll if recovery becomes too weak. |
| Players have reduced maximum Resistances | Every build, especially characters that rely on high maximum Elemental Resistances. | Treat it as a major damage multiplier and avoid combining it with extra elemental damage. |
| Reduced Block and less Armour | Armour, shield, and block-based characters. | Reroll when these are core defensive layers or when the Map has other physical damage modifiers. |
| Reduced amount of Suppressed Spell Damage Prevented and increased Monster Accuracy | Spell Suppression and evasion builds. | Avoid dangerous spell bosses or reroll if the build is not durable without those layers. |
| Monsters deal extra Physical Damage as an Element | Characters with weak elemental mitigation or physical damage conversion defenses. | One version may be manageable, but several extra-damage and speed modifiers together are dangerous. |
| Increased Monster Critical Strike Chance and Critical Strike Multiplier | Builds without reduced extra damage from Critical Strikes. | Reroll when combined with extra damage, reduced maximum Resistances, or increased speed. |
| Monsters fire additional Projectiles or skills Chain additional times | Minion builds, characters surrounded by allies, and builds vulnerable to overlapping projectiles. | Use careful positioning and chain protection, or reroll on projectile-heavy layouts. |
| Monsters avoid Elemental Ailments, Poison, Impale, or Bleeding | Damage-over-time and ailment builds. | Reroll if the avoidance causes unacceptable damage loss or prevents important defensive ailments. |
| Players gain reduced Flask Charges | Pathfinder setups and builds relying on permanent utility flasks. | Confirm flask uptime or replace the Map. |
| Elemental Weakness, Vulnerability, or other Map curses | Characters without overcapped Resistances or sufficient reduced Curse Effect. | Overcap Resistances, gain curse protection, or reroll the Map. |
Never judge modifiers separately when several can interact. Reduced maximum Resistances, extra Physical Damage as Lightning, increased Critical Strikes, and increased Monster speed can turn an individually manageable Map into a lethal one. Atlas Passives that increase the effect of explicit Map modifiers amplify both the reward and the danger.
Reflect Modifiers and Thorns in PoE 3.29
The announced 3.29 rules replace the old global Physical and Elemental reflect Map modifiers with Physical or Elemental Thorns on Rare Monsters. Thorns activates when the Rare Monster receives the matching damage type, lasts for 5 seconds, and cannot be gained by that monster more than once every 10 seconds.
In Red Maps, announced Thorns values are 800 reflected Physical Damage or 1500 reflected Elemental Damage per trigger. A player can take this damage at most once every 0.1 seconds, and it can be mitigated by defenses such as Evasion, Block, Armour, and Resistances. Fast-hitting builds should still treat Thorns as dangerous, but it is no longer the old rule where every monster reflects a percentage of all matching Hit Damage.
How Map Drops and Higher Tiers Work
Map sustain depends on how many eligible monsters are killed, how much Map quantity the area has, and whether the dropped tier is allowed. Running a difficult Map with low clear speed can produce fewer Maps than a slightly easier Map that the build clears completely.
- Normal monsters can drop Maps up to the tier of the current area.
- Magic and Rare monsters can drop Maps one tier above the area.
- The Map boss can drop Maps up to two tiers above the area.
- Atlas Passives can increase Maps found or give Tier 1 to Tier 15 Maps a chance to become one tier higher.
- Higher Item Quantity and more monsters generally improve the number of opportunities for Map drops.
- Three Map items of the same tier can be sold to a vendor for one Map item one tier higher.
Do not skip the boss during Atlas progression. Boss completion reveals connected nodes, may provide a higher-tier Map, and advances influence or other endgame objectives when the selected area is eligible. The official Atlas Passive Tree can be searched for Maps found and higher-tier Map chance before committing points.
How to Sustain Maps Reliably
Consistent Map sustain comes from several small advantages working together. The following order avoids overspending while still keeping progression moving.
- Complete Bonus Objectives: Each one provides an Atlas point, and every four add 1% Map Item Quantity.
- Take Map progression passives early: Allocate increased Maps found and higher-tier Map chance before specializing heavily in reward mechanics.
- Run the highest safe tier: A completed Tier 10 is more useful than a failed Tier 12. Move upward when damage, defenses, and boss consistency are ready.
- Roll for sustainable difficulty: Quantity and pack size help, but not when the modifiers slow the build or consume all six portals.
- Clear enough of the Map: The boss completes the node, but leaving large groups alive removes Map drop opportunities.
- Use Cartography Scarabs when needed: Add them when the Map pool is shrinking or when pushing a new tier, not automatically on disposable low-tier Maps.
- Maintain a reserve: Keep several Maps one tier below the current target so one bad streak does not end progression.
- Use fallback sources: Kirac's shop, vendor upgrades, Map reward containers, and trade can rebuild a depleted pool.
Once sustain is comfortable, Atlas points can be moved from basic Map progression into the mechanics you intend to farm. Removing every sustain passive too early can still produce shortages, especially when the build skips monsters or frequently fails bosses.
If a character repeatedly fails high-tier modifiers despite correct Map rolling, a custom PoE build setup can help identify whether the real issue is recovery, mitigation, damage uptime, flasks, or an unsupported defensive layer.
Kirac's Shop, Vendor Upgrades and Trade
Kirac no longer provides Missions or Scouting Reports. His current shop offers a wider selection of Map-related items, usually for Gold, and the inventory can be rerolled by spending Gold. Check the shop when a specific tier is blocking an Atlas path or when the reserve falls below a comfortable level.
- Buy only the tiers or special Maps that solve an immediate progression problem.
- Sell three Maps of the same tier to receive one Map a tier higher when lower tiers are abundant.
- In Trade leagues, compare the cost of replacement Maps with the currency being spent rerolling an unsuitable Map.
- In SSF, preserve extra high-tier Maps and use Kirac's Gold rerolls before relying heavily on the vendor upgrade.
How Voidstones Affect Map Tiers and Sustain
Each Voidstone is associated with an Atlas quadrant. Socketing it raises the minimum Map Tier in that quadrant to Tier 16, causes Map drops there to become one tier higher, and converts Map drops below Tier 16 into Gold. Each Voidstone also grants a separate global effect and enables a chance for Tier 16 Maps to become Nightmare Maps.
Voidstones are powerful once the build can sustain and clear Tier 16 content, but they change the purpose of lower-tier drops. Do not judge late-game sustain by the number of low-tier Maps because empowered quadrants convert those drops instead. Track the Tier 16 reserve and use Map quantity, Atlas Passives, and Scarabs when that reserve starts shrinking.
In 3.29, completing a Map affected by a Voidstone can cause an Atlas Anomaly to appear the next time the Atlas is opened. Anomalies do not require a Map item, are not affected by the Atlas Passive Tree, and cannot be enhanced with Fragments. They are additional Atlas content rather than a replacement for the regular Map pool.
Tier 17 Nightmare Maps
Nightmare Maps are Tier 17 areas with level 84 monsters and modifiers designed for established endgame builds. They are not the next step immediately after reaching Red Maps; first secure Tier 16 completion, reliable recovery, ailment protection, boss damage, and defenses that remain functional under hostile Map modifiers.
- Read every explicit and implicit modifier before opening the Map.
- Do not assume a build that clears ordinary Tier 16 Maps can handle the same modifier combination in a Nightmare Map.
- Complete each of the five Nightmare Maps to earn its Atlas Skill Point.
- Only invest valuable enhancements when the build can defeat the boss consistently.
- Sell an unsuitable Nightmare Map in Trade league rather than forcing a modifier combination the build cannot run.
Common PoE Mapping Mistakes
Most mapping problems are caused by outdated information, missing Bonus Objectives, or accepting more modifier risk than the build can support.
- Looking for named normal Map items: Current normal Maps drop as generic tier items. Choose the normal area through the Atlas.
- Following an old Favoured Map strategy: The Favoured Map system was removed when Map items stopped being tied to specific normal areas.
- Expecting Kirac Missions: Kirac now supports progression through his Gold shop rather than Missions and Scouting Reports.
- Planning around ordinary Cartographer's Chisels: New copies no longer drop in the current system.
- Corrupting before reading modifiers: Make a Red Map safe while it is still modifiable, then use the Vaal Orb and check it again.
- Ignoring the Bonus Objective: Boss completion alone does not award the normal Atlas Passive Point if the required rarity or corruption condition is missing.
- Stacking dangerous modifiers: Several moderate damage modifiers can become more lethal together than one obvious build-breaking modifier.
- Removing sustain passives too early: Wait until the Map reserve remains stable across a meaningful number of runs.
- Skipping too many monsters: Rushing directly to the boss reduces the number of Map drop opportunities.
- Pushing tiers after repeated failures: Farm a lower tier until defenses, damage, and recovery can support the next step.
Final PoE Mapping Strategy
Progress through the highest tier you can finish consistently, complete every available Bonus Objective, and keep an explicit reroll list for modifiers your build cannot run. Use early Atlas points for Maps found and higher-tier chance, roll enough quantity to support drops without creating lethal combinations, and keep a lower-tier reserve. As Voidstones move quadrants to Tier 16, shift the sustain plan toward Tier 16 quantity, Scarabs, and boss completion, then enter Nightmare Maps only after ordinary endgame Maps are reliable.