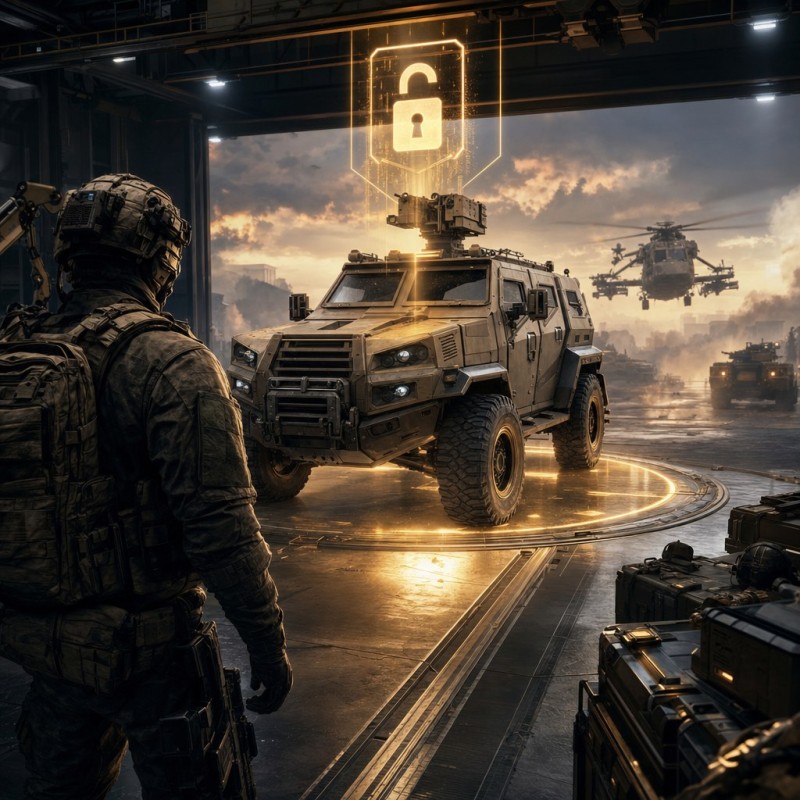
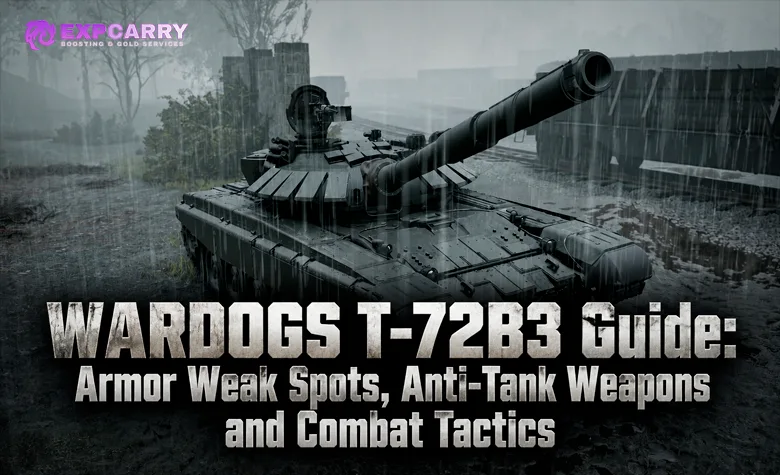
The T-72B3 arrived in WARDOGS with Season 2 on October 15, 2026, giving Driver players a new main battle tank that costs less than the L2A6. It can dominate exposed infantry and poorly defended positions, but anti-tank weapons remain a serious threat. The key is understanding how WARDOGS handles vehicle damage: the game uses separate component hitboxes rather than a fully simulated real-world armor model. RPG-7 and MAAWS rockets can therefore produce different results depending on exactly where they land. This guide covers the T-72B3's armor and component health, tested weak spots, rocket requirements, attacks from each direction, and the decisions that help both infantry squads and tank crews survive Season 2 engagements.
Short answer: Against an undamaged T-72B3, game-data calculations suggest approximately 3 MAAWS rockets or 5 RPG-7 rockets when hits register on the main body. Community firing-range tests report faster kills through specific rear and engine-area hitboxes—sometimes 2 MAAWS or 3 RPG-7 hits—but these are observed results, not guaranteed damage thresholds. The rear hull is the most useful area to test for an efficient kill, while direct track hits are better treated as mobility damage.
T-72B3 Stats, Price and Unlock Requirements in Season 2
The T-72B3 is positioned as a more affordable main battle tank rather than a direct upgrade to the L2A6. BULKHEAD describes it as slower, cheaper and slightly more fuel-efficient than its existing counterpart. That difference matters in long matches: a squad that loses one expensive tank may struggle to replace it, whereas the T-72B3 offers heavy firepower at a lower deployment cost. Its actual value still depends on crew coordination, safe routes and the ability to keep it repaired.
| Attribute | Value | What it means |
|---|---|---|
| Introduced | Season 2, October 15, 2026 | Available in the current Early Access season |
| Progression | Driver level 20 | Required before the permanent progression unlock |
| Unlock cost | $250,000 Cash | One-time Driver progression unlock |
| Vehicle vendor price | $16,000 Cash | Paid when purchasing the vehicle in a match |
| Main vehicle health | 750 HP | Recorded in community-extracted game data |
| Engine health | 150 HP | Separate damageable component |
| Fuel tank health | 150 HP | Separate damageable component |
| Track health | 125 HP per track | Damage can impair mobility |
| Crew positions | 3 | Driver, turret gunner and mounted machine gun gunner |
| Main weapon | 125 mm cannon | Primary anti-vehicle and heavy-firepower option |
The Driver requirement and prices come from BULKHEAD's official Season 2 patch notes. Health values come from a community-maintained reference based on extracted game data, not from a developer-published damage chart. Keep these two types of information separate when comparing the tank with other vehicles. Players working toward Driver level 20 can also review the available vehicle unlock progression options, since reaching the required level and paying the Cash cost are different steps.
How T-72B3 Armor and Component Damage Actually Work
The T-72B3 looks heavily protected, especially around its turret and front hull. However, appearance is a poor way to estimate rocket damage in WARDOGS. Community analysis of the current game files indicates that the T-72B3 does not have a separately functioning explosive reactive armor layer. Its visible armor blocks should not be interpreted as individual protective charges that absorb the first rocket. Instead, damage depends on the projectile's damage type and the vehicle part registered by the hit.
This also means that real-world assumptions about armor thickness and impact angle do not translate directly into the game. A front hit is not necessarily assigned a universal reduction simply because the surface looks thick, and a side hit is not automatically stronger because it arrives at a right angle. The important distinction is whether the explosion registers on the main body, an engine-related hitbox, a track, or another component. The vehicle damage reference explains why a blast can behave differently from a simple body-health calculation.
Important: The 750 HP main-health value and the 150 HP engine value are separate records. Do not add them together to calculate a universal tank health pool, and do not assume that destroying a track is equivalent to destroying the tank. Community rocket-count calculations generally assume clean hits against the main body, without repairs or overlapping component damage.
Main Hull Damage vs Engine Damage
When explosives register on the main body, the T-72B3 follows a relatively predictable damage pattern. That is where the common estimates of five RPG-7 hits or three MAAWS hits come from. Engine-area impacts can produce a different result because they interact with a separate component, and firing-range tests show that rear hits may both stop the vehicle and contribute substantial damage toward its destruction.
The practical lesson is to choose an aim point for a purpose. If you need to destroy the tank as quickly as possible, focus on a repeatable high-damage body or rear-engine hitbox. If the tank is about to escape or turn its cannon toward your squad, a mobility-disabling hit may be valuable even when it does not immediately finish the vehicle. A disabled T-72B3 is still dangerous if its gunner has a clear line of sight.
Tracks, Fuel Components and Visual Armor
Each track has its own recorded health, allowing infantry to interfere with movement without necessarily dealing efficient damage to the main health pool. Some firing-range tests also report unexpectedly high damage when rockets hit particular front-track boundaries, which suggests that neighboring hitboxes can influence the result. Treat those unusual intersections as test-dependent opportunities rather than reliable weak spots.
The fuel tank is also represented as a separate component, but that alone does not establish a guaranteed fuel explosion or one-hit kill. Similarly, the turret's exterior equipment can look vulnerable without sharing a consistent damage rule across every surface. For reliable play, learn the broad component zones first and only rely on tiny hitbox shortcuts after reproducing them in the current build.
T-72B3 Weak Spots: Front, Side, Rear and Turret
The most useful way to study T-72B3 armor weak spots is by combining attack direction with the specific part being struck. A direction alone is too broad: hitting a rear track is not the same as hitting the rear engine cover, and a rocket landing beside the tank can register differently from a direct impact. The following comparison combines game-data estimates with clearly identified community firing-range observations from Season 2.
| Hit location | RPG-7 results | MAAWS results | Practical priority |
|---|---|---|---|
| Front main body | About 5 hits in baseline calculations and RPG testing | About 3 hits in MAAWS testing | Reliable damage, but dangerous exposure to the main gun |
| Side main body | About 5 hits in published RPG tests | About 3 hits across most tested areas | Good when the tank is distracted or crossing open ground |
| Rear hull and engine area | As few as 3 hits in published RPG tests | As few as 2 hits in community MAAWS tests | Highest-value tested area for damage and mobility disruption |
| Most turret surfaces | Around 5 hits in RPG testing | Generally around 3 hits in MAAWS testing | Fallback when the hull is concealed; results depend on the exact part |
| Certain small turret fittings | No dependable RPG count established | 2 hits reported on some small zones | Too precise to be the default target during a moving fight |
| Tracks | Can disable a track with a direct hit | Can disable a track; some boundary hits have unusual damage | Movement suppression rather than a guaranteed fast kill |
The RPG figures are based on Season 2 firing-range tests published by Aim Sector. The MAAWS results come from a separate player-conducted tank hitbox test. Neither is an official BULKHEAD damage guarantee. The results are valuable because they describe actual aiming locations, but hit registration, repairs and small differences in impact position can change the number of rockets required.
Front Armor: Consistent Damage but High Exposure
From the front, the T-72B3 presents its cannon and much of its protected-looking hull to the attacker. Published RPG testing found approximately five hits to destroy it through standard front-body impacts, while MAAWS testing recorded three hits across the ordinary front surfaces. There is no confirmed universal frontal-armor multiplier that makes every frontal shot weaker than every side shot. The real disadvantage is tactical: an infantry player firing directly in front of an alert tank is easier for its gunner to engage.
Front attacks make sense when the tank is already damaged, distracted by another squad, or prevented from advancing. If you have no route to another angle, concentrate damage on the same main-body area and avoid wasting rockets on isolated track segments unless stopping its movement is your immediate objective. The tank's turret can still rotate while the vehicle is immobilized, so disabling movement does not make a frontal position safe.
Side Armor: Separate Hull Damage From Track Damage
A broadside T-72B3 is easier to hit, but that does not make every side impact a weak-spot hit. Community RPG testing recorded approximately five hits through ordinary side armor, comparable to the front. Directly striking a track is a different action: it can impair the tank's movement, but the resulting component damage should not be confused with five clean hits to the main body.
Side attacks are particularly useful when a tank is moving through a road, turning around a building, or engaging an ally in another direction. If a single launcher cannot finish it before it reaches cover, taking away its movement may create an opportunity for other players. If multiple anti-tank players are ready to fire together, ordinary side-body hits are often simpler to coordinate than aiming at a very small component boundary.
Rear Hull: The Best Tested Damage Opportunity
The rear hull and engine area produced the most favorable results in the available Season 2 tests. Aim Sector recorded three RPG-7 hits to destroy the T-72B3 from the rear, with the opening rear hit disabling movement in its tests. A separate player test recorded two MAAWS hits through the back of the hull or engine-cover area, compared with three hits over much of the front and sides. Those observations make the rear the strongest practical target when it can be reached safely.
Be precise about the wording: this is a tested component-related damage advantage, not proof that WARDOGS uses a physically modeled thinner rear armor plate. Rear track covers, engine surfaces and the back of the turret can register as different parts. If the vehicle does not react as expected, check whether your rocket struck the intended area before assuming that its armor values have changed.
Turret and Small Equipment Hitboxes
The turret is a useful fallback target when terrain or a wall hides the hull. Standard turret hits in the cited tests were not consistently better than standard hull hits, though one MAAWS firing-range investigation found two-hit results on certain small structures around the turret. The same tester described limitations in identifying exact impact points, so these findings should be treated as opportunities for further practice rather than easy, repeatable shortcuts.
Do not assume that the ammunition rack, turret ring or gun barrel works like a dedicated weak-spot system from a different tank game. Unless a particular effect is demonstrated in the current WARDOGS build, a normal body hit is a more dependable choice than gambling on a detailed real-world tank diagram.
Explore services related to this guide, selected from our Wardogs catalog.
View All Wardogs Services

RPG-7 vs MAAWS: Which Anti-Tank Weapon Is Better?
Both launchers can destroy a T-72B3, but they suit different budgets and progression stages. In Season 2, the RPG-7 costs less to purchase in a match, while the MAAWS needs fewer clean main-body hits in community-derived damage calculations. This makes the MAAWS the more efficient dedicated tank-killing choice when available, especially if your team can coordinate several hits before the target moves or begins receiving repairs.
| Factor | RPG-7 | MAAWS |
|---|---|---|
| Season 2 vendor price | $1,800 Cash | $2,400 Cash |
| Progression | Available earlier in Support progression | Support level 18 |
| One-time MAAWS unlock cost | Not applicable | $100,000 Cash |
| Calculated main-body hits | Approximately 5 | Approximately 3 |
| Best reported rear-hull result | 3 hits in RPG testing | 2 hits in MAAWS testing |
| Best reason to choose it | Lower match cost and earlier accessibility | Fewer rockets needed against heavy armor |
| Main limitation | More hits and longer exposure in a solo attack | Higher purchase and progression requirements |
BULKHEAD reduced the MAAWS progression requirement from Support level 20 to 18 and its permanent unlock cost from $125,000 to $100,000 in the Season 2 update. The revised launcher prices are also documented in the game's current balance references. If the MAAWS is your main goal, prioritize the appropriate Support role progression instead of spending time on Driver levels that do not unlock the launcher.
When the RPG-7 Is the Right Choice
The RPG-7 is a sensible pick when you have not unlocked the MAAWS, need a cheaper anti-vehicle option, or expect to work as part of a group rather than destroy a fresh tank alone. Its lower price leaves more Cash available for the rest of your loadout. The trade-off is that several successful hits may be needed, giving the T-72B3 more time to retreat, return fire or receive assistance.
Against a healthy tank, think in terms of the team's total available rockets rather than your personal chance of landing one heroic shot. A single RPG-7 hit can still matter if it damages the engine, prevents a retreat or lets another player finish the vehicle. Against an already damaged tank, the cheaper launcher may be sufficient without paying for the MAAWS.
When the MAAWS Is Worth Its Higher Cost
The MAAWS is preferable when enemy tanks are repeatedly controlling an objective and your squad needs a reliable source of heavy vehicle damage. The calculated three-hit main-body requirement means a smaller coordinated group may finish the T-72B3 before it escapes. Its better result in rear-hull firing-range tests creates another reason to select it when you can choose the engagement location.
The downside is the commitment required to unlock and replace the weapon. You should not spend every available Cash reserve on a launcher if that leaves you without ammunition, transport or support equipment for the rest of the match. Consider the enemy team's vehicle activity before deciding how much of your team's economy should go into anti-tank equipment.
How to Destroy the T-72B3 From Different Directions
The best anti-tank plan depends on where your squad is standing when the T-72B3 appears. An ideal rear shot is not always available, and spending too long searching for one can let the tank secure an objective or destroy friendly vehicles. These approaches prioritize the choices that matter in actual WARDOGS matches: avoiding the main gun's sightline, selecting a consistent hitbox, and deciding whether immediate damage or immobilization is more valuable.
Frontal Engagement: Survive the First Exchange
When facing a T-72B3 head-on, the immediate problem is the tank's ability to fire back. Use existing cover and avoid exposing several anti-tank players in the same place. If the tank has already identified your position, continuing to stand in the open while repeatedly launching rockets makes even a technically successful hit a poor trade. A coordinated volley is more useful than isolated shots separated by long intervals.
- Confirm the target: Identify whether the vehicle is a T-72B3 and whether it is already damaged.
- Choose the objective: Damage the main body if your squad has enough rockets to finish it; target movement only if stopping an advance is more urgent.
- Coordinate fire: Have multiple players engage from available cover so the tank cannot respond to each launcher one at a time.
- Reassess after impact: If the tank reverses, turns or deploys smoke, do not blindly continue firing at its last visible position.
The frontal approach becomes more reasonable when allied armor, infantry or fortifications are already distracting the tank. The goal is not to prove that its front can be penetrated; the game-data estimates already suggest that it can. The goal is to land enough relevant damage without losing the entire anti-tank group in the process.
Side Engagement: Punish Movement and Turns
Side engagements often occur when a T-72B3 crosses a street, drives around a compound or rotates toward a different threat. The broader visible hull makes consistent hits easier, but the distinction between hull and tracks remains important. If your squad has enough rockets for a kill, concentrate on the main body rather than scattering shots across unrelated components. If the tank is escaping, a track hit can keep it in the area long enough for follow-up damage.
Remember that the turret can rotate independently of the hull. A tank facing away at the start of an engagement may still bring its weapon toward you. Work with the terrain and allied pressure instead of assuming that a visible side automatically means a safe attack.
Rear Engagement: Prioritize the Engine Area
When your squad already has access to the rear of a T-72B3, aim for the rear hull or engine-cover area identified in the community tests. This offers two possible benefits: heavy damage and disruption of the tank's mobility. In published trials, rear impacts were more efficient than ordinary front or side hits, making them the clearest answer to players looking for T-72B3 weak spots.
Do not waste time pursuing a rear shot if reaching it requires crossing an exposed objective while the tank is already under effective fire from your team. A dependable side hit now can be worth more than a theoretical perfect rear hit later. The strongest approach is to create opportunities naturally through positioning, especially when the enemy driver is focused on another fight.
Squad Coordination, Ammunition and Match Economy
Destroying a fresh T-72B3 is much easier when several players contribute rather than one player trying to supply every rocket. The game-data baseline gives a simple planning target: approximately three clean MAAWS hits or five clean RPG-7 hits against the main body, before accounting for repairs, component interactions or unusual impact registration. Those are planning estimates, not promises that the last rocket will always destroy the vehicle.
- Share target information: Call out the vehicle type, its direction of travel and whether you have already damaged its engine or tracks.
- Match the launcher to the target: A tank occupying a major objective may justify MAAWS equipment; a damaged retreating vehicle may be finished with an RPG-7.
- Avoid overlapping mistakes: If one player is trying to stop the tracks, the others should understand whether they are attacking the main body or another component.
- Account for repairs: A tank that reaches friendly support may recover enough to invalidate your original rocket-count estimate.
- Protect the anti-tank players: Enemy infantry can be as dangerous to a launcher team as the tank itself, particularly when players focus entirely on the vehicle.
Season 2 also makes spending decisions important because players must balance permanent progression unlocks against equipment purchased during matches. A team repeatedly losing launchers or vehicles can run short of Cash even with the right weapons unlocked. Players planning frequent tank deployments or anti-tank loadouts may find it useful to review their Cash farming options alongside the cost of the equipment they actually use.
Other Anti-Vehicle Options Against the T-72B3
RPG-7 and MAAWS are the most direct infantry launchers for this matchup, but they are not the only sources of explosive damage. Community calculations based on the Season 2 game files suggest that anti-tank mines and placed explosives can also destroy a T-72B3. Their limitations are different from those of launchers: they depend more heavily on vehicle movement, placement, access to the target or the opportunity to trigger an explosion.
| Equipment | Calculated requirement | Main limitation |
|---|---|---|
| Anti-tank mine | 2 triggered mines | Requires the vehicle to drive over the mine; can also affect friendly vehicles |
| Improvised explosive device (IED) | 3 effective blasts | Depends on placement, timing and the actual explosion hitbox |
| C4 charge | 5 effective blasts | Requires access to the target and appropriate detonation setup |
These figures come from the community anti-vehicle damage calculations. They assume favorable explosive registration against the main body and do not account for repairs or every component interaction. Mines are valuable for denying predictable vehicle routes, but their effect is not identical to a rocket fired directly at the tank. Standard rifle fire is not a substitute for dedicated anti-vehicle equipment: the extracted T-72B3 data indicates that ordinary rifle calibers do not damage its main vehicle health.
How to Survive Longer as a T-72B3 Driver
The same weak spots that help infantry destroy the T-72B3 tell drivers how to keep it alive. The tank's lower price compared with the L2A6 does not make careless losses cheap, and its relatively slow movement makes recovery from a bad position difficult. A driver who allows enemies easy access to the rear engine area is giving away one of the clearest advantages documented in Season 2 firing-range tests.
- Keep infantry support nearby: Friendly players can spot launchers approaching areas the tank crew is not watching.
- Limit rear exposure: Avoid remaining stationary with the engine compartment facing an accessible enemy position.
- Use smoke to break visibility: The T-72B3 has a smoke countermeasure in its recorded equipment data, but smoke is an opportunity to reposition rather than permanent protection.
- Respond to mobility damage: Losing movement does not prevent the gunner from fighting, but it makes the tank much easier for multiple launchers to engage.
- Plan a repair opportunity: Disengage before repeated component damage becomes a complete loss, especially when enemy infantry have established several firing positions.
- Coordinate the crew: The driver should concentrate on movement while the gunners cover infantry threats and targets the vehicle cannot simply drive away from.
The T-72B3 is most valuable as a protected source of heavy firepower, not an isolated vehicle expected to absorb every RPG on the battlefield. Its introduction was part of the broader vehicle expansion announced by BULKHEAD and Team17 for Season 2. Against coordinated anti-tank players, positioning and support matter at least as much as the vehicle's recorded health value.
Common Mistakes When Fighting the T-72B3
Most failed anti-tank engagements come from misunderstanding the damage model or committing to a fight without enough support. The T-72B3 can survive several launcher hits, and one player exposing their position after every shot may never get an opportunity to complete the kill. Avoiding a few common mistakes makes a larger difference than memorizing a single rocket count.
- Treating every rear impact as identical. The rear engine area, turret fittings and track covers can register differently. The best test results do not apply to every surface visible from behind.
- Assuming visible reactive armor has its real-world effect. Community game-file analysis does not identify separate reactive armor protection on this tank.
- Confusing immobilization with destruction. A tank with a damaged engine or track may still have enough main health and firepower to remain dangerous.
- Trusting rocket counts without considering repairs. A calculation for a fresh, unrepaired target will not necessarily match a prolonged match engagement.
- Firing into cover or smoke without confirmation. Near misses and explosions outside the effective damage area can produce much less damage than clean direct hits.
- Choosing equipment solely by purchase price. A cheaper RPG-7 can be economical, but needing more successful hits may increase the risk of losing the entire loadout.
WARDOGS T-72B3 FAQ
These questions address the details players most often need before choosing an anti-tank weapon or aiming at a particular section of the tank.
How Many RPG-7 Rockets Destroy a T-72B3?
Approximately five successful main-body hits are required in community calculations and ordinary front, side and turret firing-range tests. Separate Season 2 testing recorded three RPG-7 hits through the rear hull. The difference is best treated as a hitbox and component-damage effect rather than a guaranteed rule based only on the direction of fire.
How Many MAAWS Rockets Destroy a T-72B3?
Three clean main-body hits are the calculated baseline, and community MAAWS firing-range tests found the same result over most front and side surfaces. The tester also reported two-hit kills against the rear hull, engine cover and certain small turret zones. Because the exact registered hitbox matters, carrying enough rockets for the three-hit baseline remains the safer assumption.
Is the T-72B3 Front Armor Stronger Than Its Rear Armor?
Not through a confirmed universal front-versus-rear thickness modifier. Game-data references instead describe damage rules based on the weapon's damage type and the component struck. The rear performs better in several practical tests because its engine-related hitboxes can receive damage differently, which is why the rear hull remains the most useful tested weak spot.
Can Rifles Destroy the T-72B3, and Are Tracks a Weak Spot?
Extracted game data indicates that ordinary rifle rounds do not reduce the T-72B3's main health. Tracks are damageable components and can be targeted to interfere with movement, but destroying a track is not the same as destroying the tank. Use a direct anti-vehicle weapon for a kill and treat track damage as a way to prevent the vehicle from escaping or repositioning.
Final T-72B3 Combat Recommendations
The T-72B3 is dangerous when supported and exposed when opponents understand its component hitboxes. For infantry, the MAAWS offers the stronger heavy-armor damage efficiency, while the RPG-7 remains a cheaper alternative that works best with coordinated fire. Target the rear hull and engine area when the opportunity is safe, use track damage when stopping movement matters more than immediate destruction, and avoid assuming that every impact follows the same damage calculation. For tank crews, protecting the rear, maintaining infantry support and preserving a route to repairs are the decisions most likely to keep this Season 2 vehicle in the fight.