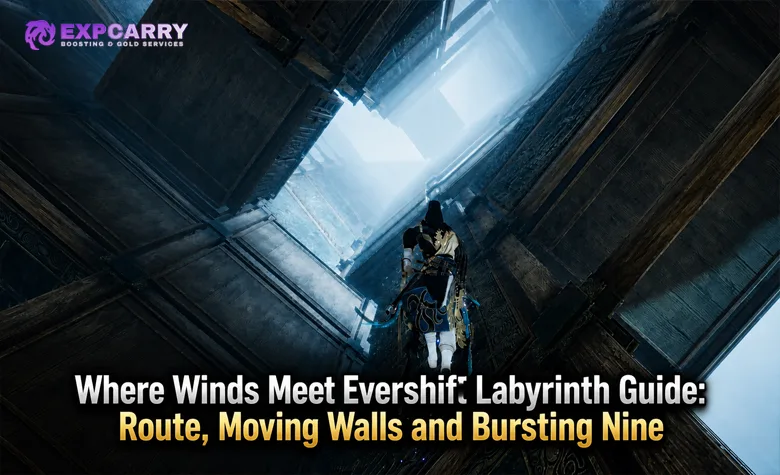
This Where Winds Meet Evershift Labyrinth guide is built around a route you can repeat without treating the dungeon as a static maze. Evershift Labyrinth is the Hidden Mountain Jianghu Legacy beneath Divinecraft Pavilion, and its clear combines a story gate, a timed rotating mechanism, moving walls, repeated combat encounters, a completionist chest route, and the permanent Bursting Nine Mystic Skill.
The important part is sequence. Walls, floors, and passages change after specific interactions and fights, so memorizing left and right turns is less reliable than memorizing route states. The walkthrough below uses the quest tracker, combat clears, moving-wall transitions, and a 14-chest completionist route as checkpoints. It also covers what to do if the rotating block does not register, if you leave the quest, or if you finish the loot route without seeing Bursting Nine unlock.
How to Unlock Evershift Labyrinth
Evershift Labyrinth is not available just because Heaven's Threshold is open. It is Jianghu Legacy Volume V in Hidden Mountain and remains tied to later main-story progression. The practical prerequisite is Hidden Mountain Main Chapter IV: Gold Crow Fall. If the Jianghu Legacy marker is missing, push the story first instead of searching Mohist City for an unmarked entrance.
Finish Gold Crow Fall before searching for the dungeon
The existing ExpCarry Clouded Revelation overview identifies Gold Crow Fall as the checkpoint that opens Evershift Labyrinth. That overview owns the broader Version 2.1 progression order; this guide starts where that article stops and follows the Labyrinth itself from its entrance to Bursting Nine.
If your character is still behind on Hidden Mountain story chapters, continue Bringer of Embers until Gold Crow Fall is complete. Players who specifically want help clearing campaign gates can use the Where Winds Meet story campaign completion page, but the in-game unlock requirement does not change: Evershift Labyrinth remains unavailable until the required story state is reached.
Start Jianghu Legacy Volume V at Divinecraft Pavilion
Once Gold Crow Fall is finished, go to Divinecraft Pavilion in Mohist City and follow the Jianghu Legacy objective into the hidden route beneath the pavilion. Investigate the marked clues as the objective directs you. The official Version 2.1 developer letter describes Evershift Labyrinth as a secret Mohist trial ground sealed beneath Divinecraft Pavilion, built around interlocking walls, pillars, and paths that move through mortise-and-tenon mechanisms.
Keep the Jianghu Legacy tracked from this point onward. The objective text is more useful than compass direction because the architecture changes state while you progress. When the tracker advances, treat that as confirmation that the room, mechanism, or combat sequence actually registered before you move deeper.
Entrance and Route Overview
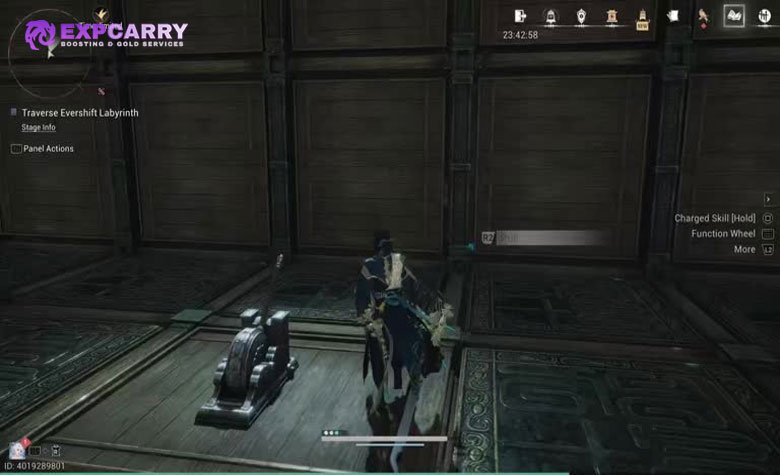
The cleanest Evershift Labyrinth walkthrough is a chain of recognizable checkpoints rather than a list of turns. The completionist route used in this guide tracks 14 chest pickups and six major combat checkpoints. Treat those numbers as route markers for this walkthrough rather than as an official dungeon counter displayed by the game.
Use the route below as a first-clear checklist. The chest groups are especially useful because the middle of the dungeon is intentionally disorienting: one solitary chest, a three-chest reveal, a five-chest room, then the late sequence of Chest 10, Combat 5, Chest 11, Chests 12 and 13, Combat 6, and Chest 14.
| Route checkpoint | What to do | Completion check |
|---|---|---|
| Divinecraft Pavilion | Follow the Jianghu Legacy objective and take the hidden route underground. | The objective moves from the pavilion into the hidden dungeon. |
| Opening mechanisms and combat | Follow the active path, clear the early mechanical constructs, and let each room finish reconfiguring before moving on. | Do not leave a combat room while the mechanism is still moving. |
| Chest 1 | Take the solitary chest in the wall slot after the early traversal or zipline section before dropping farther down. | Your running route count is 1. |
| Combats 1 to 4 | Clear the early construct encounters and follow the newly opened route after each room changes state. | The fourth combat checkpoint on this route leads into the major wall-reveal section. |
| Chests 2 to 4 | After the wall transition, sweep the exposed recesses and open all three chests. | Your running route count is 4. |
| Moving-wall descent | Wait for the dangerous wall movement, follow the safe opening, and continue downward. | You reach the large lower loot room. |
| Chests 5 to 9 | Open all five chests in the lower room before touching the next progression point. | Your running route count is 9. |
| Late maze and Chest 10 | Traverse the next maze state and take the next solitary chest before the following fight. | Your running route count is 10. |
| Combat 5 and Chest 11 | Clear the fifth combat checkpoint on this route, then take the next solitary chest. | Your running route count is 11. |
| Chests 12 and 13 | Take the paired chest stop before the last combat checkpoint used by this route. | Your running route count is 13. |
| Combat 6 and Chest 14 | Clear the final combat checkpoint on this route and collect the last solitary chest before committing to the closing traversal. | Your running route count is 14. |
| Quest finish | Continue the Jianghu Legacy objective through the final quest sequence until completion registers. | Bursting Nine is tied to completing the Evershift Labyrinth progression, not to Chest 14 by itself. |
This sequence is more useful than a static map because it survives the Labyrinth's moving geometry. If your route count is only nine when you leave the five-chest room, you are still on track. If you reach the late closing route with 13, stop and look for Chest 14 instead of assuming the final objective will return you to it automatically.
How to recover after leaving or losing the route
A failed rotating-block attempt is the simplest recovery case. Return to its lever and start the mechanism again. The lever can be pulled repeatedly, so a mistimed jump or an exit on the wrong side does not require a full restart. If the rotating-mechanism objective remains active after you leave the block, that is your signal that the passage did not register correctly.
If you leave later in the quest, reopen Jianghu Legacy Volume V in the Journal and follow the current objective rather than trying to rebuild an old wall layout from memory. Because the Labyrinth changes state as objectives advance, the live Journal is the safest reference for determining where your save expects you to continue.
If the activity itself fails to refresh after the prerequisite is complete, relog and verify that the correct quest is tracked. The current official Clouded Revelation patch notes do not document a special Evershift Labyrinth reset or checkpoint change, so old launch-day recovery advice should not be treated as a permanent system unless your live client confirms it.
Rotating Mechanism Solution
The rotating mechanism is the one part of the Labyrinth that can be reduced to a fixed interaction order. The large block is hollow, its open face rotates past your platform, and the golden bird device inside controls the exit alignment. Entering the block is only half of the puzzle.
Lever, timed jump, and golden bird
Use this exact sequence for the Where Winds Meet moving mechanism puzzle:
- Pull the lever. The block begins rotating only after the lever is activated.
- Stay on the platform and watch the open face. Do not chase the outside of the block.
- Jump into the hollow compartment. Wait until the opening faces you and commit to the interior, not the outer edge.
- Activate the golden bird device. This changes the exit alignment and is required for the far corridor.
- Walk out toward the far passage. The rotating-mechanism objective should clear as you exit on the correct side.
The two most common failures are jumping before the opening reaches the platform and forgetting the golden bird after landing inside. Neither failure destroys the run. Return to the lever and repeat the sequence. If you come out and the same quest objective is still visible, you exited back toward the starting side rather than completing the passage.
Use the tracker as the puzzle confirmation
Do not judge success only by whether you are standing in a corridor. The objective tracker is the better confirmation. A correct pass clears the rotating-mechanism step when you exit into the far corridor. If it does not clear, solve the block again before continuing deeper.
This is also a good point to heal and reset your combat rhythm. The next parts of Evershift Labyrinth combine enemy pressure with moving architecture, and entering a mechanism-triggered fight at low health creates a problem that the route itself does not require.
Explore services related to this guide, selected from our Where Winds Meet catalog.
View All Where Winds Meet Services

Moving Walls and Combat Rooms
The moving-wall section is not one long puzzle with a hidden code. It is a sequence of combat and mechanism-triggered room states. The official design description is literal: walls rise and fall, pillars shift, and paths rotate. The safe habit is to finish the active fight, stop moving while the structure changes, then identify the new route only after the motion settles.
Combats 1 to 4 lead into the first major chest reveal
The walkthrough route used here places four combat checkpoints before the three-chest reveal. Treat these early fights as progression markers. Clear the constructs from the active floor, keep away from wall seams when the room begins changing, and watch for the newly exposed passage instead of sprinting through the first gap that appears.
One important transition occurs when a combat clear causes the Labyrinth to reconfigure and push the route downward. Once the movement finishes, sweep the newly exposed recesses for Chests 2, 3, and 4. This is the first major place where fighting and loot routing overlap: the combat clear changes the room, and the changed room exposes the collectibles.
Players blocked by the quest combat rather than the puzzle can use the Where Winds Meet quests page as the relevant ExpCarry option. Evershift Labyrinth is still a quest-chain clear, so a generic exploration route is less directly related than help with the quest itself.
Moving walls, the five-chest room, and the late combat sequence
After the three-chest reveal, continue downward and respect the moving-wall hazard. The route used here marks a wall-avoidance section before Chests 5 to 9. Do not stand flush against a moving panel while waiting for the next opening; use the center of the available floor when possible, let the wall finish its travel, and only then commit to the exposed route.
At the bottom, stop and open all five chests in the room. That takes this route's running total from four to nine. This room is your strongest mid-run checkpoint because five chests are concentrated in one area. If you leave it with a lower count, fix the mistake immediately rather than hoping the later route loops back.
After Chest 9, the route becomes more linear but still has two major combat checkpoints. Traverse the next maze state, collect Chest 10, then clear Combat 5. Chest 11 follows that fight, and Chests 12 and 13 form the next paired pickup. Combat 6 comes after that pair. Once the final combat checkpoint is clear, take Chest 14 before committing to the closing traversal and quest sequence.
What to do when an empty room looks like a dead end
Do not assume every empty room means you took a wrong turn. Walkthrough footage for the current route shows a chamber where moving toward the active wall triggers additional automatons. If the quest marker still points into the room, approach the active wall or mechanism and be ready for the next encounter before backtracking.
The same rule applies after combat. If no obvious exit is visible, wait for the architecture to finish changing. Evershift Labyrinth deliberately turns a visible wall into a path and a visible path into a wall. Moving early is what makes the route feel random; waiting for the state change makes it readable.
All Chests and Rewards
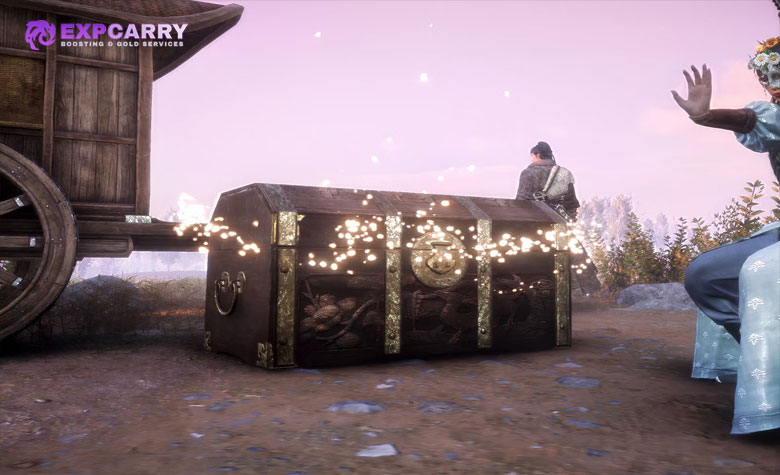
The completionist Evershift Labyrinth route used in this guide contains 14 chest pickups. The useful pattern is 1, then 3, then 5, followed by a late 1-1-2-1 sequence around the final two combat checkpoints. Treat this as the route count for the walkthrough rather than as an official in-game chest counter.
The table below keeps the chest count tied to route landmarks. For the late solitary and paired chests, use their order relative to Combat 5 and Combat 6 as the checkpoint rather than relying on a wall orientation that may look different while the mechanism is moving.
| Chest | Route landmark | When to collect it |
|---|---|---|
| 1 | Early traversal or zipline section, in a wall slot before the next drop | Open it before dropping into the deeper combat route. |
| 2 | Three-chest wall reveal | Wait for the wall transition after the relevant early combat clear. |
| 3 | Three-chest wall reveal | Sweep the newly exposed recesses before leaving the room. |
| 4 | Three-chest wall reveal | Confirm the first cluster is 3 of 3 before continuing downward. |
| 5 | Five-chest lower room | Start a full sweep as soon as you reach the bottom. |
| 6 | Five-chest lower room | Continue around the available recesses before touching progression. |
| 7 | Five-chest lower room | Keep sweeping the room; do not follow the exit yet. |
| 8 | Five-chest lower room | Check the remaining accessible wall positions after the room settles. |
| 9 | Five-chest lower room | Leave only when the five-chest cluster is complete. |
| 10 | First solitary chest after the five-chest room and next maze traversal | Take it before Combat 5. |
| 11 | Next solitary chest after Combat 5 | Collect it before the paired chest stop. |
| 12 | Paired chest stop before Combat 6 | Open both visible pickups before the final combat checkpoint. |
| 13 | Paired chest stop before Combat 6 | Your running route count should reach 13 before Combat 6. |
| 14 | Final solitary chest after Combat 6 | Take it before the closing traversal and quest finish. |
Chest 1 is easy to lose because the route visually pulls you downward. The three-chest and five-chest groups are easier once you know their counts. The late section is where counting becomes important again: Chest 10 comes before Combat 5, Chest 11 after it, Chests 12 and 13 before Combat 6, and Chest 14 after that final combat checkpoint.
Quest rewards and collectibles to separate from the 14 chests
The 14 count in this guide refers to the completionist chest route, not to every quest reward or collectible associated with Evershift Labyrinth. Current Version 2.1 material consistently identifies Medicinal Tales, Echo Jade, additional Jianghu Legacy rewards, and the Bursting Nine unlock path as rewards connected to completing Evershift Labyrinth. Exact individual chest contents are separate from that completion package, so do not treat every chest as a guaranteed source of one named progression item.
Keep unrelated exploration collectibles separate from the 14-chest route. If you miss an optional collectible during the quest, use the current Journal or exploration tracking available on your client rather than assuming the dungeon contains an additional numbered chest.
How to Unlock Bursting Nine
To answer how to unlock Bursting Nine directly: complete the Evershift Labyrinth Jianghu Legacy progression. Bursting Nine is not the reward from Chest 14 itself and is not a random open-world pickup. If you finish the chest route but the Mystic Skill remains locked, verify that Jianghu Legacy Volume V actually reached its completed state.
What Bursting Nine does
Bursting Nine is an offensive Area Debuff Mystic Skill built around Bronze Arrows that become a projectile rain and apply Cripple. Current live-oriented skill references list a 240 percent Physical Attack component in the base damage formula plus additional Physical and other attribute damage, while the base Cripple duration is listed at 5 seconds. The skill can be blocked but is listed as not parryable.
Its long-term value is control rather than treating the Labyrinth as a one-time loot run. Breakthroughs extend Cripple, increase Dodge cost on affected targets, add a second Arrow Rain input, reduce the first cast's Vitality cost, and eventually add Endurance pressure through Disjointed. That gives the permanent Mystic Skill more lasting value than the dungeon's one-time chest cleanup.
Bursting Nine breakthrough upgrades
The published upgrade information separates rank materials from breakthrough effects. Foxtail Weed is used at promotion thresholds, while Ebon Iron is used for rank progression. Public live references provide clear costs through the earlier promotion tiers but do not provide a complete, equally reliable material table for every final tier, so use the in-game upgrade panel for any cost that is not listed on your current client rather than planning around an invented number.
The breakthrough effects themselves give a clear progression target:
| Tier | Bursting Nine breakthrough | Practical effect |
|---|---|---|
| Tier 2 | Cripple lasts 2 seconds longer and the target's Dodge cost increases by 40 percent. | Improves movement pressure and makes repeated evasion more expensive. |
| Tier 3 | A second input shortly after Bursting Nine launches another Arrow Rain. It costs 10 Vitality, deals 50 percent damage, and applies enhanced Cripple. | Adds a controllable follow-up wave instead of placing all value in the first cast. |
| Tier 4 | The first Arrow Rain costs 10 less Vitality. | Makes the opening cast easier to fit into a normal resource cycle. |
| Tier 5 | The second Arrow Rain can apply Disjointed to a target affected by enhanced Cripple, reducing Endurance by 60, with a 12-second restriction on the same target. | Turns the follow-up into a stronger Endurance-pressure tool. |
| Tier 6 | Bursting Nine gains 6 percent more damage through its coefficient. | Adds direct scaling after the control upgrades are established. |
For the published material steps through Tier 4, current references use Foxtail Weed at the promotion points and increasingly higher Ebon Iron levels for the rank steps. The practical farming rule is to check the next promotion first. Do not consume a limited Foxtail Weed stock as though it were ordinary rank currency if Bursting Nine is one of the Mystic Skills you plan to promote.
Players who are specifically blocked on the Mystic Skill unlock can use the Where Winds Meet Mystic Skills unlock page as the relevant ExpCarry option. For a manual clear, the route remains straightforward: finish Gold Crow Fall, start Jianghu Legacy Volume V at Divinecraft Pavilion, use the lever and golden bird correctly, follow the chest and combat checkpoints, finish the Jianghu Legacy, then verify Bursting Nine in the Mystic Skills menu.
Conclusion
Evershift Labyrinth is much easier to reproduce when you track room states instead of trying to memorize a permanent map. Gold Crow Fall is the story gate, Divinecraft Pavilion is the starting point, and the rotating block always follows the same lever to timed jump to golden bird to far-corridor sequence. During the moving-wall sections, clear the active constructs first, wait for the architecture to settle, and only then choose the next opening.
Use this guide's chest route as a checksum: Chest 1 before the deeper drop, Chests 2 to 4 after the early wall reveal, Chests 5 to 9 in the lower room, Chest 10 before Combat 5, Chest 11 after it, Chests 12 and 13 before Combat 6, and Chest 14 after the final combat checkpoint. If you make a mistake, rerun the local mechanism or recover through the live Journal instead of assuming the entire maze must be restarted. Finish the Jianghu Legacy itself, not only the loot route, to unlock Bursting Nine and then plan its Foxtail Weed and Ebon Iron upgrades around the breakthroughs you actually intend to use.