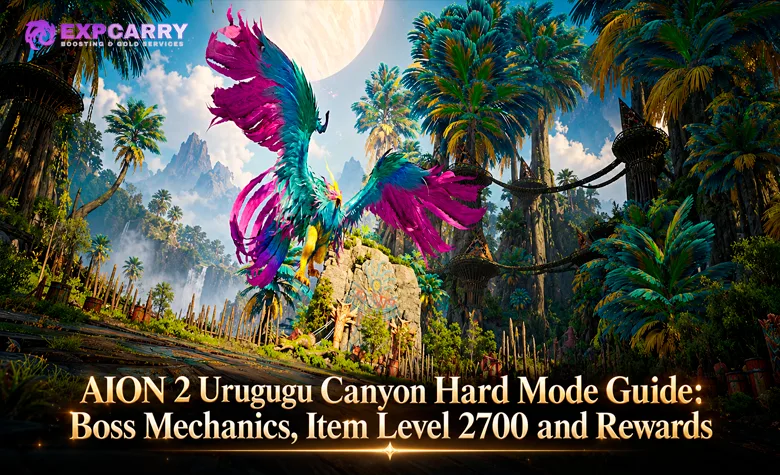
Urugugu Canyon Hard Mode arrived on AION 2 Global servers with the October 28, 2026 update. The dungeon requires Item Level 2700 and features three bosses: Guardian Captain Raur, Judge Urahum and Divine Auldor. The route is familiar to players who have cleared Normal Conquest, but the four-minute boss Frenzy timer and three-revive limit leave much less room for mistakes. Hard Mode also introduces guaranteed Ariel Fragment rewards, additional Unique crafting material sources and a chance at valuable progression items. This guide covers the entry requirements, boss attacks, safe positioning, party responsibilities, rewards and differences from Normal, based on the current Global update and documented encounter mechanics.
Short answer: Reach Item Level 2700, bring a coordinated five-player party, stop attacking during Raur's counter stance, avoid Urahum's expanding ground attacks and stack together for Auldor's marked shared-damage mechanic. Complete each boss encounter before the four-minute Frenzy timer becomes a problem, and use eligible reward claims to obtain Ariel Fragment: Urugugu and other Hard Mode loot.
AION 2 Urugugu Canyon Hard Mode Requirements
Urugugu Canyon Hard is a level-45 Expedition intended for characters who have progressed beyond the earlier Conquest tiers. Its Item Level requirement is a strict entry gate, not a recommended target. However, reaching exactly 2700 does not guarantee enough damage or survivability for a comfortable clear, especially when players are still learning the final boss. The October 28 update also adjusted Hard Expedition boss damage, so strategies based on older regional balance values should not be treated as exact descriptions of current Global damage.
| Requirement | Current Hard Mode rule | What it means |
|---|---|---|
| Availability | Live on Global since October 28, 2026 | The dungeon is currently playable, not upcoming or PTR-only content. |
| Character level | 45 | Prepare an endgame character before attempting this difficulty. |
| Minimum Item Level | 2700 | Characters below the requirement cannot enter Hard Mode. |
| Recommended party | Five coordinated players | A full group makes damage sharing, healing and the Frenzy check more manageable. |
| Bosses | Guardian Captain Raur, Judge Urahum, Divine Auldor | The two earlier bosses are optional route encounters in current client records; learn all three for complete runs. |
| Boss Frenzy timer | 4 minutes | Every long interruption reduces the time available to finish the encounter. |
| Resurrection limit | 3 revives per player | Repeated deaths can exhaust an individual's allowed revives. |
| Instance time limit | 60 minutes in current client records | This overall limit is separate from the shorter boss Frenzy timer. |
NCSOFT confirmed the 2700 Item Level requirement, four-minute Frenzy timer and three-revive limit in the official October 28 Global patch notes. The same update reduced Hard Expedition boss Attack and Damage Boost by 10% compared with their previous values. That adjustment improves survivability but does not remove dangerous mechanics or extend the time available to defeat a boss. Other details, including the 60-minute instance limit and individual loot-cube settings, come from current Global-client records rather than a separate NCSOFT announcement.
Best Party Composition and Gear Preparation
For a first clear, the most reliable arrangement is one tank, one healer and three damage dealers. A Templar is a natural tank choice, while a Cleric provides healing and valuable recovery options. The remaining slots should prioritize consistent damage, sufficient movement and players who can execute the shared-damage mechanic without hesitation. This composition is a recommendation for reliable clears, not an additional class restriction imposed by the dungeon.
- Tank: Maintain predictable boss positioning, turn frontal attacks away from the party and relocate enemies when the ground becomes dangerous.
- Healer: Prepare for heavy damage after failed dodges, keep the marked player healthy before Auldor's shared hit and watch the resurrection limit.
- Damage dealers: Maintain sustained output without triggering Raur's counterattack, getting trapped in tornadoes or missing important stack mechanics.
- Consumables: Bring appropriate food, combat scrolls and recovery items. Their value increases when the party must finish a boss within four minutes.
- Equipment: Check defensive properties, skill setup and actual damage performance, not Item Level alone.
If your character is still below the entry threshold, identify which equipment and enhancement upgrades contribute to Item Level before spending resources. The relevant progression path is more important than chasing an impressive-looking stat that does not increase the entry value. Players comparing different methods of increasing Gear Score should account for the 2700 gate and the combat performance needed after entry. Parties that already clear Krao Cave and Draupnir Hard comfortably have a useful foundation, although Urugugu Canyon's final boss introduces its own coordination requirements.
Urugugu Canyon Hard Mode Route and Checkpoints
The Hard Mode route follows the established Urugugu Canyon layout, with two earlier bosses and a final encounter against Divine Auldor. Current client records mark the two intermediate bosses as optional route encounters, although defeating them is worthwhile for a complete run and their associated reward opportunities. The dungeon contains village sections, groups of Urugugu enemies and wind-based travel mechanics. Clearing the necessary enemies efficiently saves time and reduces avoidable deaths before the final fight. There is no need to rush blindly through the instance, because the four-minute Frenzy rule applies to boss combat rather than being a four-minute limit for the entire dungeon.
- Enter Urugugu Canyon. Confirm that every party member is on Hard difficulty and has the intended equipment, skills and consumables ready.
- Handle Guardian Captain Raur and Judge Urahum. These two encounters occupy the earlier dungeon route. Defeat both when aiming for a full clear and the associated reward opportunities; current client records do not mark them as mandatory route objectives.
- Handle dangerous trash packs. Urugugu Shaman support effects and nearby enemies can make careless pulls more dangerous than necessary. Prioritize threatening support enemies instead of gathering excessive packs.
- Defeat the Urugugu Wind Mage. This activates a Windstream required for progression through the canyon. Use the wind-based traversal mechanic to reach the next section.
- Register the available Kibelisk. Set your checkpoint before committing to the final encounter so that recovery from a failed attempt is less disruptive.
- Prepare for Divine Auldor. Agree on the stack location, movement calls and recovery plan before pulling the boss.
Current dungeon references also identify wind-assisted movement through the canyon and several Kibelisk locations along the route. Their exact positioning is less important than ensuring the group has registered the checkpoint closest to the final boss. If players are new to the dungeon, explain the wind travel and the boss-specific signals before advancing. A group practicing its Expedition progression should aim for repeatable, controlled pulls rather than gaining a few seconds by skipping a dangerous pack.
Guardian Captain Raur Hard Mode Boss Mechanics
Guardian Captain Raur is an earlier boss encounter and tests whether the group can stop dealing damage on command. The dangerous part of this fight is not a complicated movement sequence but the boss's defensive stance and the retaliation it triggers. A damage dealer who continues attacking through the counter window can turn an otherwise manageable encounter into a party-wide emergency. Hard Mode retains the established Conquest mechanics, while the shorter Frenzy timer makes wasted damage windows more costly.
Counterstrike Stance: Stop Attacking Immediately
Raur raises its shield and enters Counterstrike Stance, a defensive window that punishes players who continue striking the boss. Attacks during the stance trigger retaliation, and repeated hits can make the resulting damage increasingly dangerous. When the shield stance begins, everyone should stop direct attacks and avoid launching delayed hits that will land during the active window. Wait until the stance finishes, avoid its follow-up attack and then resume normal damage.
- Watch the boss animation and dialogue. Raur visibly prepares the shield stance, giving the party a recognizable warning.
- Call a full damage stop. Damage dealers should pause attacks rather than trying to squeeze in one final skill.
- Prepare for the follow-up area attack. Create space and watch the ground rather than standing directly beside the boss waiting for the stance to end.
- Resume damage after the danger passes. Restore the normal rotation once the counter window and immediate follow-up are over.
Raur's stance is especially punishing for groups using automatic or lingering damage effects without monitoring their timing. Players should check whether their current skills continue striking after activation and adjust their sequence when the stance is about to occur. Stagger tools can be useful during difficult encounters, but the group should not assume an unverified interrupt will always cancel this defensive mechanic. The safest baseline strategy is still to stop attacking and survive the retaliation window.
Ground Slam, Knockdown and Shield Rush
Outside the shield mechanic, Raur uses physical attacks that punish players who stand too close or directly in front. Current client-derived encounter records include Shatter Ground, a damaging ground attack associated with knockdown, and Shield Rush, a charge that can catch poorly positioned players. The tank should keep Raur facing away from the healer and ranged damage dealers while leaving room for melee characters to dodge. Anyone hit by a control effect should recover promptly and return to position without creating unnecessary movement across the arena.
The ideal Raur fight alternates between steady damage and a complete pause during Counterstrike Stance. Do not sacrifice survival to make up for the seconds lost to that mechanic. If the group consistently reaches Frenzy, improve damage uptime during safe windows and make sure nobody is accidentally powering up the counterattack. A successful first boss is mainly a test of disciplined execution rather than raw equipment.
Explore services related to this guide, selected from our Aion 2 catalog.
View All Aion 2 Services

Judge Urahum Hard Mode Boss Mechanics
Judge Urahum is another intermediate boss and replaces Raur's counterattack challenge with a stronger emphasis on movement and ground control. The boss creates damaging areas around itself, uses expanding attacks and can apply Contamination effects that make positioning increasingly important. The fight becomes much harder when players repeatedly stand in existing hazards or drag the boss through the middle of the group. As with Raur, a distinct additional Global Hard-only attack pattern has not yet been firmly documented, so the established Conquest mechanics remain the reliable foundation.
Expanding Area Attacks and Ground Pulses
Urahum uses an attack pattern that expands outward in several stages, threatening characters who dodge the first impact but remain in the next area. Client records identify a three-part ground attack associated with Smite Ground, while encounter observations describe visible yellow danger zones. When the cast begins, move out of the threatened area and keep watching until the entire sequence ends. Returning immediately after the first impact is a common mistake, because another pulse or lingering zone may still be active.
- Close-range pulse: Step away from the boss when the attack begins. Avoid re-entering until the damaging sequence has finished.
- Expanding ground attack: Read each new area rather than reacting only to the first circle. Continue moving if the next stage threatens your position.
- Lingering hazard: Do not run straight back into a contaminated area simply because the initial hit has ended.
- Faster attack sequences: When Urahum becomes more aggressive, preserve movement options and avoid committing to long stationary animations.
Contamination, Knockback and Safe Positioning
Several of Urahum's attacks can inflict Contamination or create dangerous ground effects. Current client descriptions associate this behavior with abilities such as Feather Toss, Smite Ground and Contaminate Field, although exact visual timing can vary by attack. If a player receives a delayed ground effect, moving toward the outer part of the available fighting area helps preserve space for the rest of the party. The tank should relocate Urahum when existing hazards make the current position unsafe, while damage dealers should follow without cutting through dangerous zones.
Urahum also has attacks capable of knocking players back or briefly disrupting control. Healers should anticipate damage spikes when several players are caught by overlapping areas, but the party should avoid relying on healing through every mechanic. A clean fight keeps the center of the arena usable, reduces unnecessary movement and preserves damage uptime. The main goal is to prevent the arena from becoming cluttered with hazards before the group has finished the boss.
Divine Auldor Hard Mode: Final Boss Mechanics
Divine Auldor is the final boss and the most coordination-heavy encounter in Urugugu Canyon. The fight combines frontal wind attacks, tornadoes, grabs, aerial attacks and a marked-player mechanic that requires the party to share incoming damage. The most dangerous mistake is treating every red marker as something to avoid: one specific marker tells the group to stack together instead. Under the four-minute Frenzy timer, the party must perform these mechanics quickly enough to maintain damage without losing players.
Tempest Strike: The Mandatory Group-Soak Mechanic
During Tempest Strike, Auldor moves toward the center and takes to the air as the attack develops. One party member receives a visible mark, followed by a red circular area with arrows pointing inward. That marker identifies the player who must be protected by a shared-damage group stack. Instead of running away, the marked player should remain accessible while the other party members move inside the circle and divide the impact between them.
- Recognize the mechanic. Watch for Auldor moving to the middle, taking flight and creating the marked-player warning.
- Find the marked player. Use the visible circular marker and inward-pointing arrows rather than guessing who is targeted.
- Gather inside the circle. Every available party member should reach the marked player before the impact.
- Avoid tornadoes while moving. Do not cross an active wind attack blindly, because being controlled can prevent you from reaching the stack.
- Heal and spread afterward. Restore health, then return to safe positions for the next attack sequence.
The damage is distributed among players inside the marked area, making a full group stack much safer than leaving one player alone. A defensive ability should not be treated as a guaranteed substitute for sharing the hit, especially when the Hard Mode damage pattern is involved. Groups often fail because the marked player runs away instinctively or the damage dealers continue their rotation instead of moving. Agree on a clear voice-call such as “stack on the mark” before the fight so that everyone reacts the same way.
Frontal Wind Attacks, Tornadoes and Crowd Control
Auldor launches wind-based attacks across the arena, including frontal patterns that can spread through several lanes. Staying directly in front of the boss is dangerous for non-tanks, while ranged players may find more room to move farther from the source of the fan-shaped attacks. The tank should control Auldor's facing so that these attacks do not unexpectedly sweep across the healer and damage dealers. Current encounter footage and client-derived descriptions also show that a player caught by the wind can become controlled and vulnerable to a follow-up grab.
When a wind lane or tornado approaches, prioritize a clean dodge over finishing a cast. Players who are caught should use their available crowd-control recovery promptly, because a prolonged control effect can lead into a damaging slam and lost damage time. The group should also avoid spreading so far apart that reaching the next shared-damage marker becomes impossible. The goal is to remain mobile without losing the ability to regroup within a few seconds.
Grab, Aerial Slam and Expanding Impact Rings
Auldor has a grab-and-slam sequence that must not be confused with Tempest Strike's marked group soak. In the established Conquest encounter, a grabbed player can be lifted and slammed into the ground, producing a central impact followed by outward-moving danger areas. Nearby teammates should react to the actual ground indicators, moving away from the first impact and adjusting their position for the following rings. The healer should be ready for damage to the grabbed player and anyone caught by the landing.
There is an important regional distinction here: Korean Hard Mode reports describe a change in which a grab-related landing becomes another shared-damage circle. That specific Hard-only change has not yet been independently confirmed for the October 2026 Global version. Do not automatically stack on an ordinary grab landing unless your current fight shows the inward-arrow shared-damage indicator or your group has verified the behavior directly. The established, clearly recognizable Tempest Strike marker remains the confirmed group-soak mechanic to prioritize.
Later Phases, Arena Hazards and the Frenzy Timer
Conquest encounter recordings place major Tempest Strike sequences at roughly 75% and 30% boss HP, although these values are approximate observations rather than fixed, officially published Global Hard Mode thresholds. The later part of the fight can introduce additional tornado pressure and make the outer arena less comfortable to occupy. When the boss moves back toward the center, prepare for another shared-damage mechanic and keep the group close enough to react. Avoid treating a particular percentage as a guarantee that the next mechanic must occur immediately.
The four-minute Frenzy timer makes every avoidable grab especially expensive. Each time a damage dealer loses control of their character, fails a stack or has to be revived, the group loses time that cannot be recovered by simply standing still and waiting. Save appropriate offensive cooldowns for windows when the boss is vulnerable and the party can attack without being interrupted by the next mechanic. Consistent damage between mechanics is more valuable than a risky burst sequence that causes several deaths.
For visual comparisons, the Urugugu Canyon encounter reference documents Conquest attack patterns and distinguishes observed mechanics from client-derived details. NCSOFT's NCER boss-pattern overview also illustrates the counter stance, expanding areas and Auldor's group soak, but that particular overview explicitly identifies itself as AI-generated and should not be treated as definitive proof of every current Hard Mode behavior. For Global, rely on the visible attack indicators and the current live encounter when regional descriptions differ.
Urugugu Canyon Normal vs Hard Mode: What's Different?
Hard Mode is an advanced version of Urugugu Canyon Conquest, not an entirely new dungeon with a separate set of bosses. It keeps the recognizable route and core mechanics while increasing the entry requirement and tightening the combat rules. The reward pool also changes significantly, which is the main reason experienced players may want to move beyond Normal Conquest. The comparison below uses Normal to mean the regular Conquest difficulty, not the lower-level Exploration version.
| Feature | Normal Conquest | Hard Mode |
|---|---|---|
| Minimum Item Level | 1400 | 2700 |
| Character level | 45 | 45 |
| Boss roster | Raur, Urahum, Auldor | Same three bosses; intermediate encounters are optional route objectives |
| Boss level in current client records | 54 | 70 |
| Boss Frenzy timer | 5 minutes | 4 minutes |
| Resurrection rule | Regular Conquest rules | Maximum 3 revives per player |
| Core boss mechanics | Counter stance, contamination, wind attacks and group soak | Core mechanics remain; some regional Hard-only variations need Global confirmation |
| Kina rewards | Lower reward amount | More Kina than Normal, as confirmed by NCSOFT |
| Ariel Fragment: Urugugu | Not part of the new Hard-specific guaranteed reward | Guaranteed through the applicable Hard reward claim |
| Philosopher's Stone: Revelation | Not part of the new Hard-specific reward announcement | Possible drop and selectable guaranteed reward |
| Unique crafting materials | Selected materials in the existing loot pool | Wrathful Mind, Wrathful Will and Wrathful Ego are all obtainable |
| Achievements | Normal Conquest achievements | Additional Hard achievements with Unique skin rewards |
The biggest practical difference is the combination of the shorter Frenzy window and limited revives. Normal Conquest provides more time for players to recover from imperfect positioning, while Hard Mode rewards familiarity with every attack. The earlier official October 21 Hard Expedition update introduced the preceding Hard tier, and the October 28 update expanded that progression to Urugugu Canyon and Vakron Sky Island. Current client records provide additional comparisons such as boss levels and reward-cube values; those should be rechecked after major patches rather than treated as permanent balance rules.
Urugugu Canyon Hard Mode Rewards and Loot
Hard Mode offers several important reasons to repeat Urugugu Canyon beyond the challenge of its boss encounters. NCSOFT confirmed guaranteed dungeon-specific Ariel Fragments, a chance at Philosopher's Stone: Revelation, more Kina than Normal and the availability of all three Wrathful crafting materials. Expedition Hero Artwork is also part of the possible reward pool, while separate Hard Mode achievements award Unique skins. The distinction between guaranteed rewards, random drops and selectable guaranteed-reward milestones matters when planning repeated runs.
| Reward | Availability | Main use or limitation |
|---|---|---|
| Ariel Fragment: Urugugu (Bound) | Guaranteed Hard Mode reward | Used in Substance Morph for Ariel progression or Enhance Stones. |
| Philosopher's Stone: Revelation (Bound) | Random chance; also a selectable guaranteed reward | A valuable progression item, but not an automatic drop from every clear. |
| Expedition Hero Artwork | Chance to obtain | Additional collection and character-progression value. |
| Wrathful Mind | Possible Unique crafting material | Used in recipes requiring this material; not a guaranteed drop. |
| Wrathful Will | Possible Unique crafting material | Useful for equipment crafting and related material requirements. |
| Wrathful Ego | Possible Unique crafting material | Expands the material pool beyond the regular Urugugu Conquest selection. |
| Kina | Higher reward amount than Normal | Supports further equipment and crafting progression. |
| Unique skins | Hard Expedition achievements | Earned by completing the relevant achievement objectives. |
| Aulamus and other equipment | Listed in current client-derived loot pools | Check the live reward window for available pieces and current claim conditions. |
These rewards do not all follow the same acquisition rule. The Ariel Fragment is part of the guaranteed Hard reward structure, whereas the Philosopher's Stone can appear randomly or be selected through the guaranteed-reward system when the relevant milestone is reached. Wrathful materials remain chance-based drops, so clearing the dungeon once does not mean receiving one of each material. The current client also lists equipment, accessory and cosmetic rewards beyond the explicitly announced additions, but individual percentages should not be treated as permanent official drop rates.
Ariel Fragment: Urugugu and Daevanion Crystal Conversion
The guaranteed Ariel Fragment: Urugugu (Bound) is one of Hard Mode's most useful progression rewards because it can be exchanged through Substance Morph. Urugugu and Vakron provide their own dungeon-specific fragment items, so players should check the exact item name when planning a conversion. The October 28 patch established two conversion options, one for Daevanion progression and the other for general enhancement resources. These are separate choices competing for the same fragment supply.
- 100 Ariel Fragments: Convert into one Daevanion Crystal: Ariel (Bound) through Substance Morph > Special > Daevanion. The official patch lists a limit of 30 conversions per character.
- 1 Ariel Fragment: Convert into five Enhance Stones through Substance Morph > Special > Consumables. The official patch describes this conversion as unlimited.
- Practical priority: Save fragments for Daevanion Crystals when Ariel-board progression is your main objective. Convert surplus fragments into Enhance Stones when that progression no longer needs them or equipment enhancement is the more urgent bottleneck.
The conversion limit makes planning important. Spending every fragment on Enhance Stones may delay a future Daevanion upgrade, while saving every fragment indefinitely can leave useful enhancement resources unused. Check the current Substance Morph interface before committing, especially if your character already has a significant amount of Ariel progression completed. For a broader breakdown of fragment sources and usage decisions, see the AION 2 Ariel Fragments Farming Guide.
Wrathful Mind, Will and Ego: Which Materials Can Drop?
Urugugu Canyon Hard can provide Wrathful Mind, Wrathful Will and Wrathful Ego rather than limiting the reward pool to the material associated with its regular Conquest version. This makes the dungeon attractive for players crafting equipment that requires several different Wrathful components. However, a broader loot pool does not necessarily give the best individual drop chance for the exact material you need. If you are missing only one specific reagent, compare the available Normal and Hard farming options instead of assuming the harder dungeon is always more efficient.
The reward decision also depends on whether you need Ariel Fragments, equipment, Kina or other Hard-only items from the same run. A character pursuing several upgrades can gain more overall value from Hard Mode even if a regular dungeon has a better chance at one particular material. For a breakdown of material sources and crafting uses, see the Wrathful Mind, Will and Ego Farming Guide.
Odyle Energy, Reward Claims and Guaranteed Selection
Current Global-client records list 40 Odyle Energy for a Urugugu Canyon Hard reward-cube claim. They also list a selectable guaranteed reward after 28 eligible claims, compared with 21 in regular Conquest. These figures come from current client-derived databases and should be checked in the live reward interface before planning a long farming schedule. They describe reward collection, not a promise that every completed run automatically provides every item in the loot table.
The client-derived reward structure also gives value to defeating the earlier bosses before claiming the completed dungeon's rewards. Although those encounters are marked as optional route objectives, a full clear can provide more reward opportunities than focusing only on the final boss. Keep track of your available Odyle Energy and reward-claim allowance instead of judging the dungeon only by how fast your party can defeat Auldor. For more on resource costs and claim planning, see the AION 2 Odyle Energy Guide.
How to Clear Urugugu Canyon Hard Mode Consistently
Once the individual boss mechanics are understood, consistent clears depend on assigning responsibilities and reducing avoidable downtime. A group with strong equipment can still fail when nobody calls Raur's counter stance or players scatter during Auldor's shared hit. Conversely, a coordinated party can preserve a surprising amount of damage by avoiding unnecessary revives and control effects. The following priorities help turn a first clear into a repeatable farming route.
- Assign one mechanic caller. One player should announce Raur's shield stance, Urahum's expanding areas and Auldor's shared-damage marker.
- Keep the tank's positioning predictable. Sudden boss turns can redirect frontal attacks into the rest of the group and force damage dealers to abandon safe positions.
- Maintain a safe regrouping distance. Spread for normal attacks, but remain close enough to reach Auldor's marked player before Tempest Strike lands.
- Use recovery skills intentionally. The three-revive limit means repeated avoidable deaths are more dangerous than one temporary reduction in damage output.
- Protect the four-minute damage window. Prepare offensive cooldowns, consumables and movement plans so that mechanics interrupt the rotation as little as possible.
- Review the cause of every failed attempt. Separate damage shortages from positioning failures. More Item Level will not fix players repeatedly attacking into Raur's counter stance.
The healer should make recovery calls when players are likely to die from a follow-up attack rather than attempting to rescue every mistake at the last second. Damage dealers should avoid making the tank chase enemies through unsafe areas, and the tank should not drag Auldor so far from the group that the next shared marker becomes difficult to reach. Resource planning matters as well: additional Kina rewards are useful only when they support upgrades that improve future clears. When comparing equipment expenses with your available Kina supply, prioritize improvements that address a real damage, survival or entry requirement.
Common Urugugu Canyon Hard Mode Mistakes
Most repeated failures come from a small number of recognizable decisions rather than obscure mechanics. Identifying them early is often more useful than making several equipment changes between attempts. Pay particular attention to whether the party is dying to specific attacks or reaching Frenzy with everyone alive. Those situations require different solutions and should not be treated as the same problem.
- Continuing to attack Raur during Counterstrike Stance: The counterattack can punish the entire group. Call the stance and stop damage immediately.
- Returning too early after Urahum's first ground pulse: Expanding attacks and lingering hazards may still be active. Wait for the complete sequence.
- Leaving contaminated ground in the middle of the arena: Move delayed hazards toward safer locations and reposition the boss when necessary.
- Running away with Auldor's shared-damage marker: The marked player needs the group inside the circle, not farther away.
- Ignoring tornadoes to finish a damage rotation: A control effect can lead to a grab, additional damage and a major loss of boss uptime.
- Assuming every grab landing is a group soak: The specific grab-related Hard variation reported in Korea is not yet verified for the current Global encounter.
- Entering at 2700 without preparing a build: The entry gate establishes eligibility, not a guarantee that the party can finish before Frenzy.
- Confusing completion with reward collection: Check Odyle Energy and the reward-claim rules before calculating the value of repeated runs.
Urugugu Canyon Hard Mode FAQ
These answers clarify the main entry, reward and mechanic questions that can affect a first Hard Mode clear.
Can I enter Urugugu Canyon Hard Mode below Item Level 2700?
No. The October 28 Global update sets 2700 as the minimum entry requirement. A character below that threshold must improve the relevant Item Level sources before entering.
Is a five-player party mandatory?
A full five-player party is strongly recommended for reliable clears, particularly for Auldor's shared-damage mechanic. Current client records support smaller party configurations, but fewer players make damage sharing, healing and the four-minute Frenzy check more demanding.
Are Ariel Fragments guaranteed after every boss kill?
NCSOFT identifies Ariel Fragment: Urugugu as a guaranteed Hard Mode reward, but reward collection still follows the applicable dungeon reward system. Check the reward cube and your available claim resources rather than assuming every individual boss kill directly awards fragments.
Does Auldor's grab always require the entire party to stack in Hard Mode?
No such rule has been confirmed for the current Global version. The inward-arrow marker on Tempest Strike is the established shared-damage mechanic; the additional grab-related group soak comes from Korean Hard Mode reports and needs separate Global verification.
Final Tips for Urugugu Canyon Hard Mode
Urugugu Canyon Hard rewards preparation and clean execution more than reckless damage. Enter with a coordinated party above the 2700 Item Level gate, stop attacking during Raur's counter stance and keep Urahum's ground hazards under control. Against Auldor, recognize the marked shared-damage circle, avoid wind-based control effects and maintain enough damage uptime to handle the four-minute Frenzy timer. Once the group can repeat those mechanics reliably, the dungeon becomes a valuable source of Ariel Fragments, possible Philosopher's Stones, Wrathful crafting materials, Kina and Hard achievement rewards.