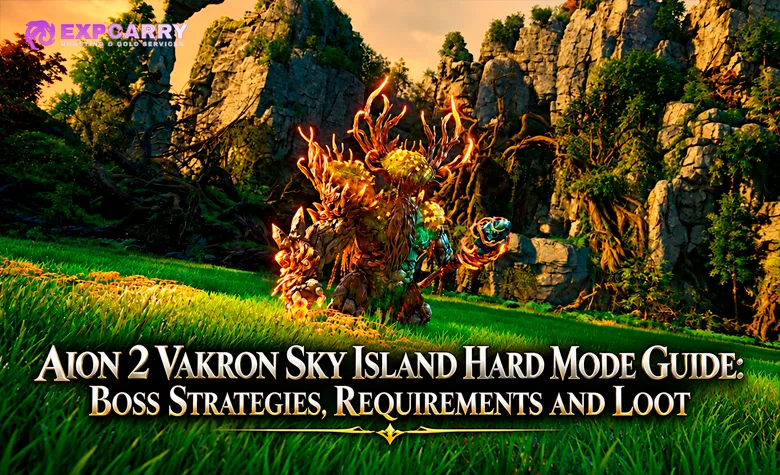
Vakron Sky Island Hard Mode became available on AION 2 Global servers with the October 28, 2026 update. The dungeon requires Item Level 2700 and features three bosses: Tiere, Thamon and Vakron. The biggest challenges are managing Tiere's poison phase without covering the safe area, avoiding attacks that heal Thamon, and surviving Vakron's thorn roots, expanding shockwaves and deadly rock enclosure. Hard Mode also introduces a four-minute boss Frenzy timer, a limit of three revives per player and improved rewards. This guide explains the boss strategies, party positioning, dungeon route, dangerous mistakes, equipment preparation and loot available in the current Global version, while distinguishing confirmed rules from regional Hard Mode observations.
Short answer: Reach Item Level 2700 and bring a coordinated party with reliable damage, healing and movement. Break Tiere's flower and rotate together, stop the damage type that heals Thamon, free petrified or rooted teammates, jump Vakron's expanding waves and destroy the red rock before its lethal attack. A successful Hard Mode reward claim grants Ariel Fragment: Vakron and provides access to additional loot. Defeating both optional mid-bosses improves the reward pool.
Vakron Sky Island Hard Mode Requirements
Vakron Sky Island Hard is an endgame Expedition designed for level-45 characters who have progressed beyond regular Conquest. The required Item Level is a mandatory entry condition, but meeting it does not guarantee that the group can defeat the bosses before Frenzy. Players need enough sustained damage to handle the shorter combat timer while still reacting properly to the dungeon's mechanics. A group that repeatedly fails Normal Conquest's poison, petrification or red-rock phases should practice those mechanics before moving into Hard Mode.
| Requirement | Hard Mode | Practical importance |
|---|---|---|
| Global availability | Live since October 28, 2026 | Hard Mode is available in the current Global release. |
| Character level | 45 | Prepare an endgame character. |
| Minimum Item Level | 2700 | Entry is blocked below the required threshold. |
| Recommended group | Five coordinated players | A full party provides more reliable damage, healing and mechanic recovery. |
| Bosses | Tiere, Thamon, Vakron | Vakron is the required final boss; optional mid-bosses contribute additional rewards. |
| Boss Frenzy timer | 4 minutes | Long interruptions and accidentally healing a boss become especially costly. |
| Revive limit | 3 per player | Repeated deaths cannot be treated as unlimited recovery opportunities. |
| Instance timer | 60 minutes in current client records | Separate from the shorter Frenzy timer during boss fights. |
The official October 28 Global patch notes confirm the 2700 entry requirement, four-minute Frenzy timer and three-revive limit. The same update reduced Hard Expedition boss Attack and Damage Boost by 10% compared with previous values. This balance adjustment gives players more room to survive individual hits but does not remove the dungeon's dangerous patterns. Details such as boss levels, reward-cube costs and the overall instance timer are additionally documented in current Global-client records and should be checked again after future updates.
Best Party Composition for a First Clear
A reliable starting composition is one tank, one healer and three damage dealers. A Templar can keep bosses facing away from the group, while a Cleric provides recovery during poison, petrification and root mechanics. The remaining players should prioritize consistent damage and the ability to change targets quickly when flowers, trapped allies or rocks appear. This arrangement is recommended for first clears rather than being an additional restriction on the classes permitted to enter.
- Tank: Keep Tiere and Thamon positioned predictably, control Vakron's facing and move away from hazards without dragging attacks across the group.
- Healer: Monitor poison pressure, prepare healing for petrified allies and prioritize recovery when a player is trapped in thorns.
- Damage dealers: Switch immediately to flowers, petrified teammates, thorn prisons and the red rock when those targets appear.
- Everyone: Prepare movement controls, understand the four-minute timer and avoid spending revives on repeated positioning mistakes.
Item Level 2700 is only the starting point for preparation. Check whether your equipment, Arcana, Stigmas and enhancements support the damage or survivability your role needs during these encounters. Players still working toward the entry requirement can compare available Gear Score progression options before investing in an upgrade that does not improve their effective Item Level. Teams already comfortable with the earlier Hard Expeditions have a useful foundation, but Vakron's target-switching and movement mechanics require separate practice.
Vakron Sky Island Route: Debuffs, Windstreams and Elemental Altars
Vakron Sky Island has more traversal mechanics than a straightforward corridor dungeon. Players move between floating islands, use wind currents, interact with Kibelisks and complete an elemental objective before reaching the final boss. The route itself can cause unnecessary deaths when someone misses a jump or becomes rooted while traveling. Learning the movement sequence makes repeated clears significantly smoother, even before the party improves its boss damage.
Vakron's Gaze and Fog Spiritstones
While traveling through the instance, players accumulate a debuff described as Vakron's Gaze in current references and as Surveillance in some encounter explanations. At three stacks, the character becomes rooted in thorns and begins taking damage until released. Fog Spiritstones along the route remove the accumulating effect. Boss rooms and Windstreams can also clear the travel debuff, so players should use these transitions wisely. Monitor your stacks instead of waiting until someone becomes immobilized on an inconvenient platform.
If a teammate is already trapped, the others can attack the thorns to release them. Do not leave a rooted player behind while the group continues toward the next island, because they may be unable to follow or escape safely. Bind the available Kibelisks as the party advances so that a death does not require replaying an unnecessarily long section. These travel mechanics are documented in current dungeon references and also appear in NCSOFT's Vakron Sky Island community overview, although that overview identifies its own summary as AI-generated and should not replace verification in the live game.
How to Cross the Floating Islands
The route between the first and second bosses includes a destructible obstruction, Windstreams and narrow aerial crossings. Players who repeatedly miss the landing often try to control their movement too aggressively during the launch. In the documented route, letting the Windstream carry the character before opening the wings produces a more reliable crossing. Defeat the Odyle Stone Spirit where required to remove the route barrier, and distinguish actual flying from gliding: on default PC controls, V initiates flight when permitted, while Space is used for jumping and gliding. Practice the crossing in Normal Conquest if your group is unfamiliar with it.
- After Tiere, follow the route to the stone obstruction. Destroy the blocking object and enter the available Windstream.
- Allow the current to launch you. Avoid unnecessary directional inputs or midair dodges that can alter the intended trajectory.
- Open your wings when the game permits it. Glide toward the next landing rather than trying to force the crossing through repeated movement commands.
- Continue through the floating islands. Use the indicated route, activate useful Kibelisks, defeat the Odyle Stone Spirit to remove its barrier and clear enemies blocking required passages.
- Reach Thamon's area. Confirm that every player has arrived before starting the boss encounter.
Four Elements and the Barrier Before Vakron
After Thamon's area, the party reaches a flying section associated with four elemental objectives: Fire, Water, Wind and Earth. The elements must be brought to their corresponding altars to progress toward the final boss. Their positions can vary between runs, so follow the current objective markers instead of memorizing a fixed order. Current client guidance also describes absorbing Odyle while flying and activating an altar during a limited interaction window. Keep sufficient Flight Power by using the available recovery objects, and coordinate which player is handling each element. With five players, one can remain available to assist.
The important point is to complete the active elemental interactions rather than assuming the final boss becomes available immediately after Thamon's area. Check the current objective indicators and confirm that the barrier has been disabled before moving onward. Register the final available Kibelisk before entering Vakron's arena. Players focusing on efficient Expedition runs should practice the flying section until nobody is losing time or revives to avoidable falls.
Tiere Hard Mode Boss Strategy
Tiere is the first mid-boss and tests controlled positioning during a poison phase. Her normal attacks include alternating strikes and swipes, but the most dangerous sequence forces the party into a limited safe area while poison drops repeatedly around them. Groups that scatter in different directions quickly cover the available space and trap themselves. Hard Mode retains these established Conquest mechanics, while the shorter Frenzy timer gives players less time to recover from a poorly executed phase. Tiere is optional for Conquest completion, but defeating her removes her associated poison pressure and improves the final reward claim.
Alternating Slams, Swipes and Spacing
During normal combat, Tiere can strike one side of the arena and then attack the opposite side. Watch which arm or side begins the sequence instead of assuming a single dodge will handle both impacts. The tank should maintain consistent facing, while damage dealers avoid standing in a position where the next swipe catches multiple players. Her Isolation Zone poison effect also punishes players who stand too close to affected teammates, because nearby allies can damage one another. Spread during ordinary combat, then gather only when the flower mechanic calls for coordinated movement.
Flower Mechanic: Destroy, Stack and Rotate Together
During major poison phases, commonly observed around 75% and 25% HP in regular Conquest, Tiere moves toward the center and the surrounding arena becomes dangerous. A flower known as Detoxifying Rafflesia appears in the safe area and must be destroyed. Once the flower is broken, the party gathers at its former position to cleanse the poison and prepares for four successive poison drops aimed at players' locations. Instead of dodging independently, everyone should move together in a prearranged direction so that the resulting poison pools remain grouped behind the party.
- Identify the phase. Watch for Tiere moving to the center and the flower appearing while poison threatens the surrounding area.
- Destroy the flower immediately. Switch damage away from the boss until the required object is removed.
- Gather at the safe location. Stack where the flower stood to receive the cleansing effect instead of remaining in the surrounding poison.
- Call one movement direction. Clockwise is a practical convention, but counterclockwise also works if everyone follows the same call.
- Move together after each poison drop. Expect four targeted drops and take controlled steps so the persistent pools remain concentrated in previously used space.
- Prepare for the finishing attacks. Tiere can finish with a slam, an outward charge and another slam, so keep moving until the sequence ends.
The key is to create new safe space with each coordinated movement rather than using the entire circle at once. When one player moves the opposite direction, their poison can block the route planned by the rest of the party. When the group spreads too early, several overlapping pools may leave no clean location for the final attacks. If a player becomes heavily slowed by poison, the healer should prepare for extra damage while the group keeps moving along its agreed route. An appropriate antidote can help remove the slowing poison, and a successful stagger may interrupt the phase.
Why Groups Fail Tiere's Poison Phase
Most failures happen because players begin the movement sequence before the flower is destroyed or continue attacking Tiere while the objective remains active. Another common mistake is failing to communicate the direction of rotation, which causes poison pools to appear across multiple sides of the safe area. Damage dealers should treat the flower as the immediate priority and return to the boss only when the safe-zone mechanic is under control. A clean phase conserves both healing resources and valuable time before Frenzy.
Explore services related to this guide, selected from our Aion 2 catalog.
View All Aion 2 Services

Thamon Hard Mode Boss Strategy
Thamon is the second mid-boss and combines petrification with a damage-type absorption mechanic. Players can accidentally heal him by continuing to attack during the wrong colored phase, turning an otherwise successful pull into a failed damage check. His ground attacks and grabs also punish teammates who remain immobilized for too long. Hard Mode does not currently have a separately verified Global-only Thamon mechanic, so executing the documented Conquest patterns correctly remains the most reliable approach. Like Tiere, Thamon is not required for the Conquest completion objective, but defeating him adds rewards to the final claim.
Petrification: Free Teammates Before the Slam
Thamon creates small attack circles that can turn affected players to stone. A petrified character cannot move normally, leaving them vulnerable to a dangerous follow-up area attack. The safest response is to dodge the initial circles, then immediately attack any teammate who was caught to break the effect. One successful hit can release a petrified ally. The healer should monitor the trapped player, while the tank avoids turning Thamon's next frontal attack toward their position.
Do not assume every circular warning is harmless just because the first hit does not kill its target. Petrification becomes dangerous when it prevents the victim from avoiding the next slam. Players should keep enough distance between one another to recognize who has been trapped and maintain a clear line of sight for the rescue. If the group repeatedly loses players here, assign one nearby damage dealer to prioritize breaking petrification before returning to the boss.
Red and Purple Absorption: Stop the Correct Damage Type
Thamon periodically changes color, indicating which damage category will heal him instead of damaging him. Red means physical attacks restore his HP; purple means magical attacks restore his HP. The effect lasts approximately ten seconds in documented Conquest encounters. The group must immediately stop the matching type of damage until the effect ends. This is particularly important under the four-minute Hard Mode Frenzy timer, because even a short period of accidentally healing the boss can erase a large amount of progress.
| Boss color | Damage that heals Thamon | Correct response |
|---|---|---|
| Red | Physical | Templar, Gladiator, Ranger and Assassin stop damaging the boss. |
| Purple | Magical | Sorcerer, Spiritmaster, Cleric and Chanter stop damaging the boss. |
| No absorption color | No corresponding active absorption phase | Resume normal damage while avoiding other mechanics. |
The documented absorption categories follow the class's damage type, not simply its distance from the boss. Templars, Gladiators, Rangers and Assassins must respect the red phase; Sorcerers, Spiritmasters, Clerics and Chanters must respect the purple phase. Do not assume that a ranged attack becomes magical or that a close-range ability necessarily changes your class's absorption interaction. During the matching phase, use the downtime for repositioning, recovery or abilities that do not heal Thamon. One player should call “red—physical stop” or “purple—magic stop” so the entire group responds immediately.
Grab, Rock Projectiles and Large Ground Attacks
Thamon also uses wide ground attacks, a charging grab and rock-based projectiles. His grab can lift and slam a player, while some frontal attacks can knock characters down and interrupt their movement. The tank should keep him oriented away from the group, and other players should move out of the charge path instead of attempting to withstand it. When a large arena attack begins, react to its actual warning and use the appropriate dodge or jump timing rather than assuming it can always be avoided by standing behind the boss.
Current client records identify a broad fan of rock projectiles that should be sidestepped rather than jumped over. Keeping a clear view of Thamon makes it easier to distinguish this attack from his petrification circles. If the healer is forced to recover several players at once, the group should slow its offense briefly and regain safe positioning. The encounter is much more consistent when players correctly handle petrification and absorption before trying to optimize every damage window.
Vakron Hard Mode Final Boss Strategy
Vakron is the final boss and the encounter most likely to stop an otherwise successful run. His attacks combine targeted thorn roots, repeated ground strikes, radial line patterns, expanding waves and a lethal enclosure made of rocks. Several of these mechanics require immediate target switching rather than simply dodging a warning on the ground. Hard Mode also has additional attack variations described in current client records and Korean regional reports, but those details must be distinguished from mechanics already demonstrated in Global Conquest.
Thorn Mark: Separate the Target and Break the Roots
Vakron marks a player with an effect that can develop into a thorn prison. The marked character should move away from the other party members before the effect triggers, because nearby teammates can also be caught. Once the thorns appear, the remaining players should attack the prison immediately to release the trapped character. Leaving someone immobilized is dangerous because Vakron continues attacking while the victim takes damage and cannot reposition.
Current Hard Mode client-derived records describe a version that can mark two players, while the established Normal encounter generally features one primary marked target. The two-target behavior is supported by client-derived Hard Mode data, but it should not be presented as independently confirmed Global live behavior without direct encounter verification. If two marks appear, both targets should separate from the party and from each other while remaining close enough for teammates to free them quickly. The group should identify which thorn prison needs the most urgent assistance instead of allowing several players to remain trapped simultaneously.
Meteor Fall: Manage Consecutive Targeted Strikes
Vakron can target party members with several rapid ground attacks in succession. Players should keep moving while watching their own warning circles and avoid crossing another teammate's path. In ordinary Conquest, disciplined movement already reduces the chance of several attacks overlapping in one location. Korean Hard Mode reports and current client-derived references additionally describe lingering damaging pools after these impacts, although their exact live Global behavior still needs separate confirmation.
If the attacks leave persistent pools in your Hard encounter, place them deliberately toward an outer section of the arena rather than scattering them across the middle. Move in a coordinated direction and keep the future red-rock escape route clear. Avoid running through the group's planned safe area simply because one circle is following you. A healer should expect extra pressure when a player becomes rooted while standing inside a damaging pool.
Surging Thorn: Jump Three Waves and Glide Over the Final Blast
Surging Thorn is one of Vakron's most dangerous mechanics. The floor changes color as the boss begins a longer cast, and expanding shockwaves travel outward from the center. The group must jump the waves as they arrive instead of relying on an ordinary ground dodge. A final arena-wide blast follows, so surviving the three visible waves does not mean the mechanic is over.
- Recognize the cast. Watch Vakron moving into the mechanic and the arena warning appearing.
- Jump the first expanding wave. Time the jump for the approaching impact rather than jumping immediately when the warning starts.
- Repeat for the second and third waves. Maintain rhythm and avoid becoming distracted by other players' movement.
- Prepare for the final blast. After the third wave, jump again and open your wings to glide so the character remains airborne as the ground-level blast passes.
- Land safely and resume damage. Avoid immediately moving into another active line or targeted attack after the mechanic ends.
Additional line attacks can radiate outward from Vakron during the sequence. The safest position is between the currently active lines, but players must watch for the next pattern instead of standing permanently in one gap. Do not use an early jump for every attack without checking its timing; the final blast can catch a player who lands too soon. The visual encounter reference at Aion 2 Maps distinguishes observed attack timing from client-derived values and can help groups practice the sequence before entering Hard Mode.
Lodestone Prison: Destroy the Red Rock or Wipe
During Lodestone Prison, Vakron pulls the party toward the middle and creates a circular barrier of rocks around the players. One rock is visibly red, identifying the section that must be destroyed to create an escape route. The group should stop attacking Vakron immediately, focus damage on the red rock and move through the opening before the boss's cast finishes. Remaining inside the enclosure when the final attack lands can cause a party wipe.
- Watch for the pull toward the center. Prepare to switch targets as soon as the rock enclosure appears.
- Identify the red rock. Do not waste time attacking an ordinary gray section.
- Focus the same target. All available damage dealers should help break the red rock rather than splitting damage across several objects.
- Move through the opening immediately. Creating the gap is only the first step; everyone must leave the dangerous area before the cast completes.
- Check for stragglers. Call the escape route clearly so players who were briefly controlled can follow it.
Target selection is a frequent reason groups fail this mechanic. Some players remain locked onto Vakron even when they attempt to attack the red rock, so their abilities never damage the intended object. If this happens, clear the existing target and select the rock directly using the controls available in your combat mode. Practice the target switch in Normal Conquest until every player can consistently attack the correct object without losing several seconds.
Radial Lines, Side Slams and Additional Control Effects
Vakron's other attacks still matter because they can disrupt the party immediately before a major mechanic. He uses line-shaped attacks that radiate from his position, alternating strikes that threaten different sides of the boss and targeted attacks that require quick movement. Some ground patterns are safer to sidestep than to jump, so players should not treat every warning as another Surging Thorn wave. The tank should maintain predictable positioning while damage dealers keep enough space to react without overlapping their targeted circles.
Current client and regional Hard Mode references also describe additional effects around a rooted player, including follow-up area damage. The exact combination of these additions has not yet been independently documented in the October 2026 Global Hard release. The practical preparation is straightforward: separate marked players, free roots quickly and remain ready to dodge the next area attack. Avoid building a strategy around exact regional damage numbers or unverified timing thresholds.
Vakron Phase Timing and the Four-Minute Frenzy Check
Normal Conquest observations place major Surging Thorn and Lodestone Prison sequences around the middle and later portions of Vakron's health bar. Some references describe approximate repetitions near 60%, 55%, 40% and 35% HP, but these are observation-based estimates rather than officially confirmed Global Hard thresholds. Watch the boss's animation and cast bar instead of relying on a precise percentage alone. A group that reacts correctly to the visible mechanic can survive even when its timing differs from a recorded run.
Hard Mode's four-minute Frenzy timer makes target-switching speed extremely important. Every delayed thorn rescue, mistimed jump or failed rock phase reduces the damage time available for the rest of the encounter. Save suitable offensive cooldowns for periods when the boss can actually be attacked, rather than activating them immediately before a forced movement sequence. The group should also avoid placing potential lingering Hard Mode pools where the next rock enclosure or escape path is likely to become dangerous.
Vakron Sky Island Normal vs Hard Mode
Hard Mode retains the three-boss layout of regular Vakron Sky Island Conquest while raising the progression requirement and tightening combat rules. The key officially confirmed differences are the 2700 Item Level gate, four-minute Frenzy timer, three-revive limit and expanded rewards. Current Global-client records provide further details about boss levels and reward claims. References to Normal below mean regular Conquest, not the easier Exploration difficulty. In Conquest, only Vakron is mandatory for completion; defeating Tiere and Thamon increases the reward pool.
| Feature | Normal Conquest | Hard Mode |
|---|---|---|
| Required Item Level | 1400 | 2700 |
| Character level | 45 | 45 |
| Bosses | Vakron required; Tiere and Thamon optional | Same three-boss layout and Conquest completion structure |
| Boss level in current client | 54 | 70 |
| Boss Frenzy timer | 5 minutes | 4 minutes |
| Resurrection rules | Regular Conquest rules | 3 revives per player |
| Core boss mechanics | Flower, petrification, absorption, roots, shockwaves and red rock | Same foundation with additional Hard variations described in client and regional references |
| Ariel Fragment: Vakron | Not part of the new guaranteed Hard reward | Guaranteed through the applicable Hard reward claim |
| Philosopher's Stone: Revelation | Not part of the October 28 Hard-specific reward addition | Possible drop and selectable guaranteed reward |
| Unique crafting materials | Selected materials | Wrathful Mind, Will and Ego all obtainable |
| Kina | Lower reward amount | More Kina than Normal |
| Achievements | Regular Conquest achievements | Additional Hard achievements and Unique skins |
The earlier October 21 Hard Expedition update established the previous Hard difficulty tier, while October 28 expanded the available Hard lineup to Vakron Sky Island and Urugugu Canyon. The mid-boss encounters currently retain their known Conquest mechanics without a separately verified major Global Hard redesign. Vakron's additional two-target root behavior and lingering attack pools are described by client-derived or Korean regional sources, so they should be treated as mechanics to prepare for and verify in the live encounter. Do not mistake an older Korean strategy or datamined attack record for an officially confirmed Global change.
Vakron Sky Island Hard Mode Loot and Rewards
Vakron Sky Island Hard Mode provides several important progression rewards beyond ordinary equipment drops. NCSOFT confirmed a guaranteed dungeon-specific Ariel Fragment, a chance at Philosopher's Stone: Revelation, a selectable guaranteed-reward option for that stone, more Kina than Normal and possible Expedition Hero Artwork. The Hard Mode loot pool also includes all three Wrathful Unique crafting materials. Separate Hard achievements grant Unique skins, giving repeated clears value for players interested in collection rewards as well as combat progression.
| Reward | How it is obtained | Why it matters |
|---|---|---|
| Ariel Fragment: Vakron (Bound) | Guaranteed with an eligible Hard Mode reward claim | Used for Daevanion Crystal conversion or Enhance Stones. |
| Philosopher's Stone: Revelation (Bound) | Possible random reward or selectable guaranteed reward | Valuable progression item; not an automatic drop from every clear. |
| Expedition Hero Artwork | Chance to obtain | Additional collection and progression reward. |
| Wrathful Mind | Possible Unique crafting material | Used in relevant equipment recipes. |
| Wrathful Will | Possible Unique crafting material | Useful for crafting projects requiring this reagent. |
| Wrathful Ego | Possible Unique crafting material | Expands the available crafting-material pool in Hard Mode. |
| Kina | Higher amount than Normal Conquest | Supports further character progression and crafting. |
| Vakron equipment and Guard | Listed in the current client-derived reward pool | Equipment and reward-selection options; verify the current live cube. |
| Unique skins | Hard Expedition achievements | Cosmetic rewards for meeting achievement objectives. |
It is important to separate the official reward categories from exact client-derived drop rates. The guaranteed Ariel Fragment requires an eligible reward claim rather than merely defeating the boss without opening the cube. Other items are not guaranteed, and the selectable Philosopher's Stone depends on reaching the relevant guaranteed-reward milestone. Current client records also list Vakron armor pieces, the Vakron Guard, Sealed Forest Spirit Wings and artwork variants in the broader reward pool. Individual percentages and exact item distributions may change, so the live reward interface should be checked before committing resources to a long farming schedule.
Ariel Fragment: Vakron and Daevanion Crystals
Ariel Fragment: Vakron (Bound) is the dungeon-specific fragment introduced with this Hard difficulty. It is separate from the Ariel Fragment items associated with other Hard Expeditions, and the corresponding Substance Morph recipes should be checked by item name. The October 28 Global update confirmed two uses for these fragments: Daevanion progression and Enhance Stones. Choosing between them depends on whether your next upgrade requires an Ariel Crystal or equipment-enhancement materials.
- 100 Ariel Fragments: Convert into one Daevanion Crystal: Ariel (Bound) through Substance Morph > Special > Daevanion. The official patch states a limit of 30 conversions per character.
- 1 Ariel Fragment: Convert into five Enhance Stones through Substance Morph > Special > Consumables. The official patch describes this conversion as unlimited.
- Farming priority: Save fragments for Daevanion Crystals when board progression is the main goal. Consider Enhance Stones when the relevant crystal progression is already satisfied or another upgrade has higher priority.
Current client-derived loot data lists 60–90 Ariel Fragment: Vakron from an eligible final-boss Hard reward claim, but that exact range is not separately published in NCSOFT's Global patch notes. Treat it as a current client reference rather than a permanent official guarantee. For routes, conversion priorities and the differences between dungeon-specific fragments, consult the broader Ariel Fragments Farming Guide.
Wrathful Mind, Will and Ego Farming Value
Vakron Sky Island Hard can reward Wrathful Mind, Wrathful Will and Wrathful Ego, allowing one dungeon to contribute to several crafting objectives. Regular Vakron Conquest has a more restricted material selection, while the Hard update expanded the possible Unique crafting material pool. However, a wider selection does not guarantee a higher chance of receiving the one specific reagent your recipe requires. Players should compare their immediate crafting needs with the additional Ariel and other Hard rewards before deciding where to spend their farming opportunities.
If you need multiple Wrathful materials, repeated Hard reward claims can be efficient because each eligible claim contributes to several progression goals. If you need only a single material, another Conquest dungeon may remain a better target depending on its current loot pool. Compare the available sources and recipes in the Wrathful Mind, Will and Ego Farming Guide.
Odyle Energy, Reward Claims and Guaranteed Selection
Current Global-client records list a cost of 40 Odyle Energy for a Vakron Sky Island Hard reward-cube claim. Energy is spent to claim rewards, not simply to enter and fight the dungeon. The records also list a selectable guaranteed reward after 28 eligible claims, compared with 21 in regular Conquest. These are client-derived values rather than independently published guarantees for every future patch, so verify the live reward window before planning an extended farming route. The guaranteed-reward selection may include equipment-related options and Philosopher's Stone: Revelation when the relevant milestone is reached.
The same client-derived system associates the reward claim with the bosses defeated during the run. Killing Tiere and Thamon can therefore improve the available reward pool, even though neither is mandatory for the Conquest completion objective. Current extracted loot records list up to 480,000 Kina for a full three-boss Hard reward claim, compared with 300,000 for a comparable regular Conquest claim; these precise amounts should be treated as client data, while the official patch confirms only that Hard rewards more Kina. For energy management, cube claims and farming limits, see the Odyle Energy Guide.
Hard Mode Achievement Skins
NCSOFT confirmed that Hard Expedition achievements provide Unique skin rewards. Current client-derived records associate Vakron Sky Island Hard with Ruinous Devourer armor appearances and the title Vakron Sky Island Dweller. Recorded achievement milestones award appearance pieces across multiple clears, rather than granting the whole set from one run. These rewards are tied to achievement progress rather than being guaranteed random drops from the final boss's ordinary loot pool. Check the live achievement panel for the exact objectives, number of clears and available appearance pieces before setting a long-term collection target.
How to Prepare for Reliable Vakron Hard Mode Clears
The dungeon becomes much easier when players agree on mechanics before entering rather than improvising after someone has already died. Tiere requires synchronized movement, Thamon requires damage-type awareness, and Vakron requires immediate target switching and well-timed jumps. These demands are different enough that a single generic “maximize DPS” instruction is not useful. Preparation should focus on the specific actions most likely to cause a failed attempt.
- Confirm entry and survivability. Reach Item Level 2700, review your defensive setup and bring suitable food, scrolls and recovery items.
- Choose a Tiere rotation direction. Decide before the pull whether the party will move clockwise or counterclockwise after destroying the flower.
- Assign a Thamon color caller. Someone must announce whether physical or magical damage should stop during each absorption phase.
- Prepare a rescue priority. Every damage dealer should be ready to free petrified or rooted allies instead of waiting for a designated player to handle every prison.
- Practice Vakron's jumping sequence. Learn the timing of the expanding waves and final airborne dodge in Normal Conquest if necessary.
- Check red-rock targeting. Make sure all players can switch away from the boss and attack the correct rock immediately.
- Plan the reward claim. Confirm available Odyle Energy and decide whether the additional loot from the optional mid-bosses justifies a full clear.
Groups should also track their damage without neglecting movement. At Thamon, the wrong damage type actively reverses progress, while at Vakron an unsuccessful rock phase can erase an otherwise strong attempt. Improve the mechanic that is actually causing failure before spending additional resources on a small numerical upgrade. If equipment improvements are necessary, compare their cost with your available Kina resources and prioritize the upgrades that provide a meaningful improvement to the current run.
Common Group Mistakes That Cause Hard Mode Wipes
Several mistakes repeat across inexperienced parties even when the individual players have enough Item Level to enter. The common theme is that one person's positioning or target choice can damage the entire group's chance of success. Knowing these errors beforehand makes them easier to recognize during the fight. The party should review the specific failure after each attempt instead of assuming that every wipe means more damage is required.
- Ignoring Vakron's Gaze between bosses: Use Fog Spiritstones and debuff-clearing transitions before reaching three stacks.
- Missing a Windstream landing: Practice the launch and glide sequence instead of repeatedly forcing directional movement in midair.
- Failing to destroy Tiere's flower: Switch targets immediately so the safe-zone phase can proceed.
- Spreading poison in different directions: Follow the agreed rotation and preserve a clean area.
- Leaving someone petrified at Thamon: Free the trapped player before the follow-up area attack.
- Attacking Thamon with the absorbed damage type: Red absorbs physical damage; purple absorbs magical damage.
- Stacking on Vakron's thorn-marked player: The marked target should separate before the root spreads.
- Landing too early during Surging Thorn: The final blast follows the expanding waves, so time the last jump and glide correctly.
- Attacking the wrong rock: Focus the red section and leave the enclosure immediately after it breaks.
- Scattering potential Hard Mode pools across the center: Preserve safe movement and escape paths whenever lingering ground hazards appear.
- Wasting time under Frenzy: Avoid preventable control effects, repeated deaths and attacks that restore a boss's health.
Vakron Sky Island Hard Mode FAQ
These questions clarify the most important entry, mechanic and reward details for groups preparing their first Hard Mode run.
What Item Level is required for Vakron Sky Island Hard?
The minimum is 2700 Item Level, as confirmed in the October 28 Global patch notes. Meeting the entry requirement does not guarantee that the party has enough damage to beat the four-minute Frenzy timer.
Do physical or magical attacks heal Thamon?
It depends on the active color. Red means physical damage heals him, while purple means magical damage heals him; stop the corresponding damage type until the effect ends.
How do you survive Vakron's red-rock mechanic?
When the party is pulled into the circular enclosure, everyone must attack the red rock and escape through the gap before the final blast. Attacking gray rocks or remaining inside after the red rock breaks can cause a wipe.
Are the additional Hard Mode root and poison-pool mechanics confirmed on Global?
Current client-derived data and Korean Hard Mode reports describe additional targets and lingering pools. Their precise implementation has not been independently confirmed in the October 2026 Global live encounter, so treat them as preparation scenarios rather than guaranteed mechanics.
Final Vakron Sky Island Hard Mode Strategy
Vakron Sky Island Hard Mode is primarily a test of group coordination under a tighter damage timer. Arrive with Item Level 2700 and a prepared party, manage the travel debuff, rotate together through Tiere's poison phase and stop the damage type that heals Thamon. Against Vakron, free trapped teammates, jump and glide through Surging Thorn, and destroy the red rock before the lethal enclosure attack. Although only Vakron is mandatory for Conquest completion, defeating the two mid-bosses improves a full reward claim. Once these mechanics are consistent, the dungeon becomes a valuable source of Ariel Fragments, possible Philosopher's Stones, Wrathful crafting materials, equipment rewards and Hard Mode achievement skins.