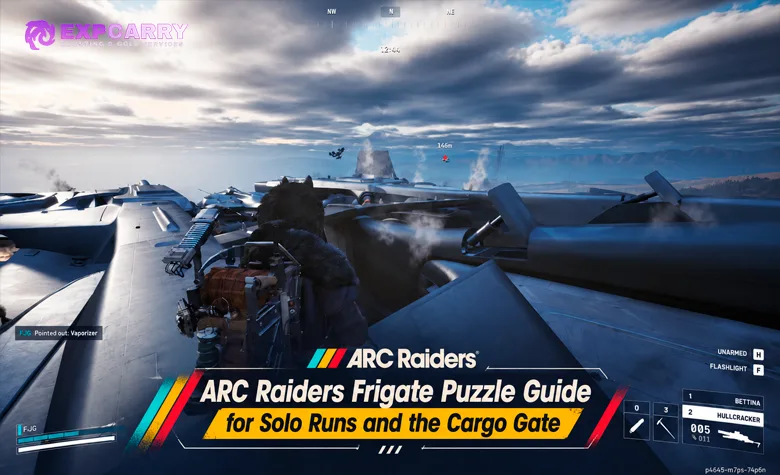
The ARC Raiders Frigate puzzle has two very different ways to approach its loot. If you only need a Frigate Inductor for Research Station IV, you can board the ship alone, breach its ARC containers, secure the material and extract without completing the cargo release. If you want the full Frigate cargo, prepare for a much longer operation involving Power Cores, yellow activation targets, Hydras and coordinated cargo mechanisms. The Frigate arrived with Frozen Trail on October 8, 2026, and Update 2.3.0 changed its cargo gate while making higher-tier loot more likely deeper inside the ship. That makes the old strategy of opening the first container and leaving less attractive than it was at launch. This guide covers both routes, the current puzzle sequence, the best places to search for an Inductor, and when a solo Raider should abandon the full clear.
Short answer: For a fast solo run, board the Frigate from a rear Reclaimer, breach accessible containers, put any Frigate Inductor in your Safe Pocket and extract. For the full cargo, destroy the Power Cores across the ship, open the updated cargo mechanisms and release the payload with help from other Raiders.
ARC Raiders Frigate Puzzle Overview and Which Route to Choose
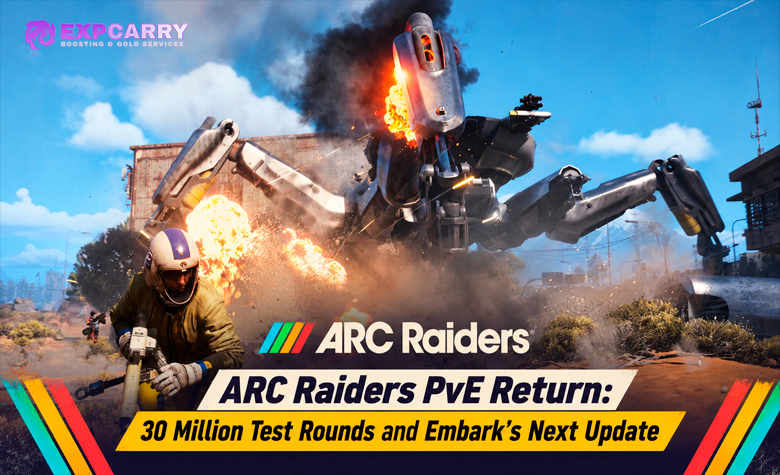
The ARC Frigate is a rotating ARC Operation rather than a permanent location on Pendola Pass. It can appear over several Rust Belt maps when the ARC Frigate condition is active. Players board the airborne vessel using ARC Reclaimers, explore its exterior and interior sections, and fight through powerful ARC defenses. The complete operation ends with the release of a large cargo payload containing valuable technology and Research materials.
Embark introduced the Frigate in the official Frozen Trail 2.0 update alongside Pendola Pass, weapon amplification, the Outpost and the Research Station. However, the encounter has received several changes since launch. The current guide uses the mechanics documented after the October 27 update rather than assuming every launch-week shortcut and cargo interaction still works exactly the same way.
| Objective | Solo Inductor Route | Full Cargo Route |
|---|---|---|
| Main goal | Find Frigate Inductor and other useful ARC materials | Release the main cargo and search its valuable containers |
| Required players | One player can search accessible containers | Cooperation is required for documented simultaneous controls |
| Power Cores | No full clear required | Must clear the required cores throughout the ship |
| Cargo Gate | Not required | Must complete its latches and release interactions |
| Main equipment | Mobility tool, protection and a light combat kit | Strong ARC damage, ammunition, mobility and team utility |
| Time commitment | Stop once useful loot is secured | Can consume most of the raid |
| Main risk | Exposed movement and losing the extraction | Hydras, Power Core hazards, player coordination and time |
| Best for | Solo research material farming | Coordinated groups and players targeting the cargo reward |
Choose the objective before deploying. A Raider missing one Inductor should not automatically bring a full anti-ARC loadout for a puzzle that is unnecessary for that item. On the other hand, players who specifically want the dropped cargo need enough ammunition, time and cooperation to complete the entire operation. Trying to switch between those goals halfway through a bad run is a common reason players lose expensive equipment.
Can You Complete the Entire Frigate Solo?
You can enter the Frigate alone, loot containers and reach some deeper areas using mobility equipment. Experienced players have also demonstrated ways to bypass certain lifts and explore sections that would normally require assistance. That does not mean every mandatory puzzle interaction can be completed independently.
The documented full sequence contains simultaneous controls that require multiple Raiders. The central Power Core mechanism has interactions involving three players, while cargo release procedures have required cooperation from at least two. A Raider entering a solo matchmaking queue can complete the operation when other players aboard help with those stages, but that is different from a guaranteed one-player full clear.
Player reports from November describe successful completions in solo queues with cooperative strangers. They also describe failed attempts where everyone looted containers and left before the essential Power Cores were destroyed. If no one is helping with the synchronized objectives, a solo material run is usually the more realistic plan.
Where to Find the ARC Frigate and How to Board It
The Frigate appears only when its map condition is active. Before launching, open Map Selection and find a destination labeled ARC Frigate. The ship is not permanently parked above Pendola Pass, and entering an ordinary raid will not summon it. Its available map rotates with the event schedule.
Embark maintains an official ARC Frigate schedule showing the active destination and upcoming rotations. Check your server region and the current map before deploying instead of following an old hourly schedule from another region.
Which Maps Have the Frigate Condition?
The current community Frigate database lists Dam Battlegrounds, Buried City, Spaceport, The Blue Gate and Pendola Pass as supported destinations. These are not five permanently active Frigates. The condition rotates, so only the currently scheduled map matters for your next run.
Frigate raids also change the rules of the surrounding map. Free Loadouts and Raider Hatches are unavailable, locked loot rooms are disabled, and the general loot value outside the operation is reduced. That makes the Frigate a poor choice for a normal low-risk scavenging trip unless the ship itself is your objective.
Pendola Pass has a separate route and extraction system described in the ARC Raiders Pendola Pass Map Guide. The Frigate puzzle takes place aboard the ship, however, so its core sequence is not a unique Pendola Pass dungeon.
How to Board the Frigate Using a Reclaimer
The usual boarding method uses an ARC Reclaimer, a large circular platform that travels between ground level and the ship. These platforms operate near the rear of the Frigate. Reaching one early is safer than waiting in open terrain while the ship's cannons and other Raiders focus on the boarding area.
- Select a raid with ARC Frigate active and move toward the ship when it appears.
- Watch for blue targeting lasers from the Frigate's ground-facing cannons and avoid standing in their firing area.
- Locate a Reclaimer platform approaching ground level near the rear of the vessel.
- Climb onto the platform and complete its Disrupt interaction.
- Remain aboard during the ascent and move onto the Frigate when the platform reaches its docking position.
- Identify the two side walkways before choosing your entry route.
A Grappling Hook or Snap Hook can also help with difficult movement around the ship. These tools are especially useful when returning from a lower section or bypassing a lift that requires multiple players. They do not automatically complete the Power Core objectives or release the cargo.
What to Do if a Reclaimer Does Not Dock Properly
Reclaimers have had occasional docking problems in earlier Frozen Trail updates. If a platform is not reaching a usable position, avoid jumping blindly toward the hull. Watch the next movement cycle or use a mobility tool only when you can identify a reachable landing point.
Falling from the Frigate can end an otherwise successful run, especially when you are carrying valuable unprotected items. There is no reason to risk your entire kit on an uncertain jump when a safer route remains available.
Route 1 Fast Solo Frigate Inductor Farming
The fastest practical solo strategy is to loot accessible breach containers without committing to the cargo puzzle. Frigate Inductors are part of the ship's container loot pool, so you do not need to destroy every Power Core or detach the main cargo to have a chance of finding one.
There is one important adjustment after Update 2.3.0. Embark increased the chance of higher-tier rewards deeper inside the Frigate. This does not remove Inductors from outer containers, but it makes a carefully planned move toward the inner sections more attractive when your gear and the current situation allow it.
Best Loadout for a Fast Solo Frigate Run
A solo Inductor run should prioritize mobility and survival over carrying enough explosives to destroy the entire ship. You still need a functional weapon because other Raiders and smaller ARC enemies can interrupt your route, but fighting every Hydra is usually a poor use of time when the main objective is container looting.
| Equipment | Purpose | Priority |
|---|---|---|
| Custom Loadout with Safe Pocket | Protects a valuable Inductor if the run fails | Essential |
| Reliable personal weapon | Handles smaller ARC and unexpected player encounters | Essential |
| Shield and healing supplies | Helps survive exposed boarding and interior hazards | Essential |
| Grappling Hook or Snap Hook | Supports vertical movement and bypasses certain lifts | Highly useful |
| Photoelectric Cloak | Helps break ARC attention during exposed movement | Useful |
| Smoke Grenades | Provides cover while interacting with contested containers | Useful |
| Barricade Kit | Provides temporary protection during dangerous interactions | Optional |
Leave enough inventory space for the materials you came to collect. Bringing several expensive weapons and too much ammunition can reduce your flexibility without helping with the actual objective. For a short run, your best defense is getting into useful cover, looting efficiently and leaving before the situation turns into a prolonged fight.
Fast Solo Route from the Rear Landing to the Containers
The easiest starting route uses the rear boarding area and its side walkways. These connect toward the Lower Atrium and contain opportunities to access breachable ARC containers without completing the synchronized reactor puzzle.
- Board the Frigate early using a Reclaimer near its rear section.
- From the landing, take one of the side walkways instead of pushing straight into the most exposed combat area.
- Enter the accessible passage and look for circular containers marked Breach and Search.
- Check nearby ARC activity before opening a container. The breach animation can leave you exposed.
- Search each accessible container and prioritize Frigate Inductors, ARC Data Modules and useful Amplification Modules.
- Use a mobility tool to access additional walkways when the route is clear and you can identify a safe return path.
- Once you find the Inductor or the risk becomes too high, return toward the boarding area and leave the ship.
Do not waste time trying to solve every platform mechanism on the way in. Some platforms require simultaneous interactions, while a Grappling Hook can bypass the movement obstacle. If your only objective is loot, there is no reason to force a team puzzle just to reach a container that another accessible route can provide.
Should Solo Players Push Deeper After Update 2.3.0?
Deeper containers now have a better chance of higher-tier rewards, making the Upper Atrium and accessible interior sections more interesting. However, the improved loot does not remove the additional risks. More dangerous areas contain Hydras, environmental hazards and players who may be working through the full puzzle.
A recorded solo run published on October 28 demonstrates a more advanced method of accessing the cargo hold without completing the final cargo release. The player destroys a lower Power Core, uses Grappling Hook movement to reach the interior, and searches containers around the turbine section. That run produced several Frigate Diagnostic Nodes and ARC Data Modules, but its result is one player's loot outcome rather than a guaranteed reward table.
This route is worth learning after you can already board, search the outer sections and extract consistently. Beginners should not risk an Inductor already secured in their Safe Pocket simply to chase one more difficult container. The material you needed is more valuable than an unfinished optional detour.
Players farming materials across multiple attempts can compare the Frigate route with ordinary ARC Raiders material farming objectives. A Frigate run is valuable for its specialized ARC technology, not because every container guarantees a rare item.
How to Loot Frigate Containers Without Getting Burned
Frigate containers are not harmless lockers. Update 2.1.0 introduced burning damage from opening certain hatches, so remaining close to the interaction area can punish players who assume the container is safe immediately after breaching it.
The official Update 2.1.0 patch notes confirm the hatch damage change. Watch the opening animation, avoid standing in the active hazard and move back into cover before spending additional time sorting your inventory. Smoke and temporary protection can help with incoming attacks, but they should not be treated as immunity to the hatch's environmental damage.
If another Raider is already searching the same row of containers, look for a different accessible section rather than waiting in an exposed queue. The longer you remain in one predictable position, the easier it becomes for ARC or hostile players to interrupt the run.
Explore services related to this guide, selected from our ARC Raiders catalog.
View All ARC Raiders Services
Where Frigate Inductors Drop and What They Unlock
The Frigate Inductor is a Legendary Topside Material associated with the ARC Frigate. Community item records list the ship's breachable containers as its acquisition source, while the Research Station upgrade screen establishes its role in unlocking the next research tier.
One Inductor is required for the upgrade from Research Station III to Research Station IV. The same upgrade also requires Thermal Shakers and ARC Data Modules, as well as four Outpost rooms. If that is your immediate goal, obtaining the Inductor is the difficult specialized part of the material checklist, so do not recycle or sell it by mistake.
| Material | Amount | Main farming consideration |
|---|---|---|
| Frigate Inductor | 1 | Rare Frigate-specific material found in ship containers |
| Thermal Shaker | 3 | Collect separately through relevant ARC material farming |
| ARC Data Module | 3 | Search suitable ARC technology containers including the Frigate |
The same requirements are recorded in the ARC Raiders Amplified Weapons Guide, which explains how Research Station IV relates to the broader weapon amplification system. Reaching the Research Station milestone does not automatically unlock every amplified weapon or replace the separate Gunsmith requirements.
If the station upgrade is your current progression objective, the ARC Raiders workshop upgrade progression is relevant to preparing the remaining requirements. Check your actual station screen before consuming rare materials, particularly if a later patch changes the recipe.
Is the Frigate Inductor Guaranteed?
No. A Frigate Inductor can appear in qualifying containers, but opening one container or completing one Frigate raid does not guarantee the item. The same applies to Amplification Modules and other rare ARC materials. Container type and location affect the available loot opportunities, while the actual reward remains random.
Embark confirmed that deeper Frigate areas became more rewarding in Update 2.3.0, but did not publish a fixed Inductor drop rate for every individual container. That is why a solo player should balance additional search opportunities against the risk of losing unprotected loot and equipment.
What to Do Immediately After Finding an Inductor
Move the Inductor into your Safe Pocket as soon as you pick it up. The pocket protects its contents if your Raider is knocked out, which is especially valuable on a map condition where the return trip may be more dangerous than the initial boarding.
Check that the item is actually in the protected slot before continuing. Other materials, weapons and modules outside the Safe Pocket still depend on a successful extraction. If the Inductor was your only reason to board the ship, leaving immediately is a reasonable decision.
Route 2 Full Frigate Puzzle and Cargo Release Walkthrough
The full Frigate route is a different undertaking from solo container farming. Your objective is to disable the ship's required Power Cores, open the paths into its interior and release the main cargo. Along the way, you must handle Hydras, exposed deck sections, fire and wind hazards, and mechanics that require several Raiders acting together.
For this route, a coordinated squad is strongly recommended. Additional players already aboard can help, but relying entirely on random cooperation leaves the operation vulnerable to people abandoning it halfway through. Bring enough ammunition and supplies for a long encounter rather than equipping the light kit intended for a quick Inductor run.
Best Equipment for the Full Cargo Puzzle
Weapons capable of dealing reliable damage to ARC components matter more during a complete run. Community clears commonly use Hullcrackers, strong rifles and explosives against Power Cores and defending machines. A mobility tool remains valuable because you need to move between several levels of the vessel, while protective equipment helps during forced interactions near enemies.
A full-clear squad should also bring enough spare ammunition and healing to finish the late stages. Running dry before the final interior cores means the group may reach the Cargo Hold without being able to complete the objective. Coordinated roles help, with some players dealing with cores, others watching Hydras and at least one person managing the next set of controls.
Step 1 Clear the Lower Atrium and Activate the Platforms
After boarding, follow the side walkways into the Lower Atrium. The initial elevator requires coordinated interaction, although mobility tools can bypass the lift for movement. Inside, look for yellow components attached to the walls. Shooting them reveals platforms and creates a route toward the upper sections.
The Lower Atrium also contains Power Cores connected to the ship's systems. Some are exposed through a mechanism requiring three Raiders to hold separate controls, while others can be reached through an alternative entrance near the lower section. Those additional cores matter because they are connected to the cargo release. Moving past them without destroying them can leave the final objective incomplete.
Do not confuse bypassing a lift with completing the reactor puzzle. A Grappling Hook may get your character onto a higher walkway, but the Power Cores still need to be destroyed for a full clear. If the necessary controls require multiple players, coordinate those interactions before the group moves to the next section.
Step 2 Destroy the Top Deck Power Cores
The Top Deck is one of the most dangerous parts of the operation. Community mapping identifies several groups of Power Cores across the exposed upper structure, including cores overlooking the atrium, units inside fire-filled rooms and additional cores positioned along the outer wings.
The outer wings are particularly dangerous because Hydras can cover large open sections with little protection. Wind hazards can also push players toward dangerous areas, while fire may remain active until the relevant cores are destroyed. Avoid sending every Raider onto the same exposed walkway before the group is ready to deal with the threats.
Work through the visible Power Core groups and use the ship's progression cues to check what remains. Community reports describe the side-wing cores as one of the most frequently missed parts of the full operation. If the group reaches a locked interior route, return to the upper sections and check for an unfinished core rather than assuming the gate is bugged.
Step 3 Reach the Cargo Hold and Open the Interior Doors
Once the required exterior Power Cores are disabled, continue toward the Cargo Hold. This is the transition between the ship's outer puzzle and the interior sections containing the remaining systems. The area has both exposed combat positions and more sheltered lower spaces, making it useful for regrouping before the final stages.
Look for the yellow components associated with the interior doors. Destroying the relevant targets opens the next passages into the ship. Do not mistake arriving at the Cargo Hold for completing the puzzle. The large cargo payload is visible here, but its release remains locked until the required systems have been disabled.
Hydras can remain active around the Cargo Hold and its entrances. Use the lower protected areas when recovering or reorganizing, then move toward the next objective with enough ammunition to deal with the remaining Power Cores.
Step 4 Clear the Interior Rooms and Turbine Power Cores
The Frigate interior has mirrored sections that connect toward a central turbine room. Each side contains additional Power Cores and yellow activation components. Destroying the cores opens further passages, eventually allowing players to reach the systems inside the turbine area.
The turbine room introduces another hazard. Noxious fog damages Raiders who remain exposed, while large fans can block movement between sections. Shooting the relevant yellow components changes the fan behavior and can remove fog from the corresponding area, creating a safer route toward the remaining cores.
Clear the required cores on both sides rather than assuming one completed room disables the whole system. If the final cargo release remains unavailable, check the interior progression indicators and confirm the other side has been cleared. The ship's current visual hatches and audio cues are useful for identifying which mechanisms still need attention.
How to Open the Frigate Cargo Gate and Drop the Payload
The Cargo Gate is the final major puzzle after the Power Cores have been destroyed. This is also the area most affected by outdated walkthroughs. Launch-week guides describe paired control panels and repeated synchronized interactions, while the current community documentation describes cargo latches and additional circular release mechanisms.
Embark explicitly states in the official Update 2.3.0 patch notes that the cargo gate was changed to a newer version. The same update added clearer hatch feedback and improved the progression indicators. For that reason, follow the interaction prompts on the current gate rather than assuming that an older video's exact button sequence still applies.
Step 5 Release the Cargo Latches
Return to the Cargo Hold after the remaining Power Cores have been destroyed. Current community mapping describes four latches keeping the cargo attached to the Frigate. These must be opened before the final release sequence becomes available.
Work around the cargo and locate each active latch. Confirm that the interaction completes and check the gate's visual state before moving to the next one. Opening the fastening mechanisms can trigger additional Hydra activity, so players should be ready to move into cover instead of remaining exposed while everyone watches the release animation.
The important objective is to remove all required cargo restraints. If the next mechanism remains inactive, check for an unfinished latch or surviving Power Core. Do not assume that interacting with the nearest panel once completes every part of the cargo sequence.
Step 6 Activate the Final Cargo Release
After the main latches are opened, current community documentation describes two additional circular cargo release mechanisms. Complete the interactions indicated by the live gate. Recorded full clears also show paired actions on opposite sides of the cargo, requiring cooperation between Raiders.
The exact number and presentation of interactions have changed across guides and patches. The safe procedure is to assign players to the visible release points, communicate when both sides are ready and continue until the cargo detaches. If a prompt requires simultaneous actions, one Raider cannot reliably complete that stage without another participant.
Do not spend time repeating an interaction that is already marked complete. Use the current status indicators to identify what remains. A full clear is finished only when the cargo actually releases from the Frigate, not merely when the last Power Core appears destroyed.
Step 7 Ride the Cargo Down and Loot It
Once the cargo detaches, players can ride it toward the ground. The payload is covered with containers containing valuable ARC technology and materials. The intended final sequence is to remain aboard during the descent, allow the cargo to reach its landing area and search the available containers once it is safe.
Embark improved this interaction in Update 2.2.0. That patch fixed cases where players were ejected during the fall, adjusted crushing behavior and limited thruster heat damage around the landing area. These changes make the descent more reliable than some launch-week footage suggests, but they do not remove the need to stay in a safe position.
Do not assume the cargo always lands in the same place. Its landing position depends on the map and encounter state, and Embark has adjusted Pendola Pass cargo drop points in previous updates. Check your surroundings after landing and remember that other Raiders may also be moving toward the payload.
Frigate Power Core and Cargo Puzzle Checklist
The most common reason for a failed full clear is missing a Power Core in an area the squad already visited. Because the Frigate contains several exterior and interior sections, it helps to separate progression into zones rather than guessing how many targets remain somewhere above or below the current walkway.
The latest community layout documents six Power Cores in the Lower Atrium, fourteen on the Top Deck and eight in the deeper interior. These counts come from the community map rather than a complete developer-published checklist, so treat the visible in-game progress as authoritative if the encounter changes in a later update.
| Section | Main objective | Commonly missed detail |
|---|---|---|
| Lower Atrium | Activate yellow targets and destroy the lower Power Cores | Extra cores near the alternative lower entrance |
| Top Deck | Destroy exposed and enclosed Power Cores | Side-wing cores near Hydras and environmental hazards |
| Cargo Hold | Open the routes leading into the interior | Remaining yellow components around the doors |
| Interior Rooms | Disable cores in the mirrored sections | The opposite room may still contain active systems |
| Turbine Room | Change fan and fog behavior and destroy the remaining cores | Uncleared cores beyond the turbine barriers |
| Cargo Gate | Release the cargo latches and final restraints | Incomplete latches or synchronized release interactions |
| Cargo Landing | Loot the payload and extract | Other Raiders arriving at the dropped cargo |
Keep checking the remaining objectives as the group progresses. The October 27 patch improved visual hatches and audio signals on Power Core vents specifically to make the current state easier to understand. If the cargo refuses to release, backtrack methodically instead of firing at random machinery.
What Do the Yellow Buttons and Targets Do?
Yellow components control several mechanisms around the Frigate. Some expose platforms, others unlock passages, and those inside the turbine room change the hazard state. They are progression targets rather than ordinary loot containers, so shooting them can make the next section accessible even when no item drops.
Do not assume every yellow target is connected to the same mechanism. Check what changed after destroying it, identify the next reachable platform or door and continue from there. If a section contains synchronized controls, use your teammates rather than trying to solve a multi-player interaction by repeatedly shooting unrelated targets.
How to Handle Hydras and Dangerous Power Core Rooms
Hydras are among the Frigate's most dangerous defenders. They can control exposed walkways and punish players who try to stand still while breaching a Power Core. Rocketeers and Vaporizers add further pressure, making it easy for a group to spend its ammunition on enemies while leaving the actual objectives unfinished.
Fight the machines that are preventing progress and use cover where possible. A Barricade Kit or Photoelectric Cloak can help a player reach a dangerous interaction, while a strong anti-ARC weapon can shorten the time spent exposing and destroying a core. Avoid turning every room into a prolonged battle unless the enemies are blocking the route the squad needs.
Is Full Cargo Loot Better Than Solo Container Farming?
The Frigate contains valuable materials throughout its hull, but the dropped cargo is the most concentrated reward area. It can provide Frigate Diagnostic Nodes, Amplification Modules and other technology used in advanced research. Those rewards are attractive, but reaching them requires far more work than searching the nearest accessible containers.
Update 2.3.0 improves the relative value of moving deeper into the ship. That means the real choice is not simply outer hull versus cargo. Skilled solo players can also reach some interior containers without finishing the final release, giving them a middle option between a short material run and a complete operation.
| Loot source | Potential rewards | Recommended use |
|---|---|---|
| Entry wing containers | ARC materials with a chance for an Inductor or modules | Quick solo searches |
| Upper Atrium containers | Additional ARC technology and module opportunities | Solo players comfortable with vertical routes |
| Deep interior containers | Better chance of higher-tier rewards after Update 2.3.0 | Experienced players prepared for tougher hazards |
| Released main cargo | Concentrated research materials, Diagnostic Nodes and Amplification Modules | Coordinated full clears |
No official per-container drop rates have been published for the Frigate Inductor or individual Amplification Modules. A successful cargo release therefore provides more valuable search opportunities, not a guaranteed item list. A fast solo extraction with one needed Inductor can be more useful than a full clear where most of the equipment is lost.
Are Frigate Diagnostic Nodes Worth Farming?
Frigate Diagnostic Nodes are Research items associated with the ship. The current item database lists each node as providing 1000 Research Points, making them attractive to players who are developing the new Research Station system.
Recorded solo cargo hold runs have produced several nodes without releasing the final payload, but those examples do not establish a fixed reward per raid. The number found depends on the containers reached and their individual loot rolls. If Research Points are your primary goal, compare the results of your own deeper solo runs with the time and equipment required to complete the full puzzle.
Where to Farm Amplification Modules on the Frigate
Amplification Modules can appear in Frigate containers, with deeper areas offering better opportunities for higher-tier loot after Update 2.3.0. The main dropped cargo is another important source. However, the module grade and specific result are not guaranteed by simply opening the cargo gate.
These materials connect to the weapon amplification progression introduced with Frozen Trail. Once you have enough resources for your current upgrade, securing an extraction is more important than continuing to search every possible container. Losing several unprotected modules while chasing one additional loot roll is a poor trade.
How to Escape the Frigate with Your Loot
Looting the ship is only half the run. If you entered for an Inductor or another rare component, you still need to leave safely with anything outside your Safe Pocket. The Frigate is not an extraction point by itself, and Raider Hatches are disabled while the condition is active.
The exit route depends on whether you completed the full puzzle. A solo container farmer will usually return toward the ship's boarding platforms, while a group that released the cargo must plan an extraction from the payload's landing location.
Solo Route Back to the Reclaimer
After looting the accessible sections, return toward the rear landing where the Reclaimers dock. If you moved down into a lower interior, use your mobility tool to regain the necessary height before crossing toward the exit. Avoid attempting an unfamiliar jump simply because you can see the outside of the ship.
Board a suitable Reclaimer when it arrives and remain aboard during the descent. Once on the ground, move away from the ship's exposed firing area and travel toward a standard extraction. There is no reason to keep searching once your main objective has been secured and the remaining route is becoming dangerous.
Extraction After Releasing the Main Cargo
When the cargo lands, search its containers efficiently and move toward an available extraction before the raid timer expires. Do not assume that the landing area is safe just because the main puzzle is complete. Other players may approach the cargo after seeing or hearing the event progress.
On Pendola Pass, extraction uses Ballistic Gondola Transceivers. The established options include Northern, Reckless, Supermarket and Glacial. Choose the one that makes sense from the actual landing position and current threats rather than assuming the payload always drops beside the same landmark.
On other maps, use the extraction methods available in that raid. Since Raider Hatches are unavailable during ARC Frigate, do not rely on a Hatch Key as your emergency escape plan.
Is It Worth Completing the Frigate in Solo Matchmaking?
For most players who need a single Frigate Inductor, finishing the full cargo puzzle is unnecessary. The faster and more controlled objective is to board, search enough suitable containers, protect the rare material and leave. Spending most of a raid attempting synchronized controls with strangers is a much larger commitment, especially when the group is not making progress.
A complete cargo run becomes more attractive when several players are actively destroying cores, communicating and preparing for the final release. Recent community reports describe successful full clears in solo matchmaking, but those successes involved cooperation from other Raiders aboard the ship. They should not be interpreted as proof that every solo lobby contains enough willing participants.
When to Commit to the Full Cargo Run
Watch what the other players do during the first part of the operation. If they are exposing Power Cores, opening routes, protecting teammates and responding to the required controls, continuing toward cargo may be worth the effort. A group that is actually solving the puzzle is more valuable than a crowded ship where everyone is only searching containers.
It is also reasonable to commit when you specifically need Research Points or advanced Amplification Modules and have enough resources to survive the full route. In that situation, coordinate the next section with the available players rather than wandering independently and hoping the final gate opens on its own.
When to Stop and Extract Instead
Leave when the current progress no longer justifies the equipment and time at risk. Warning signs include players abandoning the operation, missing cooperation for required controls, repeated deaths around the same Hydra position and too little time left to finish the remaining cores and reach an exit.
If you have already secured an Inductor or valuable modules, do not let the possibility of a bigger cargo payout turn a successful material run into an unnecessary loss. The Frigate condition will rotate back, giving you another opportunity to attempt the full puzzle with a better group.
Frigate Quests and Puzzle Completion Are Different Goals
Some Trader assignments involve boarding the Frigate, damaging particular ARC enemies or completing other objectives aboard the ship. Those objectives should be checked individually because not every Frigate quest requires the complete cargo release.
For example, community walkthroughs of the Boarding the Frigate assignment describe dealing damage to specific ARC defenders rather than requiring the entire ship to be disabled. Do not commit to every Power Core and cargo mechanism until you confirm what your active quest actually asks you to do.
Players pursuing several Trader assignments can review the ARC Raiders quest progression separately from material farming. Completing an active quest and extracting with an Inductor are different outcomes, even when both involve the same map condition.
Common ARC Raiders Frigate Puzzle Mistakes
The Frigate punishes players who confuse movement shortcuts with puzzle completion, forget to protect valuable loot or follow launch-week instructions after the cargo gate changed. Most failed attempts can be traced to a few avoidable decisions rather than an especially difficult individual container interaction.
Trying to Force a Full Clear Without Other Players
Solo matchmaking does not mean the entire full-clear puzzle is designed for one person. Several documented controls require simultaneous actions, and the final release has needed multiple players in recorded clears. If no one will cooperate, switch to accessible container farming instead of spending the raid trying to force a locked mechanism.
Skipping Power Cores After Using a Grappling Hook
A mobility tool can bypass a lift or help reach another walkway, but the ship's Power Core requirements remain. If the cargo sequence refuses to advance, check for unfinished objectives in the Lower Atrium, outer wings and interior. Reaching the cargo before the power system is disabled does not mean it is ready to release.
Following the Old Cargo Gate Sequence
Embark updated the cargo gate in version 2.3.0. Some older videos show different interaction orders or repeated panel actions. Use the current latch indicators and prompts, and coordinate the release mechanisms that require more than one Raider. The important outcome is seeing the payload detach.
Standing Too Close to Opening Hatches
Frigate hatches can inflict burning damage while opening. Breach the container, watch the hazard and reposition before looting when necessary. Taking avoidable damage from a container can leave you without enough healing to survive the return to the Reclaimer.
Farming Only the First Containers After Update 2.3.0
Outer containers remain accessible, but Embark increased higher-tier loot opportunities deeper inside. If you are comfortable navigating the ship, additional inner containers may provide better chances. If you are a beginner or already have the Inductor, an early extraction can still be the smarter choice.
Forgetting That Raider Hatches Are Disabled
The Frigate condition disables Raider Hatches. Plan your return before the timer becomes critical, especially after releasing the cargo. On Pendola Pass, use the available Gondola Transceivers rather than searching for an ordinary elevator or relying on a Hatch Key.
ARC Raiders Frigate Puzzle FAQ
These answers cover the remaining questions about solo farming, the cargo gate and the current Frigate rewards.
Can you get a Frigate Inductor without completing the puzzle? Yes. Frigate Inductors can appear in the ship's breachable containers, so a solo Raider can search accessible sections and leave without releasing the main cargo. The item is not guaranteed from any individual container.
How many players are needed to open the Frigate cargo? Documented full clears include three-player synchronized controls during the Power Core stages and cooperative interactions at cargo release. Solo matchmaking can work when other Raiders help, but a reliable independent one-player full clear is not established.
Does the Frigate always spawn on Pendola Pass? No. ARC Frigate is a rotating map condition that can appear on several maps. Check the official schedule or active Map Selection label to see where it is currently available.
What changed about the Frigate in Update 2.3.0? Embark updated the cargo gate, added clearer visual and audio progression cues, and increased the chance of higher-tier loot deeper inside the ship. Older route guides may not describe the current gate interactions accurately.
Conclusion
For a Frigate Inductor, start with the solo container route and leave when the material is secured. For the full cargo, prepare a coordinated run that clears the Power Cores, opens the interior, completes the current cargo gate interactions and extracts after the payload lands. The main decision is whether the additional loot justifies the time, ammunition and cooperation required. A clean solo extraction is better than a failed full clear, but an organized group can make the cargo worth the effort.