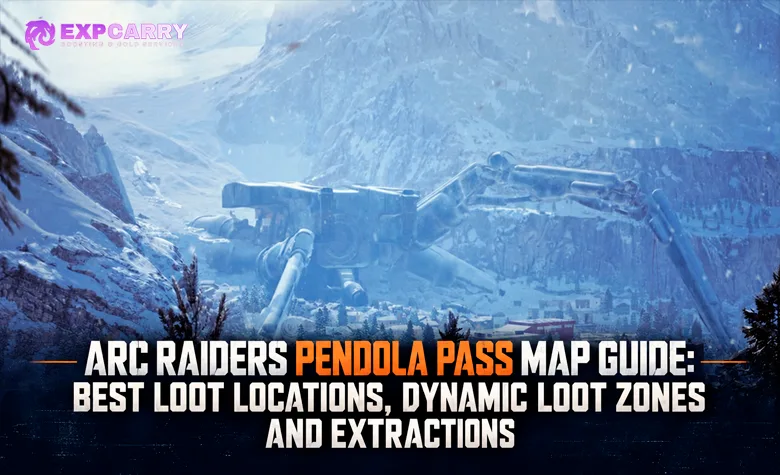
Pendola Pass is one of the most rewarding and dangerous maps in ARC Raiders, combining the ruined streets of an Italian mountain settlement with railway infrastructure, research facilities and the wreckage of a fallen Emperor. Introduced in the live Frozen Trail 2.0 update on October 8, 2026, the map features Dynamic Loot Zones that change the value of different areas between raids. Its extraction system is also unique: instead of ordinary elevators and Raider Hatches, you must summon a Ballistic Gondola. The best approach is to choose a loot category, plan a route around nearby cover and identify an extraction transceiver before your inventory fills up. This guide reflects the live changes through Update 2.3.0 on October 27, 2026.
Short answer: Old Town and Researcher Lodgings are strong choices for residential loot, Railyard and Loading Platforms for industrial materials, and Cielo Sereno Observatory for technological and Exodus loot. Check the current Dynamic Loot Zones before committing to a route, then extract through one of four Ballistic Gondola Transceivers: Northern, Reckless, Supermarket or Glacial.
Pendola Pass Map Overview and How to Unlock It
Pendola Pass takes Raiders beyond the familiar Rust Belt into a mountainous region built around an abandoned settlement, frozen transport routes and advanced Exodus infrastructure. The map became playable with the official Frozen Trail 2.0 update, which also introduced the Bully, Skulker and Hydra enemies. Unlike smaller locations where several profitable buildings sit within a short sprint, Pendola Pass regularly forces you to choose between competing objectives separated by exposed terrain.
Current community guides list 25 rounds played as the normal unlock requirement. This is a match-count milestone rather than a specific character-level requirement. If Pendola Pass is still locked, check its destination tile for your remaining progress; you can inspect the map beforehand to learn the important locations and extraction markers.
The map is organized around four broad regions: Northern Tracks, Almatera Village, Freight Terminal and Southern Pass. Each contains smaller named locations with different loot categories. Learning those categories is more useful than memorizing a single supposedly perfect route, because the game's Dynamic Loot Zones make the value of an area fluctuate between raids.
- Northern Tracks: Researcher Lodgings, Frozen River, Dispatch Tower, Deep-Space Telescope and Cielo Sereno Observatory. This region combines residential searches with technological objectives and exposed mountain approaches.
- Almatera Village: Old Town, Almatera Station, Piazza della Rupe, Porta Benvenuti and the Fallen Emperor. It offers household loot, commercial containers and the map's most dangerous special objective.
- Freight Terminal: Railyard, Railroad Junction, Loading Platforms, Commissary Supermarket and nearby utility structures. This is the main area to consider for industrial, mechanical, commercial and medical supplies.
- Southern Pass: Old Hamlet, Truck Stop and surrounding routes. These areas can provide useful secondary scavenging opportunities, especially when the central map is contested.
A good Pendola Pass raid starts before you move. Look at your spawn, inspect the current loot-zone information and identify which of the four extraction transceivers you could realistically reach. You should also note the nearest building or Emergency Shelter in case Flash Freeze weather interrupts your route. On this map, a detour that looks harmless on the tactical screen can become a costly crossing when the weather turns or another squad reaches high ground first.
Best Loot Locations on Pendola Pass
The most valuable Pendola Pass locations depend on what you need. A Raider looking for household trinkets should not chase the same containers as someone farming mechanical components or preparing to enter the Fallen Emperor. The table below groups important landmarks by their established loot categories and the practical trade-offs involved in visiting them. It does not assign permanent loot multipliers or guaranteed Blueprint drops, because those would be misleading under the current system.
| Location | Loot focus | Best reason to visit | Main risk |
|---|---|---|---|
| Old Town | Residential, Old World | Household items, trinkets and dense room-by-room scavenging | Close-range PvP, hidden players and narrow interior routes |
| Researcher Lodgings | Residential | Alternative residential farming away from the central village | Exposed approaches and nearby ARC activity |
| Railyard | Industrial, Mechanical | Mechanical components, industrial containers and equipment searches | Open railway lanes, elevated positions and ARC patrols |
| Loading Platforms | Exodus, Industrial | Exodus-related materials and industrial loot during a freight-area run | Exposed loading areas and limited cover between structures |
| Railroad Junction | Electrical, Mechanical | Electrical and mechanical materials on a shorter connecting route | Rail crossings and predictable movement lanes |
| Commissary Supermarket | Commercial, Medical | Consumables, medical supplies and a compact building search | Contested interiors, entrances and nearby extraction traffic |
| Almatera Station | Commercial | Commercial loot and the Train Station locked room | Traffic between Old Town and the Fallen Emperor |
| Cielo Sereno Observatory | Exodus, Technological | Technological loot, Exodus containers and an Observatory locked room | High-ground exposure, vertical access and competing squads |
| Deep-Space Telescope | Exodus | Additional Exodus-focused scavenging while operating in the northern region | Long approaches and exposed mountain terrain |
| Fallen Emperor | ARC, special objective loot | Advanced ARC technology and Amplification-related progression | Hydra encounters, restricted access and heavily contested extraction routes |
The important word is focus, not guarantee. These loot categories help you choose where to search, but they do not promise a particular weapon, Blueprint or material in every deployment. An efficient resource farming plan therefore needs a primary location, a nearby alternative and an extraction point that remains viable when the first area has already been looted.
Old Town and Researcher Lodgings: Residential Loot
Old Town is an excellent starting point when your goal is household materials, collectible trinkets or other Old World loot. Its compact buildings give you repeated chances to search cupboards, drawers and loose items without committing to a long industrial route. The same layout also creates danger: another Raider can hear you move between rooms, wait at a doorway or approach through a neighboring building while you are distracted by containers.
Search one group of houses thoroughly, then evaluate your inventory before moving deeper. If you obtain the rare item you came for, do not automatically clear the rest of the village. Researcher Lodgings offers another residential option for players operating farther north, although reaching it from the central settlement may require an exposed transition. Choose the closer area that fits your spawn and current loot-zone value rather than crossing the map merely because one location has a stronger reputation.
Railyard and Loading Platforms: Industrial and Mechanical Farming
Railyard is one of the map's major industrial landmarks. Its containers, lockers and mechanical loot opportunities make it worth exploring when you need components for crafting or Workshop progression. However, railway lines and open sections expose you to enemies approaching from several directions. A fight near the tracks can also announce your position to squads moving between the freight facilities and other objectives.
Loading Platforms and Railroad Junction are useful extensions when you still have inventory space and need Exodus, industrial, electrical or mechanical loot. The sensible route is to move through a compact sequence of nearby structures, not to sprint across every open platform. Stay aware of the Glacial Transceiver in the freight region, because it gives you a potential exit without requiring a trip back toward Almatera Village.
If you are collecting crafting Blueprints alongside materials, treat every promising container as an opportunity rather than a guaranteed source of a particular recipe. The category and current value of the area influence where you should search, but the actual item still depends on the loot roll. Extracting one valuable find is usually better than losing it while pursuing another uncertain drop.
Cielo Sereno Observatory and Deep-Space Telescope
Cielo Sereno Observatory is a strong destination for Raiders interested in technological and Exodus-related loot. The complex has multiple approaches and vertical spaces, which makes it attractive for careful searching but dangerous when another squad controls the higher ground. Before entering, identify how you will leave the main building and whether continuing toward the Deep-Space Telescope would place you too far from a practical extraction route.
The Observatory also has a locked room associated with the Pendola Pass Observatory Key. If you carry that key, the visit becomes more focused: reach the correct building, open the room, search it and decide whether the surrounding containers justify staying longer. Without a key, the area can still be worthwhile for its regular loot category, particularly when the current Dynamic Loot Zone indicators favor that part of the map.
Commissary Supermarket and Almatera Station
The Commissary Supermarket combines commercial and medical loot in a relatively concentrated location. This makes it useful for replenishing healing supplies or collecting everyday valuables without entering the Fallen Emperor. A compact interior can save travel time, but it also creates predictable doorways and routes that other Raiders can monitor. Search carefully, listen for nearby movement and remember that the Supermarket Transceiver may draw additional activity into the surrounding area.
Almatera Station is more attractive for commercial loot and a visit to its locked Train Station room. It fits naturally into a route beginning in Old Town, but it also lies near the more dangerous Emperor side of the map. Do not assume that every sound near the station comes from ordinary ARC patrols. Raiders preparing for the Fallen Emperor, looking for their own key room or moving toward the Reckless Transceiver may pass through the same area.
How Dynamic Loot Zones Work on Pendola Pass
Dynamic Loot Zones are the defining feature of Pendola Pass farming. Embark introduced the system as a test that changes the value of certain areas between raids. Crucially, it does not change the area's underlying loot category. A Residential location remains Residential, while an Industrial location remains Industrial; what varies is how rewarding that area may be in the current session.
This changes how you should read the map. A traditionally popular location is not automatically the best option every time, and a quieter location may offer better value when its loot zone is favorable. There is no official fixed multiplier that lets you calculate guaranteed profits for Old Town, Railyard or the Observatory. Treat visible zone-value information as a planning signal, then combine it with your objective, travel distance and extraction risk.
- Choose the item category first. Decide whether you need Residential, Medical, Mechanical, Exodus or another type of loot.
- Check the current map. Compare the relevant areas and their present loot-zone indicators rather than relying on a route from a previous raid.
- Consider distance and danger. A favorable zone across exposed terrain may be less efficient than a slightly less rewarding area close to your spawn.
- Set a fallback location. If the primary area is contested or already looted, move to a nearby location with a compatible loot category.
- Extract when the objective is complete. The theoretical value of another zone means little if reaching it risks the items you have already secured.
Dynamic Loot Zones are a map system, not the same thing as a scheduled world event. You can encounter changing loot value during ordinary Pendola Pass raids, while conditions such as Redirection and ARC Frigate appear according to the game's rotation. Confusing the two leads to poor planning: a valuable Residential zone does not suddenly become a guaranteed source of ARC technology just because the map highlights it.
Explore services related to this guide, selected from our ARC Raiders catalog.
View All ARC Raiders Services

Pendola Pass Map Conditions: Redirection, ARC Frigate and Night Raid
Beyond ordinary looting, Pendola Pass hosts rotating activities that can dramatically change where Raiders gather. These conditions create valuable objectives, but they also concentrate ARC enemies and competing players around recognizable locations. Before deploying for a specific event, check the official Pendola Pass map-condition schedule for the current server region instead of assuming a condition will be active in your next raid.
Redirection: Emperor Payloads and Special Resources
Redirection is particularly relevant for players preparing to enter the Fallen Emperor. The condition creates opportunities involving Emperor-related payloads and the components used to obtain the Emperor Gateway Conduit. It can be a worthwhile choice when your objective is advanced progression rather than ordinary trinket farming, but participating means moving toward an activity other Raiders may also be tracking.
Arrive prepared to defend yourself, inspect the objective area before committing and decide whether you can safely extract the parts you find. Do not assume that every Redirection payload will contain a specific Blueprint or completed Conduit. If your goal is simply to build up ordinary materials or Coins, a quieter route may be more productive than entering a contested event.
ARC Frigate: High-Value Technology and High Risk
The ARC Frigate creates a separate high-risk opportunity involving advanced ARC technology, interior objectives and dangerous enemies. It is not equivalent to searching an ordinary industrial building. Raiders must deal with the event's access, hazards and enemies while protecting their escape route, so this is best approached with a loadout suited to sustained combat and a squad that understands the objective.
The Frigate should be treated as a deliberate destination rather than a casual stop added to a residential farming run. If your backpack already contains rare household loot, entering a dangerous event can turn a successful raid into a complete loss. It is more sensible to attempt Frigate content when its rewards are the main reason for your deployment.
Night Raids and Flash Freeze Are Different Hazards
Night Raid changes visibility and makes navigation, sound and combat awareness more demanding. Flash Freeze is a separate weather threat associated with Pendola Pass itself, rather than merely another name for the scheduled Night Raid condition. The Redirection condition explicitly disables Flash Freeze for that raid. Otherwise, a freezing front can interrupt travel through open ground and force you into buildings or Emergency Shelters. Planning around these two hazards requires different decisions: darkness calls for better observation, while an incoming freeze makes reaching enclosed cover the immediate priority.
Do not expect the same safe approach during every weather or lighting situation. The route across Frozen River may look manageable in ordinary conditions but become an extremely poor choice when visibility collapses and shelter is distant. A longer path through structures can be preferable when it offers places to wait out the weather and break line of sight with enemies.
Fallen Emperor: Access Requirements and Loot Strategy
The Fallen Emperor is the map's signature high-risk location. The wrecked ARC giant attracts both dangerous machines and Raiders seeking advanced technology. Its interior is not a standard room you can enter by opening an ordinary Pendola Pass key door. Opening its entrance requires an Emperor Gateway Conduit, which can be crafted using materials obtained through Redirection or claimed once as a finished item at level 60 of the Frozen Trail Reward Pass.
Current community guides describe the Conduit as a crafted access item made using its learned blueprint and three specialized ARC Couplers: ARC Insulated Coupler, ARC Conductive Coupler and ARC Plated Coupler. These components come from Harvester Payloads called down using Emperor Beacons obtained from active Damaged Emperor Relays during Redirection. Since those drops are not guaranteed, prepare for repeated attempts rather than assuming one event will provide the entire access chain.
The important update is that the Emperor's loot distribution changed in Live Update 2.3.0. Embark's October 27 patch notes state that containers near the entrance now offer lower-tier rewards, while better loot has been moved deeper inside. The same update reduced the drop chance of the Emperor Key blueprint from Redirection pods, with a smaller chance of other ARC components and higher-tier loot added in compensation.
That makes the Emperor a poor choice for a casual, lightly equipped entrance-only loot run. If you spend a valuable Conduit and intend to leave after opening a few early containers, you may receive much less than expected. For meaningful progression, assemble a loadout that can survive deeper encounters and agree on an extraction plan before entering. The nearby Reckless Transceiver is convenient geographically, but its position under the Emperor makes it one of the more exposed exits.
Pendola Pass Keys and Locked Rooms
Pendola Pass contains conventional locked rooms in addition to the Fallen Emperor's special entrance. These smaller rooms can fit into an ordinary loot route when you already possess the matching key. They are not a reason to cross the entire map regardless of spawn, particularly because opening a room does not guarantee a specific rare drop under the current loot system.
- Pendola Pass Train Station Key: Used at the locked room in Almatera Station. The station's western entrance and reception area provide a practical approach.
- Pendola Pass Observatory Key: Used at Cielo Sereno Observatory. Community route descriptions point toward an interior locked room reached through the observatory complex.
- Pendola Pass Old Town Key: Used in the western residential portion of Old Town, associated with a basement entrance among the houses. Do not confuse Old Town with Old Hamlet, which is a separate location.
- Pendola Pass Railyard Key: Associated with a locked room at the Controlled Receiving Facility in the Railyard area. Current community walkthroughs describe an upper-level approach through the building.
Bring the exact key for the room you intend to open, and avoid relying on another Pendola Pass key as a substitute. Keep valuable keys protected when your inventory setup allows it, then assess whether the destination is still worth visiting after checking the current loot-zone value and enemy activity. The Emperor Gateway Conduit is a separate access item and does not replace any of these four conventional keys.
All Four Pendola Pass Extraction Points
Pendola Pass replaces the usual extraction elevators and Raider Hatches with the Ballistic Gondola. Four named transceivers allow you to call one, but the gondola does not simply appear as a ready-to-board elevator at the tower. You must activate an available transceiver, identify the nearby landing point and reach the gondola before departure. Check the active extraction markers for your current raid, since availability can vary with map conditions. Planning that final movement is just as important as planning the loot route itself.
| Extraction point | Nearby landmark | Best use | Main concern |
|---|---|---|---|
| Reckless Transceiver | Piazza della Rupe, close to Fallen Emperor | Leaving after an Almatera Village or Emperor-side run | Open exposure and traffic from the Emperor objective |
| Northern Transceiver | Frozen River, northern part of the map | Extracting after Observatory or northern-region exploration | Open ground and limited cover during approach |
| Supermarket Transceiver | Commissary Supermarket | Leaving after commercial, medical or central freight-area looting | Nearby building traffic and possible third-party ambushes |
| Glacial Transceiver | Freight Terminal, between Railyard and Loading Platforms | Extracting after industrial and Exodus-material farming | Exposed transitions across freight infrastructure |
These four named exits are documented in current community map data. Their locations are useful for route planning, but the safest choice changes with the current raid. A transceiver that is geographically closest may still be a poor option if another squad is holding it or the surrounding terrain leaves you exposed to ARC fire.
How to Extract Using the Ballistic Gondola
The gondola extraction is more involved than approaching an ordinary elevator. You should assume that the request itself creates danger, because it reveals activity in the area and can trigger an ARC response. The safest sequence is to approach from cover, check for enemy movement and prepare a route to the landing zone before activating the transceiver.
- Find a Gondola Transceiver. Use the extraction icons on the Pendola Pass map and travel to one of the four named locations.
- Inspect the surroundings. Look for nearby ARC, exposed sightlines and other Raiders before interacting with the tower.
- Request the Ballistic Gondola. Activate the transceiver using its interaction prompt.
- Locate the landing position. Watch for the incoming gondola map marker and the visual cues indicating where it is descending. The landing point is nearby, not necessarily directly beneath the transceiver.
- Reach the gondola and board. Approach one of its three pods, open it and enter. Make sure your squad reaches the boarding area before a departure countdown leaves someone behind.
- Complete the extraction. Remain secured inside the pod until the gondola launches and your return is registered.
Community walkthroughs place the usual landing zone roughly 100–150 meters from the call point, but treat that as a practical observation rather than a guaranteed fixed distance. The current incoming marker matters more than memorizing an exact number. If you are carrying rare loot, avoid calling the gondola while standing in the open without a plan for reaching its actual landing position.
Why Calling a Gondola Is Dangerous
The extraction sequence became more dangerous after Update 2.2.0. Embark explicitly confirmed in its official October 20 update notes that ARC now react when Gondola Transceivers are used. An exit that was relatively quiet before the interaction can therefore attract attention while you are waiting or crossing to the landing zone.
Use nearby walls, buildings and terrain to reduce exposure. Avoid firing at every distant machine unless it threatens your route, because prolonged combat can draw additional attention and delay boarding. If you are in a squad, communicate before anyone begins entering a pod. The gondola has three enclosed pods, and an early departure can leave a teammate stranded even when the initial extraction call was successful.
Some community demonstrations describe riding outside the gondola with traversal equipment, but this is a specialized and exposed maneuver rather than the recommended extraction method. For normal solo and squad play, boarding the intended pods is the safer plan. Do not build a valuable-loot run around a risky external ride when standard boarding is available.
Best Pendola Pass Loot Routes for Solo Players and Squads
Pendola Pass rewards short, purposeful loops more consistently than blind map-wide sweeps. Your best route should match the loot category, your spawn, the current Dynamic Loot Zones and a reasonable gondola exit. The following examples are route patterns rather than rigid paths: reverse them when your spawn is closer to the endpoint, and switch to a fallback area if fighting or weather makes the original plan unsafe.
Solo Route: Old Town to Almatera Station
For a solo Raider seeking trinkets and ordinary supplies, begin by checking Old Town's residential buildings. Search one compact block thoroughly, then move toward Almatera Station only if your inventory still has room and the station's commercial loot is useful. Avoid the Fallen Emperor unless you entered with the equipment and access item needed for that objective. This route keeps the focus on manageable buildings and prevents an unnecessary detour into the map's most dangerous combat area.
Plan the extraction around the situation rather than automatically choosing the nearest tower. The Reckless Transceiver is convenient from this part of the map, but it sits close to the Emperor and can be heavily exposed. If there is obvious fighting there, consider a different available transceiver and weigh the extra travel against the risk of forcing a contested extraction.
Industrial Route: Railyard and Loading Platforms
Players farming industrial, mechanical or Exodus materials can use Railyard as their main search area and Loading Platforms as an extension. The two locations cover different but complementary loot categories, making them useful together when you need a mixture of crafting resources. Check Railroad Junction along the route only when its electrical or mechanical containers serve your current objective.
The Glacial Transceiver is the natural extraction candidate for this loop, although its approach may expose you across freight infrastructure. If you have already secured valuable components, do not extend the run toward the Observatory without a specific reason. Moving farther from your planned exit adds another dangerous crossing and can turn a productive materials run into a lengthy survival exercise.
Technology Route: Observatory and Deep-Space Telescope
Use Cielo Sereno Observatory as the primary objective when you want technological or Exodus-related loot. Enter the complex from an approach that offers cover, clear the relevant containers and decide whether to extend toward the Deep-Space Telescope. The latter can provide additional Exodus-category opportunities, but reaching it means spending more time on exposed northern terrain.
The Northern Transceiver is a logical extraction option for this region. Watch the weather before committing to its open approach. If a Flash Freeze front is developing, remaining inside a suitable building until conditions improve can be safer than attempting the full crossing with a valuable Blueprint in your backpack.
High-Risk Route: Redirection, Fallen Emperor and Extraction
This route is for Raiders who entered Pendola Pass specifically for advanced ARC progression. First, participate in the appropriate Redirection activity to pursue Emperor-related parts when the condition is active. On a later prepared run, bring the Emperor Gateway Conduit, enter the Fallen Emperor and push deeper only while your equipment, healing and team coordination remain sufficient. The current loot distribution rewards meaningful interior progress rather than repeatedly searching the entrance.
The Reckless Transceiver may be the closest convenient exit after the Emperor, but its proximity makes it an obvious destination for other players leaving the same objective. Do not assume that proximity equals safety. If the extraction area is being watched or overwhelmed, preserve your route flexibility and consider another transceiver before you commit to the call.
Dangerous Areas, ARC Enemies and Weather Hazards
Pendola Pass combines environmental pressure with powerful ARC and the usual threat of other Raiders. The biggest mistake is treating each danger separately. A Bully encounter can drain your healing, force you into open ground and leave you unable to survive the next Flash Freeze. Likewise, a prolonged PvP fight near a gondola may become much harder once ARC react to the extraction request.
Bully, Skulker and Hydra Threats
The Bully is an aggressive ground machine that punishes players who allow it to close the distance. Fight near cover and avoid giving it a straight approach across an open lane. The Skulker is more deceptive: its movements and ambush behavior make it dangerous when you are focused on another target or searching containers without listening for threats. The Hydra is a much more serious encounter associated with high-value ARC objectives such as the Fallen Emperor and Frigate.
Do not bring a lightweight scavenging setup into a Hydra encounter simply because the nearby containers look valuable. Save heavy combat for a dedicated run with appropriate ammunition and supplies. When your objective is residential or mechanical loot, avoiding an unnecessary fight is often the better strategy. The map offers plenty of profitable scavenging without requiring you to challenge every machine you see.
How to Survive Flash Freeze on Pendola Pass
Flash Freeze is a moving weather hazard that can rapidly reduce visibility and punish Raiders caught outdoors. When the warning appears, the immediate goal is to reach an enclosed building or Emergency Shelter, not to finish searching another container. A short delay can leave you crossing open terrain when visibility disappears and environmental damage begins to matter.
- Identify shelter before leaving cover. Every long crossing should have a known building, tunnel or Emergency Shelter nearby.
- React to the warning. Stop optional looting and move toward enclosed space before the freezing front reaches you.
- Avoid exposed shortcuts. Frozen River, broad platforms and steep paths can become dangerous when the weather changes during a crossing.
- Wait for conditions to improve. Use the downtime to heal, reload and review your extraction plan instead of forcing movement through the whiteout.
- Leave shelter carefully. Other Raiders may also have waited inside nearby structures, so do not assume the area is empty when the weather clears.
Some Pendola Pass doors can also be obstructed by ice. The Raider Tool can break through frozen barriers, while Flame Spray provides an alternative method of clearing them. Carrying suitable utility can save time when a door blocks the most direct route to shelter. However, no tool replaces the need to recognize an incoming Flash Freeze early and avoid being stranded on an exposed slope.
Best Loadout and Supplies for Pendola Pass
There is no single weapon that makes every Pendola Pass route optimal. A solo residential run emphasizes mobility, efficient looting and the ability to disengage from close-range threats. A Railyard expedition benefits from enough ammunition to handle nearby ARC, while a Fallen Emperor or Frigate attempt calls for a much more combat-focused setup. The best preparation is to decide which of those activities you are actually undertaking before filling your inventory.
- Reliable primary weapon: Choose a weapon you can use consistently at the distances expected on your route. Do not sacrifice all mobility for firepower during a simple trinket run.
- Healing and shield supplies: Carry enough to recover from an unexpected fight and still reach extraction. The map's travel distances can make one poorly timed encounter especially costly.
- Movement utility: A Zipline or suitable traversal tool can help with vertical routes, although you should not assume every cliff or rooftop has a safe traversal point.
- Door-clearing utility: Flame Spray can be useful when frozen doors block access to buildings, but it is optional for routes that do not depend on those entrances.
- Protected inventory space: Reserve appropriate Safe Pocket space for keys or valuable finds when your loadout supports it.
- Extraction supplies: Keep healing, utility and ammunition available for the gondola call rather than spending everything clearing the last loot area.
For longer farming sessions, your Coin budget matters because repeated equipment replacement can consume the value of a successful loot run. A profitable route is not merely one where you find expensive items; it is one where the loot you extract consistently outweighs the supplies you risk. If you are learning Pendola Pass, inexpensive, reliable gear is often a sensible starting point.
How to Combine Pendola Pass Loot Runs With Quests
Several Pendola Pass quests direct Raiders toward named landmarks such as Almatera Station, Cielo Sereno Observatory, Railyard and Commissary Supermarket. These assignments can make an otherwise ordinary loot run more valuable, but they should not be confused with a general farming objective. Some quests require an interaction or visit, while others depend on collecting items, fighting ARC or meeting a specific completion condition.
Before deploying, open the current objective and locate its destination on the map. If the quest takes you to Cielo Sereno Observatory, you can search nearby technological containers after completing the necessary interaction. If it requires the Railyard, consider gathering industrial materials during the same visit. This is more efficient than completing the quest, extracting and then returning to the identical location for unrelated loot.
Keep the required quest objectives separate from optional scavenging. Once the assignment has registered, do not risk losing important collected items just to open another container. Earlier Frozen Trail issues affected some Pendola Pass objective tracking, and subsequent updates fixed specific cases, so always confirm progress in your current quest interface rather than assuming that reaching a named area was sufficient.
Common Pendola Pass Mistakes That Ruin Profitable Runs
Most failed Pendola Pass farming attempts come from poor route decisions rather than a lack of loot. A Raider can find valuable materials within minutes and still lose everything by crossing the entire map toward an unnecessary objective or calling a gondola without checking the landing approach. Avoiding the following mistakes is often more useful than memorizing additional container locations.
- Assuming one location always has the best loot: Dynamic Loot Zones change area value between raids. Check the current map and keep alternative locations in mind.
- Ignoring loot categories: Higher value does not turn Residential containers into guaranteed Mechanical or Exodus drops. Farm the category that matches your objective.
- Crossing the map for one extra container: Long exposed travel can cost more than the potential reward, especially when your inventory is already valuable.
- Entering the Emperor without preparation: The special access item, dangerous enemies and deeper loot distribution make it a deliberate objective rather than an ordinary scavenging stop.
- Confusing transceivers with landing points: Calling the gondola is only the first step. You still need to reach its actual landing position and board.
- Forgetting the ARC extraction response: Interacting with a Gondola Transceiver can attract enemies. Prepare cover and resources before requesting extraction.
- Ignoring Flash Freeze warnings: A valuable container is not worth being trapped on exposed terrain when the freezing front arrives.
- Using the wrong key: Train Station, Observatory, Old Town and Railyard keys open different rooms. The Emperor requires its own Conduit.
- Spending every supply before extraction: Keep ammunition, healing and movement options available for the final approach, where threats can arrive quickly.
ARC Raiders Pendola Pass FAQ
These answers cover the most common questions about unlocking the map, finding valuable loot and returning safely through its unusual extraction system.
How do you unlock Pendola Pass in ARC Raiders? Current community map guides list a requirement of 25 rounds played. Check the locked destination tile to see your own progress. Pendola Pass is a permanent map introduced with Frozen Trail 2.0, not a limited-time event area.
What is the best loot location on Pendola Pass? There is no permanent best location for every raid. Old Town is a strong choice for Residential and Old World loot, Railyard for Industrial and Mechanical materials, and Cielo Sereno Observatory for Technological and Exodus loot. Dynamic Loot Zones can change the current value of these areas, so inspect the map before committing.
Does Pendola Pass have Raider Hatches or normal elevators? No. Pendola Pass uses four Ballistic Gondola Transceivers instead of the usual extraction system. Activate an available transceiver, locate the incoming gondola, reach its landing point and board a pod.
Where is the safest Pendola Pass extraction point? No transceiver is guaranteed to be safe. Supermarket and Glacial can fit compact central or industrial routes, Northern is useful for northern exploration, and Reckless is near the Fallen Emperor but particularly exposed. Choose according to nearby enemies, current fighting, weather and your location rather than relying on a universal ranking.
Does Dynamic Loot change which items can appear in an area? Embark describes the system as changing an area's loot value while preserving its underlying category. A Residential zone remains Residential, and an Industrial zone remains Industrial. The system affects where it may be profitable to search, not the fundamental identity of each location.
Final Pendola Pass Map Recommendations
The most consistent Pendola Pass strategy is to match your route to the loot you need, check Dynamic Loot Zones at the start of each raid and choose an extraction point before your backpack fills. Old Town is practical for residential scavenging, the Railyard and Loading Platforms serve industrial farming, and Cielo Sereno Observatory rewards players willing to tackle a more exposed technological route. Save the Fallen Emperor and Frigate for dedicated high-risk expeditions. Above all, respect Flash Freeze warnings and the ARC response to gondola calls: on Pendola Pass, knowing when and how to leave is just as important as knowing where to loot.