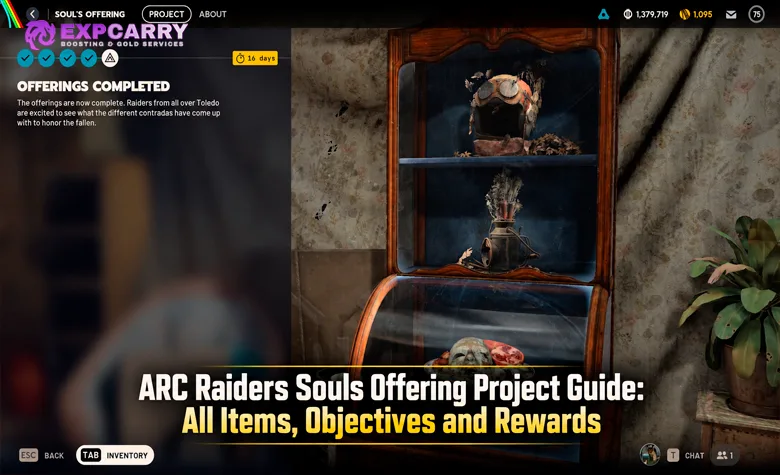
The ARC Raiders Souls Offering Project is a limited-time activity introduced with Live Update 2.3.0 on October 27, 2026. To complete it, you must gather 58 items across three collection stages and finish a fourth objective by setting off fireworks on the rooftop of the Santa Maria Houses in Buried City. The project rewards weapons, valuable attachments, the Pilgrim Backpack cosmetic and an Offering Display Table Design. Unlike a normal scavenging run, success depends on keeping seemingly ordinary household items instead of selling or recycling them. This guide covers every required item, practical farming locations, the fastest order of progression and the final rooftop objective. The event is live, but its exact closing time should be checked in your in-game Projects screen.
Short answer: Complete Vaulto's, Ferrovia's and Murteta's offerings by donating 58 items from 11 categories. Claim the three Fireworks Boxes from Stage 3, bring one to the Santa Maria Houses rooftop in Buried City, deploy it and trigger the fireworks to finish the project and unlock the final rewards.
What Is the Souls Offering Project in ARC Raiders?
Souls Offering, also written as Soul's Offering in the project interface and community databases, is a temporary Player Project organized around Celeste's effort to honor fallen Raiders. Instead of building one large structure, you assemble offerings for three neighboring communities of Toledo: Vaulto, Ferrovia and Murteta. Each stage consumes a different set of materials and grants its own rewards, while the final stage sends you topside to complete the tribute.
Embark officially introduced the project in its October 27 Live Update 2.3.0 notes. It is an active game feature, not a datamined event or an unreleased seasonal preview. The developer also explained the three communities in its official Contradas of Toledo article: Vaulto specializes in secrecy and signal disruption, Ferrovia is associated with engineers and infrastructure, and Murteta emphasizes order and hierarchy. These differences explain the three distinct offerings, but they do not change the materials you must submit.
Open the Projects section in Speranza and select Soul's Offering to see your current stage and donation progress. You can collect materials through ordinary raids, store them in your stash and turn them in as they become available. There is no reason to carry all 58 items into a single raid, and the final rooftop objective is separate from the first three donation stages.
Community project records list the event as running from October 27 to November 16, 2026. Some earlier guides display November 15 instead, and Embark's original patch notes do not specify an exact closing hour. Use the countdown in your own Projects interface as the final authority. If you are close to finishing, aim to complete the rooftop objective before November 15 rather than gambling on the final hours.
All Four Souls Offering Stages, Objectives and Rewards
The project follows a fixed sequence: three material submissions and one field objective. You can prepare later-stage materials in advance, but completing the current stage is what moves the project forward. The first three stages account for all 58 required items; Stage 4 requires an action rather than another material donation.
| Stage | Required items or objective | Completion rewards |
|---|---|---|
| 1. Construct Vaulto's Offering | 1 Dead Flowers, 2 Rock Salt, 15 ARC Alloy, 1 Expired Respirator | Stiletto II, Extended Barrel I, Angled Grip II, Stable Stock II |
| 2. Construct Ferrovia's Offering | 3 Dead Flowers, 2 Railway Lantern, 15 Advanced ARC Powercell, 10 Remote Raider Flare | Torrente II, Compensator III, Extended Medium Mag III, Stable Stock III |
| 3. Construct Murteta's Offering | 2 Fancy Plate, 1 Mask Fragment, 1 Insulation Roll, 5 Fertilizer | Vulcano I, Shotgun Silencer, Extended Shotgun Mag III, 3 Fireworks Box |
| 4. Honor the Fallen | Set off fireworks on the rooftop of the Santa Maria Houses in Buried City | Pilgrim Backpack cosmetic, Offering Display Table Design |
The quantities and stage rewards are documented in the current ARC Raiders community wiki and independently matched by the ARC Tracker project checklist. Embark confirms the event itself, while those community-maintained records provide the detailed material list. The distinction matters because the developer's patch announcement does not include every donation requirement.
Complete Souls Offering Materials Checklist: All 58 Items
Before heading topside, inspect your stash. A player who regularly sells decorative household loot can already possess most of the ARC components but none of the rare trinkets. Others may have the opposite problem: enough Dead Flowers and Fancy Plates, but not the Advanced ARC Powercells needed for Ferrovia. Use the totals below to decide what deserves a dedicated raid.
| Item | Total | Stage | Recommended source or search area |
|---|---|---|---|
| ARC Alloy | 15 | 1 | ARC wreckage, defeated machines and relevant ARC component recycling |
| Advanced ARC Powercell | 15 | 2 | Higher-value ARC encounters and machine loot; do not confuse with ordinary Powercells |
| Remote Raider Flare | 10 | 2 | Shani's stock, crafting with the blueprint or scavenging |
| Fertilizer | 5 | 3 | Greenhouses and agricultural loot, including Dam Battlegrounds and Blue Gate |
| Dead Flowers | 4 | 1 and 2 | Residential trinket loot in Old Town on Pendola Pass, Buried City apartments and homesteads |
| Rock Salt | 2 | 1 | Household and kitchen loot in residential buildings |
| Railway Lantern | 2 | 2 | Railway-related containers around Almatera Station on Pendola Pass |
| Fancy Plate | 2 | 3 | Residential trinket loot, including cupboards, tables and loose household items |
| Expired Respirator | 1 | 1 | Medical loot areas such as Buried City Hospital and Stella Montis medical facilities |
| Mask Fragment | 1 | 3 | Rare Old World trinket loot; search residential buildings and exposed surfaces |
| Insulation Roll | 1 | 3 | Scavenging, including industrial and utility areas, or crafting at Refiner 1 |
These locations are farming leads, not guaranteed spawn points. Trinkets depend on container and loose-loot rolls, while enemy components depend on the machines encountered and what they drop. The best route changes according to your remaining checklist. A Raider missing one Mask Fragment should not repeat an entire ARC combat route just because that route was efficient earlier in the project.
Explore services related to this guide, selected from our ARC Raiders catalog.
View All ARC Raiders Services

Stage 1: Construct Vaulto's Offering
Vaulto's Offering is a straightforward opening stage if you already loot destroyed ARC machines. The 15 ARC Alloy can come naturally from combat and scavenging, but the Dead Flowers, Rock Salt and Expired Respirator are easy to overlook. The efficient approach is to complete the household and medical portions first, then obtain any missing Alloy during normal raids rather than forcing an unnecessary high-risk fight.
Where to Get Dead Flowers and Rock Salt
For Dead Flowers, begin with residential interiors in Old Town on Pendola Pass or the apartments of Buried City. Search cupboards, drawers, shelves and loose items rather than running through buildings looking only for weapon cases. Dead Flowers are a collectible trinket, not a resource gathered by interacting with outdoor plants. Rock Salt follows a similar residential search pattern, with kitchens and household containers being sensible priorities.
Do not stop collecting Dead Flowers after obtaining the single unit needed for Vaulto. Ferrovia requires another three, so your project-wide target is four Dead Flowers. The same habit applies to other unusual trinkets and miscellaneous items: inspect their names before selling or recycling them, because a seemingly low-priority object may be the only thing blocking a later project stage.
Best Way to Find an Expired Respirator
Medical loot is your strongest lead for the Expired Respirator. Buried City Hospital and medical sections of Stella Montis are reasonable destinations, while smaller medical facilities can provide alternatives when those areas are contested. Bring a loadout you are comfortable extracting with, clear reachable containers efficiently and leave when the item is secured. Losing the respirator while chasing optional combat loot is worse than making a second raid for the remaining ARC Alloy.
After donating the four item categories, Vaulto awards the Stiletto II and three weapon attachments. Claim the rewards, check that Ferrovia's Offering has become active and keep collecting relevant items even if the next stage's material requirements are not yet complete.
Stage 2: Construct Ferrovia's Offering
Ferrovia shifts the project from mostly household scavenging toward a combination of rare loot and machine components. Its requirements are the largest of the four stages: three additional Dead Flowers, two Railway Lanterns, 15 Advanced ARC Powercells and 10 Remote Raider Flares. This is where players who rely on a single farming route often waste time, because no one loot category efficiently supplies all four requirements.
Where to Find Railway Lanterns
Head toward railway infrastructure on Pendola Pass, with Almatera Station as a practical first stop. Examine storage containers, lockers and nearby surfaces rather than assuming a Railway Lantern will appear at a fixed coordinate. If you have not finished your Dead Flowers collection, combine this trip with a search of Old Town housing before moving toward the station. You can work on two difficult item types in the same raid without committing to a long cross-map detour.
The Railway Lantern is not interchangeable with an ordinary light source or utility device. Keep checking the exact inventory name before extracting. If your route produces one lantern but the surrounding area is already looted or crowded, preserve the find and leave instead of gambling it on a second station search.
How to Farm 15 Advanced ARC Powercells
Advanced ARC Powercells must be treated as a separate requirement from standard ARC Powercells. Prioritize encounters with machines that provide higher-value ARC components, including heavier enemies when your weapon setup and ammunition supply can handle them. Inspect the loot after each kill and count only the exact item named in the project. Beating a dangerous machine is not progress if it drops the wrong component or your squad cannot extract.
For a solo Raider, repeated manageable encounters can be more productive than one expensive fight that burns through ammunition and healing. A coordinated group can handle tougher ARC more safely, but should still decide when to bank the collected components. Organize materials farming around the remaining Powercell count rather than treating every available fight as mandatory.
How to Obtain 10 Remote Raider Flares
Remote Raider Flares offer a useful alternative to random scavenging. The current community item database lists them at Shani for 810 Coins each, making the full set of ten worth 8,100 Coins if the offer is available at that price in your live trader inventory. You can also craft them at Utility Station 1 after learning the appropriate blueprint. Each crafted flare requires 2 Chemicals and 4 Rubber Parts, so producing all ten would consume 20 Chemicals and 40 Rubber Parts.
Check Shani's actual stock before planning your purchases, because trader offers can change. Embark's official trader overview introduces Shani's role, but the exact flare price and crafting recipe above come from current community item records rather than that developer article. These are donation items, so keep them in your stash until you submit them. Most importantly, Remote Raider Flares are not Fireworks Boxes and will not substitute for the device needed in Stage 4.
Completing Ferrovia awards a Torrente II and three higher-tier weapon attachments. The bigger advantage is reaching Murteta's Offering, where the number of required items drops sharply but several of them can be difficult to locate.
Stage 3: Construct Murteta's Offering
Murteta requires only nine items in total, but this is not necessarily the easiest stage. Two Fancy Plates, one Mask Fragment, one Insulation Roll and five Fertilizer can take longer to obtain than a much larger pile of common machine components. The safest strategy is to divide the hunt into residential, agricultural and craftable materials, then make a dedicated extraction once you find the rarest trinket.
Where to Farm Fancy Plates and Mask Fragments
Start in residential buildings with dense household loot. Old Town on Pendola Pass and the apartment areas of Buried City are useful search candidates for Fancy Plates and other Old World valuables. Check shelves, tables, kitchen cabinets and exposed surfaces. Some reported Mask Fragment finds come from similar residential locations, but there is no verified guaranteed spawn that makes one specific house a certain source.
Do not spend the whole raid looking only at the floor or only inside cabinets. A methodical room-by-room search gives you more chances to notice different loot placements, and it keeps you from repeatedly checking the same spaces. If you find a Mask Fragment, protect that extraction immediately. The project needs only one, and losing it to an unnecessary fight can cost more time than the rest of Murteta's materials combined.
Best Fertilizer Farming Locations
For the five Fertilizer, target agricultural environments rather than city apartments. The Hydroponic Dome Complex on Dam Battlegrounds is a useful search area, with greenhouse and agricultural locations on Blue Gate as alternatives. Inspect containers associated with growing, gardening and food production, and pick up Fertilizer whenever you encounter it during unrelated raids.
Fertilizer is often an inventory-management problem more than a combat challenge. It can be tempting to drop ordinary-looking supplies when a valuable weapon or attachment appears, but doing so may force another farming run. Track your remaining project count before replacing a required material with loot you could obtain again later.
How to Get an Insulation Roll Without Depending on Loot
An Insulation Roll can be scavenged, including from utility and industrial areas, but crafting provides a more controlled option. Current item data lists a recipe at Refiner 1 requiring 14 Fabric for one Insulation Roll. If your stash already contains enough Fabric and the station is available, craft the roll instead of committing to another uncertain scavenging route.
This is a good moment to inspect your broader crafting components before recycling items. Keep the required Fabric separate from materials reserved for ammunition, repairs and other equipment upgrades. Crafting one Insulation Roll solves exactly one project requirement; there is no reason to produce extras for Murteta unless you have another use for them.
Finishing Murteta grants the Vulcano I, Shotgun Silencer, Extended Shotgun Mag III and, critically, three Fireworks Boxes. These boxes are the key to completing the final stage. Put at least one aside immediately, because it is the easiest way to avoid an unnecessary purchase or crafting session before the Santa Maria Houses objective.
Stage 4: Honor the Fallen at Santa Maria Houses
The final Souls Offering objective takes place on the rooftop of the Santa Maria Houses in Buried City. You are no longer collecting trinkets for a donation. Instead, you must bring a Fireworks Box into a raid, reach the correct rooftop and activate the fireworks as a tribute to the fallen. The important distinction is that the requirement concerns both the location and the device's activation.
- Claim Stage 3 rewards. Confirm that Murteta's Offering is complete and that your inventory or stash contains at least one of the three awarded Fireworks Boxes.
- Prepare a Buried City run. Equip the Fireworks Box and a practical survival loadout. Keep room for healing and mobility rather than filling your inventory with optional loot before reaching the objective.
- Travel to Santa Maria Houses. Locate the named housing complex on the Buried City map and approach the rooftop. Use an accessible route through or around the buildings, watching for other Raiders while climbing.
- Place the Fireworks Box on the roof. Do not assume that activating one at street level or in another nearby building will meet the location requirement.
- Trigger the fireworks. The Fireworks Box is a remotely activated utility item. Placement alone is not the same as setting it off, so complete the activation and check that the project objective updates.
- Verify completion. Confirm that Honor the Fallen is marked complete and that the final rewards have been unlocked before treating the project as finished.
There is a small but important disagreement between published walkthroughs: some mention an additional requirement to deal 300 damage to ARC near Santa Maria Houses, while the current ARC Raiders Wiki and ARC Tracker list only the rooftop firework activation. Do not treat that combat step as universally required. Open your live Projects objective and follow any extra instruction shown there; if your screen lists only the firework, there is no basis to add an invented damage requirement.
What If You Lose All Three Fireworks Boxes?
You are not necessarily locked out if you die with your boxes or accidentally use them elsewhere. The current community item listing shows Fireworks Boxes sold by Shani for 6,000 Coins each, subject to a limit of three per day. With the learned blueprint, you can also craft one at Explosives Station 2 using 1 Explosive Compound and 3 Pop Triggers. Verify the live vendor offer and your crafting access before relying on either replacement route.
Set aside enough Coin reserves if you have already consumed the Stage 3 rewards, but remember that keeping one of the original three boxes costs nothing extra. A Remote Raider Flare or ordinary visual signal is not a replacement. The objective specifically calls for fireworks, and the Fireworks Box is the item designed for that action.
Best Souls Offering Farming Routes and Completion Order
The fastest route is determined by your missing materials, not by the number of locations you can visit in one raid. You will generally save time by combining items that share a loot category, leaving when you secure a rare find and handling ARC combat separately from delicate household scavenging. The routes below are practical priorities, not promises of fixed loot spawns.
Route 1: Pendola Pass Residential Loot and Railway Areas
Begin with Old Town residential interiors, searching for Dead Flowers, Rock Salt, Fancy Plates and other valuable household items. If you still need Railway Lanterns, continue toward Almatera Station and inspect railway-related containers. Check industrial and utility loot along the way if an Insulation Roll is still missing. This route is particularly useful when you have not yet completed Vaulto or Ferrovia and want progress on several future items in one trip.
Be flexible about the order of buildings. Embark's Frozen Trail 2.0 patch notes explain that Pendola Pass uses a Dynamic Loot Zone system, so the value of a residential area can change between raids even though its general loot type remains residential. A route that produced several rare trinkets once is not guaranteed to repeat that result. If your first cluster has poor loot, move to another relevant area instead of forcing the exact same container sequence.
Route 2: Agricultural and Medical Loot
Once your household checklist is mostly complete, focus on the materials that do not fit the Pendola Pass residential loop. For Fertilizer, search the Hydroponic Dome Complex on Dam Battlegrounds or agricultural areas on Blue Gate. For the Expired Respirator, use a separate medical-focused run through Buried City Hospital or another appropriate medical area. These objectives reward targeted scavenging, not extended fighting.
Avoid carrying a rare Mask Fragment or Fancy Plate into a dangerous detour just to collect one more common item. Extract the hard-to-replace loot first. You can always obtain another piece of ARC Alloy or additional Fertilizer later, while recovering a rare trinket may depend on several more successful loot rolls.
Route 3: ARC Components, Then the Buried City Finale
When only ARC Alloy and Advanced ARC Powercells remain, switch to a combat-focused setup. Bring weapons and enough ammunition for the machines you intend to fight, prioritize survivable encounters and inspect every relevant component drop. Do not confuse the two required resources. Keep a running count so you can extract as soon as your total reaches 15 of each.
Once Murteta is complete, make the Santa Maria Houses rooftop your primary destination on a Buried City raid. This is a short objective, not a reason to clear every nearby building. Bring the Fireworks Box, reach the roof, activate it and verify completion. A clean objective-focused run is usually safer than treating the finale as another full scavenging expedition.
All Souls Offering Rewards and Whether the Project Is Worth Completing
Souls Offering rewards progression as you move through the stages, so even partial completion provides usable equipment. Vaulto supplies a Stiletto II and attachments, Ferrovia adds a Torrente II with stronger weapon modifications, and Murteta provides a Vulcano I and shotgun attachments. These items can be useful during ordinary raids, although their value depends on your current loadouts and the gear you already own.
The main reason to finish all four stages is the final cosmetic reward: the Pilgrim Backpack. Unlike the weapons obtained earlier, it is the project's distinctive completion reward. You also receive the Offering Display Table Design for the Outpost. The design is an unlock, not a finished table that automatically appears in your furnishings.
If you want to craft the Offering Display Table after unlocking its design, current community crafting references list a separate cost of 3 Dead Flowers and 30 Sheet Metal. Those materials are not included in the 58-item project requirement. In practical terms, collect seven Dead Flowers instead of four if you want to finish the project and have enough flowers reserved for the table recipe. Confirm the recipe in your own Outpost interface before spending the extra materials.
For a Raider who wants the Pilgrim Backpack or Outpost design, completing the project is worthwhile because the final reward is tied to a temporary activity. For someone interested only in weapons, the earlier stages already provide equipment without requiring the rooftop finale. However, stopping after Murteta means missing the two rewards that distinguish this project from ordinary loot farming.
Common Souls Offering Mistakes That Waste Time
Most failed attempts come from inventory decisions or confusion about the final objective rather than an especially difficult fight. A few habits can remove entire extra raids from the project. Check these points before selling loot, changing maps or heading toward Santa Maria Houses.
- Collecting only one Dead Flowers item: Vaulto needs one, but Ferrovia needs three more. The project total is four, or seven if you also want the materials for the Offering Display Table.
- Recycling rare household items: Fancy Plates, Mask Fragments and Expired Respirators may look like ordinary valuables. Keep the exact project quantity until the relevant stage is complete.
- Confusing ARC components: Regular Powercells do not replace the 15 Advanced ARC Powercells required for Ferrovia.
- Using Remote Raider Flares as fireworks: Ferrovia's ten flares are donation materials. The rooftop finale requires a Fireworks Box.
- Spending all three Stage 3 Fireworks Boxes: Save at least one for Buried City so you do not have to purchase or craft a replacement.
- Activating fireworks at ground level: The listed final objective specifies the Santa Maria Houses rooftop, not merely the surrounding neighborhood.
- Trusting guaranteed-loot claims: Residential and industrial search locations are useful starting points, but rare trinkets do not have confirmed fixed drops in every raid.
- Waiting until the final day: Community listings place the deadline around November 15–16, 2026. Follow your in-game countdown and leave time for at least one replacement attempt.
ARC Raiders Souls Offering FAQ
These questions cover the remaining details that matter when you are planning your last few raids or trying to avoid losing project progress.
Can I collect materials for later stages before unlocking them? Yes. You can keep future-stage items in your stash while working on the current offering. The project stages themselves progress in order, so submit the required items through the active Projects interface when each stage becomes available.
Is Souls Offering a repeatable or daily project? No daily repeat is listed for Soul's Offering. It is a temporary, four-stage Player Project with a final completion reward. Do not plan your farming around receiving another full set of rewards every day.
Do I need to defeat a boss to complete the final stage? The current community project checklist specifies activating fireworks on the Santa Maria Houses rooftop. Some independent guides additionally mention dealing 300 damage to ARC nearby. Check the exact objective displayed in your live Projects screen rather than assuming a mandatory boss fight or an unlisted combat step.
When does Souls Offering end? Community project databases list November 16, 2026, while some earlier coverage gives November 15. Embark's release announcement does not state an exact closing hour. Your in-game project countdown is the safest reference, and finishing before the last day avoids timezone and reset uncertainty.
Can I complete the project solo? The listed objectives do not require a fixed squad size. Solo Raiders can collect and donate the materials across multiple successful raids, then complete the rooftop objective. The main challenge is protecting rare loot and surviving the Buried City visit, so a cautious loadout and early extraction can be more valuable than unnecessary combat.
Final Souls Offering Completion Tips
Keep the project simple: collect the four Dead Flowers and other rare household items first, obtain the missing medical and agricultural materials, then finish the ARC component and flare requirements. Donate everything across the first three stages, preserve one of Murteta's Fireworks Boxes and make a focused trip to the Santa Maria Houses rooftop. Check the project screen after triggering the fireworks so you do not leave the Pilgrim Backpack and Offering Display Table Design unclaimed. Most importantly, treat the event timer as a real deadline and secure rare finds instead of risking them on one more unnecessary fight.