
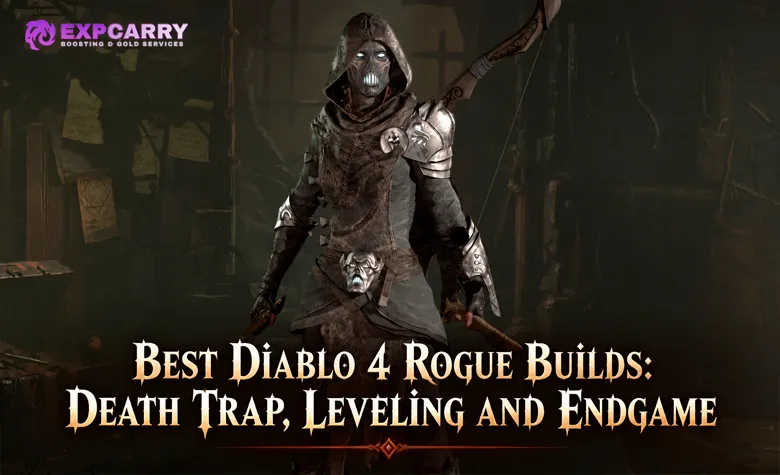
The Rogue is one of Diablo 4's fastest and most flexible classes, with builds designed for mobile farming, powerful ranged attacks, and demanding endgame encounters. Death Trap remains a compelling option for players who enjoy chaining high-damage attacks with rapid movement, but it requires significantly more equipment than a typical leveling build. If you are starting a new Rogue, Dance of Knives is a more practical route to level 70, while Penetrating Shot and Heartseeker offer different ranged alternatives.
This guide explains how to choose a Rogue build, level efficiently, and develop a complete Death Trap setup. It covers the modern skill tree, Rogue Specializations, active skills, rotation, Energy and Cooldown Reduction requirements, Unique equipment, Legendary Aspects, runes, gems, Talismans, Paragon boards, glyphs, and mercenaries. The recommendations focus on lasting class mechanics rather than a single season's rankings or temporary rewards.
Short answer: Dance of Knives is an excellent Rogue leveling build, while Death Trap is a powerful gear-dependent endgame option. For sustained Death Trap resets, build around Preparation, Beastfall Boots, a Death Trap cooldown of 15 seconds or less, at least 225 Maximum Energy, reliable Energy restoration, and reduced trap arming time. Penetrating Shot is a strong alternative for ranged endgame damage.
Best Diablo 4 Rogue Builds for Different Activities
The strongest Rogue choice depends on your gear, preferred combat range, and the content you want to complete. Death Trap excels at mobile clearing once its reset loop works, but it is not automatically the best option for every player or every high-difficulty encounter. Other Rogue builds offer easier progression or a different balance between damage, mobility, and complexity.
| Build | Best for | Main advantage | Main limitation |
|---|---|---|---|
| Death Trap | Optimized endgame, fast farming, Pit and Tower runs | Strong area damage, mobility, and repeated Ultimate casts | Strict equipment and resource requirements |
| Penetrating Shot | Ranged endgame damage, difficult encounters | Powerful piercing attacks and specialized Poison or Cold variants | Requires positioning and build-specific equipment |
| Dance of Knives | Leveling, movement-focused farming | Attacks while moving and works without a mandatory starting Unique | Interrupted channels and poor Energy sustain reduce efficiency |
| Heartseeker | Accessible ranged gameplay | Simple targeting and a less demanding combat rhythm | Different endgame scaling and damage profile |
Death Trap is the focus of this article because it has one of the Rogue's most distinctive endgame mechanics. However, current build performance can change when Blizzard adjusts individual skills, items, or damage interactions. Treat any tier placement as a temporary comparison, not a permanent property of the class. Blizzard's Rogue balance notes provide the official context for recent skill changes.
Rogue Class Mechanics, Specializations, and Stat Priorities
Rogues use Energy to fuel their attacks and can specialize in different combat patterns. The three Specializations are Combo Points, Inner Sight, and Preparation. Choosing the correct one is essential because Death Trap does not use the same resource loop as a typical Combo Points leveling build.
Preparation vs Combo Points and Inner Sight
Preparation is the key Specialization for the optimized Death Trap setup. Spending enough Energy reduces Ultimate cooldowns, which allows Beastfall Boots and a large Energy pool to contribute to repeated Death Trap casts. This is fundamentally different from Combo Points builds, where Basic attacks prepare stronger follow-up attacks, or Inner Sight builds, which focus on their own resource opportunities.
Dance of Knives can level effectively with Combo Points generated by Blade Shift before starting its sustained attack. Death Trap, by contrast, becomes attractive when Preparation, Maximum Energy, resource restoration, and cooldown reduction work together. The modern skill tree also uses expanded active-skill branches and variants, so older builds based on removed passive nodes should not be copied without checking them against the current game. Blizzard details the redesigned progression system in its official skill-tree overview.
Best Rogue Stats for Death Trap
Dexterity is the Rogue's primary damage attribute, but Death Trap is a breakpoint build: its most important improvements are the ones that allow the rotation to function continuously. Once the essential requirements are met, you can invest more heavily in damage multipliers, Critical Strike Chance, Attack Speed, and survivability.
| Stat | Why it matters | Priority |
|---|---|---|
| Cooldown Reduction | Brings Death Trap's cooldown within the range supported by Preparation resets. | Critical |
| Maximum Energy | Provides the resource pool needed for repeated Preparation activations. | Critical |
| Energy Restoration | Refills the resource spent by Beastfall Boots after each cast. | Critical |
| Trap Arm Time Reduction | Helps traps activate before a newer cast replaces them. | Critical for fast casting |
| Ranks to Death Trap | Strengthen the main skill and support important resource interactions. | Very high |
| Dexterity | Improves Rogue damage and relevant Paragon bonuses. | High |
| Critical Strike Chance | Supports direct damage and selected offensive multipliers. | High after the reset loop works |
| Attack Speed | Improves attack animation throughput at relevant breakpoints. | Advanced optimization |
| Maximum Life, Armor, Resistances | Keep the Rogue alive during difficult encounters. | Maintain adequate defenses |
Do not sacrifice a crucial Maximum Energy or Cooldown Reduction affix for a small damage upgrade while the build still suffers downtime. A slightly weaker Death Trap that can be cast repeatedly is more useful than a stronger trap followed by a long wait. Defensive stats also matter because frequent repositioning does not eliminate the risk of being hit.
Death Trap Rogue Skill Bar and Combat Rotation
Death Trap combines area damage with the Rogue's mobility and utility abilities. The optimized version uses Scoundrel's Leathers to make Trap skills count as Core skills, Beastfall Boots to spend Energy on appropriate Ultimate casts, and Preparation to reduce the cooldown. The Explosive Trigger variant gives Death Trap additional Grenade interactions, creating further opportunities for compatible offensive bonuses.

Recommended Death Trap Skills
The following six-skill bar is a useful endgame framework. It provides the main damage ability, movement, defense, enemy weakening, and supporting effects. Earlier versions may use different utility skills while their equipment remains incomplete, so the final configuration should not be forced onto a fresh character.
| Skill | Purpose | Investment priority |
|---|---|---|
| Death Trap | Main damage skill; Explosive Trigger adds Grenade interactions. | Highest; maximize ranks and unlock the required modifiers. |
| Shadow Step | Rapid positioning and movement between targets. | Unlock the mobility variant and useful cooldown effects. |
| Concealment | Unstoppable access, defensive recovery, and offensive setup. | Invest in the modifiers used by your rotation. |
| Dark Shroud | Maintains defensive protection and related bonuses. | Enough ranks and modifiers for reliable uptime. |
| Smoke Grenade | Weakens or disrupts important enemies and supports damage windows. | Utility first, additional ranks as needed. |
| Cold Imbuement | Optional defensive and offensive support in compatible variants. | Use when its modifiers and equipment synergies are available. |
Some earlier builds used Puncture, Poison Trap, or another Energy generator on the bar. Those can still be useful during progression, but they are not mandatory in a completed version that immediately restores the Energy spent on Death Trap. Likewise, Death Trap should not be described as a Grenade skill unless the appropriate variant or another valid effect actually provides that tag.
Death Trap Rotation: Step by Step
The rotation is built around preparing the trap, spending a large Energy pool, triggering Preparation, and restoring that Energy before the next cast. Movement and defensive abilities fill the gaps without interrupting the main damage cycle. Once the build is fully optimized, the loop becomes fast, but every part must work consistently for reliable boss damage.
- Position: Use Shadow Step to approach an enemy group or move into an advantageous position.
- Prepare: Activate Dark Shroud, use Smoke Grenade against dangerous targets, and apply Concealment when its defensive or offensive bonuses are needed.
- Cast: Use Death Trap with a sufficiently full Energy pool to activate the intended Preparation interactions through Beastfall Boots.
- Reset: Allow Preparation to reduce the cooldown and Aspect of Aftermath to restore the Energy required for another cast.
- Repeat: Reposition with Shadow Step, maintain defensive buffs, and continue casting Death Trap as soon as the complete loop permits.
Against ordinary packs, the build can move rapidly between groups. Against bosses, avoid depending on kills for cooldown or resource restoration: the setup must generate enough resets and Energy without nearby weak enemies. The more consistently this works, the more valuable additional damage upgrades become.
Explore services related to this guide, selected from our Diablo IV catalog.
View All Diablo IV Services

Death Trap Breakpoints: Cooldown, Energy, and Attack Speed
Death Trap is unusually sensitive to mechanical thresholds. The strongest equipment pieces are not necessarily those showing the highest damage number; they are the pieces that allow uninterrupted casts. Before investing heavily in expensive items, check whether the character meets the cooldown, Energy, restoration, and trap activation requirements.
| Requirement | Practical target | Why it matters |
|---|---|---|
| Death Trap cooldown | 15 seconds or less in the optimized Preparation setup | Allows the intended Energy-spending resets to keep pace. |
| Maximum Energy | At least 225 for the corresponding reset configuration | Supports multiple Preparation activations from a complete Energy spend. |
| Energy restoration | Enough to replace the Energy spent after each cast | Prevents the loop from stalling after one or two attacks. |
| Trap Arm Time Reduction | Enough for traps to activate before new casts overwrite them | Protects real damage output during rapid casting. |
| Attack Speed | Optimize for your weapons and animation breakpoint | Prevents attack animations from limiting throughput. |
| Critical Strike Chance | Increase after core requirements are met | Improves sustained damage and selected item synergies. |
How to Reach 225 Energy and Maintain the Reset
Maximum Energy can come from compatible equipment affixes, supporting Uniques, and other character bonuses. Beastfall Boots interact with the Energy pool, while Preparation provides cooldown reduction when enough Energy is spent. The missing part is restoration: Aspect of Aftermath and additional Death Trap ranks must return enough Energy to support the next cast.
More Maximum Energy is not always an improvement if the character cannot refill the larger pool. Similarly, improving cooldown reduction alone will not solve a build that runs out of Energy. Check the three values together: current Death Trap cooldown, Energy available before casting, and Energy restored afterward. If the loop fails, identify which value is missing before changing unrelated equipment.
Attack Speed and Trap Activation
Attack Speed becomes important after the reset loop is stable. Its exact animation breakpoint depends on the equipped weapon types and other active bonuses, so an old universal percentage should not be treated as a permanent target. Highly optimized dual-sword configurations can pursue a faster animation breakpoint, while less expensive versions should first prioritize the essential resource and cooldown requirements.
Trap Arm Time Reduction is a separate concern. If Death Trap is cast faster than the existing traps can activate, later casts may replace earlier traps before they deal their expected damage. Tempering and relevant Paragon nodes, including options on Deadly Ambush, help address this limitation.
Death Trap Rogue Gear, Unique Items, and Legendary Aspects
Death Trap needs several interacting pieces of equipment. The first priority is establishing the Core-skill and Energy-spending interaction, followed by reliable restoration and cooldown control. Once the loop is complete, you can pursue stronger damage modifiers, better affixes, and higher-quality versions of important items.

Core Items and Equipment Slots
Scoundrel's Leathers, Beastfall Boots, and Eyes in the Dark each have a different function. Do not confuse their equipment slots: Eyes in the Dark belongs in the pants slot, not the Charm slot. Talisman Charms are part of a separate equipment system.
| Slot | Priority item or stat | Purpose |
|---|---|---|
| Helmet | Cooldown Reduction, Maximum Energy, defense; appropriate Unique alternatives | Helps meet reset requirements and survive difficult encounters. |
| Chest | Scoundrel's Leathers | Makes Trap skills count as Core skills, supporting the Beastfall Boots interaction. |
| Gloves | Cooldown Reduction, Death Trap support, Trap Arm Time Reduction | Improves activation speed and helps maintain the reset loop. |
| Pants | Eyes in the Dark | Provides important Death Trap-specific damage effects. |
| Boots | Beastfall Boots | Spends Energy through suitable Ultimate casts and supports Preparation resets. |
| Amulet | Trap skill ranks, Cooldown Reduction, useful damage multipliers | Supports damage, resource interactions, and cooldown requirements. |
| Rings | Aspect of Aftermath, Saboteur's Signet or suitable alternatives | Restores Energy and strengthens compatible Grenade interactions. |
| Weapons | Strong damage affixes, Dexterity, relevant multipliers | Improve the damage engine after the reset requirements are satisfied. |
For advanced setups, Sea Lord's Fine Gloves can contribute to Maximum Energy, while selected weapon and helmet options can improve damage or attack speed. The ideal choice depends on the resources and breakpoints your character already has. Invest expensive crafting materials in equipment you expect to keep, rather than repeatedly upgrading temporary pieces. Managing gold for equipment crafting and rerolls is particularly important once you begin optimizing several slots together.
Legendary Aspects and Mythic Upgrades
Aspect of Aftermath is a major part of the Energy restoration loop. Opportunist's Aspect can support compatible Grenade interactions, while other offensive or defensive Aspects should be chosen according to the skill variant and remaining equipment slots. The strongest fully optimized setup is not necessarily the correct starting setup: a missing resource affix can matter more than a higher damage multiplier.
The modern item system offers additional ways to improve Uniques, including Horadric Cube crafting for players with access to the relevant features. However, do not assume that every Unique can be upgraded under identical conditions or that a seasonal material recipe will remain available forever. Blizzard outlines the major itemization and Horadric Cube systems, while individual recipes and restrictions should be checked before spending rare materials.
Talismans, Charms, and Mercenaries
The Lord of Hatred Talisman system uses a Seal and equipped Charms to provide additional bonuses and set effects. For Death Trap, Applied Alchemy is an important damage-oriented set to consider. Legacy of the Sightless is a different option, and the two should not be treated as interchangeable simply because both interact with Rogue abilities. Prioritize the actual set bonuses your configuration can activate.
For mercenaries, Raheir is a dependable defensive choice because his Bastion-related protection can help the Rogue survive dangerous attacks. Subo is useful during farming thanks to information and utility that support efficient movement through content. Mercenaries are supporting systems rather than substitutes for adequate Maximum Life, Armor, Resistances, or defensive skills.
Best Rogue Runes, Gems, and Paragon Glyphs
Runewords, socketed gems, and Paragon glyphs should strengthen the specific version of Rogue you play. Death Trap generally benefits from additional defense, Critical Strike Chance, and damage interactions that support the completed rotation. Choose these upgrades after determining whether your main problem is survivability, resource stability, or damage.
Recommended Death Trap Runewords
A runeword pairs a Ritual rune with an Invocation rune. The Ritual determines how Offering is generated, and the Invocation spends it to activate an effect. A complete character can use up to two compatible pairs, so select effects that activate reliably during actual combat.
| Runes | Benefit | Recommended purpose |
|---|---|---|
| Cir + Que | Barrier support through Earthen Bulwark. | General survivability and difficult endgame content. |
| Zan + Gar | Supports Critical Strike Chance. | Damage optimization after the core resource loop works. |
| Cir + Sol | Additional defensive mitigation. | Alternative when survival is more important than damage. |
| Poc + Mot | Automates a Dark Shroud-related effect in compatible setups. | Convenience when its trigger conditions are reliable. |
Rune choices are not universal. For example, Cir + Que is useful only when the Ritual generates enough Offering to maintain the desired Barrier effect. The foundations of the system are described in Blizzard's official rune overview. Special item-creation recipes inspired by Diablo II are separate from standard Ritual-and-Invocation runewords and should not be treated as permanent requirements.
Best Gems for Death Trap
Use gem effects that match your damage type and defensive needs. A direct-damage Death Trap configuration may benefit from an Ultimate-damage-oriented weapon gem where its current tooltip supports that interaction, while armor gems can increase the Rogue's primary attribute. Jewelry gems are often best used to cover missing elemental resistances.
| Slot | Suggested direction | Reason |
|---|---|---|
| Weapon | Diamond when its current effect supports Ultimate damage | Improves the primary damage ability. |
| Armor | Emerald for Dexterity | Supports the Rogue's main damage attribute. |
| Jewelry | Gems matching your lowest elemental resistance | Improves survival in higher difficulties. |
Always compare the current gem tooltip with the skill tags and bonuses used by your build. Temporary seasonal socket items are not part of the evergreen requirements, and the best option may change when an item grants a different damage interaction.
Death Trap Paragon Boards and Glyphs
Paragon strengthens Death Trap damage, helps meet its mechanical requirements, and provides additional defenses. Relevant boards include Deadly Ambush for Trap-related bonuses, Cheap Shot for compatible damage scaling, and No Witnesses for useful Ultimate or attack-speed interactions. The exact board arrangement should be adjusted around glyph activation requirements and available points.
| Priority | Glyph | Build role |
|---|---|---|
| 1 | Versatility | Supports flexible damage interactions used by the setup. |
| 2 | Ambush | Strengthens damage against enemies affected by relevant control conditions. |
| 3 | Grenadier | Supports the Grenade interactions enabled by Explosive Trigger. |
| 4 | Explosive | Further develops compatible explosion-related damage. |
| 5 | Canny | Provides additional scaling for suitable damage configurations. |
Upgrade the glyphs that affect your actual damage first, then improve secondary bonuses. Check the required attributes inside each glyph radius before spending points on distant nodes. Developing Paragon glyph levels is a separate part of endgame progression and should be planned alongside equipment improvements.
Rogue Leveling Guide: Level 1 to 70
Death Trap is an endgame destination, not the simplest starting build. Before its required Uniques and Energy interactions are available, Dance of Knives offers a much smoother leveling experience. Its moving attacks and relatively low initial equipment requirements make it practical for campaign progression, Helltides, and other activities that reward consistent clearing.

Dance of Knives Leveling Skills and Rotation
A practical leveling setup develops Dance of Knives as the main damage skill, supported by Blade Shift, Dark Shroud, Shadow Imbuement, Concealment, and Shadow Clone. Blade Shift can establish Combo Points before a sustained Dance of Knives attack, while defensive and mobility effects help prevent the channel from being interrupted. This is a different Specialization and rotation from the final Death Trap build.
- Prepare: Maintain Dark Shroud and use Blade Shift to build the Combo Points required by your selected setup.
- Enhance: Apply Shadow Imbuement and use Shadow Clone when additional damage is needed.
- Clear: Channel Dance of Knives while moving through enemies and avoiding dangerous attacks.
- Restart: If the channel ends or Energy becomes insufficient, reposition and rebuild the necessary Combo Points before attacking again.
| Level | Main goal | Equipment priority |
|---|---|---|
| 1–14 | Develop a basic Energy generator and early Dance of Knives damage as skills unlock. | Current-level weapons and reliable defenses. |
| 15–29 | Add defensive utility, Combo Points support, and suitable Imbuement skills. | Dance of Knives ranks, Dexterity, movement support. |
| 30–49 | Complete the leveling bar and improve the ability to maintain Dance of Knives while moving. | Damage, Energy sustain, Maximum Life, Resistances. |
| 50–69 | Continue efficient farming and collect Death Trap equipment without weakening the leveling build prematurely. | Useful Uniques, Legendary Aspects, and progression rewards. |
| 70+ | Respec when the Death Trap reset loop can function, or continue into a Dance of Knives endgame variant. | Paragon glyphs, Ancestral gear, Tempering, Masterworking. |
Do not switch just because you obtained one Death Trap Unique. Scoundrel's Leathers, Beastfall Boots, enough Maximum Energy, resource restoration, and cooldown reduction must work together. If the reset loop is incomplete, stay with your functioning leveling build and continue collecting equipment. This distinction is especially useful when planning Rogue leveling progression separately from endgame build preparation.
Alternative Endgame Rogue Builds
Penetrating Shot is a strong alternative for players who prefer ranged attacks and careful positioning. Its piercing projectile can clear lines of enemies, while specialized Poison and Cold configurations change its damage and control profile. Heartseeker offers a more straightforward ranged rhythm, though its strengths and equipment requirements differ from those of Death Trap.
Dance of Knives can also remain a long-term build rather than serving only as a temporary leveling setup. If you prefer constant movement and smooth farming over managing strict Death Trap breakpoints, continuing with a properly developed Dance of Knives build may be the better choice. The purpose of switching is to improve the playstyle you want, not to follow a temporary tier-list position.
Frequently Asked Questions About Death Trap Rogue
Death Trap has several unusual requirements, so many problems that look like insufficient damage are actually caused by an incomplete resource or cooldown loop. The following answers cover the most important decisions before committing to the build.
Is Death Trap Rogue Still Good for Endgame?
Yes. Death Trap remains a viable and powerful endgame archetype with strong mobility and area damage when properly equipped. However, it should not be described as permanently superior to Penetrating Shot, Dance of Knives, or every other Rogue build. Its practical strength depends on current balance, your equipment, and the activity being attempted.
Which Items Are Required for Death Trap?
Scoundrel's Leathers and Beastfall Boots establish the core interaction between Trap skills, Energy spending, and Preparation. Eyes in the Dark adds important Death Trap damage, while Aspect of Aftermath and supporting equipment help restore the Energy needed for continuous casts. Additional damage items become valuable after these requirements work together.
Why Does Death Trap Stop Resetting?
Check four things: the Death Trap cooldown, Maximum Energy, Energy restored after casting, and Trap Arm Time Reduction. The commonly used optimized setup aims for a cooldown of 15 seconds or less and at least 225 Maximum Energy, but those numbers alone are insufficient if the spent Energy is not restored or the traps are replaced before activating.
Is Death Trap Good for Hardcore?
Death Trap can work in Hardcore, but its mobility does not replace defensive planning. Maintain adequate Maximum Life, Armor, and Resistances, use defensive tools such as Dark Shroud and Concealment correctly, and favor protective runewords or mercenary support when survival is uncertain. Avoid increasing difficulty beyond the point where a missed defensive action could end the character.
Final Thoughts
The Rogue offers several distinct ways to progress through Diablo 4. Dance of Knives is a practical choice for leveling and mobile farming, Penetrating Shot provides a powerful ranged alternative, and Death Trap rewards players who enjoy a fast, highly optimized endgame rotation. The most important step for Death Trap is completing the Energy, cooldown, and activation mechanics before investing heavily in additional damage.
Build around your preferred playstyle, keep defenses appropriate for the content, and upgrade skills, gear, runes, Talismans, and Paragon glyphs as a connected system. That approach remains effective even when seasonal rankings and temporary bonuses change.