

The best Diablo 4 Druid build depends on whether you want fast leveling, efficient farming, reliable boss damage, or a setup capable of pushing difficult endgame content. Shred offers exceptional mobility and a rewarding Werewolf playstyle, Lightning Storm clears large areas with minimal repositioning, and Landslide provides powerful Earth-based damage. Tornado and Boulder offer equally distinct alternatives, but each requires different gear and resource management.
This guide covers the Druid's strongest build families, a complete Shred progression path from early leveling into endgame, Spirit Boons, skill variants, Legendary Aspects, Unique items, gems, runes, Talisman sets, Paragon Boards, glyphs, mercenaries, and practical combat strategies. The recommendations follow the current live skill and item systems rather than relying on a single season's temporary rankings.
Short Answer: Choose Shred for mobile Werewolf combat, Lightning Storm for wide-area farming, Landslide for controlled Earth damage, Tornado for sustained ranged pressure, or Boulder for heavy-impact gameplay. Shred is the main build detailed below, including its leveling route, endgame equipment, runewords, Spirit Boons, and five-board Paragon setup.
The Druid's Place in the Current Diablo 4 Meta
Druid remains one of Diablo 4's most flexible classes because its builds can combine shapeshifting, Nature Magic, crowd control, defensive barriers, and persistent damage effects. However, the strength of a particular build depends heavily on its interaction with Unique items and Talisman bonuses. A character wearing ordinary leveling equipment should not be expected to reproduce the performance of a fully optimized endgame setup.
Recent balance changes have also altered several interactions that previously defined Druid builds. The redesign of Storm Shepherd's Call reduced part of its former damage scaling, Lightning Storm can no longer rely on the old confined-space targeting behavior, and Might of the Ursine now benefits Werebear skills rather than every skill cast while transformed. These distinctions are documented in Blizzard's official season and class balance notes.
| Mechanic | Current Function | Build Impact |
|---|---|---|
| Willpower | The Druid's main damage attribute, with improved damage scaling in the current skill system. | Prioritize it alongside survival and build-specific multipliers. |
| Spirit | Resource used by Shred, Tornado, Landslide, and other damaging skills. | Early builds need generation; specialized endgame equipment changes the rotation. |
| Spirit Boons | Class-specific bonuses from Deer, Eagle, Wolf, and Snake spirits. | Improve resource recovery, critical damage, attack speed, and Ultimate uptime. |
| Storm Shepherd's Call | Talisman set supporting Storm skills and Spirit-based damage bonuses. | Central to many Storm Shred and Tornado setups, but requires the correct set pieces. |
| Might of the Ursine | Its offensive bonus applies to Werebear skills. | Do not use it as a generic multiplier for Lightning Storm without the required skill tag. |
| Paragon and Glyphs | Long-term character progression after reaching level 70. | Important for resource recovery, damage scaling, defenses, and endgame specialization. |
Build rankings change when balance patches, bug fixes, or newly discovered interactions affect actual performance. Instead of treating one disputed tier list as permanent, compare how each build handles the content you play most often: Helltides, boss encounters, The Pit, the Tower, or material farming.
Best Diablo 4 Druid Builds for Leveling and Endgame
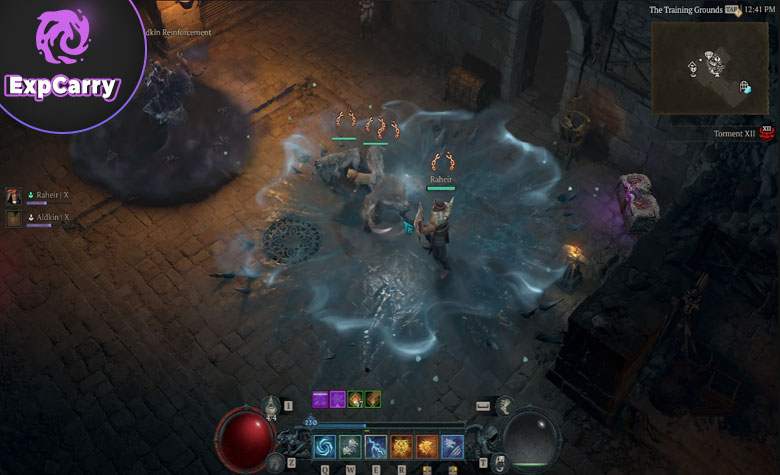
There are several viable Druid archetypes, but five provide especially clear choices for players who want to specialize. Their strengths come from different damage mechanics, and switching between them often involves more than replacing one skill. For example, Shred emphasizes Werewolf mobility, while Landslide needs Earth-oriented equipment and crowd-control interactions.
| Build | Main Strength | Main Limitation | Recommended Use |
|---|---|---|---|
| Shred | Rapid mobility, repeated strikes, strong Werewolf synergies. | Close-range positioning and demanding endgame item requirements. | Fast farming, active melee combat, endgame progression. |
| Lightning Storm | Broad area coverage and consistent Storm damage. | Needs appropriate resource support and careful skill-tag interactions. | Leveling, large enemy packs, general farming. |
| Tornado | Sustained damage across multiple targets. | Projectile behavior and positioning can affect damage consistency. | Ranged combat, dense encounters, endgame farming. |
| Landslide | Strong Earth bursts and effective damage against concentrated targets. | Resource costs and setup-dependent crowd control. | Elite packs, bossing, controlled endgame encounters. |
| Boulder | Heavy Earth damage and powerful interactions with Dolmen Stone. | Slower pacing and greater dependence on specialized items. | Bosses, deliberate Earth-focused gameplay. |
Shred Druid: Fast Werewolf Combat
Shred is built around a three-part melee combo that allows the Druid to close the distance and strike repeatedly. During leveling, the Roundhouse variant makes the final attack cover a wider area, helping clear groups without constantly changing targets. For endgame, Storm Shred changes the damage profile by adding Lightning damage and the Storm and Nature Magic interactions needed for specialized equipment.
Waxing Gibbous is a major offensive weapon for this build because it strengthens Shred and can generate additional strikes. Ifeh's Dire Totem changes Grizzly Rage into a Dire Werewolf transformation, while Dark Howl allows Debilitating Roar to function as a Werewolf skill. These items work together to keep the character's primary combat abilities compatible with the same form.
The build is approachable while leveling but becomes substantially more technical in endgame. Spirit management, Ultimate uptime, and maintaining defensive effects matter more than simply maximizing damage. Players still developing a new Druid can follow the route below, while broader character leveling progression is a separate consideration from optimizing the final build.
Lightning Storm Druid: Wide-Area Nature Magic
Lightning Storm provides strong coverage against large enemy groups and is particularly comfortable when frequent repositioning would slow down a melee build. The skill benefits from Storm bonuses, critical-hit effects, and equipment that improves the frequency or effectiveness of Lightning damage. Modern endgame versions can use Werewolf-compatible interactions rather than relying on older Werebear-based combinations.
The important limitation is Might of the Ursine: merely casting Lightning Storm while visually transformed into a Werebear does not make it a Werebear skill. A functional Lightning Storm setup therefore emphasizes genuine Storm, Nature Magic, and compatible shapeshifting bonuses. Storm Strike can supplement damage against priority targets, while defensive skills provide protection during sustained casting.
Tornado Druid: Sustained Storm Pressure
Tornado attacks enemies through repeated moving projectiles, making it suitable for fights where several targets remain active for an extended period. The Fleshrender Unique is especially valuable because it improves Tornado damage and causes expired Tornadoes to return toward the character, creating additional opportunities to hit enemies along their path.
The endgame version can share several pieces with a Shred setup, including Ifeh's Dire Totem, Dark Howl, and Storm-oriented Talisman bonuses. However, Tornado deals Physical damage by default, so Lightning-specific multipliers cannot automatically be treated as Tornado damage bonuses. Evaluate every Aspect and glyph according to the actual damage type and skill tags involved.
Landslide Druid: Earth Damage and Petrify
Landslide focuses on repeated Earth attacks that can concentrate damage on elites and bosses. Song of the Old Mountain is especially useful in builds that apply Fossilize and Petrify, allowing accumulated damage to contribute to powerful explosions around affected targets. The Basilisk is a Unique Charm associated with this Earth and Petrify approach; it should not be confused with a weapon.
Landslide usually requires careful Spirit management until its endgame resource sources are established. Gift of the Stag, resource affixes, suitable Legendary Aspects, and eventually specialized Unique items help maintain its damage cycle. Choose this build when you prefer controlled attacks and strong damage windows over Shred's constant movement.
Boulder Druid: Heavy Earth Impact
Boulder provides a different Earth playstyle from Landslide. Its attacks are more deliberate, and Dolmen Stone plays a central role by increasing Boulder damage and causing Boulders to explode when their normal duration ends. This reduces the waste from additional Boulders and makes sustained casting more rewarding once the necessary equipment is available.
Because Boulder's pacing and gear requirements differ from Shred, it is better treated as a dedicated build rather than a quick skill replacement. Prioritize Spirit recovery, Earth damage, defensive uptime, and the item interactions supporting repeated Boulder casts.
Cataclysm and Pulverize as Alternative Druid Builds
Cataclysm remains a useful option for players who prefer large-area Nature Magic damage and substantial Ultimate-based combat windows. Pulverize offers a heavier Werebear experience with straightforward close-range area damage. Both can work as leveling or endgame alternatives, but their equipment and Paragon priorities differ from the Storm Shred setup detailed here.
For a first character, the practical choice is the build that clears enemies consistently without draining its resource or exposing the character to repeated deaths. The strongest theoretical endgame combination is not automatically the fastest leveling build when its defining Uniques have not yet dropped.
Shred Druid Build: Skills, Leveling Path and Rotation
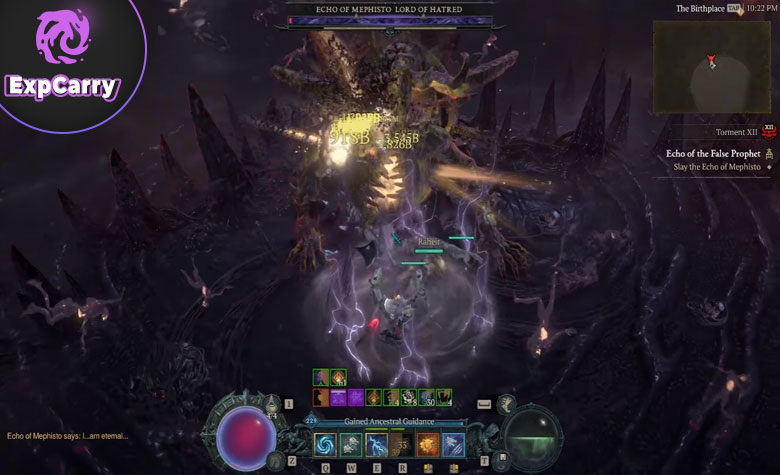
Shred is a useful centerpiece for a complete Druid guide because its core gameplay begins early and develops into a specialized Storm Werewolf build. The leveling and endgame versions should be treated as two stages of the same character. During leveling, Claw supplies Spirit and manually cast defensive skills keep the build stable. In the final setup, runes, Talisman bonuses, and Unique items take over several of those responsibilities.
Druid Leveling Roadmap: Level 1 to 70
Begin with the skills that make Shred usable before specialized equipment becomes available. Prioritize one reliable Spirit generator, the main damage skill, and defensive protection rather than attempting to assemble a six-skill endgame rotation immediately. The current skill system includes selectable variants, so choose upgrades by their actual effects instead of relying on pre-expansion talent-tree point lists. Blizzard explains the larger skill-tree redesign in its official Lord of Hatred systems overview.
| Stage | Skill and Upgrade Priorities | What to Do |
|---|---|---|
| Levels 1–10 | Claw, Shred, Earthen Bulwark; early Spirit and defensive upgrades. | Use Claw to generate Spirit, Shred to finish enemies, and Earthen Bulwark before dangerous attacks. Improve Shred's damage as skill points become available. |
| Levels 11–20 | Blood Howl, Wolves, Shred's Spirit and Roundhouse upgrades. | Add healing, companion utility, and stronger group damage. Start the Druid class mechanic quest at level 15. |
| Levels 21–35 | Cyclone Armor, more Shred ranks, defensive variants, critical-hit and resource support. | Roundhouse remains a dependable choice for clearing. Test Storm Shred when you have useful Lightning or Storm synergies, but do not force the switch without support. |
| Levels 36–50 | Finish the main Shred package; improve Blood Howl, Earthen Bulwark, Wolves, and relevant form bonuses. | Upgrade weapons frequently, collect useful Aspects, and maintain a steady Spirit cycle. Add an Ultimate only when its supporting skills make it worthwhile. |
| Levels 51–70 | Complete the selected skill variants, defensive effects, and supporting damage skills. | Farm suitable Uniques, prepare Storm Shred, unlock the required Talisman bonuses, and improve resistances before moving into demanding content. |
| Level 70 and beyond | Transition to the endgame six-skill bar and five-board Paragon setup. | Replace the Basic generator only after the build sustains Spirit reliably. Develop glyphs, optimize gear, and raise difficulty gradually. |
This is a progression order rather than a claim that every skill becomes available at the exact level shown in the table. Quest rewards and progression systems can provide additional skill points, while your available equipment may justify learning a defensive or resource skill earlier. The priority is to maintain a functional rotation throughout the journey.
Shred Skill Variants and Endgame Skill Bar
For leveling, a dependable six-slot bar is Claw, Shred, Earthen Bulwark, Blood Howl, Cyclone Armor, and Wolves. Claw handles resource generation, Shred provides mobility and damage, and the remaining skills supply barriers, healing, passive bonuses, or crowd control. Shred's Roundhouse variant is useful for wider attacks, while its Spirit upgrade improves resource recovery from critical hits.
Once the required endgame items are equipped, switch to Storm Shred and a bar designed around permanent Werewolf-compatible combat. The following arrangement assumes Ifeh's Dire Totem, Dark Howl, Storm Shepherd's Call, and a reliable method of triggering Earthen Bulwark without a dedicated slot.
| Skill | Recommended Direction | Purpose |
|---|---|---|
| Shred | Storm Shred | Main damage, mobility, Storm interactions, repeated critical strikes. |
| Grizzly Rage | Cornered Beast direction with Ifeh's Dire Totem | Major offensive window while remaining in Dire Werewolf form. |
| Debilitating Roar | Werewolf-compatible setup through Dark Howl | Damage reduction and a significant offensive benefit. |
| Lightning Storm | Hero of the Storm and compatible Werewolf support | Additional Storm damage and recurring Nature Magic triggers. |
| Cyclone Armor | Defensive and grouping utility | Resistance support, crowd control, and positioning enemies for Shred. |
| Wolves | Supportive companion upgrades | Passive benefits and help against selected targets. |
Important: This is the item-supported endgame bar, not the bar you should copy at level 15. Earthen Bulwark can be activated through a Que runeword, while Malefic Crescent can trigger Blood Howl automatically. Without those interactions, retain the corresponding skills on your bar and temporarily replace a less essential support ability.
Spirit Boons: How to Unlock and What to Choose
The Druid unlocks Spirit Boons through the class quest beginning with Druid: Spirits of the Lost Grove at level 15. Complete the Túr Dúlra Stronghold in Scosglen and follow the quest chain to the animal spirits. Offerings unlock bonuses associated with Deer, Eagle, Wolf, and Snake. Once the system is fully unlocked, bonding with one animal spirit allows you to select an additional boon from its group.
| Spirit | Boon | Reason |
|---|---|---|
| Deer | Gift of the Stag | Raises maximum Spirit and provides passive Spirit recovery. |
| Eagle | Avian Wrath | Improves critical strike damage for the Shred damage cycle. |
| Wolf | Calamity | Extends Ultimate duration, improving Grizzly Rage uptime. |
| Snake | Overload | Storm attacks can generate Ferocity, improving skill speed. |
| Snake, bonded | Calm Before the Storm | Nature Magic Lucky Hits can reduce Ultimate cooldown. |
During early leveling, consider Swooping Attacks for attack speed or Energize for additional Spirit recovery if those provide more immediate value. The endgame double-Snake combination becomes increasingly useful as Storm Shred, Lightning Storm, and Grizzly Rage are integrated into the same rotation.
Shred Rotation for Farming and Bosses
The basic goal is to enter a fight with defensive protection, activate the important damage bonuses, and maintain Shred attacks without repeatedly interrupting the sequence to refill Spirit. Against bosses, consistency matters more than reckless movement: avoid dangerous mechanics first, then resume attacks during safe windows.
- Before engaging: confirm that your Spirit recovery works and that your defensive trigger is ready. Cast Earthen Bulwark manually if you have not yet obtained the Que setup.
- Prepare support effects: use Lightning Storm and Cyclone Armor as your setup requires, then activate Debilitating Roar for protection and its equipment-supported damage bonus.
- Activate Grizzly Rage: with Ifeh's Dire Totem equipped, enter Dire Werewolf form and take advantage of its offensive bonuses.
- Use Shred continuously: dash between enemies in packs. Against bosses, stay close only while attacks are safe and avoid losing offensive uptime to unnecessary movement.
- Refresh important effects: maintain Roar, Ultimate uptime, barriers, and Spirit. If damage suddenly falls, check missing buffs before assuming the weapon is too weak.
If the character regularly runs out of Spirit, reintroduce Claw, improve resource generation, or finish the necessary Talisman set. A resource-starved Shred build is weaker than a simpler leveling setup that can attack continuously.
Explore services related to this guide, selected from our Diablo IV catalog.
View All Diablo IV Services


Legendary Aspects, Unique Items, Gear and Stat Priorities
Endgame Shred gearing revolves around assembling several compatible items rather than chasing one impressive damage number. Waxing Gibbous improves the main attack, Ifeh's Dire Totem makes Grizzly Rage compatible with Werewolf combat, and Dark Howl allows Debilitating Roar to remain usable in the same form. Until those items are available, an ordinary Legendary weapon with strong affixes may outperform a poorly rolled Unique.

Required and Recommended Shred Gear
Use the following equipment priorities as a practical gearing path. The items marked as optional depend on whether you are building a standard farming character, an advanced damage-focused version, or a more defensive Hardcore setup.
| Slot | Item or Aspect | Why It Matters |
|---|---|---|
| One-handed weapon | Waxing Gibbous | Major improvement to Shred damage and additional strikes. |
| Totem | Ifeh's Dire Totem | Converts Grizzly Rage into a Dire Werewolf skill and enables the endgame transformation setup. |
| Gloves | Dark Howl | Makes Debilitating Roar a Werewolf skill and adds offensive value. |
| Amulet | Malefic Crescent | Automatically triggers Blood Howl and supports resource recovery; a practical standard option. |
| Advanced amulet | Locran's Talisman | High-end critical damage option when enough critical strike chance has been secured elsewhere. |
| Helm | Leoric's Crown or defensive alternative | Strong socketed-gem benefits in specialized setups, or survivability while gearing. |
| Chest | Defensive Legendary or Enigma runeword item | Choose survivability first; Enigma offers a specialized mobility option. |
| Pants | Tibault's Will or defensive Legendary | Damage and resource support associated with Unstoppable effects. |
| Boots | Great Storm Aspect or defensive alternative | Storm synergy and Ferocity-related bonuses, balanced against mobility needs. |
| Rings | Crushing Aspect, Dirge of Airidah, or resource support | Damage while Fortified, Storm damage, Spirit generation, and other build-specific benefits. |
Before the important Uniques drop, prioritize functional Legendary Aspects such as Crushing Aspect when you can maintain Fortify, Overcharged Aspect for relevant Lightning interactions, and a resource Aspect if Shred is difficult to sustain. Gear crafting has changed substantially with Horadric Cube systems and Mythic item options; Blizzard's official 3.0 patch documentation is a useful reference for the underlying systems. Avoid assuming that every Unique is automatically better than a properly tempered and upgraded Legendary.
Best Druid Stats and Affixes
Willpower is the main attribute for most Druid damage setups, but damage alone cannot carry a character through difficult content. Maximum Life, Armor, resistances, and damage reduction form the defensive foundation. Critical Strike Chance and Critical Strike Damage become particularly important for Shred, while Spirit regeneration, resource generation, and cooldown reduction determine whether its attack cycle remains uninterrupted.
| Priority | Stat or Affix | Reason |
|---|---|---|
| Core damage | Willpower, ranks to Shred, compatible damage multipliers | Strengthens the main damaging ability and its supporting skills. |
| Damage consistency | Critical Strike Chance, Critical Strike Damage, Attack Speed | Improves repeated Shred hits and damage uptime. |
| Resource stability | Spirit generation, resource regeneration, Spirit on relevant triggers | Prevents interruptions and strengthens Spirit-related Talisman interactions. |
| Defensive baseline | Maximum Life, Armor, elemental resistances, damage reduction | Reduces the risk of dying during melee attacks. |
| Cooldown and movement | Cooldown Reduction, Movement Speed, useful mobility effects | Improves Grizzly Rage uptime and farming efficiency. |
When enchanting or rerolling an item, fix missing defensive and resource requirements before chasing small increases in secondary damage. Frequent changes to several equipment slots can consume substantial crafting currency, so plan major upgrades around the items that actually enable the build. This is particularly important when assessing the overall cost of gold-intensive gear optimization.
Gems and Socket Priorities
Gems should match the damage type of the skill actually dealing most of your damage. A physical Roundhouse Shred setup and a Storm Shred setup should not necessarily use the same weapon gem. Defensive jewelry gems are also important until resistances are comfortable, especially when optional seasonal socket items introduce additional penalties.
| Slot | Recommended Gem | When to Use It |
|---|---|---|
| Weapon, physical Shred | Skull | Use when the main damaging skill is still dealing Physical damage. |
| Weapon, Storm Shred | Topaz | Use after switching the main damage profile to Lightning. |
| Armor | Sapphire | Reliable Willpower increase; upgrade gem quality as materials allow. |
| Jewelry, standard setup | Diamond or needed resistance gem | Maintain elemental resistances instead of leaving a major defensive weakness. |
| Jewelry, eligible seasonal setup | Build-appropriate Soul Splinters | Optional seasonal effects with bonuses and trade-offs; not part of the permanent base build. |
In the current seasonal realm, Abyssal Splinters can provide powerful effects, but they are not universally safe. Splinter of Anguish increases critical-related power at the cost of higher resource costs, while Splinter of Lies improves farming rewards but imposes defensive penalties. Reserve such choices for a character whose damage, Spirit economy, and defenses can support them.
Runes, Runewords and Their Differences
There are two separate mechanics that players commonly call runewords. A socketed runeword combines a Rune of Ritual, which generates Offering, with a Rune of Invocation, which spends that Offering to produce an effect. Certain crafted runeword items instead use a specific multi-rune recipe and a compatible base item. These systems should not be confused when planning sockets or crafting materials.
| Combination | Effect | Best Stage |
|---|---|---|
| Moni + Ceh | Movement-skill triggers generate Offering for summoned Spirit Wolves. | Early leveling and supplementary control. |
| Poc + Gar | Resource spending generates Offering for a temporary Critical Strike Chance bonus. | Leveling before stronger endgame options. |
| Poc + Que | Resource spending builds toward an automatic Earthen Bulwark cast. | Endgame defense and freeing a skill-bar slot. |
| Moni + Ber | Repeated Mobility casts build toward an effect that can deliver Crushing Blows. | Advanced Shred setups with reliable Mobility triggers. |
Socketed pairs occupy two sockets on the same eligible item, and only two pairs can be active. Choose their trigger runes according to how often your build actually meets the condition. The endgame Poc + Que combination is especially useful because it allows Earthen Bulwark to contribute barriers and other selected upgrades without taking a visible skill slot.
For crafted runeword items, Enigma uses Jah, Ith, and Ber in a compatible chest base and changes Evade into a Teleport-style movement ability with a Spirit cost. Insight uses Ral, Tir, Tal, and Sol in a compatible weapon base and provides useful general statistics and resource support. These items are optional progression tools, not prerequisites for learning Shred. Check access to the relevant crafting and rune systems in your expansion and realm before planning around them.
Paragon Boards and Glyphs for Shred Druid
Paragon becomes the main long-term progression system after reaching level 70. For Storm Shred, the important objectives are recovering Spirit through Werewolf interactions, strengthening Storm and Nature Magic damage, maintaining offensive bonuses, and taking defensive nodes when melee survival becomes difficult. The following is a coherent five-board framework rather than a promise that every character needs identical individual node paths.
| Order | Board | Suggested Glyph | Main Goal |
|---|---|---|---|
| 1 | Starter | Earth and Sky | Establish early damage bonuses for Nature Magic interactions. |
| 2 | Lust for Carnage | Keeper | Support Werewolf combat and important Spirit recovery. |
| 3 | Thunderstruck | Fang and Claw | Improve Storm-related damage while maintaining close-range synergies. |
| 4 | Constricting Tendrils | Spirit | Expand offensive interactions and strengthen the main attack cycle. |
| 5 | Heightened Malice | Fulminate | Round out the offensive setup for demanding endgame encounters. |
The Starter Board plus four additional class boards is the maximum board framework. Rotate each board as needed to reach valuable nodes and glyph sockets efficiently. Prioritize the Legendary nodes your chosen setup actually activates, then fill in rare and defensive nodes after the essential path is connected.
Glyph Upgrade Order and Progression
For a Lightning-focused Shred setup, the practical glyph priorities are Spirit, Fulminate, Earth and Sky, Fang and Claw, and Keeper. Spirit and close-range bonuses reinforce the main attack cycle, while the other glyphs strengthen appropriate elemental and shapeshifting interactions. If survivability is insufficient, consider defensive substitutions rather than maximizing every damage multiplier.
- Socket the available glyphs as soon as the required Paragon Boards are accessible.
- Raise important glyphs to level 25 to expand their radius and activate stronger surrounding-node interactions.
- Continue toward level 51 for the larger radius and additional glyph power.
- After the core glyphs are established, improve them further while investing spare Paragon Points into useful rare and defensive nodes.
The Pit is the primary activity for glyph upgrading. Because increasing glyph power also improves access to more difficult content, Paragon glyph progression is worth planning alongside weapon upgrades rather than leaving it until all other equipment is finished.
Talisman Sets, Charms and Advanced Shred Setup
Talisman equipment adds another layer of customization through a Seal and its equipped Charms. For Storm Shred, set bonuses are especially important because they can change how the character spends Spirit and how effectively repeated Storm attacks deal damage. A character missing the necessary set pieces should use the resource-generating leveling bar until the complete interaction works.
Standard Storm Shepherd's Call Setup
A straightforward endgame arrangement uses the five-piece Storm Shepherd's Call bonus with a suitable Seal. This supports Spirit-consuming Storm damage and improves the value of repeated casts. A Unique Charm such as Thundergod's Blessing can occupy an available remaining slot when the Seal configuration allows it.
Storm Shepherd's Call should not be described as an unlimited damage multiplier. Its current set effects have explicit limits, and the damage bonus from consumed Spirit cannot simply be stacked indefinitely. Even when Storm skills become easier to cast, generating Spirit is still useful because the amount available affects the set's offensive cycle.
Advanced Mythic Talisman Option
Fully optimized versions can combine bonuses from Song of the Old Mountain and Storm Shepherd's Call by using a Seal that changes set-piece requirements, such as Seal of the Diamond Mind. This approach aims to benefit from Storm damage while also triggering the Fossilize and Petrify mechanics associated with the Earth-focused set.
Do not switch into this setup solely because an item has Mythic quality. Confirm that the available slots activate the intended set bonuses, that the build can trigger the required Earth effects, and that its Spirit generation remains stable. Standard Storm Shred is more useful than an incomplete advanced configuration.
Mercenaries, Farming Strategy and Endgame Progression
Mercenaries can improve the Druid's defenses, attack speed, positioning, and farming convenience. The best choice depends on the content: aggressive farming rewards offensive support, while high-difficulty pushing and Hardcore play place greater value on emergency protection.
| Mercenary | Main Benefit | Best Use |
|---|---|---|
| Raheir | Protective abilities, defensive support, and emergency survival tools. | Hardcore, difficult bosses, and early endgame. |
| Varyana | Attack Speed and aggressive combat bonuses. | Fast farming when defenses are already comfortable. |
| Subo | Map information and useful offensive support. | Exploration, material routes, and general farming. |
| Aldkin | Additional control and reinforcement options. | Alternative reinforcement for dangerous encounters. |
For a defensive baseline, hire Raheir and consider an offensive or control-focused reinforcement. For speed farming, Varyana becomes attractive once your equipment provides enough protection. Evaluate mercenary skills according to the abilities and reinforcement triggers you have actually selected.
What to Farm and Upgrade First
At level 70, focus on building a stable character before attempting the highest available difficulty. Obtain the essential Shred Uniques, establish Spirit recovery, finish the required Talisman bonuses, and begin upgrading glyphs. The next step is improving item affixes, resistances, cooldowns, and damage multipliers so that stronger enemies do not interrupt the build's rotation.
- Early endgame: farm useful Legendaries and target the key Shred Uniques. Maintain Armor, resistances, and Maximum Life.
- Functional build: equip Waxing Gibbous, Ifeh's Dire Totem, and Dark Howl when their combined bonuses are ready. Complete Storm Shepherd's Call and verify Spirit sustain.
- Paragon development: unlock the recommended boards, upgrade glyphs, and take the nodes needed for your defenses and resource economy.
- Gear optimization: improve affixes, tempering, Masterworking, runes, and Talisman configuration. Change one major item at a time and recheck the resulting stats.
- Push preparation: test the build in progressively harder content, identify where damage or survival fails, and make targeted adjustments.
Helltides and repeatable activities are useful when you need experience, crafting resources, and ordinary equipment upgrades. The Pit and the Tower provide additional tests of endgame performance, while different dungeon progression activities can help organize farming goals around the materials and upgrades your character still needs.
Common Shred Druid Mistakes
Most Shred problems come from missing interactions rather than a single weak stat. If the character feels dramatically worse than expected, inspect its form compatibility, resources, Talisman pieces, and defensive layers before replacing expensive equipment.
- Using Grizzly Rage without Ifeh's Dire Totem: the resulting transformation may prevent the intended Werewolf skill rotation.
- Replacing Claw too early: without enough Spirit recovery or the appropriate Talisman bonus, Shred becomes difficult to sustain.
- Copying endgame slots during leveling: automatic Blood Howl and Earthen Bulwark triggers require specific items or runewords.
- Mixing physical and Lightning bonuses: use the damage type and tags of the selected Shred variant when choosing gems and multipliers.
- Ignoring Armor and resistances: high damage does not compensate for dying whenever a dangerous enemy reaches you.
- Copying bug-dependent push setups: exceptional clears involving unintended interactions should not be used as reliable gearing targets.
Whenever Blizzard changes a skill tag, item interaction, or Talisman bonus, recheck the build's assumptions before committing rare materials. The official Diablo IV patch notes remain the reference for live fixes and balance changes.
Diablo 4 Druid Builds FAQ
These answers address the most common decisions players face when moving from basic Druid leveling into specialized endgame builds.
What is the easiest Druid build for leveling?
Lightning Storm and straightforward Shred leveling setups are both approachable. Shred needs Claw and defensive support early on, while Lightning Storm favors wider area coverage. Choose whichever keeps Spirit and survival consistent with your available gear.
Can I play Shred without Mythic Unique items?
Yes. Shred works during leveling and can progress into endgame without a full Mythic setup. However, the specialized Storm Shred version becomes much stronger once its supporting Uniques and Talisman pieces are assembled.
Which Paragon glyphs should Shred upgrade first?
Spirit, Fulminate, Earth and Sky, Fang and Claw, and Keeper are strong priorities for the Storm Shred framework described here. Reach important radius breakpoints before investing heavily in one glyph.
Is Druid better for melee or ranged combat?
Both are viable. Shred rewards aggressive melee movement, while Lightning Storm and Tornado offer greater distance from enemies. Landslide and Boulder provide distinct Earth-focused options for players who prefer more deliberate attacks.
Final Thoughts
Druid offers meaningful choices between fast shapeshifting attacks, broad Storm damage, and powerful Earth skills. Shred is an excellent long-term project for players who enjoy active Werewolf combat, but the build only reaches its full potential when Spirit recovery, skill compatibility, equipment bonuses, defenses, and Paragon progression work together. Build that foundation first, then optimize for the activities you enjoy most.