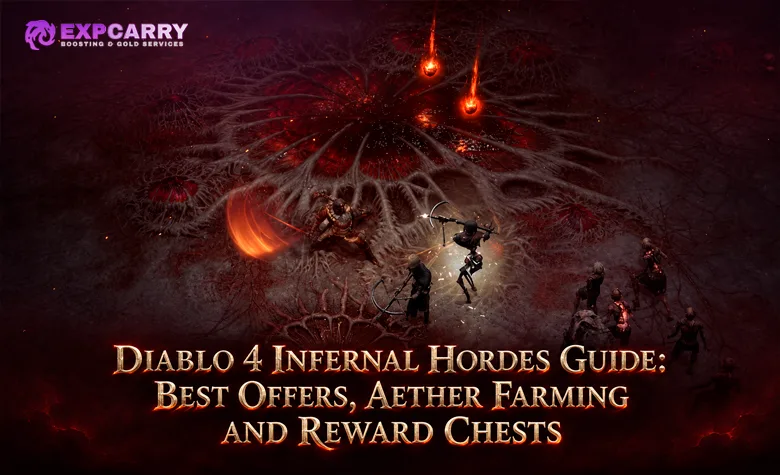
Infernal Hordes can shower you with Burning Aether or leave you staring at a disappointing reward chest after several minutes of fighting. The difference usually comes down to what happens between the waves. Pick Offers that work together, keep Aether Events spawning, and the final payout grows quickly. Grab every modifier with a bigger number while ignoring its downside, and you can end up spending half the run chasing monsters your build struggles to kill.
Diablo 4's current Infernal Hordes are also different from the version many older farming guides describe. Chaos Waves, Bartuc, updated reward costs, and the Lord of Hatred War Plans system have changed how players approach the activity. This guide covers the live Season 15 rules, including practical Offer priorities, wave-by-wave farming, difficulty selection, and where to spend your Aether after the final boss.
Short answer: Build your run around one or two reliable Aether sources. Early Offers that increase Aether Event frequency or establish a strong Fiend, Hellborne, or Aetheric Mass setup are usually worth more than small one-time bonuses. Take profitable Chaos Waves when your character can clear them, choose the Fell Council when you want to preserve Aether for reward chests, and spend your final balance according to whether you need Obducite, gear, gems, or gold. The best farming difficulty is the highest Torment level you can clear quickly and consistently.
How Infernal Hordes Work in Diablo 4
Infernal Hordes are timed combat encounters built around killing enemies, triggering special events, and collecting Burning Aether. Each wave gives you a limited window to make as many profitable events happen as possible. After the last wave, you face a boss and exchange your accumulated Aether for rewards.
The basic loop is easy to understand. The real strategy is in the details: every Offer can change what spawns, how dangerous it becomes, and how much Aether you receive for killing it. Some modifiers keep paying throughout the entire run, while others are useful only if your existing choices make them worthwhile.
Compasses, Wave Counts, and Access
Infernal Compasses determine the encounter you enter. In Torment difficulty, standard Hordes can feature six, eight, or ten waves. Longer runs create more opportunities to stack Offers and collect Aether, but they also take more time and demand greater consistency from your build.
Compasses can be obtained through endgame activities, including Helltides, Nightmare Dungeons, Whispers, and boss-related rewards, or crafted at the Occultist for Sigil Powder. Players using the Lord of Hatred War Plans system can also enter selected activities through their War Plan route, which can generate the required access item when needed.
Before Torment, Fleeting Hordes provide a shorter introduction with four waves and a reduced Fell Council encounter. They are useful for learning the activity, but they should not be confused with the full Torment farming loop.
| Format | What to Expect | Best Use |
|---|---|---|
| Fleeting Hordes | Four waves, fewer Offer choices, and a smaller Fell Council encounter. | Learning the mechanics before entering Torment. |
| Six-wave Hordes | A shorter Torment run with fewer opportunities to stack modifiers. | Fast, consistent farming and testing a new build. |
| Eight-wave Hordes | More time for Offers to build on one another. | A middle ground between run length and Aether potential. |
| Ten-wave Hordes | The longest standard format, with more Offer choices and greater Aether potential. | Established builds that can maintain their clear speed through the later waves. |
Infernal Offers Stay With You
Before the first wave and between subsequent waves, you choose an Infernal Offer. A normal selection presents three options. Each combines a Boon, which helps you earn Aether or deal with enemies, with a Bane, which makes some part of the run more dangerous.
Most ordinary Offers remain active for the rest of the run. That makes an excellent first-wave choice much more valuable than the same modifier picked just before the final wave. If an Offer increases the number of events you can trigger, you want that bonus working for as many waves as possible.
Chaos Waves follow different rules. They replace the upcoming wave with a special encounter rather than becoming a normal permanent modifier. They can pay extremely well, but accepting one also means giving up the regular Offer you could have selected instead.
Where Your Burning Aether Actually Comes From
Regular monsters keep the encounter moving, but special Aether Events provide much of the currency you are trying to farm. Defeating ordinary enemies helps trigger these events, so your clear speed affects how often you get another chance to earn Aether.
You should think about the arena as a constantly updating set of objectives. Your job is not simply to kill every demon on screen. It is to trigger the next valuable event, finish it quickly, collect the Aether, and repeat.
Aether Fiends and Aether Lords
Aether Fiends are powerful enemies that appear through event triggers. They are straightforward targets: spawn them, kill them quickly, and collect their Aether. Offers can increase their rewards, make them appear more frequently, or turn them into tougher Aether Lords.
Aether Lords can become extremely profitable when several modifiers work together. The catch is their health and damage. If turning Fiends into Lords makes every event take much longer, the apparent upgrade can reduce your total Aether per minute.
For builds with strong single-target damage, however, a Fiend-to-Lord setup is one of the most attractive directions a run can take.
Hellborne
Hellborne are dangerous enemies that can be introduced or strengthened through Infernal Offers. Once your run starts generating them reliably, additional modifiers can increase their numbers or the Aether they award.
This is where many players make their first mistake. They remember that Hellborne used to dominate Infernal Hordes farming and automatically select every Hellborne-related Offer. Blizzard subsequently reworked and rebalanced the Offer system, so Hellborne are no longer the only viable path to a strong payout.
Choose them when the available modifiers fit together and your build can erase them quickly. Do not force the strategy if your early choices have already pushed the run toward Fiends, Masses, or another profitable setup.
Aetheric Masses
Aetheric Masses are stationary targets that award Aether when destroyed. Fast builds can remove them almost immediately, making them useful for keeping your farming rhythm intact.
Some Offers increase their rewards, create additional Masses, or cause other enemies and events to appear when they die. Those combinations can turn a simple objective into a chain of profitable kills.
Masses are particularly appealing when you have enough damage to destroy them without stopping your regular monster-clearing rotation.
Soulspires
Soulspires require you to kill enemies inside their active area. Unlike a Fiend or an Aetheric Mass, a Soulspire cannot always be completed by dumping damage into one target. You need monsters in the correct position.
That makes them awkward for builds that instantly kill enemies outside the circle or scatter packs across the arena. Pulling enemies into the area, controlling your positioning, and avoiding unnecessary movement can make a huge difference.
Blizzard increased Soulspire range and improved enemy ambushes around them, making the mechanic more practical than it was at launch. Even so, a Soulspire-heavy setup is only worth chasing if you can complete the objectives quickly.
| Event | What Makes It Profitable | Main Problem | Best Fit |
|---|---|---|---|
| Aether Fiends | Reliable elite kills and stacking Aether bonuses. | Single-target damage can become a bottleneck. | Balanced AoE and boss damage. |
| Aether Lords | Large payouts when Lord-related modifiers stack. | High health and dangerous attacks. | Strong single-target builds. |
| Hellborne | Extra spawns and Aether per kill. | Uncontrolled damage and slower kills at higher difficulty. | Fast elite-killing builds. |
| Aetheric Masses | Quick destruction and possible event chains. | Some modifiers increase danger or slow the loop. | High burst damage and mobile builds. |
| Soulspires | Strong rewards when the correct modifiers combine. | Enemies must die inside the active area. | Builds with pulling, grouping, or excellent area control. |
Best Infernal Offers to Pick for More Aether
There is no single Offer that wins every run. Your first few selections shape which later choices become valuable, and your build determines whether the extra enemies are profitable or just annoying. Still, several Offers stand out because they improve how often you earn Aether rather than adding a tiny bonus at the end.
Start With Event Frequency When Possible
The Exalted Hordes is an excellent early choice because it increases the rate at which killing normal monsters generates Aether Events. That bonus helps almost every farming setup: more events mean more Fiends, Masses, or Soulspires to complete.
The tradeoff is that normal monsters become more dangerous. If your build already clears ordinary packs without trouble, this is usually a manageable downside. If you are barely surviving each wave, the additional pressure can make the Offer less appealing.
An early event-frequency bonus is especially valuable in eight- and ten-wave runs, where it has more time to pay you back.
Build Around Aether Goblins When the Offer Appears
The Aether Goblins can introduce Goblins through Aether Events. These enemies are valuable because they can provide substantial Aether payouts, particularly when you are already generating events quickly.
This makes The Aether Goblins a strong partner for The Exalted Hordes. You trigger more events, which gives you more opportunities for valuable Goblin spawns.
There is one condition: you need to kill the Goblins. If your build struggles to catch mobile targets or the extra enemy health slows everything down, the combination loses some of its appeal.
Stack Fiend and Lord Offers When You Can Kill Them Fast
Fiend-focused runs can become extremely rewarding when the Offers start reinforcing one another. The Exalted Fiends increases Aether from Fiend kills, while The Colossal Fiends can turn those encounters into more valuable Aether Lord fights.
Follow-up Lord modifiers become attractive once you are consistently generating and killing them. The Ruthless Lords, for example, increases the payout from those enemies, but also makes the encounters more demanding.
This strategy works best when elites disappear almost as quickly as ordinary packs. If an Aether Lord survives long enough to consume a large part of the wave, stop stacking difficulty and look for a modifier that makes the overall run faster.
Take Hellborne Offers as a Package
The Summoned Hellborne and other Hellborne-generating Offers establish a new source of Aether. Once Hellborne are appearing regularly, options such as The Surging Hellborne or The Exalted Hellborne can improve the payoff.
The important distinction is between an Offer that creates Hellborne and one that only improves Hellborne you are already seeing. Increasing the reward from an enemy that barely spawns will not rescue a weak run.
Get the engine running first. Add the multipliers afterward.
Use Mass and Soulspire Offers Selectively
Mass-related Offers are worth considering when your character can destroy Aetheric Masses immediately. Effects that create additional Masses or let them produce more events can generate excellent value without forcing you to chase difficult enemies.
Soulspire modifiers require more caution. Offers that increase Aether per completed Soulspire look attractive, but modifiers that make the objective take longer can be a trap. A high-value Soulspire that sits unfinished while the timer expires is worth nothing.
If you have strong grouping tools, Soulspire-focused combinations become much more reasonable. Without them, prioritize the objectives your build can finish reliably.
| Offer or Combination | Priority | Why Pick It? | When to Skip It |
|---|---|---|---|
| The Exalted Hordes | High, especially early | More frequent Aether Events benefit almost every strategy. | Normal monsters are already too dangerous. |
| The Aether Goblins | High with fast event generation | Creates opportunities for large Aether payouts. | You cannot kill or catch Goblins efficiently. |
| The Exalted Fiends | High in Fiend-focused runs | Improves the reward from enemies you are already killing. | Few Fiends are spawning. |
| The Colossal Fiends | High for strong builds | Can turn Fiend events into more rewarding Lord encounters. | Aether Lords take too long to kill. |
| Hellborne-generating Offers | High when selected early | Establishes another source of repeatable Aether. | Your build struggles against dangerous elites. |
| Aetheric Mass combinations | Medium to high | Quick objectives can create profitable event chains. | The Banes make Masses slow or dangerous to clear. |
| Soulspire payout modifiers | Build-dependent | Can produce strong returns with good grouping. | You frequently leave Soulspires unfinished. |
| Small end-of-run bonuses | Usually lower early | Provide a predictable amount without relying on repeated events. | A strong permanent farming modifier is available instead. |
Important: Infernal Offers were substantially reworked. Their exact numerical bonuses and available follow-up choices can change with patches. Use the current in-game tooltip for the final Bane and Boon values; the priorities above describe how the combinations work, not a promise that every Offer will appear in every run.
Explore services related to this guide, selected from our Diablo IV catalog.
View All Diablo IV Services

Which Offers Should You Choose Between Waves?
Offer selection gets easier when you stop treating each choice as an isolated reward. A strong run usually has three stages: establish the farming setup, improve its payouts, and finish without throwing away your accumulated Aether.
Early Waves: Pick Something That Keeps Paying
During the first two or three Offer selections, look for a way to increase Aether Event frequency or establish a profitable enemy type. This is where The Exalted Hordes, an early Goblin option, or a strong Fiend or Hellborne starter can make the biggest difference.
Do not chase a minor one-time reward over an Offer that could improve six more waves. The earlier you activate a useful permanent modifier, the more opportunities it has to generate additional Aether.
Middle Waves: Strengthen What Is Already Working
By the middle of a run, you should know which events are producing your Aether. If Fiends are dying instantly, increase their payout or upgrade them. If Masses are creating quick chains, stay with Mass-related bonuses. If Hellborne are showing up constantly, additional Hellborne rewards make more sense.
This is also where greedy picks can ruin a good run. An Offer that turns comfortable kills into drawn-out fights can erase the value of its bonus. Watch the actual Aether gain, not just the number printed on the selection screen.
Final Waves: Protect Your Clear Speed
Near the end, a modifier that only pays after repeated future events has fewer opportunities to help you. Immediate rewards become more competitive, especially if your preferred setup is already powerful.
Avoid adding unnecessary enemy health or damage just because an Offer looks exciting. Your goal is to reach the boss with a full Aether balance and enough resources to finish the encounter comfortably.
Should You Take Chaos Waves?
Chaos Waves are special encounters that can appear as an additional choice between regular waves. They change the rules of the next fight and can offer substantially more Burning Aether than a normal wave.
Some bring Chaos Rifts and dangerous projectiles. Others introduce powerful enemies or Aether Goblins. Their exact rewards vary, so treating every Chaos Wave as an automatic win is a mistake.
The decision comes down to two questions: can you clear the special encounter, and is its immediate payout worth giving up a permanent Offer?
When a Chaos Wave Is Worth Taking
A profitable Chaos Wave is often the right choice when your build can handle its mechanics and your regular Offers are mediocre. A large immediate Aether payout can rescue an otherwise average run.
Chaos Waves are also attractive later in a run, when a new permanent modifier has fewer waves left to provide value.
Watch for especially rewarding encounters, such as waves featuring Aether Goblins. Their potential payout can be enormous, although the exact result depends on the encounter and how efficiently you complete it.
When to Choose a Normal Offer Instead
Suppose you are running a ten-wave Compass and a Chaos Wave appears near the beginning. If the alternative is an excellent permanent Offer that would strengthen your farming for the rest of the run, skipping the Chaos Wave can be the better long-term decision.
The same applies when a special encounter is a bad matchup for your build. A wave filled with tough enemies or complicated objectives is not profitable if you spend most of its timer struggling to complete it.
Chaos Waves have a higher reward ceiling. Permanent Offers can have a higher total payoff when selected early enough. Judge the choice by the number of waves remaining.
How to Farm More Aether During Each Wave
Good Offer choices matter, but they cannot compensate for a slow farming rhythm. Each regular wave lasts 60 seconds. You want those seconds filled with monster kills and completed Aether Events, not long trips across the arena or unfinished objectives.
Keep Monsters Dying to Trigger More Events
Open the wave by clearing nearby packs quickly. As Aether Events appear, switch to them without abandoning the flow of combat. Once an event is completed, move immediately into the next dense group of enemies.
Builds with wide-area damage have an advantage because they can kill regular monsters while damaging nearby event targets. However, you still need enough single-target damage to finish Fiends and Lords before they become a distraction.
Do Not Waste Half the Timer Crossing the Arena
Constantly running from one corner to another can destroy an otherwise promising run. Watch the event indicators and choose a route that keeps combat continuous.
If two events appear, prioritize the one you can complete quickly and safely. A nearby Mass you can destroy instantly may be a better first target than a Soulspire that requires several seconds of setup.
Movement speed, mobility skills, and reliable crowd control all help, but movement alone does not earn Aether. You still need to finish the objectives you reach.
Handle Soulspires Without Losing Momentum
When a Soulspire appears, fight inside its active area and bring monsters toward it. Avoid clearing every enemy at the edge of the arena before entering the circle.
In a party, players who can pull or group monsters should help complete the Soulspire. Other players can keep nearby enemies under control without dragging everything away from the objective.
If the wave is almost over and the Soulspire still needs several kills, consider whether another nearby event is more realistic to finish. Do not spend the final seconds chasing a payout you are unlikely to collect.
Collect Your Aether Before Moving On
Burning Aether must be collected. Keep your pet equipped, since pets can help pick it up during the fight, and pay attention to Aether left on the ground after events end.
In group play, each player has their own Aether total for reward spending. Do not assume that one player's excellent run balance automatically gives everyone the same amount to spend at the end.
Fell Council or Bartuc: Which Final Boss Is Better for Farming?
After the final wave of a Torment Infernal Horde, you can choose between the Fell Council and Bartuc. For a straightforward resource farm, this decision is one of the most important in the entire run.
Choose the Fell Council to Preserve Aether
The Fell Council is the standard final encounter and does not require the large Aether payment associated with Bartuc. You fight three selected Council members, with one acting as the empowered Council Speaker.
For players farming materials, gold, or the main reward chests, the Council is usually the practical choice. Your accumulated Aether remains available for spending after the fight.
Keep enough damage and survivability for the Council itself. A build that handles regular waves comfortably can still struggle if the empowered boss stays alive too long.
Bartuc Costs 666 Burning Aether
Bartuc offers a tougher alternative encounter, but entering his fight costs 666 Burning Aether per player. In a party, everyone must be able to pay the cost. The first player who selects Bartuc commits the group to that choice.
That expense matters. If you want to fight Bartuc and still have 400 Aether available for the Greater Equipment reward, you need at least 1,066 Aether before committing to the boss.
Bartuc uses Chaos Portals and dangerous projectile attacks. His fight is worth considering when you specifically want the rewards associated with the encounter or have enough Aether that the entry cost does not ruin your chest plan. His boss drops are awarded after the kill without another Aether payment.
For ordinary Obducite or gold farming, do not spend 666 Aether simply because the boss is available. The Fell Council lets you put that currency directly toward the resources you came for.
Infernal Hordes Reward Chests: Where Should You Spend Aether?
The final chest room is where an excellent run can still turn into a disappointing one. Burning Aether has several possible uses, and the best choice depends on the upgrade your character actually needs.
Current reward costs are not the same as the original Infernal Hordes launch costs. Older guides describing 20-Aether material chests and a 60-Aether Greater Equipment chest should not be used for the current endgame.
| Reward | Aether Cost | What You Get | When to Choose It |
|---|---|---|---|
| Spoils of Greater Equipment | 400 Aether | High-end equipment, including a guaranteed Ancestral Legendary with a Greater Affix, plus additional rewards such as Obducite and gold. | You need gear upgrades or useful items for salvaging. |
| Spoils of Materials | Your remaining Aether | Crafting resources, including materials used for Masterworking, according to the current reward configuration. | You need materials more than another random item. |
| Spoils of Gold | Your remaining Aether | Gold, with rewards scaling according to the Aether spent. | Gold is blocking your next upgrades or crafting attempts. |
| Chest of Talismans | Normally 200 Aether when available; 1 Aether with the Season 15 Splinter of Terror rank 20 modifier. | Talisman-related rewards. | You have unlocked the relevant reward and need Seals or Charms. |
| Hoard of Greater Equipment | 1,000 Aether when enabled. | A larger equipment-focused reward added through the Infernal Hordes Activity Tree. | Your War Plan setup enables it and your goal is gear. |
When to Spend 400 Aether on Equipment
The Greater Equipment reward is attractive when you still need Ancestral gear with Greater Affixes. It gives you a focused reason to save at least 400 Aether instead of spending your entire balance elsewhere.
However, the guaranteed Greater Affix does not guarantee a useful item for your build. If most of your equipment is already strong and you have several pieces waiting for Masterworking, a material-focused payout may advance your character more.
Decide before entering the run whether you are hunting upgrades or paying for upgrades you already have. That choice prevents impulsive chest spending afterward.
When Materials Are the Better Reward
Materials are usually the sensible priority when you already own good gear but lack the resources to improve it. Obducite is particularly important for Masterworking, and a character with several unfinished upgrades can burn through a large stockpile quickly.
The material reward converts your remaining Aether into a resource-focused payout. That means the amount you finish with matters. More Aether is not just a better score; it is a larger opportunity to progress your equipment.
If your goal is specifically Obducite, check whether your Infernal Hordes Activity Tree is configured to favor it before starting the farm.
When to Take Gold Instead
Gold is easy to overlook until several expensive upgrades drain your reserves. If crafting, Masterworking, or other gear changes are blocked by gold rather than materials, the Gold reward can be the most useful option.
Blizzard improved the Infernal Hordes Gold Chest so its payout scales more favorably with Aether. That makes it a legitimate farming choice instead of something you only click because you have a little currency left.
Still, do not choose gold by habit. Look at your actual shortage. If you have plenty of gold but no Obducite, the material reward is the more direct solution.
Talismans and Additional War Plan Chests
Lord of Hatred introduced the Talisman system, and the Infernal Hordes Activity Tree can add a Chest of Talismans through the Council Coffers node. That creates another possible destination for your Aether.
The normal displayed cost is 200 Aether. During Season 15, Diablo's Splinter of Terror at reputation rank 20 modifies Council Coffers and reduces this cost to just 1 Aether when the required seasonal effect is active. Do not assume that discount applies to every character or realm.
The Activity Tree can also unlock a Hoard of Greater Equipment for 1,000 Aether. These specialized rewards are worth planning around, but they only matter when you have actually enabled the corresponding nodes.
For more detail on assembling Seals and Charms, see the Diablo 4 Charms and Talismans Guide.
Best War Plans Upgrades for Infernal Hordes Farming
Players who own Lord of Hatred and have unlocked War Plans can customize Infernal Hordes through its Activity Tree. These upgrades change how the run behaves, which rewards appear, and which resources are worth targeting.
This is a separate system from Infernal Offers. Offers are selected during an individual run, while Activity Tree choices shape the activity before you begin.
Forged in Flame or Flawless Find?
Forged in Flame changes Infernal Hordes drops toward Obducite instead of Gem Fragments. If you are Masterworking multiple pieces of gear, this is the obvious direction to consider.
Flawless Find does the opposite, favoring Gem Fragments instead of Obducite. Pick it when gems are your current bottleneck.
These are exclusive choices. You cannot use both simultaneously to maximize both resources. Decide which material you need before committing to a long farming session.
Method and Madness Helps You Build Better Offer Chains
Method and Madness increases the likelihood of receiving Infernal Offers from the same category as your previous choice. This is useful because focused combinations generally outperform random modifiers that do not support each other.
If you are building around Fiends or Hellborne, more chances to see related Offers can make the run considerably more consistent.
The Black Pact provides another opportunity to reinforce a category through an additional altar between waves. This altar can be invoked only once per run and offers a choice from the same category as your previous Offer. Together, these nodes are attractive when your main goal is to create a powerful, repeatable Aether setup.
Impending Doom Rewards Fast Builds
Impending Doom triggers additional Aether Events at all arena locations when a wave has ten seconds remaining. That gives a strong build one more opportunity to convert its damage into currency.
The catch is obvious: you need to finish those events before the wave ends. If your build struggles with positioning or single-target damage, the extra objectives can appear too late to be useful.
In Season 15, Diablo's Splinter of Terror at reputation rank 14 modifies this node so the effect triggers with 30 seconds remaining instead of 10, creating more time to finish the additional events.
Reign in Hell Versus Total Chaos
Reign in Hell provides another Infernal Offering choice each wave but suppresses Chaos Waves. This is attractive when you want consistent Offer combinations and a predictable farming setup.
Total Chaos makes Chaos Waves appear more frequently but reduces the normal Offer choices available. It leans into high-risk, high-reward encounters.
These nodes are mutually exclusive. Choose based on your build and farming goal, not because one sounds more powerful:
- Reign in Hell: Better when you want reliable modifier stacking and fewer unpredictable encounters.
- Total Chaos: Better when your build can comfortably clear special waves and you want to chase their larger immediate payouts.
Bedlam, Pulse of Aether, and Other Useful Nodes
Bedlam grants 50 Aether when entering a Chaos Wave, while Pulse of Aether grants 50 Aether when suppressing one. Both increase enemy Monster Power by 1 and are exclusive choices, so the best option depends on whether your setup encourages or avoids Chaos Waves.
Devil's Deal introduces an Infernal Challenge that can award 200 Aether when completed. It is useful for players who can reliably satisfy the challenge without compromising the rest of the run.
Infernal Hoard adds a larger equipment reward after the final boss. It deserves consideration when you are specifically farming gear rather than Obducite or gold.
For complete War Plan route building, activity chains, and War Chest priorities, use the existing Diablo 4 War Plans Guide. The important choice for Infernal Hordes is which Activity Tree effects support the resources you are trying to collect.
What Torment Difficulty Is Best for Infernal Hordes?
The highest Torment difficulty you have unlocked is not automatically the best place to farm. Higher Torment levels offer stronger rewards, but a slow clear can destroy your efficiency.
Diablo 4 now has twelve Torment levels. The right one for Infernal Hordes is the level where your build can keep killing enemies quickly, complete the special events, and defeat the final boss without repeatedly running into survival problems.
Use Aether per Minute, Not Just Aether per Run
At the same Torment level, imagine you earn 900 Aether in a comfortable run that takes eight minutes. That is better farming efficiency than earning 1,100 Aether in a difficult run that takes fifteen minutes.
The second run has the larger final number, but the first produces more Aether for the time spent. When comparing different Torment levels, also account for their reward scaling and measure the actual resources or gear you earn per minute.
Track several runs at your current difficulty before moving higher. If the next Torment level substantially reduces the number of events you complete without providing better rewards per minute, step back until your damage improves.
When to Increase Difficulty
Move up when regular enemies disappear quickly, Aether Fiends no longer interrupt your rhythm, and the final boss dies without a drawn-out fight.
You should also be able to survive the Banes attached to your preferred Offers. A build that barely survives ordinary waves may struggle badly after several damage-increasing modifiers have accumulated.
Push higher for better overall rewards when the extra difficulty does not significantly slow the farm. Otherwise, stay where your runs are smooth.
How to Prepare Your Build for Fast Infernal Hordes
A good Infernal Hordes build needs more than impressive boss damage. You spend most of the activity fighting dense packs, reacting to event spawns, and moving around the arena. The best setup handles all three without forcing constant pauses.
Balance AoE Damage and Elite Killing
Strong AoE damage lets you clear normal enemies quickly enough to trigger more events. Reliable single-target damage finishes the Fiends, Lords, Hellborne, and final boss that stand between you and your rewards.
If your build excels at clearing packs but struggles against elites, avoid stacking Offers that create stronger single targets. If your single-target damage is excellent but ordinary packs take too long, prioritize improvements to your area damage before farming longer Hordes.
Bring Movement, Control, and Survivability
Movement skills help you reach new events, while pulls and crowd control are especially useful for Soulspires. Defensive cooldowns become increasingly important once several Banes are active.
Check your resistances, armor, sustain, and escape options before increasing Torment. A small defensive adjustment can be more valuable than another damage bonus if it prevents deaths during difficult Chaos Waves.
Keep your pet equipped to help collect dropped Aether, and make sure your build has enough resource generation to maintain damage without long gaps.
Prepare for the Final Boss Before You Start
Do not build exclusively for wave clearing and then discover that the Fell Council takes several minutes to kill. Save reliable single-target damage for the end of the run.
If Bartuc is your intended target, prepare for more dangerous mechanics and remember the 666-Aether entry cost. A run focused on ordinary resource farming usually benefits more from a fast Council kill and a larger remaining chest budget.
Mistakes That Ruin an Infernal Hordes Farm
Most disappointing runs come from a handful of repeated decisions. Fixing them often improves your Aether income more than changing your entire build.
- Picking Offers only by their Aether bonus: An extra reward is worthless when the enemy takes too long to kill.
- Ignoring Offer synergy: Three unrelated modifiers rarely perform as well as a coherent Fiend, Mass, or Hellborne setup.
- Taking difficult Chaos Waves automatically: A special wave can pay well, but not when your build cannot complete its objectives.
- Leaving Soulspires unfinished: Kill enemies inside their active area instead of clearing the arena from the outside.
- Running the highest available Torment: A slower, riskier run may produce less useful loot per minute.
- Spending 666 Aether on Bartuc without a goal: That currency could otherwise go toward materials, equipment, or gold.
- Opening a random reward chest: Choose the payout that addresses your current gear or resource shortage.
- Using old chest prices: Launch-era 20-Aether and 60-Aether reward advice no longer describes the current endgame.
- Forgetting Activity Tree choices: Farming Gem Fragments while your setup is configured for Obducite can waste an entire session.
- Judging one lucky run as your normal income: Compare several attempts before deciding that a particular Offer setup or Torment level is best.
Infernal Hordes FAQ
These are the details that most often cause confusion when players switch between older guides, different Torment levels, and the current War Plans system.
Is Hellborne Still the Best Infernal Hordes Strategy?
Hellborne remain profitable when their spawn and Aether bonuses work together. However, Blizzard rebalanced Infernal Offers, and strong Fiend, Aether Lord, Mass, and Chaos Wave combinations can also produce excellent results. The best strategy depends on your available Offers and how quickly your build completes the events.
Does Burning Aether Carry Over to the Next Run?
No. Burning Aether is earned and spent within the Infernal Hordes encounter. Treat each run as a separate farming session and use your available rewards before leaving.
Should I Always Save 400 Aether for the Greater Equipment Chest?
No. Save 400 when Ancestral gear is your main goal. If you already have the equipment you need but lack Obducite or gold for upgrades, the corresponding resource reward can be more useful. Your current bottleneck matters more than the chest's name.
Can I Farm Infernal Hordes Without Lord of Hatred?
The base Infernal Hordes activity is not exclusive to Lord of Hatred. However, the expansion's War Plans and related Activity Tree customization require access to that system. You can still use Infernal Offers, farm Burning Aether, and claim the normal available rewards without building an expansion War Plan.
Conclusion
Profitable Infernal Hordes runs are built between the waves. Start with an Offer that improves event generation or creates a reliable Aether source, stack bonuses that support it, and keep your actual kill speed high. Take Chaos Waves when their likely payout justifies the risk, not simply because they appear.
For straightforward resource farming, the Fell Council preserves more Aether for the final chests. Spend that balance on the upgrade you need: Obducite and materials for Masterworking, equipment for better affixes, Gem Fragments through the appropriate Activity Tree setup, or gold when crafting costs are holding you back.
Most importantly, farm at a difficulty where the waves keep moving. A smooth run full of completed events will beat a higher-Torment struggle far more often than an impressive difficulty label suggests.