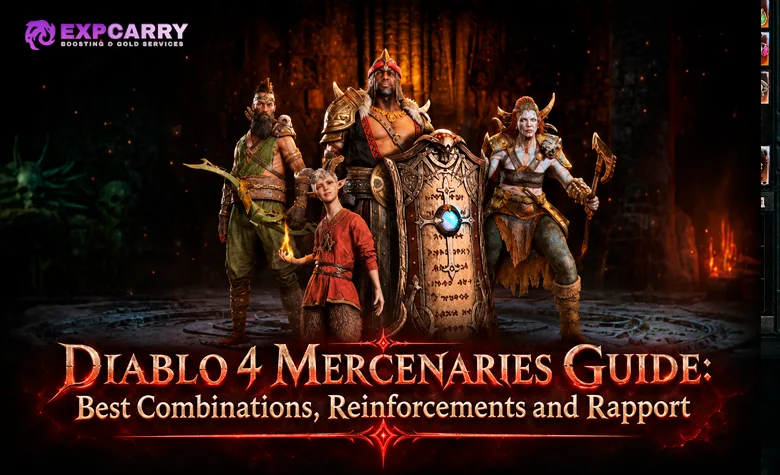
Diablo 4 Mercenaries are most useful when the hired companion fixes a recurring weakness and the Reinforcement activates at the exact moment a second ability is needed. Raheir can cover dangerous incoming hits, Varyana rewards uninterrupted pack clearing, Subo adds ranged utility and reveals nearby enemies and materials, and Aldkin brings Shadow or Fire control. A strong pairing depends on your actual skill rotation, the content being farmed, and whether you are playing solo or in a party. Choosing two popular names without checking their roles and Opportunity settings can leave the second slot doing almost nothing.
In Season 15, the latest published live patch is 3.2.4, dated October 28, 2026. The four-Mercenary system remains tied to Vessel of Hatred: you recruit allies through Nahantu quests, configure a Hired Mercenary and a different Reinforcement, and advance their individual Rapport to unlock skills and rewards. This guide covers the unlock route, skill branches, practical combinations for leveling, speed farming, bosses and Hardcore, Reinforcement triggers, Rapport progression, and Pale Marks. It separates the companion system from class-specific build rotations, which belong in the individual build guides.
Short answer: Hire Raheir when survival is your limiting factor, Varyana for continuous kill-heavy farming, Subo for scouting and marked-target utility, or Aldkin for targeted control and elemental support. Enlist a different Mercenary for one useful Reinforcement skill, bind its Opportunity to a condition that happens when you actually need it, and level each Mercenary's Rapport through the content you already clear efficiently.
Unlocking Mercenaries and the Den in Vessel of Hatred
Mercenaries require access to the Vessel of Hatred expansion and its Nahantu storyline. The campaign leads to the Den, headquarters of the Pale Hand, and introduces Raheir as the first available ally. The other three do not appear as automatic rewards for character level: each has a recruitment quest associated with the Den. Blizzard's official Mercenaries overview confirms the four-person roster, the separate recruitment quests, and the two combat roles.
After reaching the Den, inspect the quest items there rather than searching for random open-world Mercenary drops. The quest starters and their follow-up chains provide a reliable checklist for completing the roster. If a quest is not visible on an alternate character, first check whether that character has the relevant campaign skip and Mercenary access already unlocked.
| Mercenary | Recruitment route | Main role after unlocking |
|---|---|---|
| Raheir | Progress the Vessel of Hatred campaign to the Den and recruit him during the story | Defensive hired companion or emergency Reinforcement |
| Varyana | Examine the Brutal Note and complete Slayer's Retribution | Kill-chain damage, movement and melee control |
| Subo | Examine the Muddy Letter and complete A Feather on the Scale | Scouting, marked targets, ranged control and traps |
| Aldkin | Examine the Archive of Kuo Chosah and complete A Nameless Mystery | Shadow or Fire damage, debuffs and area control |
You can configure skills through the Mercenary panel or return to the Den to change Hired and Reinforcement assignments and manage Bartering. Players progressing the expansion story can also consult the Vessel of Hatred campaign progression service for the associated campaign activity; hiring and configuring Mercenaries themselves remains an in-game system, not a separate purchase requirement.
Hired Mercenary and Reinforcement: Two Slots with Different Rules
The Hired slot is your persistent solo companion. It uses a selectable Core skill, an Iconic skill, supporting passives, and its own Mercenary Perk. A Reinforcement is another unlocked Mercenary that briefly arrives to use one selected active skill when the assigned Opportunity occurs. The same character cannot fill both slots, and the Reinforcement does not receive the full Hired skill setup.
The distinction is especially important for party play. The Hired Mercenary accompanies you while playing solo, but does not remain as an extra full-time ally when you group with other players. A Reinforcement can still answer its configured trigger in a party. Never recommend a Hired-only perk as though it were granted automatically by choosing that character as the Reinforcement.
| System | Hired Mercenary | Reinforcement |
|---|---|---|
| Combat presence | Fights beside you during solo play | Appears briefly when an Opportunity activates |
| Skill configuration | Core and Iconic active skills with matching passives | One selected active skill and its Opportunity |
| Mercenary Perk | Available while hired | Hired-only perk does not apply |
| Group play | Does not accompany a normal player party | Can trigger during party combat |
| Rapport progress | Fuller progression while accompanying solo play | Slower progression, but available during group activities |
| Roster restriction | Must be different from the selected Reinforcement | Must be different from the selected Hired Mercenary |
Raheir, Varyana, Subo and Aldkin: Mercenary Roles Compared
No single Mercenary wins every type of content. Raheir is attractive when the player dies during difficult pulls, Varyana becomes stronger when enemies die frequently enough to sustain Massacre, Subo brings mapping convenience and marked-target benefits, and Aldkin provides an additional source of area pressure or control. These are role recommendations, not patch-verified numerical rankings of Mercenary damage across every class.
| Mercenary | Hired strength | Useful Reinforcement direction | Main limitation |
|---|---|---|---|
| Raheir | Protection, taunts, mitigation and emergency Valiance | Bastion for timed protection or Crater for impact and positioning | Hired-only emergency protection is not supplied by Reinforcement |
| Varyana | Massacre kill streaks, mobility and aggressive melee support | Bloodthirst or Shockwave-related control for planned damage windows | Massacre loses value when kills are infrequent |
| Subo | Seeker scouting and target marking, ranged attacks and traps | Wire Trap, Trip Mines or Molotov for a chosen setup | Seeker's map reveal does not come from the Reinforcement slot |
| Aldkin | Shadow debuffs, Fire pressure and form-based support | Field of Languish or a Fire ability aligned with the trigger | His Hired-only demon-form curse effects depend on the selected Core skill |
Explore services related to this guide, selected from our Diablo IV catalog.
View All Diablo IV Services

Raheir: Protection, Taunts, Bastion and Emergency Survival
Raheir is the most straightforward first Hired Mercenary for a character struggling with sudden deaths. His Valiance perk can intervene when incoming damage meets its threshold, and his branches offer Armor or Resistance support, enemy control, defensive utility, and healing options. A player clearing comfortably but dying to an occasional boss strike gains more from that kind of protection than from another small source of incidental damage.
His Shield Charge branch leads toward Provoke or Crater and emphasizes taunting, engagement and control. Ground Slam opens Bastion or Shield Throw, with passives such as Raheir's Aegis and Draw Fire covering other defensive needs. Choose the branch that answers your actual problem: Bastion for an absorption window, Shield Throw for additional enemy control, or the Shield Charge direction when pulling and controlling close targets matters more.
Raheir Reinforcement: Bastion or Crater
Bastion is a practical candidate when another Mercenary is already hired and the player needs a timed defensive response. Crater is a different choice, suited to builds that benefit from an additional area impact or enemy positioning effect. Bind the selected skill to an available Opportunity that corresponds to the intended moment, then observe whether Raheir actually arrives before the damage or control window has passed. A defensive effect that appears only after a lethal hit is not solving the problem.
Varyana: Massacre Stacks, Cleave and Speed Farming
Varyana favors aggressive characters that kill constantly. Her Massacre perk builds through combat kills and rewards sustained streaks with Movement Speed, making her attractive for repeated Helltide packs, dense dungeons, and fast solo routes. The value drops in an isolated boss encounter where the build cannot maintain the same kill flow. That is a reason to swap for the encounter, not proof that Varyana is universally weaker than a defensive Mercenary.
The Cleave path supports melee pressure and can lead to Bloodthirst or Whirlwind, while Shockwave opens Earth Breaker or Ancient Harpoons for different control and damage patterns. If your build needs enemies gathered closer, inspect the control path; if it already groups monsters efficiently, a damage-support route may do more. Varyana as Reinforcement brings the selected ability, not the persistent Massacre movement bonus available when she is hired.
Subo: Seeker, Enemy Marks, Wire Trap and Ranged Utility
Subo is a useful Hired option for farming sessions where information and target selection matter as much as raw damage. His Seeker perk reveals nearby enemies and materials and marks targets for additional benefits when they are killed. The mark can help resource and ability flow during regular pack clearing, but boss-only fights remove much of the kill-trigger advantage. His ranged behavior also suits characters that prefer not to rely on a melee companion for all their control.
The Wire Trap branch leads toward Cover Fire or Trip Mines, while Molotov offers a Fire-oriented route with Snipe or Explosive Charge as later choices. Select the tree for the effect you actually need—trap control, a reliable ranged contribution, or damage over time—rather than assuming every Subo option grants the same bonuses. The important slot restriction is simple: Subo's Seeker map reveal is tied to his Hired perk, so assigning him only as Reinforcement will not reproduce that exploration benefit.
Aldkin: Field of Languish, Shadow Control and Fire Pressure
Aldkin is a caster whose Shadow path uses Haunt and can lead to Field of Languish or Chain of Souls. The Fire path begins with Flame Surge and can lead to Storm of Fire or Wave of Flame. Field of Languish is worth considering as a Reinforcement when slowing enemies and reducing their damage makes the player's own rotation safer; the Fire options are more appropriate when additional area damage or Burning is the desired contribution.
As a Hired companion, Aldkin also has a demon-transformation perk with branch-dependent curses. Curse of Darkness makes nearby enemies Vulnerable, while Curse of Flames causes your direct damage to Burn enemies. These are useful effects rather than an automatic penalty, but their value depends on the full character build and the selected Core skill. A Reinforcement assignment is often an easier starting point because it gives access to a selected timed ability without depending on the full Hired perk. Blizzard's Vessel of Hatred patch notes record actual Mercenary skill adjustments, including changes to Raheir, Varyana, Subo and Aldkin; old launch-day skill numbers should not be reused without checking the present tooltip.
Mercenary Combinations for Leveling, Bosses, Farming and Hardcore
Choose a Hired companion for the benefit you want throughout the run, then use the Reinforcement slot for a different effect you need at a predictable time. The combinations below are practical starting setups based on the known skill roles, not universal best-in-slot rankings for every seasonal class build. They assume you have unlocked both characters and selected compatible abilities and Opportunities.
| Activity or build need | Hired | Reinforcement | Setup objective |
|---|---|---|---|
| New character, weak survival | Raheir | Aldkin — Field of Languish | Use persistent defensive support and timed enemy control |
| Fast solo pack clearing | Varyana | Subo — Wire Trap | Maintain Massacre while adding trap control to frequent casts |
| Exploration and material routes | Subo | Raheir — Bastion | Keep Seeker scouting active with a timed defensive backup |
| Hardcore or dangerous boss progression | Raheir | Aldkin — Field of Languish | Prioritize survival, spacing and reduced incoming damage |
| Aggressive melee build | Varyana | Raheir — Bastion | Combine kill-chain momentum with protection on a suitable trigger |
| Ranged or damage-over-time build needing control | Subo | Aldkin — Field of Languish | Keep scouting and target utility while adding a slowing enemy debuff |
| Full player party | No persistent Hired Mercenary in combat | Raheir, Aldkin or another unlocked choice | Build around a Reinforcement that actually triggers in group combat |
A pairing should be changed when the content changes. Varyana's Massacre matters far less during a long single-target phase than during dense mob clearing; Subo's scouting matters little inside a fixed boss arena; Raheir's defensive strength can be unnecessary if the build already survives every hit. For the class-specific rotation, consult the relevant ExpCarry build, such as the Druid builds guide or Warlock builds guide, rather than copying one Mercenary pairing across unrelated builds.
Solo Builds and Party Builds Need Different Mercenary Setups
For solo progression, the Hired perk can be central to the setup: Raheir's emergency intervention, Varyana's Massacre, and Subo's Seeker each change the way the character plays. In a normal player party, that full-time Hired companion is absent, so a build that depends on one of those perks must be evaluated differently. Keep the Reinforcement Opportunity tied to something your character can trigger during group combat, and do not calculate permanent scouting, movement or defensive benefits from the inactive Hired slot.
Reinforcement Opportunities: Trigger Selection and Cooldown Timing
A Reinforcement does not cast its selected skill on every attack. It waits for an Opportunity, which can be tied to a suitable player skill or a combat situation, and its ability must be available when that event occurs. If the Opportunity happens during the Reinforcement's cooldown, that event does not queue a guaranteed delayed cast; you need a fresh eligible trigger after the cooldown. Blizzard's 2.1 patch documentation also records corrections to an excessively frequent skill-based Reinforcement trigger and Raheir's control-impairment Opportunity, illustrating why trigger behavior must be checked in the current game rather than assumed from an old clip.
There are two different problems to solve: the chosen event must happen often enough, and it must happen at the right time. A defensive skill tied to a frequent but harmless button press may be on cooldown when the elite attack begins. An offensive field tied to a rarely pressed Ultimate may never appear during ordinary packs. The best Opportunity is the one that lines up with the expected value of the selected Reinforcement skill.
| Opportunity type | Useful setup | Failure to watch for |
|---|---|---|
| Player skill cast | Bind a control or damage ability to a skill you use at the start of the relevant combat window | Selected player skill is not actually in the active rotation |
| Injured or low-Life condition, where offered | Attach a defensive effect to a genuine emergency window | The skill triggers after damage has already become lethal, or remains on cooldown |
| Control-impairing effect, where offered | Use an available defensive response when crowd control disrupts movement | The condition is rare, or the chosen ability does not solve the control-related death |
| Any skill cast in combat, where offered | Align an offensive area skill with frequent combat casts | The ability fires too early or remains on cooldown during the intended damage window |
Setting a Reinforcement Skill and Testing the Opportunity
Use the Mercenary panel to check the selected Reinforcement's unlocked active skills and the Opportunity choices available to that skill. The exact choices vary with the setup, so do not treat the examples in a guide as a complete universal trigger menu. For instance, a documented Spiritborn configuration links a Quill Volley cast to Raheir’s Crater; this is a timing example rather than an automatic recommendation for every Spiritborn build. Inspect the actual trigger text and cooldown before testing; the player skill assigned as the Opportunity must be one you genuinely use.
- Choose the second Mercenary: enlist an unlocked character different from the current Hired companion.
- Select one Reinforcement skill: decide whether you need protection, damage, crowd control or a utility effect.
- Read its cooldown and allowed Opportunities: reject a pairing if the desired condition cannot be selected in the current panel.
- Assign the trigger: prefer a skill or combat event that occurs when the Reinforcement effect is valuable, not merely one that is easy to activate.
- Enter a familiar encounter: confirm the Reinforcement appears after the exact assigned event, and note its positioning.
- Repeat during cooldown: check whether the second event is skipped and whether a later fresh trigger works after recovery.
- Retune before replacing the Mercenary: moving the Opportunity to a better moment often fixes an apparently weak pairing without changing characters.
Mercenary Setups for Three Common Build Problems
The fastest way to evaluate Mercenaries is to start with a problem the character already has. A defensive failure, a slow pack-clearing route and a missing party trigger require different solutions. These examples explain the decisions involved without promising a fixed cooldown, exact skill damage, or guaranteed class-specific interaction that has not been tested in the live client.
Solo Boss Survival: Raheir Hired, Aldkin Reinforcement
Hire Raheir when one heavy boss hit is the reason the character fails. His Hired-only Valiance perk is relevant here, while a defensive skill path can add more sustained protection. Use Aldkin's Field of Languish as the secondary ability if an allowed player-skill Opportunity makes it appear during a predictable threatening phase. If the boss is immune to slowing or the damage-reduction effect does not help enough, keep Raheir's protection and change the second slot rather than forcing the original plan.
Dense Pack Farming: Varyana Hired, Subo Reinforcement
Hire Varyana for routes with frequent kills and visible Massacre uptime. Add an eligible Subo trap skill as Reinforcement to interrupt or soften the next pack when you engage it. The value of this pair depends on whether the build reaches enemies quickly enough to maintain the streak and whether the trap triggers during meaningful combat. For repeated dungeon farming, Diablo IV dungeon completion services cover the associated activity, but the Mercenary choice itself should be tested against your real route and clear speed.
Exploration and Material Runs: Subo Hired, Raheir Reinforcement
Hire Subo when his Seeker reveal saves time locating enemies and nearby materials. Use Raheir's Bastion as a possible defensive Reinforcement if a suitable Opportunity is available for the encounters you meet while exploring. This setup is not the same as assigning Subo to Reinforcement, because that would remove the Hired-only scouting perk. When the route changes into a timed Nahantu farming activity, the Kurast Undercity activity service is relevant to the dungeon itself; switch companions if the timed run needs damage or defense more than overworld scouting.
Mercenary Rapport: Ten Ranks, Skill Points and Bartering Rewards
Each Mercenary has an individual Rapport track with ten ranks. Fighting alongside an assigned companion and completing relevant content advances that character's track, unlocking skill choices and rewards as Rapport rises. Primary and Reinforcement assignments both earn progress, but older detailed guides report faster Rapport for the Hired companion while playing solo and slower progress for the Reinforcement. The official overview confirms the ten-rank structure and repeatable Pale Marks after the final rank without prescribing an exact best farm route.
Rapport progression and rewards are shared among appropriate characters in the same game-mode or realm partition, rather than forming a completely separate grind for every alternate character. Seasonal progression and Eternal progression should not be assumed interchangeable. Check the Mercenary panel on the current character before planning a new season around a reward that was earned on a different partition.
| Rapport stage | Main benefit | Player priority |
|---|---|---|
| Ranks I–IV | Mercenary skill points and early build access | Unlock useful active and passive choices for the selected role |
| Rank V | Bartering access and Mercenary-related rewards | Open the Den vendor system on a progressing character |
| Ranks VI–IX | Additional caches, materials, Pale Marks and vendor improvements | Advance different Mercenaries to broaden rewards and options |
| Rank X | Final listed Rapport-rank rewards | Complete the character's main Rapport track |
| Repeated progress after X | Additional Pale Marks | Continue earning currency through activities already worth running |
Reward tables published by different community guides disagree on some exact Pale Mark quantities, so the table deliberately identifies reward categories rather than inventing a universal current payout. Blizzard confirms that repeat progress can still generate Pale Marks after rank ten. For a specific cache amount or current restock price, inspect the live Rapport and Bartering screens before making a farming calculation.
Efficient Rapport Progression in Solo and Group Play
The practical route is to level the Mercenary you actually need, then rotate assignments once its important skill choices are available. Solo sessions favor developing the Hired Mercenary and a Reinforcement together; groups still allow a Reinforcement to earn progress, but the full-time Hired companion is absent. Spending extra time in a slow activity just because it contains many monsters may earn less useful progress than a route your build finishes quickly.
- Recruit the full roster: finish the relevant quests so every intended role can be assigned.
- Prioritize the missing ability: select Raheir, Varyana, Subo or Aldkin based on the first skill or perk your build benefits from.
- Pair a second Mercenary: let a different Reinforcement earn progress during the same solo session.
- Choose a reliable combat loop: use dungeons, Helltides or other available activities that your build clears without unnecessary deaths or long downtime.
- Rotate after meaningful unlocks: develop the next Mercenary rather than leaving all progress on one already-completed track.
- Use group sessions deliberately: equip the Mercenary you want to develop as Reinforcement when the Hired slot is inactive in party combat.
- Keep farming after rank X only for a reason: extra Pale Marks are useful, but should not displace more important character or gear progression.
Pale Marks and Bartering: Spending Rapport Rewards at the Den
Pale Marks are the Mercenary currency used at the Den's Bartering vendor, Fayira. As Rapport advances, the vendor offers equipment and caches and can provide additional options. Bartering is a supporting source of items and materials, not a direct way to strengthen a Mercenary's damage through equippable companion gear. Mercenaries use their own skill trees rather than a player-managed equipment inventory.
Before restocking the vendor, inspect the current offers and your remaining Marks. A refresh consumes currency once the available free refreshes are exhausted, so repeated rerolls can waste resources that would have purchased a useful cache or item. The current 3.2.4 patch notes provide the latest public live-build reference; do not treat outdated cache prices, season-specific materials, or older restock costs as confirmed for every current character state.
Mercenary Setup Mistakes That Waste Skill Slots and Rapport
Most inefficient Mercenary setups fail because the assigned role and the expected effect do not match. An excellent Hired perk can disappear in a party or when its owner is moved to Reinforcement, while a valid Reinforcement skill can remain silent because the trigger never occurs. Diagnose the configuration before assuming the companion itself is weak.
- Putting one Mercenary into both roles: Hired and Reinforcement slots require different unlocked characters.
- Expecting Subo's Seeker from Reinforcement: the scouting and marking perk belongs to the Hired role.
- Expecting Varyana's Massacre without hiring her: short Reinforcement appearances do not provide the persistent Hired perk.
- Building around Raheir's Valiance in group play: the Hired companion does not accompany an ordinary player party.
- Setting an unused Opportunity skill: a Reinforcement cannot activate reliably if the selected player skill is never cast.
- Ignoring cooldown overlap: a trigger during cooldown does not guarantee an automatic delayed Reinforcement cast.
- Choosing Varyana for an isolated boss solely for Massacre: sustained kill streaks are weaker when additional enemies are absent.
- Using Aldkin as Hired without checking his curse: the demon-form perk grants different Darkness or Flames effects depending on the selected Core skill.
- Copying launch-era skill values: Blizzard changed multiple Mercenary skills in later patches, so live tooltips take priority.
- Grinding the wrong Rapport track: each Mercenary has its own track, so assign the one you want to advance as Hired or Reinforcement.
- Spending every Pale Mark on restocks: refreshes are not guaranteed upgrades and compete with actual vendor purchases.
Diablo 4 Mercenaries FAQ
These answers cover slot restrictions, party behavior, Rapport progression and the main reason a Reinforcement fails to appear.
Can I use the same Mercenary as Hired and Reinforcement? No. The two assignments must use different unlocked Mercenaries. Recruit at least one ally beyond Raheir before trying to fill both slots.
Do Mercenaries work when playing with friends? Your full-time Hired Mercenary is a solo companion. The Reinforcement can still appear during party combat when its configured Opportunity is met and its skill is available.
Does Rapport stop at rank ten? The main Mercenary Rapport reward track has ten ranks, but continued progress after the final rank can award additional Pale Marks for Bartering.
Why is my Reinforcement not activating? Check that the Mercenary is enlisted, the chosen skill is unlocked, the assigned Opportunity actually occurs, and the Reinforcement ability is off cooldown. A trigger that happens during cooldown must occur again after the skill becomes available.
Conclusion
Build Mercenary combinations around a persistent solo need and one useful triggered effect. Raheir supports difficult fights, Varyana rewards fast kill chains, Subo improves scouting and ranged utility, and Aldkin provides Shadow or Fire control. Keep the Hired and Reinforcement restrictions separate, verify the Opportunity during real combat, and rotate Rapport progression across the roster until the needed skill choices and Bartering options are unlocked. A reliable trigger and the right role matter more than copying a generic Mercenary ranking.