
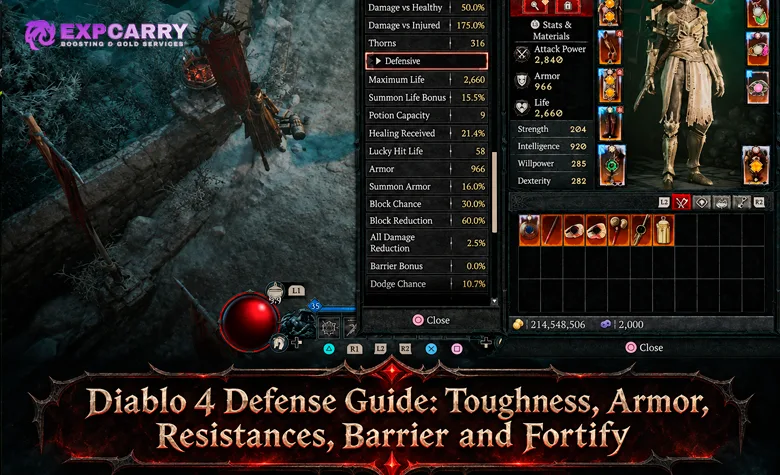
A Diablo 4 character can clear ordinary packs without losing Health and still die instantly to one elite attack, a boss explosion, or an elemental ground effect. The problem is often not a lack of total defensive stats but a weak damage-type matchup, an inactive Barrier, missing recovery, or Damage Reduction that only works under specific conditions. Toughness helps locate that weakness, but the average shown on the character sheet cannot explain every death on its own.
As of the live 3.2.4 patch in Season 15, Armor and Resistances use the defense system introduced in Season 11: Armor mitigates all damage types, individual Resistances cover Physical, Fire, Cold, Lightning, Poison, and Shadow, and Fortify supplies healing rather than its former innate Damage Reduction. This guide covers reading per-type Toughness, checking the actual protection behind the number, comparing equipment, and reproducing lethal situations before committing resources to upgrades. It does not repeat the Torment difficulty unlock and farming ladder.
Short answer: Open the Toughness breakdown, identify your lowest-protected damage type, and inspect Maximum Life, Armor, matching Resistance, active mitigation, Barrier uptime, and recovery separately. Test one gear or skill change at a time against the attack that kills you; a higher average Toughness is not an upgrade if the vulnerable matchup or defensive downtime remains unchanged.
Diablo 4 Defense Audit: Find the Weak Damage Type First
Start in the Character Stats window, where Toughness appears below Attack Power. Hover over it to inspect the defensive breakdown for individual damage types rather than relying on the main average. Blizzard added this display specifically to make effective survivability easier to compare across equipment, including the Toughness changes documented in the 2.5 patch notes.
Record the lowest value, the values for other damage types, and your Maximum Life before changing anything. The weakest type is the first candidate for improvement, not proof that every death uses that element. If an encounter mainly deals another type, a temporary buff expires, or a dangerous mechanic bypasses normal play patterns, the specific situation still matters.
- Inspect Toughness at rest: remove temporary combat effects where practical and note the average and all six damage-type values.
- Identify the weakest entry: compare Physical, Fire, Cold, Lightning, Poison, and Shadow rather than selecting the largest Armor or Resistance affix.
- Read the supporting stats: check Maximum Life, Armor, the corresponding Resistance, and relevant unconditional or conditional Damage Reduction.
- Check active protection: distinguish a Barrier currently absorbing damage from a skill that could create one after its cooldown finishes.
- Match the death pattern: separate one large hit, repeated small hits, sustained damage over time, and deaths while unable to move.
- Retest the same encounter: alter one defensive component and confirm the improvement against the same incoming threat.
The recorded baseline is essential for gear comparisons. A temporary shrine effect, party bonus, active skill, or different loadout can make two character-sheet screenshots incomparable. Keep the same equipment configuration, companions, consumables, and active effects during an A/B test, then repeat the test with normal combat buffs to see how much protection disappears between rotations.
Toughness and Effective Health: The Number Behind Your Survivability
Toughness expresses how much raw incoming damage a character can withstand after its defensive mitigation is taken into account. It is a derived estimate, not a shield, separate Health pool, or defensive stat that can be raised directly. The displayed average is a convenient overview; the damage-type entries are more useful when deciding whether an item closes a dangerous gap. Blizzard's official defense overhaul explanation describes the rating-based system and the purpose of the Toughness breakdown.
For a simplified example, imagine 20,000 Maximum Life, 20% damage mitigation from Armor, 25% mitigation from Fire Resistance, and a separate unconditional 10% Damage Reduction. If those three reductions apply multiplicatively, the proportion of Fire damage reaching Life is 0.8 × 0.75 × 0.9 = 0.54, giving approximately 37,037 effective Life against that illustrative Fire hit. These percentages are hypothetical, not Armor rating values or a claim that the game will display exactly that Toughness after every conditional modifier is evaluated.
Multiplicative Damage Reduction and Conditional Protection
Independent Damage Reduction multipliers usually reduce what remains after earlier mitigation. Two separate 20% reductions therefore leave 0.8 × 0.8 = 64% of the original damage, for 36% combined reduction rather than 40%. Some game effects follow special rules, so do not assume that every tooltip line can be summed or inserted into a universal homemade formula. The live character sheet and a controlled combat test take priority over a calculator built around outdated stacking rules.
A second complication is uptime. Damage Reduction against Close enemies may not help against a distant explosion, and a bonus while Fortified provides no benefit when its required condition is absent. A strong defensive cooldown can prevent a death without changing the resting Toughness value you recorded. Evaluate permanent mitigation separately from effects that require an enemy state, a skill cast, a Barrier, or a timed window.
Armor in Diablo 4: Universal Damage Mitigation and Diminishing Returns
Armor no longer exists solely to reduce Physical damage. Under the current system, it contributes protection against Physical and non-Physical attacks, while its rating converts into mitigation with diminishing returns as investment increases. The old fixed Armor target and old per-Torment Armor penalties belong to the previous system; do not equip an item solely to reach a legacy cap that no longer governs live defense.
Armor is particularly useful when several damage-type Toughness values are weak at once. If Fire, Shadow, and Physical defenses all improve after adding Armor, the change is working across the whole damage profile. If only Poison is significantly below every other type, a targeted Poison Resistance improvement may be a more efficient correction. Compare the percentage change in each relevant Toughness entry, not just the size of the added Armor rating.
Explore services related to this guide, selected from our Diablo IV catalog.
View All Diablo IV Services


Physical and Elemental Resistances: Repairing One Weak Matchup
There are six damage-specific Resistance categories: Physical, Fire, Cold, Lightning, Poison, and Shadow. Each mitigates its corresponding damage type, including matching damage-over-time effects where applicable. Physical Resistance is distinct from Armor, so a character can have broadly useful Armor and still show a comparatively weak Physical Toughness value. The modern Resistance system is rating-based with diminishing returns rather than the old flat 70% elemental-resistance cap.
Read the encounter as well as the character sheet. A Poison pool, Burning ground, and a succession of weapon strikes place different demands on the build, while some fights combine multiple elements. The table below is a diagnostic aid rather than a complete enemy attack database; inspect the actual effect and your current tooltip before assigning a death to one type.
| Toughness entry | Typical threat to investigate | First targeted adjustment |
|---|---|---|
| Physical | Weapon strikes, some impacts, and Bleeding damage | Physical Resistance, then Maximum Life and broad mitigation |
| Fire | Fire bursts and Burning effects | Fire Resistance or an applicable all-damage defensive layer |
| Cold | Cold hits and persistent cold-related effects | Cold Resistance; separately address Freeze or crowd control |
| Lightning | Lightning hits and repeated electrical effects | Lightning Resistance and protection during repeated hits |
| Poison | Poison pools and Poisoning over time | Poison Resistance plus adequate recovery during sustained exposure |
| Shadow | Shadow impacts and Corrupting effects | Shadow Resistance, then verify relevant conditional mitigation |
Season 15 Single-Resistance Affixes and All Resistance
Season 15 made targeted Resistance rolls more important. Blizzard's 3.2.1 patch notes state that single-Resistance affixes on equipment, Charms, and Tempering recipes were increased to seven times the value of corresponding All Resistance affixes. That compares the affix values, not the final percentage of damage prevented. Do not read it as a promise that one single-Resistance item makes you seven times harder to kill.
Use All Resistance when several types need help, and a specific Resistance when one weakness clearly dominates. The correct choice depends on your current ratings, other gear, and the marginal Toughness change; diminishing returns make a large numerical affix less impressive when the targeted defense is already strong. Lord of Hatred characters can also inspect defensive Charms and Seals; the separate Diablo 4 Talisman farming service concerns acquiring these components, while the item decision still needs to be validated through the Toughness breakdown.
Maximum Life and Damage Reduction: Surviving the First Heavy Hit
Maximum Life expands the underlying pool that Armor, Resistances, and Damage Reduction protect. In an otherwise unchanged simplified effective-health calculation, adding 10% Maximum Life also adds 10% effective health against the same damage type. It is particularly important when your character can recover rapidly between attacks but cannot survive the initial hit needed to start that recovery. Building more healing without enough Life to survive a burst does not solve that failure.
Generic Damage Reduction is valuable across damage types, but more specialized versions must be tested under the encounter's actual conditions. Reduction while Fortified requires Fortify to be present; reduction against Close enemies depends on the source being Close. Before replacing a Life affix with a conditional Damage Reduction roll, check whether the condition is active when the lethal attack lands, not merely during normal pack clearing.
Barrier: Absorbing Burst Damage Without Trusting the Tooltip Alone
Barrier is temporary absorption that takes damage before Life. Its effectiveness depends on how much Barrier the build creates, when it appears, how long it lasts, and whether it is available for the dangerous hit. Barrier Generation improves compatible Barrier effects but does not create a Barrier by itself. A large Barrier during the opening seconds of a fight is not equivalent to having that protection available every time a boss repeats its strongest attack.
Skills and effects such as Sorcerer Ice Armor, Barbarian Iron Skin, and Druid Earthen Bulwark illustrate different ways builds can gain timed absorption, but their exact values and cooldowns depend on current skill choices and modifiers. Blizzard also added Barrier Generation to the general defensive item-affix pool. A recent 3.2.3 patch corrected Horadric Cube reroll eligibility for Barrier Generation; the current published patch list continues through 3.2.4.
Barrier Uptime During a Boss Damage Cycle
To test Barrier as a real defensive layer, watch the protection over an entire attack cycle rather than checking its largest value immediately after a cast. A build that gains Barrier on a kill can feel nearly invulnerable in dense packs and much weaker against an isolated boss. A cooldown-dependent Barrier can likewise disappear during the exact window when the next major hit arrives.
- Start without temporary bonuses: record the resting Toughness values and the defensive skill's availability.
- Trigger the normal rotation: observe how quickly Barrier appears and whether it depends on enemy kills, hits, or a cooldown.
- Follow one dangerous attack cycle: check whether Barrier is still active at the moment damage lands.
- Repeat after a forced downtime: test the same threat when the Barrier source is unavailable or its condition cannot be met.
- Compare the actual failure: if death occurs only during downtime, improve uptime, timing, or baseline mitigation rather than stacking Barrier Generation without a reliable source.
Fortify: A Healing Reserve, Not the Old Permanent Damage Reduction
Fortify was redesigned in Season 11. It now accumulates as a reserve up to Maximum Life and is spent to heal missing Life over time. Any remaining Fortify places the character in the Fortified state, which can activate skills, passives, or item effects that explicitly require being Fortified. Fortify itself is not the old built-in Damage Reduction layer, and it is not the same type of temporary absorption as Barrier.
The practical distinction is the timing of damage. Fortify can help restore Life after damage, provided the character survives long enough for that recovery to matter. It cannot be treated as additional guaranteed Life against a lethal single hit, and a build may still lose important conditional mitigation if its Fortify pool is empty when the attack arrives. Keep Fortify generation, the healing it supports, and any separate Damage Reduction while Fortified as three distinct parts of the build.
Healing and Potion Timing During Sustained Damage
Health Potions under the current system restore 35% of Maximum Life immediately. The baseline capacity is four Potions, and a Potion regenerates every 30 seconds, so surviving several smaller hits still requires sensible timing rather than endless emergency healing. Life on Hit, Life Regeneration, and other class-specific effects can supplement that recovery, but they depend on actually meeting their triggers.
If Life drains steadily between dangerous attacks, compare the damage taken during one repeatable window with the healing delivered in that same window. More Maximum Life and matching Resistance reduce the pressure, while stronger recovery can repair damage that was survivable in the first place. A character killed from full Life by one hit needs more effective health or correctly timed protection before additional healing becomes the main solution.
Dodge, Block, Immune and Unstoppable in High-Pressure Fights
Dodge offers a chance to avoid eligible attacks, making it valuable over repeated hits but unreliable as the only answer to a single lethal strike. Block reduces eligible blocked-hit damage according to Block Chance and Block Damage Reduction; it is not automatically complete immunity. Class mechanics and equipment determine which of these layers are available and worth emphasizing. A character relying heavily on avoidance must still survive attacks that are not avoided or blocked.
Immune effects can prevent damage during their active window, while Unstoppable primarily answers control effects such as Stun and Freeze rather than reducing the damage of the next hit. These tools solve different problems. If a character dies because Freeze prevents a dodge out of a ground effect, more Cold Resistance may help with the damage but will not replace a reliable control escape. If the character dies to an uninterrupted direct hit, investing in control recovery alone misses the actual failure.
Gear Comparison: Test the Weakest Toughness Value Before Equipping an Upgrade
A gear upgrade must be judged by the full build rather than the largest green number on the item tooltip. A new ring may add Maximum Life but remove Fire Resistance; an offensive amulet can replace a conditional defensive effect; upgraded armor can increase overall Toughness while a lost Charm or Aspect changes the real encounter outcome. Blizzard's item comparison system can display Toughness differences for Armor and Resistance changes, but the final decision still requires reading each damage-type value and the item effects that the comparison cannot fully express.
Use the following sequence before spending Gold, crafting materials, or rare equipment on a swap. The test keeps the original item as a baseline and avoids confusing an improvement in average Toughness with a correction to the actual weak matchup.
- Keep the original equipped: record Maximum Life, Armor, all six per-type Toughness values, Barrier source, and relevant conditional Damage Reduction.
- Choose the target encounter: identify the damage type or survival pattern the replacement is meant to improve.
- Equip the candidate once: compare the lowest Toughness entry, the relevant threat's entry, and the average under identical inactive-buff conditions.
- Inspect lost effects: account for removed Aspects, Unique powers, resistances, cooldown support, and sources of Barrier or Fortify.
- Run the same combat test: compare survival during both defensive uptime and cooldown downtime.
- Calculate upgrade cost: include Enchanting, Tempering, sockets, Masterworking, and the value of the item being replaced.
- Keep the better complete setup: reject a nominal Toughness increase if it introduces a worse lethal matchup or removes a critical defensive trigger.
| Observed change | Meaning | Decision |
|---|---|---|
| Average Toughness rises, weakest type falls | The build gained broad defense but opened a specific vulnerability | Keep testing; do not call it a defensive upgrade against that type |
| Every type rises by a similar amount | Maximum Life or broadly applicable mitigation likely improved | Check uptime and offensive tradeoffs before committing |
| One weak type rises sharply | Targeted Resistance may have corrected the limiting matchup | Test against that damage type and check the next-lowest entry |
| Resting Toughness is unchanged, deaths decrease | A timed Barrier, Immune window, recovery, or control escape may be responsible | Confirm reliability in repeated encounters |
| Toughness rises, boss deaths continue | Positioning, control, missed cooldowns, or mismatched damage source may remain | Diagnose the actual attack instead of adding random Armor |
For an eligible item whose missing defensive affix can be obtained through Enchanting, use the Occultist preview before funding repeated attempts. The Diablo 4 Gold service relates to the currency side of that process, but additional Gold does not make an unsuitable item base worth finishing. For the correct order of alterations, use the separate Tempering and Masterworking guide rather than duplicating its crafting instructions here.
Defensive Upgrades: Gear Affixes, Gems, Paragon, Charms and Masterworking
Once the weak layer is identified, choose the smallest reliable correction. Maximum Life and Armor are broad upgrades, targeted Resistance fixes a specific damage type, and conditional protection belongs to the skill or equipment setup that can actually keep it active. Defensive value can come from ordinary gear affixes, eligible Tempering choices, gems, skills, Paragon, companion effects, Talisman Charms, and current equipment refinement. Not every class or item has access to every option, so verify the available affix and its current tooltip before planning a swap.
Do not replace a foundational defensive affix with a higher-roll damage bonus until the build can withstand the encounters it intends to run. The costliest mistake is often polishing the wrong item. Use normal upgrade systems to fix one defensively relevant slot, then retest before investing in additional equipment.
- Weak Physical Toughness: inspect Physical Resistance, Armor, Maximum Life, and any applicable generic mitigation; a Physical-focused gem or affix is relevant only if its current tooltip supports that use.
- One weak elemental type: compare a matching Resistance affix, eligible gem, Charm, or Temper with an All Resistance alternative.
- Several weak types: prioritize broadly useful Maximum Life, Armor, or reliable generic Damage Reduction rather than rotating individual Resistances blindly.
- Barrier fails between casts: improve the source's activation frequency or cooldown support before increasing Barrier Generation alone.
- Fortify cannot sustain Life: improve dependable Fortify generation or another recovery method, while separately checking that the character survives the opening hit.
- Control causes deaths: review access to Unstoppable, mobility, or relevant impairment protection instead of assuming every failure is a resistance problem.
Paragon Glyphs and Masterworking Defensive Affixes
Paragon choices can multiply Armor or Resistances and contribute other useful build effects, but a selected node is only valuable if the character actually meets its requirements and uses the connected bonuses. If the desired defensive improvement depends on stronger equipped Glyphs, the existing Diablo 4 Glyph progression service addresses the Pit-based upgrade loop. Recheck your Toughness after each material Paragon adjustment instead of assuming the board contributes equally across every damage type.
Masterworking strengthens the chosen item only after the correct affixes are present. The current system uses Quality up to 25 followed by a separate Capstone Bonus, not the former twelve-rank, triple-critical-upgrade sequence. Obducite matters to that refinement stage, and the Obducite farming service corresponds to the material requirement. Improve a lasting defensive piece only when its actual affix package, temper, and role in the build are settled.
Sudden Death Diagnosis: Match the Symptom to the Missing Layer
Not every sudden death is a low-Toughness problem. A character can have enough raw effective health for a hit but fail when a defensive cooldown expires, when several smaller attacks overlap, or when control effects prevent movement out of danger. The investigation should start with the last damaging event and the build state just before it, not with a random change to an item carrying the lowest numerical stat.
| Death pattern | Likely weakness to test | Practical check |
|---|---|---|
| One large attack kills at full Life | Insufficient effective health for that damage type, or missing timed mitigation | Check matching Toughness, Maximum Life, and defensive cooldown at impact |
| Poison or ground effects drain Life rapidly | Specific Resistance and sustained recovery | Compare matching Toughness and healing while the effect is active |
| Death occurs after Barrier expires | Absorption downtime rather than the peak Barrier value | Repeat the same attack with and without Barrier |
| Dense packs feel safe, isolated boss is lethal | Defense depends on kills, hits, or enemy density | Identify which defensive triggers stop working against one target |
| Death follows Freeze, Stun, or knockback | Loss of movement or failed control escape | Review Unstoppable timing and the subsequent damaging effect |
| Life falls gradually and potions cannot keep up | Recovery per second below incoming damage | Check Life on Hit, healing, Fortify generation, and exposure time |
| New item raises Toughness but survival worsens | Lost conditional defense, weaker specific matchup, or reduced uptime | Reequip the old item and repeat the same encounter |
The difference between burst and sustain determines the fix. Healing, including Fortify conversion, is useful when the character survives long enough to recover. A Barrier or appropriately timed Immune skill can handle a dangerous hit, but its protection must be present at the right moment. Damage-over-time pressure calls for matching mitigation and enough repeated recovery, while a control-related death may require a movement or Unstoppable solution.
A Repeatable Survival Test for Gear and Build Changes
Use a familiar encounter with a recognizable attack pattern and avoid changing the difficulty, route, or party between runs. The objective is not to produce a perfect laboratory measurement of damage, but to learn which defensive change consistently prevents the death that matters. Repeated observations are more useful than a single lucky dodge, block, or immunity proc.
- Record the baseline: note Maximum Life, all damage-type Toughness values, equipped items, and relevant conditional effects.
- Choose one repeatable threat: a boss attack, elite sequence, or persistent damage source that regularly exposes the problem.
- Observe defensive uptime: note whether Barrier, Fortify-related bonuses, and active Damage Reduction are present when damage lands.
- Change one variable: equip one alternative item, adjust one defensive skill, or test one targeted Resistance source.
- Repeat several times: separate reliable improvement from avoidance luck or a different enemy attack sequence.
- Check the tradeoff: confirm the change did not weaken another essential damage type or remove enough damage to prolong exposure significantly.
- Commit only after a clear result: reserve expensive Enchanting and Masterworking for a tested upgrade that solves the observed weakness.
Difficulty selection is a separate decision. If the character survives but clear times become poor, the problem may be offense or resource uptime rather than defense. The existing Diablo 4 Torment Guide covers difficulty unlocks and farming readiness; the process here focuses only on defensive mechanics and the reason a character dies.
Outdated Diablo 4 Defense Advice That Leads to Bad Upgrades
Many older builds still circulate with pre-Season 11 Armor and Resistance targets, the original Fortify definition, and incorrect assumptions about defensive crafting. Copying those benchmarks can send a player toward a stat that no longer works as described. Check the patch context before taking a supposedly mandatory defensive breakpoint from an old screenshot or build planner.
- Using the former fixed Armor cap: Armor is now rating-based, reduces all damage, and has diminishing returns rather than the old physical-only target.
- Chasing the historical 70% Resistance cap: current Resistances use ratings and diminishing returns, including the separate Physical category.
- Adding old Torment Resistance penalties: per-Torment Armor and Resistance penalties were removed in the defense overhaul.
- Treating Toughness as a defensive buff: it summarizes protection; increasing the displayed average does not guarantee the weakest matchup improved.
- Counting Fortify as automatic Damage Reduction: Fortify is now a healing reserve; only separate effects explicitly tied to the Fortified state grant their stated bonuses.
- Assuming Barrier Generation provides Barrier: it improves a compatible source but does not create absorption without that source.
- Adding every Damage Reduction percentage: independent reductions commonly multiply rather than adding directly.
- Trusting Dodge to stop every death: avoidance is not guaranteed on an individual eligible attack and does not replace sustained-damage protection.
- Masterworking a bad defensive base: more Quality cannot compensate for choosing an affix package that fails the build's actual survival test.
Diablo 4 Defense FAQ
These answers cover the most common decisions that remain after inspecting the character sheet and testing a specific lethal attack.
Does Armor reduce elemental damage in Diablo 4? Yes. Under the current defense system, Armor contributes mitigation against both Physical and non-Physical damage. Matching Resistances provide a separate layer for their specific types.
Is there still a fixed Armor or 70% Resistance cap? The old fixed Armor target and former flat elemental-resistance cap are obsolete. Current Armor and Resistances use ratings with diminishing returns, so judge additional investment by the resulting mitigation and Toughness rather than legacy thresholds.
Does Fortify stop a one-shot? Fortify itself is a reserve converted into healing, not a guaranteed extra absorption pool for one hit. Separate Damage Reduction while Fortified or other active defensive effects can help, but their conditions must be active when the hit occurs.
Should I choose a higher-Toughness item or an item with Barrier Generation? Compare the damage type that actually kills you and test Barrier uptime. Higher resting Toughness can be safer against unavoidable burst; Barrier Generation matters only when a compatible Barrier source is dependable and the additional absorption is available for the dangerous attack.
Conclusion
Diablo 4 defense is strongest when Maximum Life, Armor, matching Resistances, and dependable mitigation protect the same encounter, with Barrier and recovery covering the remaining pressure. Use the per-type Toughness breakdown to locate the weakest matchup, then verify that the damage source, skill uptime, and recovery pattern explain the death. Compare full gear setups under identical conditions and invest in the change that repeatedly solves the problem, not the one that produces the largest average number.