

The best Diablo 4 Spiritborn build depends on whether you are leveling a new character, farming equipment, or pushing difficult endgame content. Quill Volley offers a straightforward path to Level 70, while Stinger and Pestilent Swarm provide strong Poison-focused alternatives. Touch of Death remains a powerful option for players who prefer sustained Poison damage and a carefully optimized Vigor engine. This guide covers the class from its first skill points through Paragon progression, including Spirit Hall choices, skill bars, Legendary Aspects, Unique items, runewords, gems, glyphs, Talismans, and mercenaries. It follows the permanent skill-tree and itemization systems introduced with Lord of Hatred without making the recommendations dependent on one temporary seasonal power.
Short answer: Start with Quill Volley and Thunderspike, unlock Eagle Spirit Hall, and level to 70 before committing to an equipment-dependent endgame setup. Choose Pestilent Swarm or Stinger for Poison farming, Quill Volley for mobile ranged damage, or Touch of Death once its Core-skill conversion and Vigor-supporting gear are ready.
How Spiritborn Builds Work in Diablo 4
Spiritborn combines four animal spirits with skills that can gain additional tags, change their behavior, or interact with several item systems at once. Jaguar emphasizes Ferocity and aggressive attacks, Gorilla supplies defensive tools and heavy strikes, Eagle supports mobility and Lightning damage, and Centipede specializes in Poison and enemy debuffs. Your build is determined by more than the six visible skills: its Spirit Hall choices, skill variants, Paragon nodes, and item effects must support the same damage loop.
Recent balancing has strengthened several Core and Potency skills, including Quill Volley, Stinger, Crushing Hand, and Touch of Death. Spiritborn also received the Swarm of Storms Paragon board, while changes to Counterattack of the Swarm and Aspect of Supremacy affected some older configurations. As a result, old rankings that place Touch of Death uncontested at the top are no longer reliable. The official Spiritborn balance changes explain these adjustments, but individual build rankings still depend on gear, activity, and later tuning.
| Build | Main strength | Gear requirements | Recommended use |
|---|---|---|---|
| Quill Volley | Mobile Eagle damage with strong area coverage | Low while leveling; higher for endgame Vigor variants | Levels 1–70, general farming, bosses |
| Stinger | Direct Poison damage and efficient pack clearing | Low for a starter; increases for specialized versions | Leveling, early Torment, Poison progression |
| Pestilent Swarm | Persistent Poison damage across groups | Moderate; improved by specific Aspects and Talismans | Speed farming, sustained endgame damage |
| Touch of Death | Heavy Poison damage with strong close-range control | High for the Rod of Kepeleke version | Endgame Poison specialization and bossing |
| Crushing Hand | Gorilla area damage, impact, and durability | Moderate; functional before perfect Mythics | Comfortable farming and melee endgame |
| Payback | Powerful hits against grouped enemies | Low while leveling; higher in specialized endgame setups | Alternative leveling and general PvE |
| Rock Splitter Thorns / Withering Fist | Thorns-based melee or accessible Poison application | Build-specific rather than universally Mythic-dependent | Alternative leveling and early endgame |
Best Spiritborn Builds for Leveling and Endgame
No single build is optimal for every activity. The best choice is the one whose damage mechanism works with your current equipment and which can survive the difficulty you are running. These setups cover different stages of progression rather than representing a permanent universal tier list.
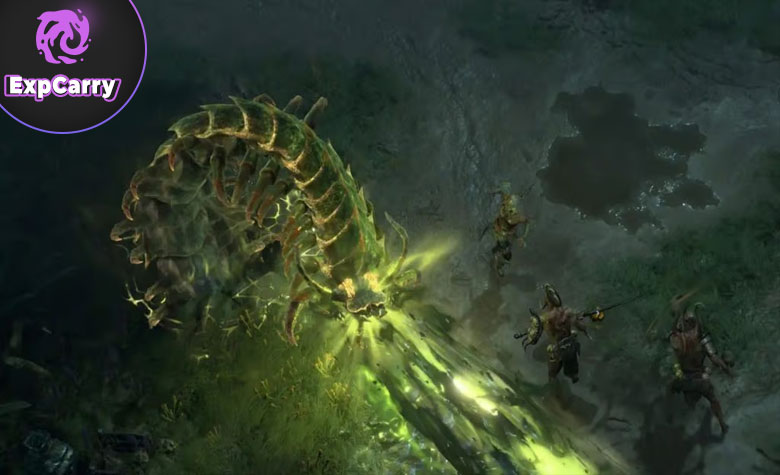
Quill Volley Spiritborn: Best All-Round Leveling Route
Quill Volley launches an Eagle-focused projectile attack that handles packs without requiring the close contact of many Gorilla and Centipede builds. During leveling, Thunderspike generates Vigor and Quill Volley spends it. Ravager, Scourge, and Armored Hide provide offensive uptime and protection, while The Hunter supplies additional burst damage. Eagle Spirit Hall adds Storm Feather damage and helps maintain an aggressive pace between packs. This setup performs well with ordinary weapons and useful Legendary Aspects, making it a practical first build before any Unique items appear.
At endgame, Quill Volley can become a more specialized resource build using Rod of Kepeleke and other equipment that improves Vigor consistency. Do not copy the endgame version onto a low-level character: the leveling build deliberately uses Basic attacks to refill Vigor, whereas the finished version may depend on interactions that are unavailable before its required items drop.
Stinger and Pestilent Swarm Spiritborn: Poison-Focused Progression
Stinger is a Centipede Core skill that deals direct damage and supports a fast Poison-oriented playstyle. It works well as an alternative to Quill Volley for players who prefer fighting closer to enemies. A leveling setup uses a reliable Basic skill to generate Vigor, Stinger as the main spender, and defensive or mobility skills to stay active between attacks. Because its starter version does not require a particular Mythic, it can transition naturally into early Torment farming.
Pestilent Swarm focuses more heavily on persistent swarms and Poison damage over time. Modern versions commonly use Stinger alongside Counterattack of the Swarm, Aspect of Infestation, and Aspect of Pestilence. The Swarm of Storms Paragon board is especially relevant when the build actually creates Pestilent Swarms or Spirit Storms. This distinction matters: a skill describing a swarm does not automatically qualify for every Pestilent Swarm bonus. Select the skills and variants that explicitly generate the effects your Paragon nodes improve.
Touch of Death Spiritborn: Gear-Dependent Poison Endgame
Touch of Death specializes in applying heavy Poison damage while surviving at close range. One established endgame version selects the Swarm of Swarms variant, which makes Touch of Death a Core skill without its normal cooldown. Rod of Kepeleke then makes that Core skill additionally count as a Basic skill and removes its ordinary Vigor cost, while a full Vigor bar enables the weapon's guaranteed critical-strike effect. Ring of the Midnight Sun helps restore the resource spent, and Harmony of Ebewaka adds another Spirit tag to improve relevant skill interactions.
A separate Touch of Death configuration uses Erupting Swarm for recurring Poison bursts and may solve cooldowns through other equipment. Swarm of Swarms and Erupting Swarm are alternative Bonus Skill Variants, not upgrades that can be equipped together. The complete setup below follows the Core-conversion version; switching to Erupting Swarm requires rebuilding the skill and item plan rather than simply replacing one damage modifier.
Crushing Hand Spiritborn: Gorilla Farming and Defense
Crushing Hand trades some of the ranged flexibility of Quill Volley for powerful close-range area attacks. Gorilla interactions, defensive skills, and effects that increase the value of repeated impacts make it comfortable for players who want a tougher character. Its damage and supporting Thorns options have received balance improvements, but the exact best configuration depends on whether you are using a standard Core build or the Heavy Hitter variant. Prioritize weapon damage, Dexterity, defensive coverage, and the affixes your selected variant scales with; do not automatically copy Poison gear from Touch of Death.
Payback, Rock Splitter Thorns, and Withering Fist Alternatives
Payback offers a direct impact-based leveling route with Vortex for grouping and The Hunter for burst damage. Rock Splitter Thorns is a more specialized Gorilla approach that benefits from Thorns, Resolve, and defensive scaling; recent adjustments make it worth considering, but a Thorns setup should not be geared like a conventional critical-hit Core build. Withering Fist provides an accessible Poison Basic skill and can support early progression or a dedicated Poison setup. These options are useful when the matching Aspects appear early or when you prefer their combat rhythm, although they should not be treated as interchangeable versions of the same build.
Spiritborn Leveling Guide: Levels 1–70
The simplest route is to begin with Quill Volley and keep it until you have both Level 70 and the equipment needed for an endgame conversion. Modern Diablo 4 uses a redesigned skill tree with several modifier branches and Bonus Skill Variants. It also raises the character-level cap to 70, so older Level 60 leveling trees and pre-3.0 passive allocations are outdated. Blizzard's Lord of Hatred systems overview explains the permanent progression changes.
Leveling Skill Bar and Point Priorities
Unlock the six skills below as their sections become available. Early skill points should establish one reliable generator and one high-damage spender before you invest heavily in utility. After the entire bar is working, concentrate additional ranks and damage-enhancing modifiers on Quill Volley. Increase defensive or resource-supporting ranks when enemies begin surviving long enough to threaten you.
| Skill | Role | Investment priority |
|---|---|---|
| Thunderspike | Basic attack and Vigor generation | Take early; add supporting modifiers as needed |
| Quill Volley | Main damage spender and pack clearing | Unlock early; prioritize damage ranks and compatible variants |
| Ravager | Offensive pressure and skill uptime | Take when available; improve uptime after main damage is established |
| Scourge | Fear, Poison pressure, and control | One early investment, then useful defensive modifiers |
| Armored Hide | Protection, Block, and Resolve support | Take before attempting harder content |
| The Hunter | Ultimate burst and Ferocity support | Unlock when available; prioritize after the core rotation works |
Level-by-Level Progression Milestones
Follow these milestones as practical priorities, not as a claim that every skill unlocks at the beginning of its listed level range. The redesigned tree opens categories progressively, while bonus skill points from Renown can alter when you finish individual branches.
| Stage | What to do | Important decision |
|---|---|---|
| Levels 1–14 | Begin with Thunderspike, unlock Quill Volley, and strengthen its damage before spreading points across every available skill. | Equip weapon upgrades frequently; do not wait for Uniques. |
| Level 15 | Complete the Sacred Hunt class quest from Tarka to unlock the primary Spirit Hall. | Select Eagle for the Quill Volley leveling route. |
| Levels 16–29 | Add Ravager, Scourge, Armored Hide, and The Hunter as the tree permits; continue investing in Quill Volley. | Balance pack-clearing speed against survivability. |
| Level 30 | Unlock the secondary Spirit Hall choice. | Choose Eagle again for the straightforward Quill Volley setup. |
| Levels 31–49 | Finish the primary damage modifiers, improve skill uptime, replace outdated weapons, and activate useful Codex Aspects. | Prioritize Vigor sustain before extra damage on paper. |
| Levels 50–69 | Complete remaining skill development, improve resistances and defense, and begin saving equipment for your intended endgame build. | Stay with the build that clears efficiently instead of forcing a premature respec. |
| Level 70 and beyond | Start Paragon progression and transition into Quill Volley endgame, Stinger, Pestilent Swarm, or Touch of Death when the required mechanics are ready. | Build around the items you actually own. |
For Quill Volley leveling, choose Eagle as both primary and secondary Spirit Hall. The primary choice rewards Eagle skills and Evades with Storm Feathers, while the secondary adds offensive benefits that suit repeated attacks. Spirit Hall selections can be changed when you respec, so you are not locked into an Eagle build forever. If you are still working through character leveling, improving your route, movement speed, and weapon quality is more valuable than collecting endgame items that your current setup cannot use.
How to Play Quill Volley While Leveling
Open with Ravager when entering a dangerous pack, use Scourge to disrupt nearby enemies, and keep Armored Hide available for significant incoming damage. Cast Thunderspike to build Vigor, then spend it on Quill Volley. Use The Hunter against bosses or dense groups rather than waiting indefinitely for a theoretically perfect moment. When the screen is clear, move immediately to the next pack. If you repeatedly run out of Vigor, use more Basic attacks and improve generation instead of removing defensive skills to chase damage.
Explore services related to this guide, selected from our Diablo IV catalog.
View All Diablo IV Services

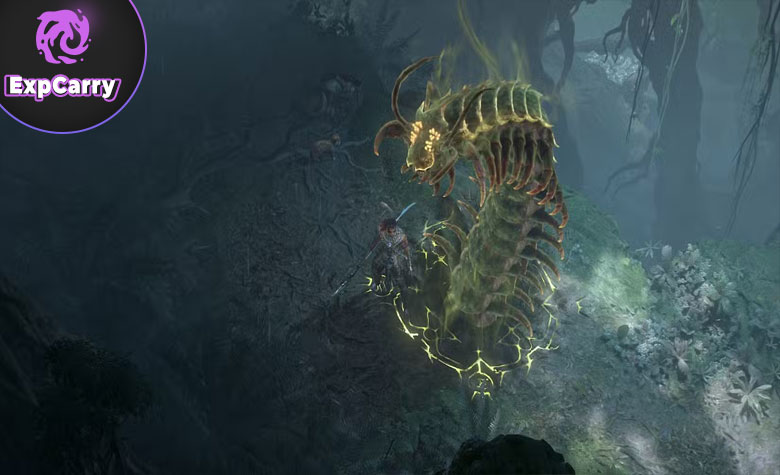
Touch of Death Spiritborn: Complete Endgame Build
The following configuration focuses on the Swarm of Swarms Core-conversion approach. Its purpose is to repeat Touch of Death casts, produce powerful Poison damage, and make frequent use of Rod of Kepeleke's full-Vigor critical strike. It should be considered a specialized endgame option, not an equipment-free leveling build.
Required Skill Variant and Unique Item Engine
First, select the Swarm of Swarms Bonus Skill Variant for Touch of Death. This makes the skill a Core skill, which allows Rod of Kepeleke to affect it. The weapon makes Core skills additionally Basic skills and removes their ordinary casting cost. At maximum Vigor, it instead consumes the resource for a guaranteed critical strike and additional damage. Ring of the Midnight Sun restores part of recently spent Vigor when a critical strike occurs; Resource Generation and the rest of your setup determine whether that refund reliably returns you to a full bar. Harmony of Ebewaka contributes an extra Spirit tag based on your secondary Spirit Hall choice.
Without Rod of Kepeleke, the Core-conversion approach loses a defining interaction. Without enough resource recovery, its strongest casts become inconsistent. Keep leveling or use another Poison setup until you can test this loop in combat. An Erupting Swarm build is a separate alternative with its own cooldown requirements and should not be mixed into this exact skill configuration.
Touch of Death Skill Bar and Spirit Hall
A defensive, close-range Touch of Death bar uses six abilities, each supporting either Poison uptime or survival. In the version below, Gorilla primary Spirit Hall adds a defensive layer and Gorilla tags, while Eagle secondary supplies offensive bonuses. This combination also interacts with Harmony of Ebewaka when the helm is equipped.
| Skill | Purpose | How to use it |
|---|---|---|
| Touch of Death — Swarm of Swarms | Main Core-converted Poison attack | Cast repeatedly; seek full-Vigor casts for Rod of Kepeleke's critical-strike benefit. |
| Ravager | Additional damage and sustained pressure | Keep its useful effects active during dangerous encounters. |
| Scourge | Enemy control and Poison-related utility | Use before committing to large melee packs. |
| Counterattack | Dodge-based defense and counterattack support | Maintain defensive uptime rather than treating it as the main damage source. |
| Toxic Skin | Poison protection, mobility, and support effects | Activate around prolonged engagements and hazardous movement. |
| The Devourer | Ultimate burst and additional pressure | Use for bosses and dangerous groups while keeping other defenses available. |
Prioritize Touch of Death's damaging ranks and the chosen Core-tagging variant before spending points on secondary damage skills. Build out Ravager, Scourge, Counterattack, Toxic Skin, and The Devourer with the modifiers that directly improve survivability, control, or uptime. Because the modern skill tree allows multiple modifier branches and class variants, verify that your selected final Touch of Death variant is Swarm of Swarms; changing it to Erupting Swarm changes the foundation of this setup.
Touch of Death Combat Rotation
Before engaging, check that your defensive tools are ready and that the Vigor engine functions. Open with Scourge to control enemies and apply useful debuffs, then activate Ravager and Toxic Skin as the situation requires. Position close enough for Touch of Death to hit reliably and cast it repeatedly. Watch your Vigor bar rather than assuming every attack receives the same Kepeleke bonus: a cast performed below maximum Vigor does not produce the same full-resource payoff. Counterattack helps manage incoming pressure, while The Devourer provides additional damage during dangerous phases. Against bosses, maintain consistent damage instead of spending every cooldown simultaneously and leaving yourself defenseless.
Best Touch of Death Gear, Legendary Aspects, and Stats
Equipment priorities begin with enabling the build's resource mechanic, then improving damage and survivability. One properly functioning Rod of Kepeleke and Ring of the Midnight Sun combination is more important than an otherwise impressive collection of unrelated Mythic items. Once the loop works, improve Poison scaling, skill ranks, Maximum Life, defenses, and cooldown uptime.

| Slot | Recommended item or Aspect | Reason |
|---|---|---|
| Weapon | Rod of Kepeleke | Enables the Core-to-Basic conversion and full-Vigor critical strikes. |
| Helm | Harmony of Ebewaka | Adds a Spirit tag and improves damage from relevant Spirit interactions. |
| Ring 1 | Ring of the Midnight Sun | Restores recently spent Vigor following critical strikes. |
| Ring 2 | Aspect of Supremacy or a suitable damage alternative | Improves offensive pressure; select an effect that benefits your actual rotation. |
| Chest | Jacinth Shell or a safer defensive chest | Supports cooldown cycling, but Jacinth Shell's Life-draining drawback must be managed. |
| Gloves | Writhing Aspect | Supports prolonged damage-over-time application. |
| Pants | Aspect of Debilitating Toxins | Provides valuable protection in Poison-focused melee encounters. |
| Boots | Aspect of Apprehension | Rewards crowd control and improves damage against feared enemies. |
| Amulet | Insatiable Aspect | Supports Centipede damage, particularly against controlled enemies. |
Aspects can be reassigned to valid equipment slots when your available Uniques occupy their preferred positions. Do not assume that every recommended Aspect can coexist with every optional Unique. For example, equipping a Unique chest removes the ordinary chest Aspect slot unless another supported crafting interaction supplies the effect. Check the item tooltip and current crafting options before committing rare materials.
Stat and Affix Priority
Dexterity is the Spiritborn's main attribute, but the most valuable affix depends on whether the current problem is damage, resource sustain, or survival. A character with excellent Poison damage but unreliable full-Vigor casts may gain more from Resource Generation than from another small damage increase. Similarly, a build that dies during Torment encounters needs Maximum Life and reliable defenses before further offensive optimization.
| Priority | Stat or affix | Why it matters |
|---|---|---|
| Build activation | Resource Generation, Maximum Vigor, effective resource recovery | Supports repeated full-Vigor Kepeleke activations. |
| Main damage | Touch of Death ranks, Poison Damage, Damage over Time, relevant multipliers | Strengthens the build's primary attack and Poison output. |
| General offense | Dexterity, Attack Speed, useful Spirit-tag bonuses | Improves damage and attack frequency. |
| Skill uptime | Cooldown Reduction and useful duration bonuses | Makes defensive and offensive support skills more reliable. |
| Survivability | Maximum Life, Armor, Resistances, Barrier support | Keeps the character alive at close range and in harder content. |
Resource Cost Reduction can interact with certain Core-skill and item mechanics, but it is not a substitute for verifying the actual Vigor loop on your character. Critical Strike Chance also has less value for the specific casts that Rod of Kepeleke already guarantees as critical strikes, although it may still affect other parts of the setup. Avoid treating Overpower Damage or generic Critical Strike Chance as universal top priorities merely because they appeared in an older Spiritborn build. Later gear optimization often consumes substantial crafting and reroll resources, so improve the build's enabling items first.
Spiritborn Gems and Runewords
Gems fill remaining sockets and help correct offensive or defensive weaknesses. Runewords use two linked runes: a Rune of Ritual that generates Offering and a Rune of Invocation that spends Offering to activate an effect. A character can equip up to two Runeword pairs. Since a runeword occupies sockets that could otherwise hold gems, the best configuration depends on whether the added effect contributes more than the lost socket bonuses.
Recommended Gems
For a Poison-focused Touch of Death setup, Emeralds are a useful starting point in offensive and Dexterity-oriented sockets. Jewelry should cover whatever resistance or defensive requirement remains unmet rather than following a fixed color list when your equipment already provides different amounts of protection.
| Equipment | Starting choice | Adjustment |
|---|---|---|
| Weapon | Highest available Emerald tier | Compare with other weapon gems if the final damage source changes. |
| Armor | Emeralds for Dexterity | Replace some with defensive gems if necessary. |
| Jewelry | Resistance or defensive gems | Fill the weakest protection gap rather than stacking an already sufficient resistance. |
Recommended Rune Pairs
For the Core-conversion Touch of Death variant, utility runes are especially attractive because grouping enemies and surviving incoming attacks both improve real damage uptime. The original purpose of runewords and the Ritual/Invocation pairing is explained in Blizzard's runeword system overview. Individual rune values can be rebalanced later, so prioritize the effect rather than assuming an old damage exploit still works.
| Rune pair | Trigger and effect | When to use |
|---|---|---|
| Yul + Kry | Yul generates Offering when a cooldown skill is cast; Kry invokes Vortex to pull enemies together. | Touch of Death and other builds that benefit from automatic grouping. |
| Cir + Tzic | Cir builds Offering through skill casts; Tzic invokes Concussive Stomp for damage and knockdown. | Additional crowd control when the main resource engine is already stable. |
| Poc + Que | Poc gains Offering as Primary Resource is spent; Que invokes Earthen Bulwark to provide a Barrier. | Resource-spending leveling builds that need more protection. |
Choose two pairs rather than equipping all three. Yul + Kry and Cir + Tzic form one practical endgame combination; Poc + Que can replace a pair when defense matters more. Tzic previously had an unintended damage interaction that was corrected, so treat it as a control option rather than a source of guaranteed extraordinary damage. If your build does not spend resources often enough for Poc, that trigger may perform poorly even if the Barrier looks attractive.
Spiritborn Paragon Boards and Glyphs
Paragon begins at Level 70 and is the main long-term progression system after the skill tree. A good route prioritizes a useful Legendary node, enough surrounding attributes to activate a glyph's additional effect, and the defensive nodes required to survive the content you are farming. Board selection must reflect the actual damage source: Poison damage over time, Gorilla attacks, and Pestilent Swarms do not all scale from the same bonuses.
Paragon Board Priorities
For the Poison-focused Touch of Death build, begin with the Starter board and prioritize boards that contribute to Poison damage, barriers, or the tags your chosen variant possesses. The exact rotation and glyph socket placement should be checked against your current attribute allocation rather than copied from a screenshot made under a different patch.
| Board or node | What it supports | Recommended application |
|---|---|---|
| Starter Board | Early attributes and first glyph socket | Reach an effective glyph bonus before taking inefficient detours. |
| Bitter Medicine | Poisoning damage and a healing-related Poison effect | Strong candidate for Poison-focused setups. |
| Viscous Shield | Damage scaling tied to Barrier relative to Maximum Life | Useful when the build maintains reliable Barrier uptime. |
| Convergence | Elemental and Spirit-tag damage scaling | Consider when Spirit Hall and item tags activate the intended bonuses. |
| Swarm of Storms | Pestilent Swarms, Spirit Storms, and Storm Feathers | Prioritize for actual Swarm or Storm-generating variants, not automatically for every Poison skill. |
Best Spiritborn Glyphs
Glyphs provide different damage and attribute-scaling bonuses. Level the glyphs you are using instead of spreading upgrades across every glyph you find. For a flexible Touch of Death setup, the following five form a useful progression shortlist; the placement order can change depending on your available Paragon points and nearby attribute requirements.
| Glyph | Main benefit | When to prioritize |
|---|---|---|
| Canny | Non-physical damage scaling | Reliable early glyph for Poison-oriented damage. |
| Fester | Centipede and Poison damage | Important when Touch of Death supplies most of your damage. |
| Spirit | Critical Strike Damage and additional offensive scaling | Helpful once the full-Vigor critical-strike loop is established. |
| Hubris | Improves Magic nodes and supports damage against Vulnerable targets | Use when the selected socket and nearby nodes justify it. |
| Colossal | Gorilla skill damage and close-range bonuses | Consider with Gorilla skill tags and a melee-focused setup. |
For Pestilent Swarm builds, Consumption is another glyph to evaluate because it specifically supports Pestilent Swarms. Quill Volley configurations instead tend to prioritize Eagle- and Lightning-compatible options such as Fulminate and Talon. Your Paragon glyph progression should support the build currently equipped, not a future loadout that still lacks its required items. Once a glyph's additional effect is available, continue improving the nodes and radius that meaningfully contribute to damage or defense.
Talismans, Charms, Mercenaries, and Mythic Upgrades
Lord of Hatred adds a Talisman system with a Seal and Charm slots. These are separate from armor and jewelry, so do not confuse a Charm or Seal with a helmet, ring, or amulet. The system requires access to the relevant expansion content. Spiritborn also benefits from the mercenaries introduced with Vessel of Hatred, although a build should remain functional even when a chosen mercenary is unavailable.
Which Talismans and Charms to Use
For Touch of Death, a Poison-oriented set such as Balazan's Bite is a logical option, while Sunstained War-Crozier can support relevant Focus and Potency interactions. Other builds use different combinations: Multitude emphasizes multiple Spirit types, while Rezoka's Rage rewards its own stacking mechanic. Begin by obtaining a usable Seal and filling its available slots with beneficial Charms. Only chase a complete set once its bonuses clearly improve your current build.
| Build | Useful Talisman direction | What to check |
|---|---|---|
| Touch of Death | Balazan's Bite and appropriate Potency support | Poison duration, skill scaling, and interaction with the selected Touch of Death variant. |
| Quill Volley | Multitude or suitable Eagle-oriented Charms | Additional Spirit tags and offensive synergy. |
| Crushing Hand | Rezoka's Rage or defensive Gorilla support | Stack maintenance, damage reduction, and intended Core-skill interaction. |
| Pestilent Swarm / Stinger | Poison-oriented Charms and set bonuses | Whether the bonus affects Poisoning damage, direct hits, or specifically generated swarms. |
Mythic Unique Crafting Priorities
Modern Mythic itemization allows eligible Uniques to exist in Mythic form, but you should distinguish crafted items from rare natural drops. The Horadric Cube's direct Mythic crafting method can preserve a chosen item's relevant properties, and an item created through that specific method carries a Crafted restriction. You can equip only one item with that Crafted tag. Other acquisition methods have different restrictions; do not plan around equipping several directly crafted Mythics simultaneously.
For the Rod of Kepeleke version of Touch of Death, acquire the ordinary Rod first, then Ring of the Midnight Sun and Harmony of Ebewaka. Improve their rolls and confirm the resource loop before investing heavily in Mythic upgrades. A high-quality Rod is a sensible candidate for direct crafting because it is central to the build. Blizzard's Mythic crafting changes overview details the distinction between direct crafting and other methods; check the current recipe interface for material requirements rather than relying on an old seasonal price.
Best Mercenaries for Spiritborn
Raheir is a dependable defensive choice when you need extra protection. Subo offers utility that pairs well with Poison and damage-over-time builds, while Varyana supports aggressive combat and Attack Speed. Aldkin can be useful as reinforcement when his slowing and damage-reduction effects fit your setup. Treat these as complementary tools: a mercenary should solve a practical weakness rather than determine the entire build.
| Mercenary | Useful contribution | Recommended situation |
|---|---|---|
| Raheir | Defensive assistance and protection | Difficult melee encounters and safer progression. |
| Subo | Area utility and support for prolonged damage | Poison-focused endgame farming. |
| Varyana | Attack Speed and aggressive support | Mobile farming and offensive setups. |
| Aldkin | Enemy debuffs and reinforcement utility | Extra control in challenging packs. |
Spiritborn Endgame Progression and Farming Strategy
Reaching Level 70 is the beginning of build optimization, not its endpoint. Choose a difficulty where enemies die consistently, complete activities that supply useful equipment and upgrade materials, and level only the glyphs you currently use. Build progression generally becomes faster when you improve one functional setup than when you repeatedly rebuild your character around incomplete high-end gear lists.
- Finish your leveling setup. Reach Level 70, unlock your Spirit Hall choices, complete useful Renown progression, and finalize the skill bar.
- Establish an endgame baseline. Improve your weapon, Armor, Resistances, Maximum Life, and basic resource sustain before raising the difficulty.
- Farm the first build-defining items. For the Core-conversion Touch of Death build, prioritize Rod of Kepeleke, Ring of the Midnight Sun, and Harmony of Ebewaka.
- Activate the proper Paragon plan. Select nodes and glyphs that scale your current damage type and ensure their bonuses activate with your available attributes.
- Improve equipment deliberately. Temper useful pieces, upgrade stronger items, and only spend expensive crafting materials after confirming the final item's role.
- Test harder content incrementally. Increase Pit, dungeon, or other endgame difficulty when clear speed and survivability remain comfortable. If progress stalls, identify whether the issue is damage, Vigor recovery, defense, or missing skill uptime.
Dungeon and Pit progression are especially useful for testing the completed build against both groups and bosses. If you are planning repeated endgame dungeon runs, compare practical clear times instead of judging a setup only by its largest damage number. A slightly lower-damage build that moves faster and survives consistently may farm materials more efficiently than a fragile pushing configuration.
Common Spiritborn Build Mistakes
Most failed Spiritborn conversions come from using the correct item names without reproducing the skill and resource interactions that make those items valuable. A build can display excellent offensive stats and still perform poorly if its main skill lacks the necessary tag, its Vigor bar does not refill, or its defensive layers disappear during boss fights.
- Mixing Touch of Death variants: Swarm of Swarms creates the Core-skill interaction used by Rod of Kepeleke; Erupting Swarm is a separate choice.
- Switching builds too early: Keep a functioning leveling setup until the new build's defining equipment and skill interactions are available.
- Confusing all swarms with Pestilent Swarms: Check the exact generated effect before investing in Swarm-specific Paragon bonuses.
- Ignoring Spirit Hall tags: Changing the secondary Spirit can alter how Harmony of Ebewaka and other effects scale your skills.
- Stacking damage without defense: Maximum Life, resistances, barriers, and skill uptime matter in difficult melee encounters.
- Using old skill trees: The modern tree uses new modifier branches and variants; older passive-point layouts are not directly transferable.
- Overinvesting in a temporary mechanic: Seasonal systems can add useful bonuses, but your evergreen Core build should work without depending on a seasonal power that disappears later.
Diablo 4 Spiritborn FAQ
These answers address the decisions that most often cause confusion when moving from a fresh Spiritborn to a completed endgame build.
What is the best Spiritborn build for leveling? Quill Volley with Thunderspike is a reliable general-purpose choice because it combines mobile damage, straightforward Vigor generation, and useful Eagle Spirit Hall bonuses. Stinger and Payback are valid alternatives.
Can Touch of Death work without Rod of Kepeleke? Yes, other Touch of Death configurations exist, but the Swarm of Swarms Core-conversion version described here depends on Rod of Kepeleke for its defining free-cast and full-Vigor interactions.
Which glyphs should a Touch of Death Spiritborn level first? Start with glyphs that immediately strengthen your actual damage source, especially Canny and Fester for a Poison-oriented setup, then develop Spirit, Hubris, or Colossal when your board layout supports their bonuses.
Does Spiritborn need a Mythic Unique to reach endgame? No. Quill Volley, Stinger, and several other setups can enter endgame without a completed Mythic checklist. Specific high-investment variants become stronger once their defining Uniques and resource interactions are assembled.
Final Thoughts
Start Spiritborn progression with a build that works immediately, then select an endgame specialization according to the equipment you obtain and the content you enjoy. Quill Volley is a practical leveling foundation; Stinger and Pestilent Swarm offer strong Poison progression; Touch of Death rewards careful management of skill variants and Vigor. Once those fundamentals work, accurate Paragon choices, appropriate runewords, defensive coverage, and disciplined gear upgrades matter more than chasing a permanent number-one ranking.