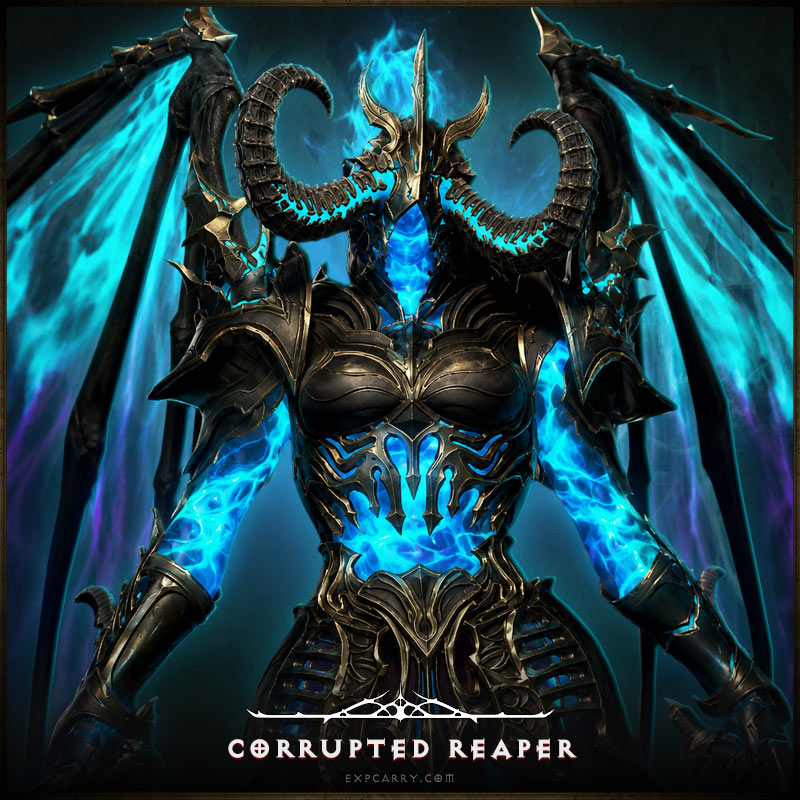


Warlock has several viable paths through Diablo 4, but the right build depends on whether you are starting at level 1, farming Torment content, or pushing difficult endgame encounters. Blazing Scream offers a practical route from early leveling into endgame, Apocalypse specializes in explosive area damage, and Demon Summoner, Lunatic, and Dread Claws provide distinct alternatives. This guide covers the complete journey, including skill progression, Soul Shards, Fragments, gear, Legendary Aspects, Uniques, Paragon boards, glyphs, runes, gems, Talismans, and combat rotations.
Short answer: Start with Blazing Scream and transition to its Orbital Scream variant at level 15. At level 70, continue farming with Orbital Scream until you obtain Elegy and the defensive gear needed for the stronger Skull Splitter endgame setup.
The recommendations reflect the live Season 15 balance environment, including the 3.2.1 Warlock changes and subsequent 3.2.3 fixes. The core leveling route, class mechanics, and gear progression remain useful beyond a single season, but rankings and seasonal powers should be checked after major patches.
Where Warlock Stands in Diablo 4
Warlock combines Hellfire damage, demon summoning, Abyss abilities, and transformations. Unlike a class built around a single resource, Warlock manages both Wrath and Dominance. That gives it considerable build flexibility, but it also makes resource management and skill interactions important from the beginning.
The current build landscape is broader than the older Lunatic-focused meta. Blazing Scream has become a leading option for leveling and powerful endgame farming, while Apocalypse remains competitive for high-damage caster play. Lunatic continues to work, but it is no longer the universal recommendation for every player.
| System or Skill | Current Significance | What Players Should Do |
|---|---|---|
| Blazing Scream | The Brimstone Hunger bonus cap increased from 25% to 50% in the Season 15 balance update. | Consider Blazing Scream for both leveling and late-game damage. |
| Dread Claws | Now counts as a Greater Demon skill, with increased base damage and a much stronger Ravenous Jaws interaction. | Use it as a serious leveling or melee-style alternative rather than an outdated fallback. |
| Terror Swarm | Received stronger periodic and burst damage, plus improved support for Archfiend skills against Vulnerable enemies. | Keep it in the leveling setup before converting to a gear-dependent endgame rotation. |
| Vanguard Shard | Its associated demon abilities received substantial damage improvements. | Use Vanguard with an Abodian-centered Blazing Scream setup. |
| Paragon | Dynamism and other class nodes reward deliberate resource and Demonform management. | Build around the mechanics your skills actually trigger rather than selecting every damage node indiscriminately. |
| Mythic and Unique gear | The Horadric Cube and updated itemization provide more ways to improve endgame equipment. | Prioritize functional build-enabling Uniques before chasing perfect Mythic versions. |
Blizzard documents these adjustments in the official Season of Hell's Legacy balance notes. Build rankings are community assessments, not permanent class statistics; a strong farming setup is not automatically the best choice for every boss or maximum-difficulty Pit run.
Best Diablo 4 Warlock Builds for Leveling and Endgame
Choose a build according to your available gear and preferred combat style. A character with ordinary leveling equipment should not attempt the same rotation as a fully equipped endgame character using Mythic Uniques.

Blazing Scream Warlock — Leveling, Farming, and Endgame
Blazing Scream is the main recommendation in this guide because it has a clear progression path. Early on, you generate Wrath and cast the skill directly. After unlocking Orbital Scream, a demon skull circles your character while you move through enemies. At endgame, the Unique sword Elegy enables a different version built around Skull Splitter and additional skull damage.
The advantages are consistent area damage, mobility, and an accessible leveling setup. The main limitation is that the most powerful endgame configuration depends on specific Uniques and sufficient healing or Barrier generation to withstand Metamorphosis.
Apocalypse Warlock — High-Damage Caster
Apocalypse focuses on building and releasing large bursts of damage rather than maintaining an orbiting skill. Umbral Chains and supporting control abilities help group enemies before the main damage window. It is especially attractive to players who enjoy deliberate setup, explosive clearing, and difficult endgame encounters.
Its equipment, Paragon priorities, and rotation differ substantially from Blazing Scream. Do not copy Blazing Scream's Hellfire-oriented gear directly into an Apocalypse build without checking which skill tags and damage multipliers apply.
Lunatic Warlock — Command Fallen and Demon Summoning
Lunatic uses Command Fallen, particularly its Mega Lunatic variant, to create repeated explosions and summon-related interactions. Cage of Madness is a signature item for this approach, while the Legion Shard and Command Ae'grom support a more summon-oriented resource cycle.
Lunatic is a good choice if you enjoy commanding waves of disposable demons. It remains viable for farming and endgame progression, although its optimal equipment should be evaluated independently of the current Blazing Scream setup.
Demon Summoner Warlock — Safe Progression
The summoner approach emphasizes Command Fallen, Command Ae'grom, Fiend of Abaddon, and supporting Lesser Demon effects. Depending on the chosen variant, Dread Claws can consume or capitalize on summons to generate stronger damage. This style is appealing for solo players who prefer their demons to carry much of the combat pressure.
It requires less precise positioning than some caster setups, but summon uptime, enemy targeting, and appropriate damage modifiers still matter. Prioritize effects that specifically support Summon and Demonology skills.
Dread Claws Warlock — Aggressive Abyss Combat
Dread Claws favors close-range engagement and powerful Greater Demon interactions. The improvements to its base damage and Ravenous Jaws variant make it a competitive low-gear leveling choice. Nether Step supplies mobility, while Shadowform-related abilities can support a more evasive variation.
Choose Dread Claws if you want immediate damage without waiting for a particular weapon. It is an alternative leveling route rather than a required stage before Blazing Scream.
Tyrant's Grasp Warlock — Demonform and Boss Damage
Tyrant's Grasp builds around transforming into a demon and using Archfiend attacks to control and damage targets. Specialized gear and the Flesh of Abaddon Talisman set can strengthen the rotation, but this archetype is more demanding to assemble than a basic leveling build.
It is best considered after you understand Wrath, Dominance, and Demonform maintenance. Its strength depends heavily on the exact variant and the available equipment.
| Build | Best Use | Gear Dependence | Playstyle |
|---|---|---|---|
| Blazing Scream | Leveling, speed farming, broad endgame use | Low while leveling; higher for Skull Splitter | Mobile Hellfire caster |
| Apocalypse | Area burst and challenging encounters | Medium to high | Set up and detonate |
| Lunatic | Summon-based clearing and farming | Medium to high | Command Fallen explosions |
| Demon Summoner | Comfortable solo and early progression | Low to medium | Minion-focused |
| Dread Claws | Early leveling and aggressive combat | Low initially | Close-range Abyss damage |
| Tyrant's Grasp | Specialized Demonform encounters | High | Transformation and burst |
Warlock Resources, Soul Shards, and Fragments
Understanding the class mechanics prevents most early build mistakes. Warlock spends Wrath on offensive abilities and uses Dominance for demon-related powers. Skills, upgrades, and equipment can change how efficiently each resource is generated or spent.
According to Blizzard's Warlock class overview, the four primary Soul Shard archetypes are Legion, Vanguard, Mastermind, and Ritualist. Each changes the character's playstyle and links it to a particular demon.
- Legion: emphasizes numerous Lesser Demons, summoning speed, and interactions with Greater Demon casts. It suits Lunatic and summon-oriented setups.
- Vanguard: focuses on front-line demon power and Abodian-related effects. This is the recommended path for the Blazing Scream progression below.
- Mastermind: favors shadow control, Laalish, and Abyss-related tactics. It is a logical option for specialized shadow builds.
- Ritualist: supports ritual-based combat and alternative demon interactions rather than the standard Vanguard rotation.
At level 15, visit Ked Bardu and begin the Disciple of the Forbidden class quest to unlock your initial Soul Shard options. Fragments add another layer of customization as you progress, with the level-30 milestone particularly important for completing the leveling setup. For this guide, select the Vanguard Shard and use the Warden Fragment with the Orbital Scream route.
Do not confuse Soul Shards and Fragments with Soul Splinters. Soul Splinters are separate seasonal powers in Season 15; they are not permanent Warlock class mechanics.
Explore services related to this guide, selected from our Diablo IV catalog.
View All Diablo IV Services

Blazing Scream Warlock Build: Skills, Leveling, and Rotation
The recommended build has two distinct stages. Levels 1–70 focus on Orbital Scream, mobility, and reliable survival without rare items. The endgame transition introduces Elegy, Skull Splitter, stronger Uniques, and potentially Metamorphosis.

Levels 1–70: Step-by-Step Skill Progression
Begin on a difficulty where enemies die quickly. Higher difficulty is only efficient when the additional rewards compensate for slower kills and deaths. Your first priority is establishing Blazing Scream damage while keeping enough Wrath to cast it consistently.
| Level | Skill Progression | Purpose |
|---|---|---|
| 1–4 | Begin with Command Fallen, unlock Blazing Scream, and add Nether Step. | Establish a Wrath-generating Basic skill, primary damage, and movement. |
| 5–10 | Take Command Fallen's Wrath support, Blazing Scream damage upgrades, Nether Step's additional charge, and Profane Sentinel when available. | Make early casting smoother and provide support against tougher enemies. |
| 11–14 | Add ranks to Blazing Scream and supporting damage or mobility upgrades. | Improve clear speed without depending on Unique items. |
| 15 | Complete Disciple of the Forbidden, select Vanguard, and switch Blazing Scream to Orbital Scream. | Unlock the build's defining mobile damage loop. |
| 16–24 | Continue investing in Blazing Scream, add Terror Swarm, and obtain its supporting upgrades. | Maintain area damage while moving between packs. |
| 25–30 | Finish your main Blazing Scream ranks, develop Terror Swarm, and select Warden Fragment when the Fragment system becomes available. | Complete the principal leveling damage package. |
| 31–40 | Add Dark Prison with Fortify, cooldown, and Chain Aura support; progress toward Terror Swarm's Searing Infestation variant. | Increase control, survival, and persistent damage. |
| 41–55 | Improve Terror Swarm, Nether Step, and Profane Sentinel according to your available points and skill prerequisites. | Strengthen damage uptime and mobility. |
| 56–70 | Complete useful supporting ranks and defensive upgrades; replace weak equipment regularly. | Prepare for Paragon and the first Torment progression checks. |
Available skill points also depend on progression rewards and seasonal systems, so this is a milestone-based allocation order rather than a claim that every character receives exactly one usable point at each listed level. If you take a different early Basic skill, respec the temporary points once Orbital Scream provides a stable damage loop.
The level cap of 70 and the associated progression systems were introduced with Lord of Hatred, as detailed in Blizzard's expansion overview. Players comparing solo progression with character leveling assistance should still complete the relevant class unlocks before choosing an endgame build.
Leveling Skill Bar and Basic Rotation
After level 15, your primary goal is to maintain Orbital Scream and continue moving. The skill's orbiting effect means you can damage enemies while repositioning rather than stopping to recast a conventional projectile for every pack.
| Skill | Role |
|---|---|
| Blazing Scream — Orbital Scream | Primary sustained damage. Maintain its orbit and refresh its duration through the skill's channeling interaction. |
| Terror Swarm — Searing Infestation | Supporting persistent damage that complements the mobile playstyle. |
| Nether Step | Travel, positioning, and escaping dangerous attacks. |
| Dark Prison — Chain Aura | Defensive support and enemy control. |
| Profane Sentinel | Additional damage and access to useful enemy debuffs, including Vulnerable support through the appropriate upgrade. |
| Command Abodian | Vanguard-linked demon utility and pressure on important targets. |
Leveling rotation: Activate Orbital Scream before approaching a pack, move through enemies using Nether Step when needed, and maintain Terror Swarm. Place Dark Prison around dangerous groups or elites, use Profane Sentinel for its supporting effects, and command Abodian against priority enemies. Refresh Orbital Scream before it expires instead of continuously rebuilding the effect.
If you lack resource generation before the Orbital Scream transition, temporarily keep Command Fallen on the bar. Avoid taking damage simply to maintain a perfect rotation; a brief reposition is better than dying while channeling.
Level 70: Transition from Orbital Scream to Skull Splitter
The build changes significantly once you obtain Elegy. This Unique sword grants the Skull Splitter variant of Blazing Scream and strengthens the smaller skulls created by the skill. That interaction forms the basis of a more powerful endgame setup.
Do not switch immediately just because Elegy drops. First secure adequate Maximum Life, healing, and Barrier support. Endgame versions using Metamorphosis with the Destruction Demon variant can damage their own Life, and an undergeared character may die even while ordinary enemies are being cleared quickly.
| Skill | Endgame Function |
|---|---|
| Blazing Scream — Skull Splitter | Main damage skill once Elegy enables the variant and improves the smaller skulls. |
| Dark Prison | Control and defensive support during elite and boss encounters. |
| Metamorphosis — Destruction Demon | Demonform, Volatility interactions, and additional scaling; use only when the self-damage is sustainable. |
| Rampage | Damage, mobility, and Greater Demon interactions according to its chosen upgrades. |
| Sigil of Subversion | Support for damage and enemy control in the selected endgame variant. |
| Command Abodian | Vanguard demon support, particularly against elites and bosses. |
Some current endgame versions substitute Profane Sentinel, Bombardment, or Sigil of Chaos for a supporting ability. These are genuine build variants, not additional seventh or eighth skills. Profane Sentinel is particularly valuable when your equipment does not already supply a reliable way to apply Vulnerable.
Endgame rotation: Activate Metamorphosis only after your healing and Barrier are established. Summon or command Abodian, apply the chosen Sigil and Dark Prison to priority targets, then cast Blazing Scream while maintaining favorable positioning. Use Rampage for its damage or mobility role and refresh support abilities before their effects expire. Against bosses, prioritize uninterrupted damage windows over unnecessary movement.
Warlock Gear, Legendary Aspects, Uniques, and Stat Priorities
The most important equipment distinction is between a functioning leveling build and a fully assembled endgame setup. While leveling, good weapon damage, survivability, and a few relevant Aspects are sufficient. At endgame, specific Unique interactions become much more important.

Leveling Gear and Legendary Aspects
Replace weapons as their damage falls behind your level. Prioritize useful offensive affixes without sacrificing basic survivability, and keep Movement Speed on boots where practical. Upgrade or imprint strong items selectively rather than spending substantial resources on equipment you will replace immediately.
| Slot or Aspect | Why It Helps |
|---|---|
| Weapon | Prioritize current weapon damage and relevant skill modifiers. A suitable two-handed weapon is acceptable before the endgame sword-and-offhand setup. |
| Edgemaster's Aspect | Rewards maintaining a high resource level while dealing damage. |
| Aspect of Ignition | Supports appropriate Hellfire and Volatility interactions. |
| Sadistic Aspect | Provides useful sustain in demon-focused versions of the build. |
| Hellbent Commander Aspect | Supports summon-related damage interactions when the chosen abilities benefit from them. |
| Defensive Aspect | Use a suitable defensive option when Armor, Life, or damage reduction is insufficient for your difficulty. |
| Boots and Jewelry | Prioritize Movement Speed, relevant resistances, and useful resource or cooldown support. |
Aspect placement depends on your weapon choice and which slots remain available after equipping Uniques. An aspect that requires a two-handed weapon is not automatically compatible with the later Elegy and offhand configuration.
Endgame Uniques and Equipment by Slot
The table below describes an advanced Skull Splitter setup. These are progression goals, not items required to begin leveling. The most important early endgame acquisition is Elegy; defensive equipment should come before optional damage optimization.
| Slot | Target | Priority and Alternative |
|---|---|---|
| Weapon | Elegy | Build-enabling Unique sword; retain a strong ordinary weapon for Orbital Scream until it drops. |
| Offhand | Infernal Homunculus | Supports Lesser Demon upgrades and endgame interactions; use a well-rolled rare or Legendary offhand initially. |
| Helm | Leoric's Crown | Advanced gearing and seasonal socket interactions; a defensive Legendary helm is enough early on. |
| Chest | Enigma or an appropriate Legendary chest | Optional high-end mobility or defensive choice; do not treat Enigma as required for Skull Splitter to function. |
| Gloves | Hand of Apotheosis | Advanced damage optimization; relevant skill ranks and offensive affixes work as interim choices. |
| Pants | Temerity | Important Barrier protection in variants that use Metamorphosis self-damage. |
| Boots | Legendary with Undying or another suitable defensive Aspect | Movement Speed and reliable sustain take priority. |
| Amulet | Moloch's Beating Flame | Strong Hellfire and Volatility scaling once the relevant skill interaction is active. |
| Ring 1 | The Eightfold Idol or a suitable Legendary ring | Variant-dependent damage improvement; use relevant affixes until the Unique is available. |
| Ring 2 | Stone of Jordan or a suitable Legendary ring | Further endgame scaling, with the best choice depending on your damage type and current resistances. |
Target-farming specific Uniques is generally more efficient than repeatedly replacing every equipment slot at random. The exact drop pool and boss availability can change, so check the current in-game boss reward list before committing a large amount of materials. Ordinary upgrades, enchantments, and the Horadric Cube also consume resources; calculate whether a piece is a meaningful improvement before using valuable gold reserves.
Blizzard's live patch notes remain the reference for subsequent fixes to items, crafting, and class interactions. Do not build around an effect described only in future PTR notes.
Best Warlock Stats and Affixes
A Skull Splitter setup should not chase every damage stat equally. First confirm that the main skill functions, then solve survivability and resource problems, and finally add damage multipliers that affect the skills actually used.
| Priority | Stats | Reason |
|---|---|---|
| 1. Build functionality | Weapon damage, required Unique effects, sufficient resources | These establish the core Skull Splitter damage loop. |
| 2. Survival | Maximum Life, Armor, resistances, healing, Barrier support | Required to withstand difficult content and any Metamorphosis self-damage. |
| 3. Direct damage | Relevant skill ranks, Hellfire bonuses, Critical Strike Chance, Critical Strike Damage | Improves the damage sources used in the selected version. |
| 4. Enemy debuffs | Reliable Vulnerable application and applicable Vulnerable damage | Useful only when your actual bar or items can maintain the debuff. |
| 5. Uptime | Cooldown Reduction, Resource Cost Reduction, resource generation, Movement Speed | Keeps combat flowing and reduces downtime between packs. |
Willpower and other primary attributes can be valuable through the current itemization system, but do not assume that an attribute is better than a multiplicative bonus or a missing defensive breakpoint. Check the in-game tooltip after changing gear, especially when a skill gains additional tags through a Unique.
Gems, Runes, and Runewords
Gems and runes should solve a specific problem. For an advanced fire-based Blazing Scream setup, Rubies in weapon sockets are a strong offensive choice, while Sapphires in suitable armor sockets can contribute Willpower. Jewelry sockets may be more useful for resistances or available seasonal powers, depending on the current character's defenses.
Diablo 4 also uses paired runes that combine a triggering condition with an invoked effect. The combinations below are practical examples for Warlock; the best selection changes when your gear already covers resource generation or damage reduction.
| Rune Pair or Socket | Purpose | When to Use |
|---|---|---|
| Igni + Tir | Helps address resource-generation requirements. | Useful when the endgame rotation cannot sustain its casts comfortably. |
| Cir + Mot | Provides Dark Shroud-based defensive support. | Useful when damage reduction is more valuable than another offensive effect. |
| Bac + Jah | Movement-based Offering and teleport-style mobility. | Optional for movement-heavy versions that benefit from extra repositioning. |
| Ruby in weapon | Fire-oriented damage scaling. | Advanced Hellfire-focused equipment. |
| Sapphire in armor | Additional Willpower. | When the primary attribute improves the selected setup more than an alternative. |
| Jewelry sockets | Resistance coverage or appropriate seasonal powers. | Choose after checking actual defensive caps and seasonal availability. |
Do not confuse these two-rune combinations with crafted multi-rune items such as Enigma. They are different equipment arrangements, and an item slot already committed to a particular Runeword cannot simply be treated as an unrestricted gem socket. Also, the older Ceh wolf interaction should not be relied upon as an automatic source of Vulnerable.
Best Warlock Talisman Sets and Seasonal Powers
The Talisman system provides an additional layer of gear customization through Charms and Seals. It is separate from the normal armor, jewelry, and weapon slots. A set's value depends on how many relevant pieces are equipped and which bonuses the selected build can activate.
For advanced Blazing Scream, the Flesh of Abaddon family is a strong target because it supports the build's damage and Life-oriented interactions. Relevant pieces include Phoba, Berú, and Linta variants of the set. A Seal of the Diamond Mind can be part of a more specialized arrangement, but the exact active set bonuses must be checked after every Charm or Seal swap.
- During leveling: use available Charms with helpful Life, damage, or mobility effects rather than waiting for a complete set.
- Early endgame: assemble useful Flesh of Abaddon pieces without sacrificing essential defenses.
- Advanced setup: compare the bonuses of your current Seal, including any reduction to the number of Charms needed for a set threshold.
- Alternative builds: Lunatic and Apocalypse can prefer other sets. A Talisman chosen for Skull Splitter should not automatically be reused.
Season 15 additionally offers Soul Splinters, including offensive and defensive options such as Splinter of the Black Soulstone, Splinter of Anguish, Splinter of Pain, and Splinter of Sin. These are seasonal choices rather than permanent requirements of the evergreen Warlock build. When a season changes, replace this layer according to the new seasonal system instead of rebuilding the entire class guide around a temporary power.
Warlock Paragon Boards and Best Glyphs
At level 70, Paragon becomes the main long-term progression system. The goal is to connect relevant Legendary nodes and develop glyph sockets that reinforce Blazing Scream's damage, demon interactions, and survivability. Avoid spending many early points clearing every ordinary node on the first board.
The following five-board route is an example for a Blazing Scream endgame configuration. Board rotation and individual connecting nodes depend on your final planner and available Paragon points, so the table identifies the intended progression rather than pretending to provide an exact node-by-node import.
| Order | Board | Glyph | Main Purpose |
|---|---|---|---|
| 1 | Starting Board | Wrath | Establish early offense and reach the first efficient exit. |
| 2 | Dynamism | Attrition | Supports Demonform and resource-sensitive damage scaling. |
| 3 | Demonic Spicules | Hellforge | Adds relevant Demonology and damage interactions. |
| 4 | Greater Hex | Demonologist | Rewards applying the debuffs and effects used by the build. |
| 5 | Fathomless | Eldritch Sight | Supports interactions involving recently summoned demons. |
Other valid variants use Superiority, Unbound, Archfiend, or different glyph-to-board assignments. This is not an instruction to combine every glyph from competing builds into one impossible setup. Follow one connected route, check the attribute requirements around each socket, and adapt the later boards if your gear changes the relevant skill tags.
Glyph leveling order: First unlock the important boards and sockets. Next, level your most impactful equipped glyphs in the Pit until their radius and additional bonuses are active. Continue upgrading them as your difficulty and available glyph experience increase, rather than pushing one less useful glyph while the others remain undeveloped.
The practical value of glyph progression comes from unlocking the bonuses your build can actually use. More glyph levels do not compensate for a disconnected Paragon path, a missing Unique effect, or insufficient defenses.
Warlock Endgame Progression: What to Farm First
Reaching level 70 is the beginning of the gearing process, not the end of the build. Progress toward higher Torment difficulties as soon as your damage and survivability allow consistent clears, but avoid forcing a difficulty where elites take excessively long to kill.
- Finish the leveling setup. Ensure Orbital Scream, defensive skills, Vanguard, and your Fragment are correctly configured.
- Unlock and clear the necessary Pit tiers. Pit Tier 10 is an early progression milestone for Torment 1, while continued Pit runs provide glyph development.
- Upgrade ordinary gear. Fill missing Armor and resistances, obtain reliable Movement Speed, and improve your weapon before chasing perfect rolls.
- Acquire Elegy. This is the key item for converting from Orbital Scream to the advanced Skull Splitter version.
- Build the defensive package. Obtain sufficient healing, Life, and Barrier support before enabling a self-damaging Metamorphosis rotation.
- Complete supporting Uniques and Talismans. Target equipment that supplies missing multipliers rather than replacing already-functional pieces for negligible gains.
- Advance Paragon and glyphs. Unlock useful Legendary nodes and upgrade the glyphs currently equipped.
- Optimize for the activity. Speed farming favors mobility and easy damage uptime; difficult bosses and Pit pushing may require different skills, defensive layers, or gear rolls.
Helltides, Nightmare Dungeons, Infernal Hordes, the Pit, boss encounters, and Lord of Hatred activities all contribute different materials or upgrade opportunities. Choose a farming route based on the upgrade you need rather than repeating the same activity indefinitely. If comparing different dungeon progression routes, prioritize those that directly improve your glyphs, gear, or access to the next difficulty.
Mercenary Choices
Mercenaries should cover weaknesses in the selected build. A fast farming character may appreciate additional movement or attack support, while a character struggling to survive should take reliable defensive utility.
| Mercenary | Best Role | Why Choose Them |
|---|---|---|
| Raheir | Defensive main mercenary | Useful when Barrier, protection, or other defensive support is the limiting factor. |
| Varyana | Aggressive farming | Provides offensive momentum and can be attractive when survival is already comfortable. |
| Aldkin | Defensive reinforcement | Field of Languish can slow enemies and reduce incoming damage during dangerous engagements. |
| Subo | Travel and general farming | An option when efficient movement between objectives matters more than maximum defensive support. |
Common Build Problems and Fixes
Blazing Scream feels weak before level 15: This is the least comfortable stage. Maintain a source of Wrath through your Basic skill, equip a stronger weapon when available, and unlock Orbital Scream before judging the build's clear speed.
Enemies survive while you run past them: Refresh Orbital Scream, check its active variant, and confirm that Terror Swarm and the relevant supporting skills are equipped. Do not assume that movement alone maintains every damage effect indefinitely.
You suddenly lose Life in endgame: Check whether Metamorphosis is damaging you. Reduce its uptime or return to the safer Orbital setup until healing and Barrier generation are sufficient.
Boss damage is inconsistent: Verify that your Vulnerable source is reliable, your Sigil and support effects are active, and your damage affixes match the tags on your current Blazing Scream variant.
Paragon upgrades feel insignificant: Check that the relevant glyph bonuses are activated and that you are following a connected path. Missing Legendary nodes or attribute requirements can negate the expected improvement.
Diablo 4 Warlock Builds FAQ
These answers cover the most common questions that arise when transitioning from leveling into endgame.
What is the easiest Warlock build for beginners? Orbital Blazing Scream is a strong all-around choice because it allows damage while moving. Demon Summoner and Dread Claws are also accessible alternatives if you prefer minions or close-range combat.
Do I need Elegy to level a Warlock? No. Elegy is an endgame target for the Skull Splitter variant. The Orbital Scream leveling version works before you obtain it.
Which Soul Shard should Blazing Scream use? Vanguard is the recommended choice for the Abodian-centered route described here. Other builds use different Soul Shards because their main mechanics are different.
Can I use this guide on the Eternal Realm? The class skills, leveling route, gear concepts, and Paragon principles remain relevant. Seasonal-only Soul Splinters and other temporary mechanics are not guaranteed to exist on Eternal.
Final Thoughts
Blazing Scream is a flexible starting point for Warlock: level with Orbital Scream, develop Vanguard and your defensive toolkit, then move into Skull Splitter only when Elegy and adequate sustain are available. Build-enabling items, correct skill interactions, and a connected Paragon route matter more than chasing every high-rarity item immediately. Apocalypse, Lunatic, Demon Summoner, Dread Claws, and Tyrant's Grasp remain useful alternatives when their playstyles better match the content you want to run.