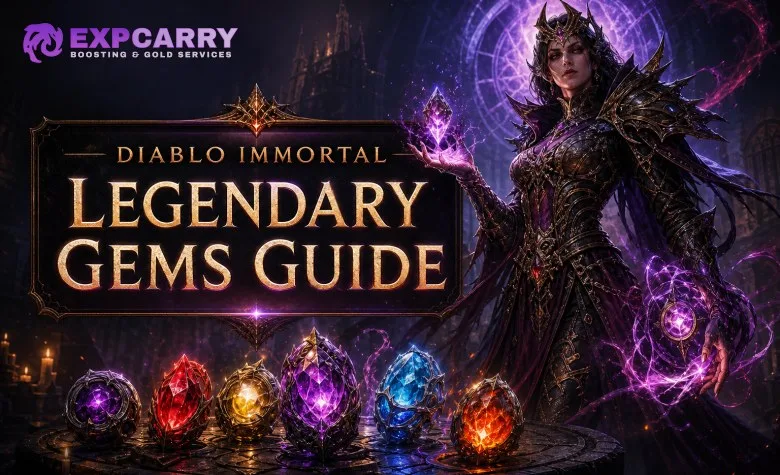
Legendary Gems are one of the most important long-term progression systems in Diablo Immortal because they provide unique effects, Combat Rating, Resonance, and additional Magic Find at higher ranks. The best gem setup depends on your activity, class, spending level, and whether you value immediate PvE damage, survivability, or Battleground performance. For most players, the efficient path is to build a dependable group of one- and two-star gems first, then add five-star gems selectively instead of replacing every gem as soon as a higher-star gem drops.
How Legendary Gems work
Legendary Gems fit into the six Legendary Gem slots on your primary equipment. You cannot equip duplicate gems, so every active slot must contain a different Legendary Gem. Legendary Gems are divided into one-star, two-star, and five-star categories.
A gem’s star rating describes its category and base potential. A one-star gem always remains a one-star gem, and a two-star gem always remains a two-star gem. A five-star gem can be obtained with a random quality between two out of five and five out of five stars. A two-out-of-five gem is still a five-star-category gem, but it provides less Resonance and less power than a five-out-of-five version.
A gem’s rank is separate from its star rating. Legendary Gems begin at Rank 1 and can be upgraded to Rank 10. Ranking up improves the gem’s effect and increases its Resonance and Combat Rating contribution. At Rank 5, the gem also unlocks its Magic Find attribute.
| Gem category | Main advantage | Best use |
|---|---|---|
| One-Star | Low upgrade cost and reliable long-term value | F2P accounts, budget builds, awakening targets |
| Two-Star | Stronger effects with manageable investment | Most low-spender and developing endgame builds |
| Five-Star | High Resonance and powerful build-defining effects | Developed accounts, high-investment PvE, and competitive PvP |
What Legendary Gems add to your character
Every Legendary Gem contributes more than its special effect. The gem also adds Combat Rating and Resonance. Resonance increases the base Life or Damage of the equipment slot containing the gem, while Combat Rating contributes directly to your character’s offensive and defensive rating.
Resonance and Combat Rating are not the same statistic. Resonance improves the base attributes of socketed gear, while Combat Rating is used when comparing your character’s power with enemies and activity requirements. A gem can be attractive because of its effect, its Resonance, its Combat Rating, or a combination of all three.
At Rank 5, a one-star gem unlocks 5% Magic Find, a two-star gem unlocks 10% Magic Find, and a five-star gem unlocks 15% Magic Find. Magic Find is a secondary benefit, so do not sacrifice a strong combat effect simply to reach Rank 5 on a weaker gem.
Best Legendary Gems for general PvE
There is no single best six-gem setup for every class. A ranged damage build, a summon build, a channeling build, a melee build, and a support build all benefit from different effects. However, several gems remain practical starting points for a wide range of PvE characters.
Berserker’s Eye
Berserker’s Eye is one of the most efficient one-star damage gems. It increases the damage you deal while also increasing the damage you take. The drawback is noticeable in difficult content, but the low investment cost and direct damage increase make Berserker’s Eye useful for open-world farming, Elder Rifts, Challenge Rifts, and dungeon speed runs.
Use Berserker’s Eye when your build can avoid incoming damage or when you need inexpensive offensive power. Replace it in difficult progression content if the increased damage taken causes frequent deaths.
Ca’arsen’s Invigoration
Ca’arsen’s Invigoration improves Primary Attack speed and is especially useful for builds that rely heavily on their Primary Attack between cooldowns. Demon Hunter, Blood Knight, Barbarian, and other attack-focused builds can gain consistent value from it.
Ca’arsen’s Invigoration is less attractive for builds that spend most of their time casting skills, commanding summons, or channeling abilities. Test your actual damage rotation rather than assuming every class benefits equally.
Everlasting Torment
Everlasting Torment causes critical hits to inflict a damage-over-time effect. It performs best on builds with reliable Critical Hit Chance and frequent attacks. The gem is particularly useful when your class or Legendary Essences already encourage repeated hits.
Do not prioritize Everlasting Torment if your build has low Critical Hit Chance, infrequent attacks, or poor access to critical-hit bonuses. In those cases, a direct damage or defensive gem may provide more consistent results.
Fervent Fang
Fervent Fang increases damage against a single target as you continue attacking that target. It is valuable for dungeon bosses, Helliquary raids, Challenge Rift guardians, and other encounters where one enemy remains alive for an extended period.
Fervent Fang is less impressive during large-group farming, where enemies die before the effect reaches its full value. Keep it in a boss-oriented loadout and consider switching to an area-damage or movement gem for open-world farming.
Power & Command
Power & Command alternates between improving Skill damage and Primary Attack damage. The gem rewards players who understand its current state and time their rotation accordingly. It is a flexible choice for hybrid builds that alternate between attacks and skills.
Power & Command is not automatically best for every class. If your build uses almost no Primary Attack or almost no skills, only part of the gem’s effect is being used.
Seled’s Weakening
Seled’s Weakening grants increased damage after defeating an Elite monster. It is strongest in activities containing frequent Elite enemies, including open-world farming and some Rift routes. Its value drops in boss encounters unless the activity provides an Elite kill before the main target.
Use Seled’s Weakening for farming and replace it with a sustained single-target gem for raids or boss-focused content.
Unity Crystal
Unity Crystal is a defensive and group-oriented option. It reduces incoming damage when nearby party members are using the same gem, making it more useful in coordinated groups than in solo play.
Unity Crystal is a practical choice for dungeon groups, raid teams, and players who regularly play with the same party. It is not a priority for solo farmers who cannot reliably maintain its group condition.
Explore services related to this guide, selected from our Diablo Immortal catalog.
View All Diablo Immortal Services


Strong two-star Legendary Gems
Two-star gems are often the best compromise between effect quality, Resonance, Combat Rating, and upgrade cost. They are much easier to build than high-quality five-star gems and can remain useful deep into endgame progression.
Bottled Hope
Bottled Hope is a strong choice for builds that regularly apply beneficial effects to themselves or allies. It can improve damage and movement speed after activating a beneficial effect, making it useful for classes with frequent buffs, shields, summons, or support abilities.
Bottled Hope is most effective when your build can trigger its condition consistently. Avoid investing heavily in it if your character has long gaps between buff activations.
Power & Command
Power & Command can also serve as a long-term two-star core gem because it provides value to hybrid rotations without requiring a rare five-star drop. Its performance depends on correct timing and whether your build can benefit from both portions of the effect.
The Abiding Curse
The Abiding Curse supports builds that apply continual damage or other harmful effects. It is more attractive for damage-over-time, summon, and repeated-hit setups than for slow burst builds.
The gem becomes less useful when enemies die instantly or when your build cannot reliably apply its required effect. It is better in sustained encounters than in very low-difficulty farming.
Mocking Laughter
Mocking Laughter provides defensive utility against certain enemy attacks and can help during leveling, solo progression, and difficult content where survival is more valuable than a small damage increase.
It is not usually a first-choice damage gem for developed PvE characters, but it can be a sensible temporary gem while your account is still below the Combat Rating needed for a difficult activity.
Kir Sling
Kir Sling is useful for builds that want additional survivability and protection against specific types of incoming damage. It is more situational than a universal damage gem, but defensive gems can outperform offensive gems when deaths are causing failed rifts or slow dungeon clears.
Five-star Legendary Gems worth considering
Five-star Legendary Gems provide more Resonance and higher long-term scaling, but they are expensive to obtain and upgrade. A low-quality five-star gem is not automatically better for your build than a high-rank one-star or two-star gem. Choose a five-star gem because its effect fits your build, not only because its icon has five stars.
Blood-Soaked Jade
Blood-Soaked Jade is a widely useful damage gem for characters that can maintain high Life and benefit from increased movement speed. It is effective in open-world content, dungeons, Challenge Rifts, raids, and many PvP situations.
The damage bonus becomes less attractive when your character spends much of the fight at low Life. Pair it with defensive tools if your build struggles to remain healthy.
Seeping Bile
Seeping Bile applies poison and can spread the effect when poisoned enemies die. It is strongest against groups of enemies and builds that attack frequently. The poison effect is less reliable against targets that die immediately or bosses where spreading cannot occur.
Blessing of the Worthy
Blessing of the Worthy creates a retaliation effect after taking damage. It is useful for melee characters, front-line builds, and PvP characters that are frequently attacked. Its value depends on receiving enough incoming damage for the effect to activate without being overwhelmed.
Echoing Shade
Echoing Shade can create temporary shadow copies that repeat attacks. It is more effective for classes and builds whose attacks are easy for the copies to reproduce. The gem is less consistent when your main damage comes from positioning-sensitive abilities or effects that copies cannot use efficiently.
Phoenix Ashes
Phoenix Ashes prevents fatal damage and provides a temporary shield. It is primarily a defensive gem for PvP, solo progression, and difficult encounters where one mistake would otherwise cause a death.
Phoenix Ashes does not increase your damage enough to justify using it in every farming build. Use it when surviving a lethal attack matters more than faster clearing.
Haunt Coil
Haunt Coil is a five-star gem introduced in a later content update. It can haunt enemies and changes its value depending on whether your character is using an offensive or defensive stance. Haunted enemies can also release damaging blasts around themselves, although repeated blasts against the same enemy are reduced.
Haunt Coil is most appealing for developed characters that can use stance mechanics consistently. Do not treat it as a universal replacement for established damage gems until you have tested its effect with your exact class, stance, and activity.
Newer one-star and two-star options
Recent updates have expanded the Legendary Gem pool with more specialized effects. Mountain Toe is a one-star gem focused on Critical Resistance and reducing Critical Hit Damage taken. It is more relevant to PvP and defensive builds than to ordinary PvE farming.
Fading Nostrum is a two-star defensive gem that provides protection against harmful continual damage effects and improves the chance to Block projectiles after taking damage. It is particularly relevant in encounters where damage-over-time effects or ranged attacks are major threats.
These gems demonstrate an important rule: a newer gem is not automatically a stronger gem. Specialized defensive gems can be excellent in Battlegrounds or specific encounters while providing little value during routine open-world farming.
Best Legendary Gems by activity
| Activity | Recommended focus | Useful gem types |
|---|---|---|
| Open-world farming | Fast movement and area damage | Berserker’s Eye, Seeping Bile, Seled’s Weakening, Blood-Soaked Jade |
| Dungeons | Consistent damage and boss performance | Fervent Fang, Everlasting Torment, Bottled Hope, Blood-Soaked Jade |
| Helliquary raids | Sustained single-target damage and survival | Fervent Fang, Everlasting Torment, Power & Command, Phoenix Ashes |
| Challenge Rifts | Damage, elite killing, and survival | Berserker’s Eye, Seled’s Weakening, Fervent Fang, defensive alternatives |
| Battlegrounds | Survivability, burst windows, and control resistance | Blood-Soaked Jade, Phoenix Ashes, Blessing of the Worthy, defensive choices |
Use separate loadouts when possible. A farming setup should not be judged by the same standards as a Battleground setup, and a raid setup should not be forced into open-world content. The best gem is the one that activates reliably in the activity you are actually playing.
F2P Legendary Gem setup
Free-to-play players should prioritize gems that can be crafted, purchased with earned Platinum, or acquired through regular Elder Rift and activity rewards. One-star gems are particularly efficient because their upgrade requirements are manageable and they can reach Rank 10 without the duplicate burden associated with high-end five-star gems.
A practical F2P approach is to use a mixture of one-star and two-star gems rather than chasing a full five-star setup. Good starting choices include Berserker’s Eye, Ca’arsen’s Invigoration, Everlasting Torment, Fervent Fang, Power & Command, and a defensive or class-specific two-star gem.
- Build six different gems before worrying about perfect quality.
- Upgrade the gems that directly support your active build.
- Use the Market carefully and avoid spending all Platinum on one speculative gem.
- Save unbound gems that may be useful for future upgrades or Market sales.
- Use Fading Embers and free Legendary Crests consistently rather than relying on rare drops.
F2P players should not copy a high-Resonance whale setup one-for-one. A five-star gem that remains at Rank 1 can perform worse for your account than a well-upgraded one-star or two-star gem that matches your skills.
Low-spender and high-investment priorities
Low spenders can usually gain the best value by building a stable two-star core and adding one or two carefully selected five-star gems. Bottled Hope, The Abiding Curse, Power & Command, and other class-compatible two-star gems provide practical performance without requiring a large supply of duplicate five-star gems.
Higher-investment players can pursue five-star gems that improve both Resonance and combat performance. Blood-Soaked Jade, Seeping Bile, Phoenix Ashes, Echoing Shade, Blessing of the Worthy, and Haunt Coil can all be valuable, but the correct choice depends on class, gem quality, rank, and activity.
Do not dismantle a useful two-star gem simply because you obtained a two-out-of-five five-star gem. Compare the gem’s actual Resonance, rank, effect, and upgrade path before replacing it.
How to obtain Legendary Gems
Legendary Gems come from several sources. Empowered Elder Rifts using Legendary Crests provide a reliable way to receive Legendary Gem rewards. You can also craft eligible gems through the Apprentice Jeweler, buy marketable gems from other players with Platinum, exchange available materials through the Fading Embers trader, and receive certain gems through Battle Pass rewards.
Most one-star and two-star gems can be crafted directly, while five-star gems are generally obtained through drops or random gem crafting options. The Market is often the most predictable way to target a specific marketable gem, but prices and availability vary by server.
RNG controls which five-star gem drops and how many stars the gem actually has. No farming route guarantees a particular five-star gem, a five-out-of-five result, or a specific duplicate needed for an upgrade.
How to upgrade Legendary Gems efficiently
Legendary Gem upgrades use Gem Power and, depending on the gem and rank, duplicate copies of the same gem. Gem Power comes from consuming eligible Legendary Gems. Higher-star gems require a much larger long-term investment, especially at later ranks.
- Choose the gem before investing heavily. Confirm that the effect works with your class and main activity.
- Reach a useful rank on several gems. A balanced setup is usually better than one heavily upgraded gem and five weak slots.
- Protect duplicate copies. Do not use a gem as Gem Power if you may need it for a future rank upgrade.
- Use manual selection instead of careless Auto Fill. Auto Fill can consume gems you intended to save.
- Compare rank and quality before replacing a gem. A higher-star category does not always mean higher immediate performance.
Starting at Rank 5, Legendary Gems can be upgraded in smaller increments when duplicate copies are combined. The change makes progression more gradual, but it does not remove the total investment required for later ranks.
If a previously equipped gem appears locked when you try to use it for Gem Power, open the gem’s details and remove the lock manually. The lock exists to prevent accidental destruction of a gem that was previously socketed.
Which socket should hold your best gems?
Place your highest-Resonance gems in equipment slots that support the attribute your build values most. Head, Shoulders, Weapon, and Off-Hand slots enhance Damage, while Chest and Legs enhance Life. Damage-focused PvE builds generally place their strongest Resonance gems in Damage slots.
PvP characters may deliberately place more Resonance into Life slots when survivability is more valuable than a small increase in offensive output. Check the attribute shown on each item instead of relying only on the equipment slot name, especially after gear changes.
PvE and PvP gem choices are different
PvE rewards sustained damage, area clearing, boss damage, and movement speed. Damage-over-time gems, Primary Attack gems, and Elite-focused gems are often excellent in farming and dungeon content because enemies can be grouped and defeated quickly.
PvP places greater value on survival, burst timing, control resistance, shields, and effects that remain useful while you are being pressured. Phoenix Ashes, Blessing of the Worthy, defensive two-star gems, and specialized options such as Mountain Toe or Fading Nostrum can be more useful in Battlegrounds than a purely offensive farming gem.
Resonance still matters heavily in PvP, but a gem setup cannot compensate completely for a major account-power difference, poor positioning, or an uncoordinated team. Build for your role and objective rather than copying a damage-only PvE loadout.
Common Legendary Gem mistakes
- Chasing five-star gems too early: An expensive Rank 1 gem may provide less practical value than a well-ranked two-star gem.
- Ignoring gem effects: Resonance is valuable, but a gem that never activates in your build wastes part of its potential.
- Using one loadout everywhere: Farming, raids, Challenge Rifts, and Battlegrounds reward different effects.
- Destroying duplicates: A duplicate may be required for a future rank upgrade.
- Spending Platinum without a plan: Save enough Platinum to complete a usable gem rather than buying isolated upgrades.
- Ignoring survival: A defensive gem can increase real damage per minute if it prevents deaths and failed activity runs.
- Assuming newer means better: Specialized gems such as Mountain Toe and Fading Nostrum are powerful only when their defensive conditions matter.
A practical upgrade order
Start by filling all six Legendary Gem slots with different gems that match your class and activity. Next, replace gems that have no synergy with your build, then raise the ranks of your most reliable one-star and two-star gems. After your core setup is stable, begin adding five-star gems that improve your actual rotation rather than chasing star quality alone.
For open-world and dungeon play, prioritize consistent damage, movement, and boss performance. For Helliquary raids and Challenge Rifts, favor sustained single-target damage while keeping at least one defensive option if deaths are limiting progress. For Battlegrounds, test defensive gems and survival effects against your class role before committing all of your Gem Power to PvE damage.