




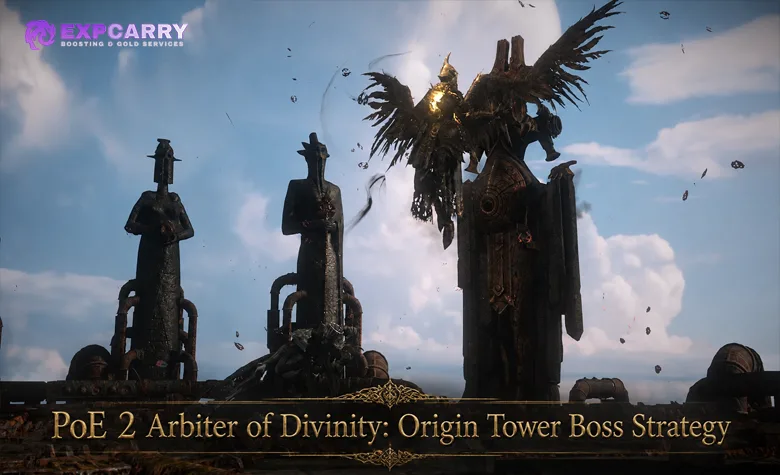
The Arbiter of Divinity concludes the Origins of Divinity route in Path of Exile 2. Reaching the encounter requires more than finding a boss icon: you must open the Precursor Fortress, defeat the Arbiter of Ash, clear the Patriarch and Matriarch Halls, assemble an Origin Core, and carry it to the summit of the Origin Tower. The battle then tests precise movement, audio recognition, lightning defence, sustained damage, and correct use of Divine Power.
This guide explains the current Fortress path, entry items, readiness checks, two combat phases, clone mechanic, principal threats, Atlas progression reward, named drop pool, and repeat-farming logic. It is written for the permanent 0.5 endgame structure rather than one temporary economy. If a character still needs broader endgame preparation, the available Path of Exile 2 progression services provide a contextual alternative while the strategy below remains suitable for self-play.
PoE 2 Arbiter of Divinity Quick Answer
Complete your first Tower to raise the Fortress, advance through its gates, and defeat the Arbiter of Ash in the Burning Monolith. This opens the inner route containing the Origin Tower and the two Halls. Kill Phyx in the Patriarch Halls for the Origin Spark and Phya in the Matriarch Halls for the Origin Cradle. Place both items in the Precursor Reactor to create an Origin Core, then take that Core to the tower summit and begin the encounter.
- Cap elemental resistances, with particular attention to Lightning Resistance, and keep a defence layer for physical spear hits.
- Use the level 79 quest encounter and its unlimited revivals to learn the full phase transition rather than judging the fight by its first health bar.
- React to major voice lines, but confirm every response with the matching animation and arena effect.
- In phase two, collect Divine Power from an edge pedestal before trying to remove Divinity Clones.
- Prioritise a clear movement lane over damage whenever lightning streams, clone attacks, or a long spear sequence begins.
- After a kill, activate an Ancient Mechanism for an unfinished Fortress section whose Atlas points and access matter to your next objective.
Where the Boss Fits in the Current Endgame
The Arbiter of Divinity is the final boss of the Origins of Divinity storyline and is fought in the Origin Tower. This is a different encounter from the Arbiter of Ash. Ash guards the way through the Burning Monolith; Divinity stands beyond that route and uses a separate two-part access key. The official Return of the Ancients overview is the permanent expansion reference for the endgame overhaul that introduced this progression.
The fight also serves a structural purpose. Maps inside the Fortress award main Atlas passive points, and repeated Divinity victories can complete different Fortress sections automatically. There is no dedicated Arbiter of Divinity passive tree to level and no old four-difficulty ladder to climb. Treat the boss as both the finale of the storyline and an alternative route through the central Atlas-point grind.
Fortress Route to the Origin Tower
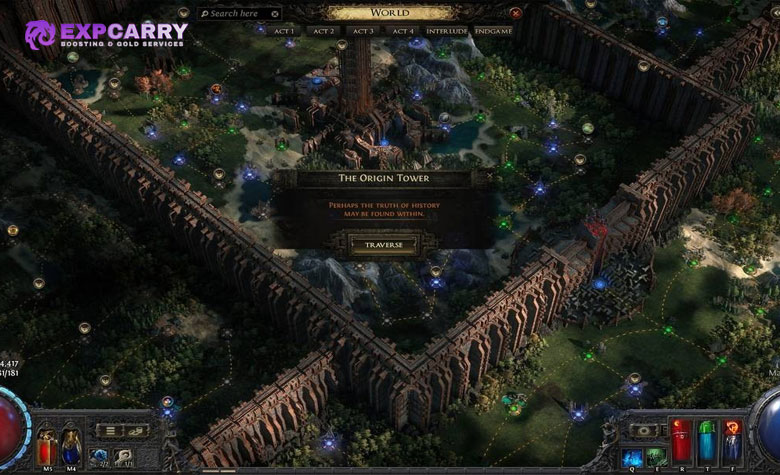
The Fortress rises after you complete your first Tower on the Atlas. Its outer sections contain gateway objectives, Enigma Chambers, and the Burning Monolith route. Progress inward until you can open the Monolith and defeat the Arbiter of Ash. That victory grants access to the deeper Fortress section where the Origin Tower, Patriarch Halls, and Matriarch Halls are located.
- Complete the first Atlas Tower and wait for the Precursor Fortress to emerge.
- Use the Fortress gateways and connected maps to reach the Burning Monolith objectives.
- Obtain the quest Crisis Fragments from the Western and Eastern Enigma Chambers, then open the Monolith.
- Defeat the Arbiter of Ash to open the route behind the Burning Monolith.
- Locate and complete the Patriarch Halls and Matriarch Halls in the inner Fortress.
- Return both Hall rewards to the Precursor Reactor inside the Origin Tower.
- Take the resulting Origin Core upward and use it to enter the Arbiter of Divinity arena.
Content Update 0.5.0 established this sequence, including the fixed Fortress after the first Tower, quest and repeat versions of Pinnacle bosses, and the five-kill alternative for Fortress completion. The current route is documented in the official 0.5.0 endgame patch notes. Guides that place the Arbiter of Divinity outside the Fortress or use the previous Atlas structure are outdated.
Origin Spark, Origin Cradle and Origin Core
The two access components have similar names, so use the boss title as a memory aid. Phyx is the Sentinel of the Spark and belongs to the Patriarch Halls. Phya is the Sentinel of the Cradle and belongs to the Matriarch Halls. Combining one of each at the Precursor Reactor produces the Origin Core needed at the top of the tower.
| Location | Boss | Access item | Purpose |
|---|---|---|---|
| The Patriarch Halls | Phyx, Sentinel of the Spark | Origin Spark | First half of the reactor recipe |
| The Matriarch Halls | Phya, Sentinel of the Cradle | Origin Cradle | Second half of the reactor recipe |
| Precursor Reactor | No boss | Origin Core | Created from one Spark and one Cradle |
| Origin Tower summit | The Arbiter of Divinity | Origin Core is consumed for access | Opens the Pinnacle encounter |
The quest versions of the Halls are fixed inside the Fortress. Afterward, repeatable Halls can appear independently on the wider Atlas, and their normal key items are tradable. A repeat farmer therefore has three sensible options: discover both Hall types, trade a surplus half for the missing half, or buy the missing item. Both Halls also contain active rail tracks: warning lights show an approaching railcar, and a collision can Heavy Stun the character and inflict Armour Break. Cross after the railcar passes instead of fighting on a lit track. Do not convert an Origin Spark or Origin Cradle casually if another boss attempt is the immediate goal.
Quest Entry and Repeat Attempts
The first Origin Tower encounter is a level 79 quest area and allows unlimited revivals. Players cannot gain or lose experience inside it. Those rules make the first access set a learning opportunity: study the transition, practise collecting Divine Power, and identify each long combo before optimising kill time.
Later Origin Sparks and Origin Cradles come from repeatable Halls found around the Atlas. Combining another pair creates another Origin Core and reopens the tower encounter in its repeat-farm form. Plan around Tier 15-ready mapping before hunting the normal Halls rather than treating their appearance as an early-endgame shortcut. Their keys have live trade value, so a failed attempt still carries an opportunity cost even when the arena permits another revival.
Avoid relying on a fixed key price, expected profit, or exact Hall discovery rate. Those values change with league age, player demand, and balance patches. Players who want assistance improving the character before committing additional keys can consider PoE 2 build preparation support; self-farmers should use the same standard and solve defence or damage problems before starting a repeat batch.
Build Readiness Checklist
A boss-ready character is not merely one that can clear a Hall. The Arbiter combines rapid spear hits, large impacts, lightning streams, projectile sequences, arena detonations, and a second phase that restores the encounter's pressure. Readiness means surviving a minor error, recovering without losing sight of the next telegraph, and dealing damage in short windows rather than requiring a stationary rotation.
| Area | Practical target | Reason |
|---|---|---|
| Elemental defence | Cap all elemental resistances and strengthen Lightning Resistance where the build can do so efficiently | Lightning bolts, streams, beams, and arena zones dominate the visual threat set |
| Physical defence | Use armour, damage reduction, Guard, block where applicable, or another dependable answer to attack hits | Several spear and melee components begin as physical attacks |
| Effective life pool | Survive an ordinary hit with enough Life or Energy Shield left to move and recover | Repeated minor mistakes become fatal when every hit empties the pool |
| Shock control | Use ailment threshold, reduced Shock effect, avoidance, or reliable removal if available to the build | Shock can make the next lightning or physical hit much more dangerous |
| Movement | Maintain responsive run speed and at least one precise emergency movement option | Safe angles move quickly during spear, stream, and clone patterns |
| Recovery | Restore the primary pool between sequences without needing continuous hits on the boss | Long defensive intervals can interrupt leech or offensive recovery |
| Single-target damage | Clear meaningful chunks during short openings and sustain resources through both phases | Burst that empties Mana or cooldowns before the transition is not enough |
| Visibility and audio | Reduce unnecessary effect clutter and keep boss dialogue audible | Current notable skills use consistent voice cues backed by clear animations |
Do not publish a universal minimum Life, Energy Shield, or DPS number for this encounter. Defensive conversion, block, Guard, recovery, skill range, and player execution change the value of every raw threshold. A better check is behavioural: the build should handle one non-critical hit, cross the arena on demand, and finish phase one without exhausting every defensive resource.
Arena Rules, Audio Cues and Damage Windows
The arena rewards mid-range positioning. Standing directly under the boss can hide the spear direction, while camping the outer wall makes it harder to cross to a pedestal or move behind a beam. Keep the Arbiter, the nearest edge pedestals, and the active ground pattern visible whenever possible.
- Move laterally around aimed attacks instead of retreating along the line of the spear.
- Preserve one dodge or movement response until the final impact of a multi-part sequence.
- Attack after a committed slam, beam, or finished combo rather than during its opening voice line.
- Use ordinary running for broad repositioning and reserve the dodge roll for a hit or boundary that must be crossed.
- When a clone or lightning pattern begins, stop watching the health bar and read the whole arena.
- Keep audio enabled, but never react to dialogue alone if the visual state contradicts the expected pattern.
The live fight is more readable than its launch version. GGG made notable-skill lines consistent, enlarged the hitboxes of phase-two clones while Divinity is active, increased gaps between several attacks, and improved visual telegraphs. These changes appear in the official 0.5.4b encounter adjustments. Old videos remain useful for broad pattern recognition, but their timing can be harsher than the current fight.
Phase One Strategy
Phase one features the winged Arbiter and teaches his spear language. He mixes lunges, dives, sweeps, beams, lightning streams, clone-like traps, and one especially long chained assault. Circle at mid-range, use the rear or side after a committed forward attack, and leave the area as soon as several effects begin to overlap.
- Lightning orb and streams, cued by "Virtue!": move away from the orb's crossing lines and fight in an open sector instead of repeatedly rolling through the streams.
- Spear toss, dive and pulse, associated with "Behold... Her Virtue and Compassion!": leave the landing point, then avoid the follow-up sweep and lightning pulse before returning to damage.
- Charge and aerial slam, associated with "Serenity!": watch the spear aim, move off the charge line, and dodge after the landing direction has committed.
- Sweeps into a lightning beam, associated with "The First Divine... must never return.": circle toward the boss's rear rather than giving the beam a long straight target.
- Divinity traps, announced through lines such as "Clarity and composure!" or "Virtuous Duplication!": touch the edge only when ready to trigger the effect, then step or roll out as it activates.
- The extended "Ire of the Mother!" chain: disengage early. It combines advancing attacks, a thrown spear, an explosion, an orbiting lightning tether, volatile effects, and additional sweeps.
The most important phase-one habit is refusing a bad damage window. The long chain becomes difficult when the player remains close through its opening attacks and loses the wider route. Break contact at the first clear cue, follow the moving hazards from outside their centre, and resume damage only when the final detonation or sweep has resolved.
Phase Transition
After enough damage, the encounter changes form rather than ending. The Arbiter returns to the centre, loses the aerial presentation, restores his health, and enters a faster grounded phase. Divine Power pedestals and persistent Divinity Clones become central to survival. Do not measure total kill progress from the first health bar or spend every long cooldown immediately before the transition.
Use the animation to recover resources, move to a position where multiple pedestal locations are visible, and prepare a short burst capable of killing a clone while the buff is active. If the build depends on a temporary buff, flask, or charge state, decide whether it can be rebuilt during the second phase instead of wasting it against transition immunity.
Divine Power and Divinity Clones
In phase two, motes of Divine Power appear on pedestals around the arena edge. Standing at an available pedestal briefly grants Divine Power. While the buff is active, the character is protected from damage and can hit the normally invulnerable Divinity Clones. The window is short, so the pickup is a tactical resource rather than a permanent defensive layer.
- Identify an available pedestal before the clone sequence becomes crowded.
- Move to it during a safe interval and remain long enough for the pickup to register.
- Immediately target the most disruptive nearby clone instead of spending the brief buff on the main boss.
- Use a fast, reliable skill for clone removal; a slow setup can waste most of the active window.
- After the buff ends, return to ordinary avoidance and reassess the next pedestal rather than assuming continued immunity.
Clones reproduce dangerous attacks and cannot be removed without the buff. Ignoring them allows extra sweeps, bolts, and beams to overlap the Arbiter's own sequence. Conversely, sprinting toward a pedestal through an active slam can fail before the pickup completes. The correct order is to avoid the immediate hit, claim Divine Power, remove a clone, and then rebuild a safe central position.
Phase Two Strategy
The grounded phase is quicker and less forgiving. Basic melee sweeps alternate with ranged lightning bolts, while teleports, spear lunges, fissures, projectile combinations, arena-wide lightning zones, clones, and wide beams reduce stable damage uptime. Use shorter attacks than in phase one and let each cue dictate one movement response.
- Fast teleport slam, cued by "Valediction!": begin moving immediately and roll after the destination is committed rather than waiting for the impact.
- Crouched lunge, cued by "Preservation!": leave the facing line as the Arbiter lowers his stance.
- Multi-hit spell sequence, associated with "Rapture!" and "Observe the Divine!": sidestep the projectile lines, expect the follow-up, and avoid counterattacking after only the first volley.
- Spear Sunder: read the raised weapon and charged slam, then move off the fissure line. This attack relies more on its animation than a distinct dialogue cue.
- Spear throw into a broad sweep, associated with "Divinity's wrath!": cross toward the inside or behind the sweep after the spear commits instead of fleeing along its expanding edge.
- Lightning-zone detonation, associated with "Salvation... was never offered.": locate an unmarked patch at once; Divine Power can provide an emergency answer if a safe route is lost.
- Three expanding sweeps into a beam, introduced by "There are fates worse than death": time each crossing separately and finish near the boss's side or rear before the beam.
- Clone pressure into a large beam, associated with "Our pain was foretold!": keep moving around the perimeter during harassment, then turn inward or behind the Arbiter when the final beam commits.
Phase two is won by controlling overlaps. If a clone remains active when the Arbiter begins a major sequence, postpone damage and prepare the next Divine Power pickup. If the arena is clear, use the end of the long beam or spear combo for a compact burst. Greedy attacks are especially costly here because several follow-ups punish the location that was safe during the opening swing.
Highest-Risk Mechanics and Responses
This table summarises the patterns most likely to end a run. Voice lines are recognition aids, not subtitles that replace visual confirmation. Translation, audio settings, and overlapping dialogue can vary, while the weapon and ground state show the actual danger.
| Threat | Read | Reliable response | Typical mistake |
|---|---|---|---|
| Lightning orb streams | Orb forms crossing lanes around itself | Relocate into a clear sector and stay outside the stream hub | Rolling repeatedly across multiple lines |
| Spear dive and pulse | Thrown spear followed by an aerial approach | Leave the impact, wait for sweep and pulse, then re-enter | Attacking after the landing but before the pulse |
| Ire chain | Long advancing combo followed by spear and tether effects | Disengage early and preserve movement for its later stages | Using every dodge on the opening attacks |
| Teleport slam | Sudden disappearance or upward movement | Run immediately and dodge once the landing direction is readable | Standing still until the impact marker is complete |
| Divinity Clones | Untargetable copies add attacks in phase two | Collect Divine Power and remove a nearby clone during the buff | Trying to damage a clone without Divinity |
| Lightning-zone detonation | Most of the floor becomes dangerous with small safe patches | Move to clear ground or use a timely Divine Power pickup | Choosing a patch without checking the route to it |
| Expanding sweeps and beam | Repeated charged spear arcs grow before a final beam | Cross each arc on its own timing and finish off the forward line | One early panic roll through the complete sequence |
| Clone harassment into beam | Copies attack for an extended interval before the Arbiter fires | Circle widely, keep the boss visible, and cut inward when the beam locks | Hugging a corner and losing sight of the boss |
Positioning by Build Type
Every archetype uses the same pedestals and telegraphs, but its safest damage distance differs. Adjust the following rules to the build's animation length and recovery model rather than forcing a melee character to play like a ranged one.
- Melee builds should orbit near the Arbiter's flank, take short openings after committed spear attacks, and withdraw before long combinations. Staying close can simplify beams, but standing directly in front makes lunges dangerous.
- Ranged builds should remain at moderate distance. Maximum range creates extra travel to pedestals and can hide the boss behind the player's own effects.
- Minion builds should prioritise the player's route over perfect minion uptime. Save commands or resummoning for resolved attacks and ensure the character has a direct skill capable of interacting with clones if required.
- Channelled builds should divide damage into brief casts and cancel immediately when the spear rises, the boss vanishes, or arena zones appear.
- Setup-heavy builds should prepare persistent effects near the expected damage lane, but never place the character at an edge pedestal before it is safe to collect Divine Power.
- Party builds should avoid stacking every player on one narrow escape line. Keep the Arbiter's facing predictable and communicate which clone or pedestal has priority.
Recovering After a Mistake
A recoverable hit becomes a death when the player immediately attacks, rolls without a destination, or loses the boss from view. Reset the situation in a fixed order: leave the current line, identify the next telegraph, restore the defensive pool, and only then resume damage.
- After a small hit, move sideways from the boss's facing and recover while he finishes a committed animation.
- After Shock is applied, treat the next hit as more dangerous. Use the build's removal or reduction tool and give up the next offensive window if necessary.
- If an orb blocks the centre, move around its stream hub instead of crossing through several lines to regain your preferred position.
- If a clone survives after Divine Power expires, disengage and locate another pedestal. Continuing to attack an invulnerable target only creates more overlap.
- If a pedestal pickup is interrupted, do not force the same route through an active spear pattern. Avoid first and return during the next completed animation.
- After death, name one cause before reviving: missed voice cue, hidden boss, early roll, failed clone removal, depleted recovery, or insufficient mitigation.
Unlimited revivals protect access, but they do not make repeated errors productive. The boss resets for another attempt, so each pull should test one correction. If ordinary spear hits repeatedly remove the entire defensive pool, stop practising and upgrade the build; if the same beam causes every death, the priority is recognition and positioning rather than more damage.
Drops and How to Evaluate Them
The Arbiter of Divinity has a named pool that currently includes five unique equipment items and three Lineage Supports. No item below should be described as guaranteed unless the live game explicitly marks it that way. Drop weights, rolls, demand, and trade values can change, so an evergreen guide should explain use cases rather than promise a fixed return.
| Reward | Type | Evaluation focus |
|---|---|---|
| The Ordained | Grand Spear | Physical and lightning rolls, critical setup, granted skills, and whether the build can use Fragment of Divinity generation |
| Decree of Acuity | Ancient Visor | Armour and Evasion scaling, Dexterity needs, and the unusual reversed Blind interaction |
| Decree of Flight | Ancient Leggings | Dodge Roll speed, Energy Shield investment, Guard generation, and the complete movement package |
| Decree of Loyalty | Ancient Mail | Chaos Resistance, maximum Chaos Resistance, Life conversion, Armour, and Energy Shield synergy |
| Opportunity | Ultimate Life Flask | Perfect Timing compatibility, recovery amount, automatic use condition, and flask-charge economy |
| Prototype Seventeen | Lineage Support | Rage generation, critical scaling, and the cost of losing Rage when the supported skill crits |
| Arbiter's Reach | Lineage Support | Persistent Buff compatibility and whether nearby allies benefit from periodic Guard |
| Seraph's Heart | Lineage Support | Spirit reservation, supported Persistent Buff, and the value of its chance-based resistance protection |
Evaluate each drop in three stages. First, confirm that its mechanics suit a real build rather than a hypothetical one. Second, inspect variable rolls and socket requirements. Third, compare current trade demand with the value of keeping it. The item name alone does not establish price, and a specialised support can be more valuable to the right setup than a poorly rolled unique.
Atlas Points and Ancient Mechanisms
Defeating the Arbiter of Divinity lets you activate an Ancient Mechanism associated with a Fortress section. The mechanism completes nearby maps in that section and grants the Atlas passive points those maps would award. The official endgame plan supports five Divinity kills to complete different Fortress sections, providing an alternative to clearing every map manually.
- Inspect which Fortress sections still contain unearned map points before choosing a mechanism.
- Prefer a section that also opens useful movement through the Fortress or connects to a near-term objective.
- Do not assume every kill grants the same number of points; the payout depends on the section and maps already completed.
- Avoid quoting one universal total for a mechanism. Prior manual clears change the visible gain.
- Remember that the reward advances the main Atlas tree, not a separate Arbiter boss tree.
This progression reward changes the value of early repeats. A mediocre item drop can accompany a highly valuable batch of Atlas points, while later kills after the relevant sections are complete must be judged mainly by loot and time. Choose the Ancient Mechanism deliberately instead of clicking the first available object after a successful fight.
Repeat-Farming Loop
Repeat farming converts two Hall discoveries or tradable key halves into one Origin Core, one boss kill, named drops, and possibly a Fortress-section completion. The profitable choice depends on current prices and personal completion, so calculate with live inputs instead of copying a static expected-value claim.
- Explore the outer Atlas for both Patriarch and Matriarch Halls while completing other high-value objectives along the route.
- Track Origin Sparks and Origin Cradles separately. A stack of one type does not create additional attempts without the other half.
- Trade surplus halves when one Hall type becomes the bottleneck rather than letting expensive inventory sit unused.
- Assemble a small batch only after phase two is consistent. Repeated pulls preserve cue recognition but also concentrate key risk.
- Record total key cost, sold results, unsold inventory, and Atlas progress separately. Listing an item is not the same as realising its value.
- Stop the batch if the same mechanic causes repeated failures. Fixing one response is usually cheaper than consuming time on uncontrolled attempts.
Players who prefer help with Hall discovery, mapping, or a focused preparation block can use flexible PoE 2 hourly farming assistance. For independent farming, the same efficient pattern applies: combine Hall hunting with wider Atlas objectives, balance the two key inventories, and separate practice attempts from profit-oriented runs.
Common Failure Points
Most failed attempts begin before the final hit. The cause is usually an incorrect access assumption, incomplete build check, lost visual information, or a repeatable response error. Review these points before spending time on another Origin Core.
- Confusing the Arbiter of Ash with the Arbiter of Divinity and stopping after the Burning Monolith.
- Reversing the Hall rewards: Phyx in the Patriarch Halls gives the Spark, while Phya in the Matriarch Halls gives the Cradle.
- Expecting the first health bar to represent the entire encounter and exhausting cooldowns before the transition.
- Neglecting physical mitigation because the most visible effects are lightning.
- Staying at the arena wall until no route remains to a Divine Power pedestal.
- Trying to kill phase-two clones without collecting the Divinity buff.
- Using a slow damage setup during the brief clone-killing window and wasting the pickup.
- Rolling at the first motion of a long combo and having no response for its final sweep or beam.
- Following launch footage without accounting for the later telegraph, timing, voice-line, and clone-hitbox improvements.
- Assuming a named unique is automatically valuable without checking its rolls and current build demand.
- Activating an Ancient Mechanism without checking which Fortress section still holds useful Atlas points.
Final Verdict
The Arbiter of Divinity is both the climax of Origins of Divinity and a shortcut through Fortress Atlas progression. Reach the inner Fortress through the Arbiter of Ash, pair the Patriarch Halls' Origin Spark with the Matriarch Halls' Origin Cradle, forge an Origin Core, and use the quest arena to learn the complete two-phase encounter.
Success comes from keeping the boss and pedestals visible, respecting physical spear hits as well as lightning effects, preserving movement for the end of long combinations, and using Divine Power specifically to control clones. Once those responses are consistent, repeat kills can convert Hall access into specialised drops and deliberate Fortress-section completion without relying on temporary market claims or outdated Atlas systems.


