





The Trialmaster is the capstone encounter of the Trial of Chaos in Path of Exile 2. Reaching him is a longer commitment than opening an ordinary boss invitation: the character needs an eligible ten-chamber Inscribed Ultimatum, must finish the entire Trial, and must bring Cowardly Fate, Deadly Fate, and Victorious Fate to the sealed door in the reward area. The battle then tests two alternating combat states, deliberate arena placement, and the ability to read attacks prepared during Time Stop. This guide covers that complete route without turning into a second general Trial of Chaos walkthrough. It explains how to secure access, choose Tribulations for a reliable approach, judge build readiness, answer every major Trialmaster pattern, recover after mistakes, evaluate the exclusive rewards, and decide whether another run is worth the cost.
Trialmaster Access at a Glance
Access has two separate requirements: a completed full-length Trial of Chaos and one copy of each Fate. A lower-room Inscribed Ultimatum may still provide Trial rewards or Ascendancy progress, but it cannot open the Trialmaster route. Read the key itself before entering. The useful line is the explicit number of trials, not a remembered character-level threshold from an older patch or guide.
| Access Step | Required Action | What to Verify | Failure Cost |
|---|---|---|---|
| Choose the entry item | Take an Inscribed Ultimatum showing ten trials to the Temple of Chaos | The item displays the full chamber count and a suitable area level | A shorter key cannot reach the Fate boss or Trialmaster door |
| Complete the Trial | Clear every objective and boss in the ten-chamber run | Your build can survive the selected Tribulations through the last room | Death during the active Trial ends the run and forfeits unclaimed room rewards |
| Collect the Fates | Own Cowardly Fate, Deadly Fate, and Victorious Fate at the same time | All three names are different; duplicates do not substitute for a missing Fate | Each completed ten-chamber run supplies only the Fate tied to its final boss |
| Open the Tower | Insert all three Fates into the sealed door in the final reward area | Gear, flasks, skill binds, and passive allocation are ready before insertion | The Fates are consumed to create the Trialmaster attempt |
| Finish the encounter | Defeat Trialmaster and collect the resolved rewards | An eligible Ascendancy item states whether the completion can grant points | A failed boss attempt requires another access cycle and another Fate set |
Grinding Gear Games has changed Trial availability in earlier updates, including the chamber thresholds described in the official Ascendancy trial update. That history is why the live Inscribed Ultimatum text should outrank a static level chart. For an evergreen check, confirm that the item says ten trials and, when Ascendancy points are the goal, look for the gold completion text that explicitly promises additional points.
How the Trial of Chaos Leads to Trialmaster
An Inscribed Ultimatum starts the run at the Temple of Chaos. Before a chamber, Trialmaster presents a reward and three negative modifiers, usually called Tribulations. After completing the objective, the player either continues and accepts another modifier or ends the run and takes the accumulated rewards. The full Trialmaster route removes the cash-out decision: the run must continue through all ten chambers, so access planning is about reducing the chance that any one modifier, room, or boss breaks the build.
Objectives You Must Be Able to Clear
Trial objectives test different weaknesses. Defeat All rewards efficient damage and target acquisition. Survival asks for safe movement under pressure rather than maximum damage. Escort requires staying near a moving statue while controlling enemies. Soul Core retrieval forces the carrier to route between objects and the altar while managing a growing physical damage-over-time burden. Sacrifice objectives require kills inside designated circles. A build that deletes bosses but cannot move, control packs, or operate while pressured is not automatically ready for a ten-chamber access run.
| Objective | Main Check | Safe Approach | Common Failure |
|---|---|---|---|
| Defeat All | Clear speed and rare-monster control | Pull manageable groups and preserve a defensive cooldown for dangerous rares | Chasing one target through overlapping floor hazards |
| Survival | Movement discipline and sustain | Use the widest safe loop and attack only when it improves control | Treating a timed room as a damage race |
| Escort | Area control near the statue | Clear ahead, then return to the movement radius instead of fighting far away | Abandoning the objective to pursue scattered enemies |
| Soul Core retrieval | Routing under physical degeneration | Plan the shortest return line before picking up each core | Collecting first and searching for the altar while the burden escalates |
| Sacrifice circles | Enemy positioning and controlled kills | Pull monsters into an active circle before committing burst damage | Killing outside the marked area and extending exposure |
| Boss chamber | Single-target damage and pattern knowledge | Slow down, use available recovery, and solve the boss before resuming speed | Entering with empty flasks or an untested single-target setup |
The run contains boss checks before the final chamber as well as the room-ten Fate boss. Those encounters are part of access, not Trialmaster phases. The official 0.3.0 patch notes confirm that the Escape Menu can return a Trial character to the entrance checkpoint; this is an exit from the attempt, not a way to preserve a failed run or create a free Trialmaster retry. If the build barely survives the earlier bosses, spending a complete Fate set immediately is poor risk management; repeat the route until arriving with resources and concentration intact.
Fates and the Final Trial Bosses
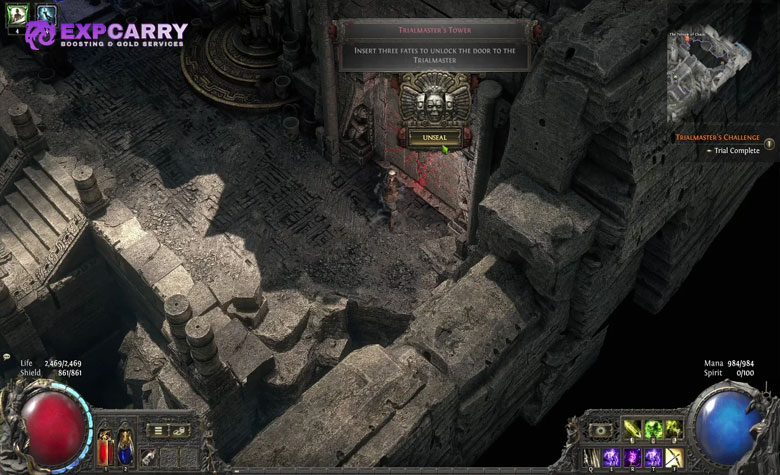
The final boss associated with a ten-chamber Inscribed Ultimatum determines which Fate can be obtained. The key reveals the relevant Fate category, allowing players to target the missing piece instead of completing random keys blindly. The three pieces are tradeable, so self-farming every variant is optional. Buying one missing Fate may be more efficient than repeating a boss category already stored.
| Fate | Final Trial Boss | Planning Use | Inventory Check |
|---|---|---|---|
| Cowardly Fate | Uxmal, the Beastlord | Choose a ten-chamber key marked for the Cowardly outcome when this piece is missing | Do not mistake a second Cowardly Fate for progress toward another slot |
| Deadly Fate | Bahlak, the Sky Seer | Reserve strong lightning and physical mitigation for the final Trial boss route | Confirm the item is present before opening the Tower door |
| Victorious Fate | Chetza, the Feathered Plague | Maintain movement against repeated physical projectile pressure in the last chamber | Keep it outside bulk-sale tabs if a Trialmaster attempt is planned |
A Fate is not a reusable unlock. Opening the Tower consumes the set, so the best time to insert it is after checking every part of the boss loadout. Players who want help completing this specific access chain can review a Trial of Chaos completion option in context; it is not a substitute for understanding which Fate and Ascendancy condition the live item actually provides.
How to Choose Trial Modifiers for a Full Run
Tribulations are a route-management problem, not permanent account difficulty. Each selected drawback continues through the active Trial and some can upgrade when chosen again. The separate Trialmaster arena does not inherit those Trial modifiers. That distinction changes the correct strategy: choose the options your build can tolerate for ten chambers, without sacrificing a good Trial route merely because a modifier would theoretically be dangerous during the boss fight.
Use a Build-Specific Rejection List
Before starting, write down the modifier families that invalidate the build. A regeneration-dependent character should reject severe recovery suppression. A projectile build should be cautious with effects that redirect, return, or otherwise disrupt its projectiles. A slow setup build should avoid combinations of faster monsters and dense moving hazards. A low-reserve defense profile should not stack resistance pressure with added elemental threats. Names and values can change, but the decision rule stays useful: reject anything that attacks the build's non-negotiable resource, damage delivery, or escape method.
- Recovery: avoid escalating recovery penalties if life regeneration, Energy Shield recharge, leech, or flask refilling is already fragile.
- Damage delivery: avoid modifiers that make the primary projectile, minion, ailment, critical, or burst cycle unreliable.
- Mobility: do not stack movement pressure, tracking hazards, and enemy speed on a character with long animation locks.
- Defense: treat reduced resistances, extra damage, critical pressure, and added projectiles as a combined package rather than isolated lines.
- Visibility: avoid selecting several floor-effect families when their colors or shapes hide objective markers and boss telegraphs.
The lowest immediate danger is not always the safest long-term choice. Taking the same mild modifier again may promote it into a version that becomes worse than a fresh alternative. Review the current and upgraded state before confirming. If all three choices are poor, select the one that conflicts least with the objective types still possible and save defensive resources for the next chamber.
What Carries Into the Boss Arena
Your character, gear, skill setup, passive choices, and available player resources matter in the Tower. The accumulated Trial Tribulations do not. This is easy to misunderstand because Trialmaster is reached immediately after the ten-chamber run, but his Tower is a distinct encounter space. A modifier that reduced recovery or complicated projectiles during the Trial does not remain as a hidden boss penalty.
| Element | Applies to Trialmaster | Practical Consequence |
|---|---|---|
| Equipped gear and weapon sets | Yes | Equip the boss configuration before entering the sealed door |
| Passive and Ascendancy allocation | Yes | Do not expect the Tower to repair an unfinished defensive tree |
| Skill gems and key binds | Yes | Bind movement, cleanse, guard, and single-target skills before consuming Fates |
| Chosen Trial Tribulations | No | Select them for the ten chambers rather than for imagined Tower overlaps |
| Trial room hazards | No | The boss arena uses Trialmaster's own placed threats |
| Player knowledge and fatigue | Yes | Pause in the reward area and review the fight before opening the door |
This separation also means a difficult access run does not predict an equally modified boss. Do not enter tilted or rushed because the last room was messy. The Tower begins a clean mechanical test, but the Fate cost makes concentration valuable.
Trialmaster Build Readiness Checklist
Readiness is not a fixed character level or damage number. Patches, itemization, classes, and encounter balance can move those benchmarks. A useful evergreen standard is performance-based: the character should complete the ten-chamber route consistently, survive a major physical hit without collapsing, maintain capped elemental resistances in its boss loadout, recover after one mistake, and deal sustained single-target damage while moving frequently.
| Readiness Area | Pass Condition | Warning Sign | Adjustment |
|---|---|---|---|
| Elemental defense | Fire, Cold, and Lightning resistances are capped in the active boss set | A weapon swap or unique item silently removes a resistance cap | Check the final equipped sheet, not the mapping set |
| Physical survival | The build has layered mitigation or avoidance plus enough effective life for a missed minor hit | Every spear connection causes immediate death or complete recovery failure | Add effective life, Armour where suitable, physical reduction, block, or reliable avoidance |
| Recovery | Life or Energy Shield can be restored after disengaging for one sequence | The character needs uninterrupted attacking to recover | Add a second sustain channel and preserve flask uses for real errors |
| Mobility | The character can cross a safe angle without a long animation commitment | Every damage cycle locks movement through Time Stop releases | Shorten rotations and keep a dedicated movement response available |
| Single-target output | Damage remains functional during repeated repositioning | Output disappears whenever the boss changes form or teleports | Prefer shorter damage windows, persistent effects, or faster setup |
| Visual clarity | Enemy telegraphs remain visible through allied effects | Minions, ground skills, or oversized effects hide Sunder lines and Hearts | Reduce optional visual noise and reposition the camera before the pull |
Chaos resistance is valuable across Path of Exile 2, but Trialmaster's defining damage profile is primarily Physical plus Fire, Cold, and Lightning attacks. Do not leave elemental caps or physical survival unfinished just because the encounter belongs to the Trial of Chaos. If the overall build is still missing its defensive foundation, a PoE 2 build setup option can be considered separately from the boss attempt.
Flasks, Charms, and Skill Setup
Enter with a Life Flask that restores enough health to matter, charges that are not casually spent, and a Charm plan tied to the damage actually expected. A stun response is valuable because the Heart punishes a broken tether with a stun. Elemental ailment protection helps against the tri-elemental sequence, but it should complement capped resistances rather than replace them. Energy Shield builds need a deliberate recharge or recoup window; life builds need sustain that still works while they are not attacking.
- Put the dodge roll and any movement skill on bindings that never compete with a long damage input.
- Use a fast, reliable single-target skill for short punish windows rather than depending only on a full stationary rotation.
- Keep one defensive response available for Time Stop release or an accidental tether break.
- Confirm that weapon swapping does not remove Spirit, attributes, resistances, or required support gems.
- Dismiss unnecessary effects that obscure the floor, especially if the build can operate without them.
Fight Structure: Two States, Not Fixed Health Phases
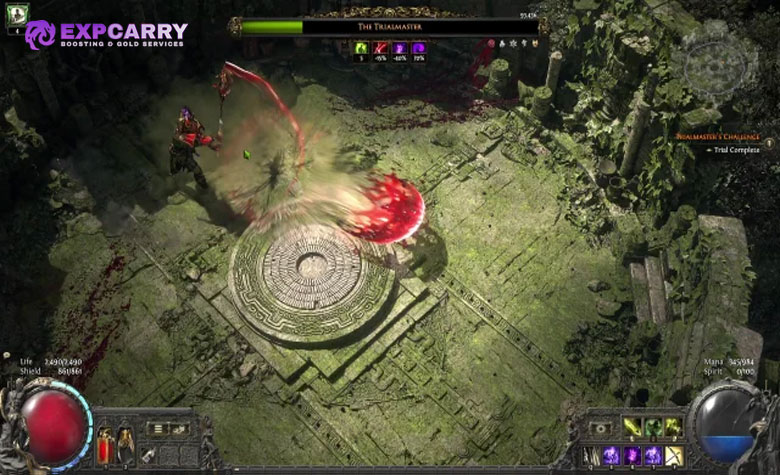
Trialmaster does not follow a simple sequence of health-gated phases. He alternates between a spear state and an unarmed caster state. Throwing the spear creates a growing arena hazard and begins the caster pattern; recalling it ends that hazard and returns him to spear attacks. Time Stop can occur in either state, but the delayed attack stored during the freeze depends on which state is active.
| State | Primary Threats | Positioning Goal | Best Damage Window |
|---|---|---|---|
| Spear state | Wide melee strings, branching Sunder, heavy area slams, and the spear throw | Keep an open side angle and encourage the thrown spear to land near the perimeter | After a committed slam or at the end of a readable melee chain |
| Caster state | Tri-elemental mortars, bouncing Blood Orbs, teleports, and Trialmaster's Heart | Circle through open ground without standing directly against the wall | After the projectile sequence passes or while the Heart is safely outside your route |
| Time Stop in spear state | Three delayed Sunder patterns prepared from different positions | Track every origin and stand outside the projected lanes before time resumes | Only after the stored fissures have released |
| Time Stop in caster state | Three delayed Blood Orbs with wall interactions | Read initial trajectories and preserve a route that does not cross their return paths | After the first paths and bounces are understood |
The key recognition cue is the weapon. If the spear is in his hands, prepare for physical slams and Sunder. If it is embedded in the floor, account for its expanding pulses while reading faster ranged patterns. This simple state check prevents many deaths caused by expecting the wrong Time Stop release.
Spear-State Attacks and Counters
Spear state places the greatest emphasis on physical survival and side movement. Trialmaster can chain ordinary swings, use a spinning combination, slam the ground to create branching fissures, and charge a broad blood-infused impact. Several of these attacks overwhelm part of physical damage reduction or contribute to Armour Break, so Armour alone should not be treated as permission to stand still.
Sunder and Branching Fissures
The overhead spear slam sends a branching pattern across the floor. Moving directly backward keeps the character inside the attack's travel line; move to a side angle or behind the boss after the commitment instead. Avoid rolling before the direction is established. An early roll can finish in the exact lane that erupts a moment later.
Heavy Slam and Close-Range Expansion
The larger impact has a clearer wind-up and punishes players who stay close to finish one more cast or combo. Leave the marked area immediately, then use the recovery animation as a safe damage window. Melee builds should plan a step-out point before starting their burst. Ranged builds should not assume distance alone is enough, because the area can extend farther than an ordinary melee swing.
Thrown Spear and Growing Pulses
When Trialmaster throws the weapon, it embeds near the targeted location and emits repeated physical pulses that expand. This attack changes the arena for the entire caster interval. Bait it toward the outer portion of the circle so its growth removes less central space, then move away as the pulse radius expands. Do not hug the boundary so tightly that the next Blood Orb bounces immediately beside the character.
A useful arena rhythm is edge, place, rotate, reopen. Begin near an outer sector, place the spear there, rotate into the open middle lane, and keep that lane available until the boss recalls the weapon. This is more reliable than running continuously around the wall, which can lead directly into returning projectiles.
Caster-State Attacks and Counters
Without the spear, Trialmaster becomes more mobile and fills the arena with projectiles. The individual attacks are readable, but their wall interactions create delayed danger. The goal is not constant rolling. Controlled lateral movement preserves the dodge for the moment when a Blood Orb, elemental impact, or Heart boundary removes the current line.
Tri-Elemental Mortar
Trialmaster throws Fire, Cold, and Lightning projectiles toward the ground. He can repeat the sequence, so stopping after avoiding the first set is risky. Move laterally around the boss, watch for the last impact, and only then commit to a long attack. Capped elemental resistances reduce the punishment for a clipped explosion, while ailment protection prevents a minor hit from becoming a movement or recovery failure.
Blood Orb
The large red projectile travels toward the player, collides with the arena wall, and can bounce or split into additional paths. It can also inflict Armour Break. The first miss therefore does not end the mechanic. Track the wall it reaches, expect a return angle, and avoid standing where the initial line and reflected line cross. Remaining slightly away from the boundary gives more reaction time than pressing against it.
Trialmaster's Heart and Tether
The Heart creates a visible circle. Crossing into it links the character to the object and slows movement. Leaving the boundary while tethered breaks the link, deals physical damage, stuns the character, and creates an explosion. The safest response is to avoid entering the circle. If already tethered, do not panic-sprint across the edge during another attack. Stay composed, identify the next Sunder or Orb path, and break the tether only when the stun will not hold the character inside a second impact. Builds able to damage the Heart from outside its radius can remove it without accepting the link.
How to Solve Time Stop
Time Stop is a reading test rather than an unavoidable damage phase. Trialmaster freezes the action, teleports through three positions, and prepares a state-specific attack at each location. When time resumes, the stored patterns release. The pause provides information: each origin and facing direction shows where danger will travel.
- Check whether Trialmaster currently holds the spear.
- Watch all three teleport positions instead of following only the final image.
- Map the Sunder lanes or Blood Orb trajectories before control returns.
- Choose one open destination that does not require crossing a stored attack.
- Move first when time resumes and delay damage until the pattern is active.
- Keep one roll for a late correction rather than spending it automatically.
In spear state, the stored attacks are branching Sunder patterns. Stand off their initial lines and move laterally from the directions Trialmaster established. In caster state, the stored Blood Orbs can interact with the walls after their first pass. An initial safe pocket may become unsafe on the rebound, so continue reading the projectiles instead of immediately attacking from the first gap.
The most common Time Stop error is panic rolling without a destination. The second is attacking as soon as control returns because the arena looked empty during the freeze. Nothing has resolved yet at that moment. Treat the first beat after resumption as movement-only unless the selected safe area is already certain.
Positioning and Dangerous Overlaps
The arena is circular and rewards controlled use of its perimeter. Place the expanding spear hazard near an edge, but fight a short distance inward so wall-bouncing Blood Orbs remain visible. Preserve one clean crossing lane through the middle. If the Heart or a pulse occupies that lane, rotate to a new sector before the next Time Stop rather than waiting for every route to close.
| Overlap | Why It Kills | Priority Response |
|---|---|---|
| Heart tether plus Blood Orb | Breaking the link can stun the character on a returning projectile | Track the Orb first, then leave the circle during a clear interval |
| Heart tether plus Time Stop | The chosen escape route may cross the boundary and force a stun as stored attacks release | Include the tether edge in the route calculation before time resumes |
| Expanding spear plus elemental mortar | The safe floor narrows while repeated impacts punish stopping | Move along the pulse edge into open space and wait for the full mortar sequence |
| Blood Orb plus arena wall | A quick collision creates a return path with very little reaction time | Stay off the boundary and move perpendicular to the first line |
| Sunder plus early dodge | The roll ends before the fissure direction fully develops | Read the slam facing, then move sideways and roll only if the lane follows |
| Armour Break plus heavy physical hit | The next slam becomes much more dangerous than the previous one | Disengage until the status clears instead of trading damage |
Damage windows come after mechanics, not before them. Trialmaster's committed slam, the end of a mortar sequence, and a completed Time Stop release are reliable opportunities. The beginning of a spear throw, the first elemental projectile, or the first Time Stop image are setup moments and should not be treated as permission for a long channel.
Recovery After a Mistake
A clipped projectile or minor slam does not need to become a death. Stop attacking, move into the largest readable area, and restore the defensive state before re-engaging. Check for Armour Break, stun exposure, elemental ailments, an active tether, and the location of the thrown spear. Recovery is complete only when the next mechanic can be answered, not merely when the life globe has moved upward.
- Stabilize position: leave the current attack line without rolling into the wall.
- Identify the status: note Armour Break, slow, tether, or an ailment before selecting the response.
- Use one resource: trigger the correct flask, Charm, guard, or recovery skill rather than spending everything together.
- Skip one damage window: let Trialmaster finish the next readable sequence while resources recover.
- Re-enter deliberately: resume damage after a slam, projectile set, or Time Stop pattern has ended.
If the character cannot recover without hitting the boss, circle through a safe sequence and use only the quickest attack needed for leech or on-hit recovery. Do not commit to a full rotation while weakened. If Armour Break is active, assume the next physical pattern is lethal until proven otherwise.
Strategy by Build Type
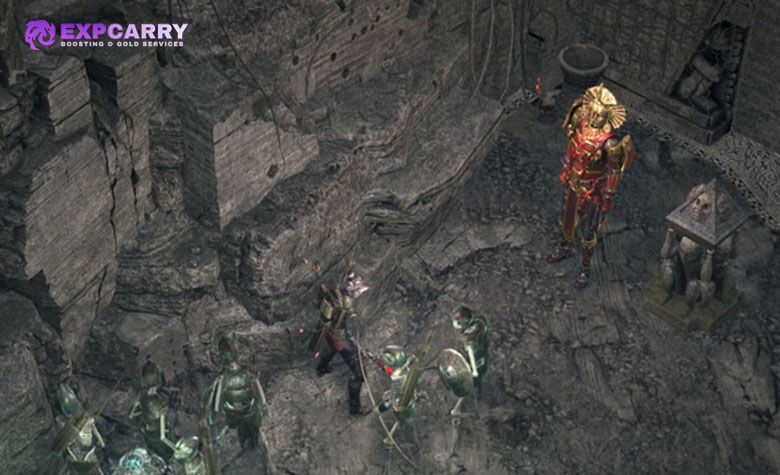
Every archetype solves the same telegraphs, but its safe damage windows differ. The correct strategy protects the build's setup time and keeps visual information readable. No archetype is exempt from Time Stop, the Heart boundary, or returning Blood Orbs.
| Build Type | Main Advantage | Main Risk | Recommended Adjustment |
|---|---|---|---|
| Melee | Easy side access during committed spear animations | Greeding damage inside the heavy slam or expanding pulse | Use short combos and preselect the retreat angle before engaging |
| Ranged attack | Can deal damage while circling mortar and spear zones | Standing at the wall and being caught by immediate Blood Orb rebounds | Fight at medium range and move perpendicular to projectile lines |
| Self-cast spell | Strong burst after predictable animations | Long cast locks during Time Stop release or repeated mortars | Use short casts until the final projectile or fissure resolves |
| Minions | Damage continues while the player concentrates on movement | Minion clutter hides Hearts, fissures, and projectile origins | Keep the boss near a controlled sector and prioritize floor visibility |
| Damage over time | Maintains pressure during defensive movement | Refreshing effects at unsafe moments out of habit | Apply before a movement sequence and refresh after the mechanic ends |
| Energy Shield | Large effective pool can absorb a small positioning error | Continuous chip damage prevents recharge | Create a full disengagement window and avoid the expanding spear pulses |
| Block or shield | Can soften blockable projectiles and routine hits | Assuming every slam or floor effect is safely blockable | Dodge major telegraphs and treat block as backup protection |
Damage should be evaluated while moving, not on a stationary target. A lower theoretical setup that applies reliably between mechanics is often safer than a peak configuration requiring uninterrupted casting. Players working on broader farming, levels, or gear before committing Fates can place those goals within an hourly PoE 2 progression option rather than treating a Trialmaster attempt as the place to test an unfinished character.
Rewards From the Trial and Trialmaster
The access run and the capstone boss have different reward layers. Trial chambers build a cumulative reward stack, intermediate bosses provide Soul Cores, and the tenth boss provides the Fate tied to that key. Trialmaster has his own exclusive Unique pool. Keep those sources separate when judging profit: a good Trial route can be rewarding even if the boss Unique is not the desired one.
| Reward Layer | Source | What It Can Include | Evaluation Rule |
|---|---|---|---|
| Accumulated Trial offers | Completed chambers | Equipment, currency, Vaal-related items, and other displayed rewards | Value the actual offer and survival probability, not an assumed average |
| Soul Cores | Trial boss chambers | Socketable cores with effects that depend on the equipment slot | Check the specific core and current build demand |
| Fate | The final boss of a ten-chamber key | Cowardly, Deadly, or Victorious Fate | Missing-set pieces are worth more to access planning than duplicates |
| Ascendancy completion | An eligible Trialmaster path | The final pair of Ascendancy Passive Skill Points when the live item and character state qualify | Read the gold text; do not assume every kill grants points |
| Trialmaster Unique | Trialmaster defeat | One item from his exclusive five-Unique pool | Judge the exact roll and build use instead of relying on unnamed rarity claims |
Reward composition has changed before. Grinding Gear Games notes that higher-level Trials phase out corrupted Rare offers and phase in Rare Currency stacks in the official Trial reward adjustment. This guide therefore avoids fixed currency-per-run estimates. Market prices, wager values, and Fate costs change with league supply and should be checked at the moment of the attempt.
Trialmaster Exclusive Unique Drops
Trialmaster currently guarantees one Unique from a five-item encounter pool: Glimpse of Chaos, Hateforge, Mahuxotl's Machination, The Adorned, or Zerphi's Genesis. A guaranteed Unique is not a guaranteed target. The five items serve different build families, and several have extreme roll variance, so the item name alone does not determine value.
| Unique | Core Identity | What to Inspect | Typical Target |
|---|---|---|---|
| Glimpse of Chaos | A corrupted helmet that remains modifiable and can roll both positive and negative elemental resistances | Life, Mana, each resistance, and whether setting Chaos Resistance to zero helps or harms the build | Corruption-focused crafting plans able to solve unstable resistances |
| Hateforge | Armour gloves built around reaching Maximum Rage, losing Rage, and generating random Charges | Armour, Rage gained, Charge timing, and the Maximum Rage modifier | Rage engines that deliberately cycle the resource for Charge generation |
| Mahuxotl's Machination | A shield combining Raise Shield, Armour and Energy Shield, variable Soul Core effect, and Everlasting Sacrifice | Both large numerical ranges and compatibility with the intended Soul Cores | Defensive or Soul Core-centered builds prepared around its special keystone-like effect |
| The Adorned | A corrupted Diamond that scales passive skills in sockets containing corrupted Magic Jewels | The increased-effect roll and the number and quality of valid Magic Jewels in the planned tree | Jewel-heavy builds designed around corrupted Magic, not Rare or Unique, Jewels |
| Zerphi's Genesis | A Heavy Belt linking Charm charge use with Life Flask charges and supporting corrupted-gem play | Charm slots, Charm duration, Strength, and skill cost efficiency during flask effects | Charge-loop and corrupted-gem setups that can exploit both sides of the belt |
Current rolls matter. In particular, the official 0.4.0 Unique item changes expanded The Adorned to a zero-to-150 percent effect range and changed Mahuxotl's variable Soul Core effect range. Older pages showing a 100 percent ceiling for The Adorned or a fixed Soul Core value for the shield are outdated. No fixed drop rates are claimed here because the official notes and current data do not publish a reliable target probability for every item.
Ascendancy Points and First-Clear Expectations
Trialmaster can complete the Trial of Chaos route to Ascendancy points seven and eight, but eligibility belongs to the entry item and character state. The safe check is the gold text on the Inscribed Ultimatum stating that completion grants additional Ascendancy Skill Points. If that line is absent, do not assume that defeating Trialmaster will create points merely because the key has ten chambers.
A character can pursue Ascendancy progression through other eligible Trial routes, so Trialmaster is not a mandatory repeat kill for every build. Players whose build is better suited to Honour management than ten escalating Chaos chambers can compare an eligible Trial of the Sekhemas completion option as an alternative route. Once the points are earned, future Trialmaster attempts are loot and challenge decisions. Separate the one-time progression value from repeat-farm economics when deciding whether to buy Fates or self-farm them.
Repeat Farming and Value Decisions
Repeat farming has three costs: the eligible ten-chamber key, the three-Fate set, and the time and failure risk of the access run. The expected return includes chamber rewards, Soul Cores, the final Fate from the run, and one random Trialmaster Unique. Because market values move, the correct decision is made from current inputs rather than a permanent claim that the encounter is always profitable.
| Farm Goal | Recommended Method | Stop Condition |
|---|---|---|
| Final Ascendancy points | Use an eligible item with explicit gold text, obtain one Fate set, and prioritize a safe clear | Stop repeating for progression once the points are granted |
| Specific Trialmaster Unique | Compare the full access cost with the live trade price of the desired item and acceptable rolls | Buy the item when repeated random outcomes cost more than the target |
| High-roll Adorned or Mahuxotl's | Value each attempt as a high-variance roll, not merely a chance at the item name | Set a Fate budget before starting and do not chase losses |
| Trial rewards and Soul Cores | Farm ten-chamber keys whose Fate category also fills a missing set slot | Cash out from unrelated shorter runs when the risk outweighs the displayed offer |
| Practice | Improve consistency on the access bosses, review Trialmaster telegraphs, and use a low-emotion attempt budget | Return to gear or build work when failures come from survival rather than recognition |
Farming is efficient only when the character reaches the Tower consistently. If most losses occur in Trial rooms, improve modifier selection and objective execution. If losses occur to Time Stop, spend the next attempt on observation rather than maximum damage. If the boss dies reliably but the desired Unique does not appear, the remaining problem is random reward selection, not combat readiness.
Common Failure Points
A failed attempt usually begins with an access decision, an arena-reading mistake, or a false reward assumption. Identifying the category prevents another key from being spent on the same problem.
- Using the wrong Inscribed Ultimatum: a key without ten trials cannot lead to the full Fate route.
- Expecting one Fate to stand for any piece: the door requires Cowardly, Deadly, and Victorious together.
- Building modifier choices around the boss: Trial Tribulations do not carry into Trialmaster's Tower.
- Entering immediately after room ten: fatigue, empty resources, or a wrong weapon set can waste a complete Fate set.
- Dropping the thrown spear in the center: its growing pulses remove the most useful crossing space.
- Standing against the wall in caster state: Blood Orbs can bounce or split with very little warning distance.
- Breaking the Heart tether reflexively: the resulting stun can overlap an Orb, mortar, or stored Sunder.
- Rolling before reading Time Stop: movement without a chosen safe destination often enters a delayed path.
- Ignoring Armour Break: a survivable projectile can make the following physical slam far more dangerous.
- Assuming a named Unique is automatically valuable: The Adorned and Mahuxotl's Machination especially require roll inspection.
After a failure, record one cause rather than changing the entire build. If the cause was a missed animation, practice recognition. If it was an unavoidable-looking overlap, improve placement. If a correctly handled minor hit still killed the character, increase defense. This keeps preparation focused and avoids sacrificing damage, recovery, or mobility without evidence.
Pre-Entry Readiness Check
Run this check in the final reward area before inserting the Fates. It catches configuration errors while they are still reversible.
| Check | Ready Answer |
|---|---|
| Access | The Trial is complete and all three distinct Fates are present |
| Ascendancy | The entry item displayed the required gold text if points are the objective |
| Resistances | Fire, Cold, and Lightning are capped with the actual boss weapon set equipped |
| Physical defense | The build can survive a minor mistake and does not rely on Armour alone against heavy telegraphs |
| Recovery | The primary defense pool can be refilled while disengaged for a full boss sequence |
| Resources | Flasks, Charms, charges, and temporary setup resources are ready |
| Bindings | Dodge, movement, guard, cleanse, and single-target skills are comfortable and verified |
| Positioning plan | The spear will be placed near an outer sector while a central crossing lane stays open |
| Time Stop plan | The player will identify the weapon state, watch three origins, move first, and attack later |
| Reward expectation | The attempt budget accepts one random Unique rather than assuming a specific target drop |
Final Verdict
Trialmaster is best approached as two connected tests. The Trial of Chaos route asks for a ten-chamber key, disciplined Tribulation choices, broad objective coverage, and three distinct Fates. The Tower then resets the modifier problem and becomes a focused boss encounter built around spear placement, bouncing projectiles, the Heart tether, physical and elemental defense, and Time Stop recognition. Keep the expanding spear near the perimeter without pinning yourself to the wall, track every delayed origin during Time Stop, and abandon damage whenever recovery or Armour Break demands attention. For progression, trust the live gold Ascendancy text. For farming, value the entire access cost against one random five-pool Unique and current market conditions. That separation between confirmed access rules, mechanical execution, and variable reward value makes repeated attempts safer and keeps the guide useful as balance numbers change.


