The current Path of Exile 2 Early Access campaign consists of Acts 1 through 4 followed by three Interludes. The Interludes replace the old Cruel replay and lead directly into the Atlas. This walkthrough covers the required story route, the side objectives that grant permanent character power, both campaign Ascendancy opportunities, and the final steps that unlock endgame.
Most outdoor layouts change between instances, so fixed left-or-right directions are unreliable. Follow the zone order, activate every waypoint, and use the world map icons to check whether a permanent reward is still available. Clear packs that block movement or keep your level close to the area level, but do not full-clear every zone unless your build needs experience or gear.
PoE 2 Campaign Route and Permanent Rewards
A clean campaign run separates required progression from valuable detours. The main quest advances the story, while marked side bosses and quest items provide Weapon Set Skill Points, Spirit, resistances, Life, Mana, a Charm slot, and other lasting bonuses. The route below collects 24 Weapon Set Skill Points and the major permanent rewards available before Maps without turning every area into a full exploration run.
| Stage | Main route | Permanent priorities | Final objective |
|---|---|---|---|
| Act 1 | Clearfell, Grelwood, Cemetery, Ogham | 4 Skill Points, 30 Spirit, Cold Resistance, Maximum Life | Defeat Count Geonor |
| Act 2 | Vastiri Desert, Keth, Titans, Deshar | 4 Skill Points, Lightning Resistance, Charm slot, first Ascendancy | Defeat Jamanra |
| Act 3 | Jungle, Machinarium, Waterways, Utzaal | 4 Skill Points, 30 Spirit, Fire Resistance, second Ascendancy | Defeat Doryani |
| Act 4 | Kingsmarch and the Ngamakanui islands | 4 Skill Points, Maximum Mana, Tattoos, flask recovery choice | Defeat Tavakai |
| Interludes | Ogham, Khari Bazaar, Mount Kriar | 8 Skill Points, 40 Spirit, Maximum Life, Orbala Boon | Return to the Hooded One |
The campaign has received route and area changes since Act 4 was introduced. The official Path of Exile 2 patch notes are the safest reference when a remembered route no longer matches the live game. In particular, the second Dreadnought area was removed, Act 3 progression was rearranged, and the old Waterways levers became pressure pads.
Act 1 Walkthrough: Clearfell to Ogham
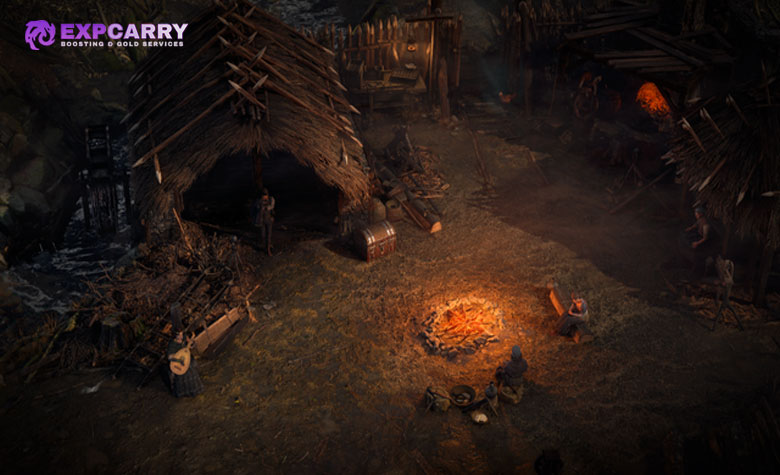
Act 1 introduces the basic quest structure and gives several permanent bonuses that remain useful for the entire character. Cold Resistance is especially valuable before the act boss, but weapon or spell damage still has the greatest effect on how comfortably the early areas play.
- Riverbank: Equip the first usable weapon and skill, defeat the Bloated Miller, and enter Clearfell Encampment.
- Clearfell and Grelwood: Kill Beira of the Rotten Pack for 10% Cold Resistance. Continue through Grelwood, speak with Una, and open access to the Red Vale and Grim Tangle.
- Red Vale: Activate all three Obelisks of Rust, defeat the Rust King at the final obelisk, and take the quest items back through Grelwood to continue the story.
- Cemetery of the Eternals: Enter the Mausoleum of the Praetor and defeat Draven, then enter the Tomb of the Consort and defeat Asinia. Use both key pieces at the Memorial Gate and kill Lachlann.
- Hunting Grounds: Defeat Crowbell for 2 Weapon Set Skill Points. Enter Freythorn for the Spirit reward, then continue to Ogham Farmlands.
- Ogham Farmlands: Find Una's Lute in a house and return it to Una for 2 Weapon Set Skill Points. Continue into Ogham Village.
- Ogham Village and Manor: Recover the Smithing Tools if the Salvage Bench is not unlocked on the account, defeat the Executioner, cross the Manor Ramparts, and enter Ogham Manor. Kill Candlemass for 20 Maximum Life before descending to Count Geonor.
Freythorn is optional for story progression but should not be skipped. Complete its three small Ritual Altars, use the large altar, and defeat the King in the Mists to gain 30 Spirit. Before Count Geonor, equip a current Life Flask, use a weapon or caster focus appropriate to the area, and raise Cold Resistance. His long final phase punishes weak recovery more than imperfect damage.
Act 2 Walkthrough: Vastiri Desert to the Dreadnought
Act 2 opens into several desert branches controlled from the Ardura Caravan. The caravan map is the travel hub, so return after each major quest item rather than trying to connect every branch on foot. This act also offers the first Ascendancy, but the Trial can be delayed until the character has reliable damage and Honour protection.
- Vastiri Outskirts: Defeat Rathbreaker and board the Ardura Caravan. Speak with the Hooded One and Sekhema Asala to begin the desert route.
- Mawdun Quarry and Mawdun Mine: Follow the rail tracks, defeat Rudja, free Risu, and return to the caravan.
- Traitor's Passage and Halani Gates: Open the Ancient Seal route, obtain a Djinn Barya from Balbala if you want to attempt the Trial early, then help Asala at Halani Gates and defeat Jamanra in the first encounter.
- Mastodon Badlands and Bone Pits: Defeat Iktab and Ekbab for the story item. Keep the Sun Clan Relic dropped by enemies in the Bone Pits.
- Keth and Heart of Keth: Find the Kabala Clan Relic, defeat Kabala in the Venom Pit for 2 Weapon Set Skill Points, then pass through the Lost City and Buried Shrines. Kill Azarian in the Heart of Keth and recover the quest objective.
- Valley of the Titans: Activate the three Ancient Seals and defeat Zalmarath in the Titan Grotto. Place the Sun Clan Relic and Kabala Clan Relic at the Relic Altar to gain one Charm slot and choose either increased Charm Charges gained or increased Charm Effect Duration. The choice can be changed by returning to the altar.
- Deshar and Spires of Deshar: Recover the Final Letter from the Fallen Dekhara and deliver it to Shambrin for 2 Weapon Set Skill Points. Use the Sisters of Garukhan shrine in the Spires for 10% Lightning Resistance, then defeat Tor Gul.
- The Dreadnought: Travel directly to the Dreadnought and defeat Jamanra, the Abomination. Do not look for Dreadnought Vanguard; the official campaign route changes removed that area from current progression.
Complete the Trial of the Sekhemas with a usable Djinn Barya to earn the first Ascendancy points. Honour is lost when you take damage, so improve movement speed, recovery, and boss damage before entering. For Tor Gul and Jamanra, Lightning Resistance and a method of handling physical hits matter more than clearing speed. If either boss stalls the run, replace the weapon, add useful modifiers to a good base, and level the main Skill Gem before repeatedly retrying.
Explore services related to this guide, selected from our Path of Exile 2 catalog.
View All Path of Exile 2 Services


Act 3 Walkthrough: Jungle, Vaal Ruins and Doryani
Act 3 has the longest sequence of connected quest objects. The important rule is to finish the Machinarium and Sanctum before trying to open the Matlan Waterways. The Large Soul Core obtained from Zicoatl is used back in the Jungle Ruins, not in the Infested Barrens.
- Sandswept Marsh and Jungle Ruins: Reach the Ziggurat Encampment, enter the Jungle Ruins, and defeat Mighty Silverfist for 2 Weapon Set Skill Points. The Venom Crypts side area contains the permanent Servi choice described below.
- Infested Barrens and Chimeral Wetlands: Speak with Alva, cross the Wetlands, defeat Xyclucian, and take the Inscribed Ultimatum. The entrance to Jiquani's Machinarium opens beyond the boss.
- Jiquani's Machinarium and Sanctum: Collect Small Soul Cores to power the mechanisms and open Jiquani's Sanctum. Spend the extra cores to reach Blackjaw and use the Flame Core for 10% Fire Resistance. In the Sanctum, power the generators, defeat Zicoatl, and take the Large Soul Core.
- Matlan Waterways: Return to the Jungle Ruins and place the Large Soul Core on the Stone Altar. Enter the Waterways and step on the pressure pads while moving through the area. Take the Azak Bog detour before continuing if the 30 Spirit reward is still missing.
- Drowned City: Locate both the Molten Vault and the Apex of Filth. Mektul in the Molten Vault unlocks the Reforging Bench on the first character after his hammer is returned to Oswald. Defeat the Queen of Filth in the Apex and take the Temple Door Idol.
- Temple of Kopec and Utzaal: Use the Idol to enter the Temple, defeat Ketzuli, activate the Gateway, and cross Utzaal. Defeat Viper Napuatzi to reach Aggorat.
- Aggorat and Black Chambers: Obtain a Sacrificial Heart from a Vaal Goliath in Utzaal or Aggorat, use it at the Sacrificial Altar for 2 Weapon Set Skill Points, then enter the Black Chambers and defeat Doryani.
The Venom Crypts reward is permanent for that character. Return the Corpse-snake Venom to Servi and choose 25% increased Stun Threshold, 30% increased Elemental Ailment Threshold, or 25% increased Mana Regeneration Rate. Choose for the build's weakest defensive layer rather than copying a default selection. In Azak Bog, defeat Ignagduk and use the Gemrot Skull for 30 Spirit.
The Inscribed Ultimatum from Xyclucian opens the Trial of Chaos and the second campaign Ascendancy. It is optional for immediate story progression, so postpone it if the available encounter modifiers are overwhelming. Act 3 also contains six Ancient Beacons for Fate of the Vaal. That system is now part of the core game, but the beacon chain is not required to defeat Doryani and enter Act 4.
Bring Fire Resistance for Mektul and Ketzuli, and make sure single-target damage is not far behind area level. Mektul advances while molten material closes the arena, so a build that can clear packs but barely damages bosses needs an upgrade before this detour.
Act 4 Walkthrough: The Ngamakanui Archipelago
Act 4 begins in Kingsmarch and uses a ship to connect the Ngamakanui archipelago. Unlike the earlier acts, the island search is nonlinear. Grinding Gear Games describes eight explorable islands and allows players to choose their order in the official Act 4 and Interludes announcement. Speak with Doryani, Alva, Tujen, the Hooded One, and Makoru before sailing so every active destination and quest marker appears.
The weapon fragments and Matiki's prison can move among the four main search destinations. Follow the Kingsmarch dialogue and quest journal instead of assuming that a fragment always belongs to the same boss. A practical sweep is Whakapanu Island, Shrike Island, Abandoned Prison, and Isle of Kin, returning to Kingsmarch whenever the Hooded One requests it.
- Whakapanu Island: Cross the coast, enter the Singing Caverns, and defeat Diamora. For Tribal Medicine, kill the Great White One in the Shark Pit, take the Shark Fin, and later give it to Kaimana for an Uncut Gem choice and a permanent Tukuama blessing.
- Shrike Island: Track and defeat the Scourge of the Skies, then report back. Search only as much of the island as the current fragment objective requires.
- Abandoned Prison: Obtain the Chapel Key, open the chapel, and defeat Forael. Use the Goddess of Justice to choose increased Life Flask recovery or increased Mana Flask recovery. The choice can be changed by returning. Continue through Solitary Confinement and defeat the Prisoner.
- Isle of Kin and Volcanic Warrens: Search for Matiki's cage if the quest points here, enter the Volcanic Warrens, and defeat Krutog. Return to Kingsmarch when the island objectives are complete.
- Eye of Hinekora and Halls of the Dead: Speak with Matiki at the well to open the route. Pay respects in the Silent Hall for 5% Maximum Mana, complete the three tests, and enter the Halls. Finish the Trial of Ngakanu, choose an elemental resistance or matching attribute Tattoo from each test, defeat Yama the White, and complete the Trial of the Ancestors for 2 Weapon Set Skill Points.
- Kedge Bay and Journey's End: Reach Captain Harlin, advance Tujen and Freya's quest, summon Omniphobia at the totem, and defeat it. Return to Tujen for 2 Weapon Set Skill Points.
- Arastas and the Excavation: Follow Missionary Lorandis, defeat Torvian, enter the Excavation, and kill Benedictus at the Precursor Forge.
- Ngakanu: Enter the Heart of the Tribe and defeat Tavakai. Speak with the Hooded One after the fight to unlock the three Interludes.
Act 4 mixes physical pressure with several elemental encounters, so balanced resistances are safer than preparing for one boss only. Upgrade the main weapon or caster item before Tavakai, keep a fast Life Flask, and use Charms that answer the ailments actually causing deaths. The Shoreline Hideout is an optional account unlock and can be cleared while completing the island route. Players who would rather bypass a stalled boss or recover an abandoned campaign character can use a single contextual PoE 2 campaign boost, but every route and permanent reward needed for a self-playthrough is included here.
All Three PoE 2 Interludes
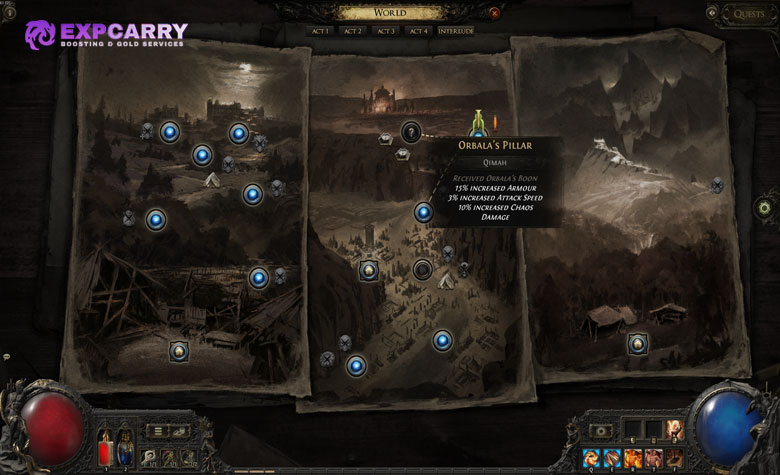
The Interludes are three separate stories between Act 4 and the Atlas. They may be completed in any order, but all three are required to finish the campaign. Mount Kriar first is efficient for builds that immediately benefit from 40 Spirit; Ogham first is a steady alternative for characters that want a less complicated opening route. Recheck equipment before entering each Interlude because resistance pressure and monster damage rise noticeably.
Ogham Interlude
Travel to the Refuge through the Hooded One, then enter the Scorched Farmlands. The Blackwood route is blocked by darkness until the Stones of Serle objective is complete.
- Enter the Stones of Serle and activate all six Runed Megaliths.
- Return to the Scorched Farmlands, cross the Blackwood, and reach Holten.
- Take the Wolvenhold branch, defeat Oswin, the Dread Warden, and use the Warden's Ledger for 2 Weapon Set Skill Points.
- Return to Holten, enter Holten Estate, and defeat Thane Wulfric and Lady Elswyth to finish the story branch.
Khari Bazaar Interlude
Start in Khari Crossing and clear the paired boss objective before moving toward the Pools of Kathal. This Interlude contains a permanent Life bonus and Orbala's selectable Boon, so skipping its side markers leaves real character power behind.
- Defeat Akthi and Anundr, speak with Risu, and claim 2 Weapon Set Skill Points from Clearing the Way.
- Travel through the Pools of Kathal into Sel Khari Sanctuary and defeat Elzarah.
- Enter the Molten Shrine and complete Molten One's Gift through the Skullmaw Stairway for 5% Maximum Life.
- Reach Qimah and use Orbala's Pillar to select one of its seven Boons. Return to the pillar later if the build needs a different option.
- Open Qimah Reservoir with Jado's help and defeat Azmadi, the Faridun Prince, to complete the Interlude.
Mount Kriar Interlude
Mount Kriar offers the largest campaign Spirit reward and a free Unique choice. Its path begins in the Ashen Forest and continues through a sequence of mountain zones before the Cuachic Vault.
- Cross the Ashen Forest, reach Kriar Village, defeat Lythara, and use the Gemcrust Skull for 40 Spirit.
- Travel to Glacial Tarn and enter the Howling Caves. Defeat the Abominable Yeti, take the Icy Tusks, and return them to Hilda for 2 Weapon Set Skill Points.
- Defeat Rakkar in Glacial Tarn to open the way to Kriar Peaks, then find Elder Maddox and choose a free Unique item.
- Continue through the Etched Ravine, defeat Stormgore, enter the Cuachic Vault, and defeat Zolin and Zelina.
After all three Interludes are finished, return to the Hooded One in Kingsmarch and claim the final 2 Weapon Set Skill Points. Do not leave for Oriath until the reward has been used and every Interlude objective that grants permanent power is complete.
From the Campaign to the Atlas
Finishing the Interludes does not place the character directly into a Map. Complete the final conversations in Kingsmarch, travel to Oriath, and speak with Farrow, the Hooded One, and Doryani as the quest directs. Doryani then introduces the Atlas and the first Waystone. The current endgame has its own storylines and fixed objectives, outlined on the official Path of Exile 2 endgame page, but the immediate goal is simply to make the first low-tier Map reliable.
| Check before the first Waystone | What to fix |
|---|---|
| Permanent campaign rewards | Review every Act and Interlude map for unfinished icons, especially Skill Points, Spirit, Life, Mana, and resistance rewards. |
| Ascendancy | Finish the Trial of the Sekhemas and Trial of Chaos if they were postponed, then allocate the earned Ascendancy points. |
| Resistances | Replace weak campaign pieces or craft missing elemental resistances. Balanced defenses are more reliable than one overcapped element and two large gaps. |
| Main damage setup | Use a current weapon or caster item, level the primary Skill Gem, and keep a separate answer for durable rares and Map bosses. |
| Life or Energy Shield | Remove items with attractive damage but almost no defensive value if ordinary Interlude enemies can kill the character in one sequence. |
| Flasks and Charms | Use current flask bases, reliable recovery modifiers, and Charms that counter the ailments most dangerous to the build. |
| Currency | Spend enough to repair a clear weakness, but keep valuable crafting currency for bases that can survive more than the first few Map tiers. |
If the first Waystone fails, the cause is usually visible in the final Interlude: slow rare kills indicate an outdated damage item, repeated elemental deaths point to resistance gaps, and running out of recovery exposes weak flasks or sustain. Fix that specific bottleneck before adding difficult Waystone modifiers.
Final Thoughts
Treat the campaign map as a character audit rather than a reason to clear every corner. Before activating the first Waystone, spend a few minutes revisiting unfinished permanent-reward icons and allocating every earned point. Once those bonuses are secured, stop investing in short-lived campaign gear and direct the next upgrades toward the weakness that appeared most often during the Interludes; that produces a much smoother Atlas start than buying several small, unfocused upgrades.