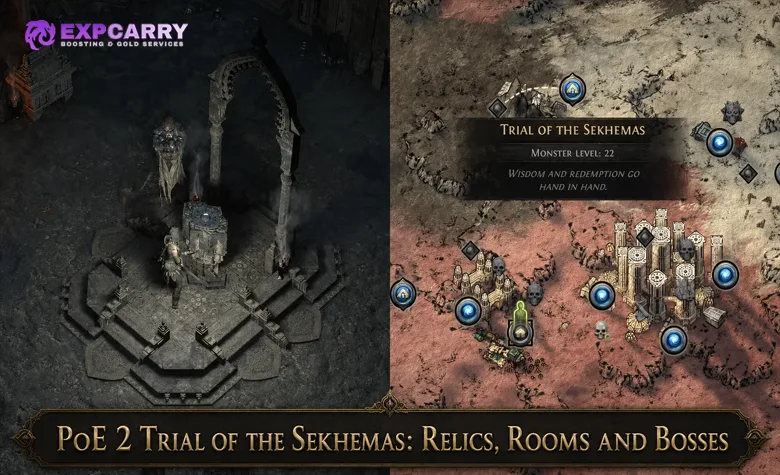
The Trial of the Sekhemas is a branching dungeon in Path of Exile 2 where careless hits matter long after a room is finished. Every attempt combines a Djinn Barya, a limited Honour pool, a Relic setup, random room rewards, persistent Boons and Afflictions, and one boss at the end of each available floor. A strong build can still fail if it enters with poor Relics or follows a route that removes its ability to recover Honour.
This guide focuses on clearing the trial itself rather than comparing Ascendancy classes. It explains how the floors work, which Relic modifiers help progression, how to approach every room type, and what to expect from Rattlecage, the Terracotta Sentinels, Ashar, and Zarokh. Since balance adjustments can change individual values, review the current Path of Exile 2 patch notes before investing in an expensive endgame Barya.
How to Unlock the Trial and Choose a Djinn Barya
The first Trial of the Sekhemas becomes available during Act 2. Open the Halani Gates, enter Traitor's Passage, defeat Balbala, the Traitor, and collect Balbala's Barya. Place it in the Relic Altar at the trial entrance to begin the Ascent to Power attempt. The quest Barya opens a single-floor trial and can be retried if that introductory attempt fails.
Later Djinn Baryas are obtained as drops and may open two, three, or four floors. Before using one for Ascendancy progression, read its description. The item must state that completing the trial grants additional Ascendancy Skill Points. A Barya without that line can still be used to collect Relics, keys, jewels, and other rewards, but it will not advance that character's Ascendancy total.
| Available floors | Floor boss reached | Normal progression use | Main preparation check |
|---|---|---|---|
| 1 | Rattlecage, the Earthbreaker | First Ascendancy | Basic resistances, movement and single-target damage |
| 2 | Terracotta Sentinels | Second Ascendancy route | Honour Resistance and damage that can balance two targets |
| 3 | Ashar, the Sand Mother | Third Ascendancy route | Strong Relic layout, poison handling and mobility |
| 4 | Zarokh, the Temporal | Fourth Ascendancy route | Capped defenses, high movement speed and boss practice |
Completing a floor for the first time expands the Relic Altar, making later attempts easier to prepare. Lower-floor Baryas therefore remain useful even after they stop awarding Ascendancy Points. Run them to learn objectives, unlock altar space, and collect defensive Relics before risking a three-floor or four-floor key.
Honour, Sacred Water and the Failure Conditions
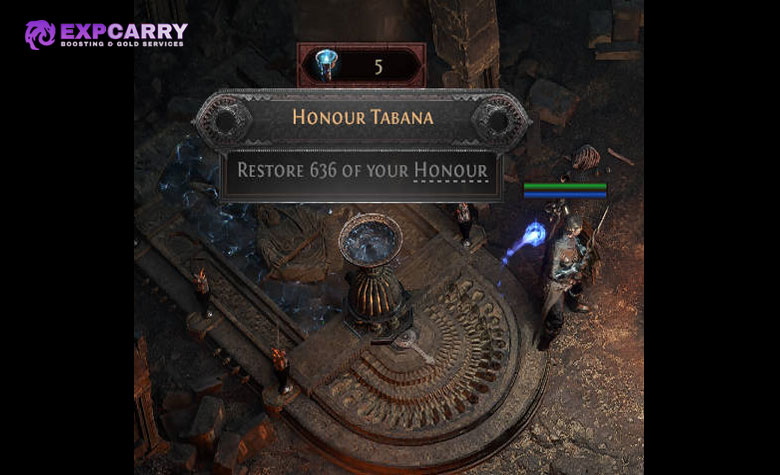
Honour is a second survival resource that persists between rooms. Enemy hits, damage over time, and traps can remove Honour in addition to affecting the character's ordinary defenses. Reaching zero Honour ends the trial even if the character still has Life, while an ordinary character death also ends the attempt unless a specific Boon prevents it.
Starting Honour is based on the character's defensive resources, including maximum Life and Energy Shield. Mind over Matter allows maximum Mana to contribute, and maximum Runic Ward is added under the current rules. Armour, Evasion, Block, Resistances, damage avoidance, and other defenses still matter because preventing or reducing the original hit also protects Honour. Grinding Gear Games previously adjusted close-range Honour damage and damage-over-time interactions in its official Sekhemas mechanics update, so melee characters should not assume their normal defenses are ignored.
Honour Resistance directly reduces the Honour lost after other relevant calculations. Its normal maximum is 75%, making it the most dependable Relic target for progression attempts. Increased Maximum Honour gives a larger mistake allowance, while Honour restoration helps repair damage already taken. These effects solve different problems, so a balanced altar is safer than stacking restoration on a character that loses most of its Honour in one hit.
Sacred Water exists only for the current run. It drops from monsters, chests, fountains, and bosses, and it can be spent at Merchants or Maraketh Shrines. A route with no useful place to spend Water turns it into delayed value instead of immediate protection. When Honour is low, prioritize a visible recovery Shrine over a distant key or speculative Boon. At the end of a successful floor, remaining Water can be spent on available goods or exchanged for additional cache keys.
Best Relics and Relic Altar Setup
Regular Relics are persistent items placed in the Relic Altar before the run begins. They occupy different shapes and amounts of altar space, so the best setup is not simply a collection of the largest pieces. Fit the highest-value defensive modifiers first, then fill unused cells with smaller Relics. Once the trial starts, the layout is locked for that attempt.
| Relic modifier | Priority for progression | Reason |
|---|---|---|
| Honour Resistance | Highest until the normal cap | Reduces Honour loss from repeated hits and hazards |
| Increased Maximum Honour | High | Creates a larger buffer for bosses and long floors |
| Increased Honour restored | High after basic resistance | Improves Shrines and other recovery opportunities |
| Reduced damage taken from bosses | High for three-floor and four-floor attempts | Protects the run at its most dangerous checkpoints |
| Movement Speed | High for Zarokh and Escape rooms | Improves positioning and timed mechanics |
| Merchant choices or lower prices | Medium | Makes it easier to find useful Boons during long runs |
| Keys, rarity and extra rewards | Low until clears are reliable | Adds loot but does not prevent a failed attempt |
Relics drop inside the trial, appear in caches, and can be purchased from the Merchant. Magic Relics with only one modifier can often be improved with an Orb of Augmentation. Avoid spending heavily on reward modifiers while learning the trial; a failed run receives no benefit from extra cache value. The official 0.5 rules also add maximum Runic Ward to starting Honour, as described in the Return of the Ancients patch notes.
Unique Relics work differently. Zarokh can drop them after a four-floor completion, and they alter a later run by imposing an additional restriction in exchange for a special reward. They are consumed when used, so they belong in farming strategies rather than a first Ascendancy attempt. Learn the normal Zarokh encounter before adding a Unique Relic condition.
Explore services related to this guide, selected from our Path of Exile 2 catalog.
View All Path of Exile 2 Services


Every Sekhemas Room Type and the Safest Route
Each floor is a connected map of rooms leading to its boss. The interface reveals room connections even when an Affliction hides other information. Preserve routes with several outgoing paths whenever possible. Entering a narrow branch can force the character into a run-ending Affliction later, while a central room with multiple exits keeps alternatives available.
| Room type | Objective | Safe approach | Relative risk |
|---|---|---|---|
| Ritual | Kill the Ritual Casters maintaining the portals | Ignore replaceable summons, locate each caster and burst it down | Usually low |
| Chalice | Defeat every required Rare monster | Activate the Chalice and follow its light trails toward the targets | Low if Rare modifiers are manageable |
| Escape | Disable all Death Crystals before time expires | Follow the beam from one crystal to the next because each activation adds time | Low to medium with good movement |
| Hourglass | Survive until the timer expires | Kill spawned Rare monsters to reduce the timer instead of endlessly kiting | Medium to high |
| Gauntlet | Reach the exit through traps and switches | Move deliberately, use safe roll timings and do not race unfamiliar trap patterns | Usually high |
Ritual and Chalice are generally the quickest rooms for a build with good damage. Escape becomes efficient once the crystal layouts and light directions are familiar. Hourglass is safer when the character can delete Rares quickly; otherwise its constant spawning creates many chances to lose small amounts of Honour. Gauntlet has fewer combat demands but becomes dangerous with faster traps, increased trap damage, reduced movement speed, or poor visibility.
Choose rooms in this order of importance: avoid crippling Afflictions, retain multiple future paths, restore Honour when needed, collect Sacred Water, visit a Merchant when there is enough Water to spend, and only then chase keys. A Gold Key is worthless if the selected route disables Relics or prevents Honour recovery before the boss.
If repeated attempts are ending before the floor boss, stop spending high-floor Baryas and rebuild the defensive Relic set in easier runs. Players who prefer assistance with an Ascendancy completion can also review the available PoE 2 Trial of the Sekhemas service. For a self-completed clear, lower-level practice is the better place to learn Gauntlets, boss animations, and room layouts.
Boons, Afflictions and Merchant Decisions
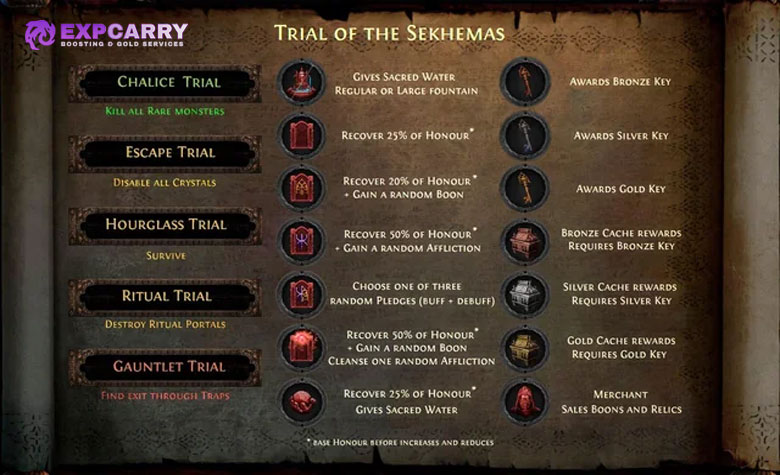
Boons remain active for the run and provide benefits such as movement speed, weaker monsters, cheaper Merchant prices, more effective Relics, Honour recovery, or a one-time rescue effect. Afflictions are persistent penalties obtained from marked rooms and optional Pledges. A Boon can improve an already stable run, but avoiding one destructive Affliction is usually more valuable than gaining a random benefit.
The most dangerous Afflictions are those that disable or reduce non-Unique Relics, prevent Honour restoration, remove a core defense, lower movement speed, hide the room map, reduce player damage, or multiply trap damage. Their severity depends on the route and build. No Evasion is disastrous for an Evasion character but almost irrelevant to a pure Armour build; reduced movement is inconvenient in ordinary combat but dangerous before Zarokh.
Pledges exchange a known cost or an added risk for a benefit. Do not accept one merely because it offers a Major Boon. Check the remaining room count, current Honour, next boss, and whether the penalty is immediate. Damage paid directly by a Pledge can be more dangerous than the tooltip first suggests, and a random Affliction can remove the recovery or mobility the run still needs.
At a Merchant, progression attempts should favor Honour recovery, increased Maximum Honour, monster damage reduction, movement speed, and effects that improve future purchases. Reward-focused Boons become reasonable only after the character can reach the boss with a comfortable Honour reserve. Sacred Water does not carry into the next attempt, so spend it before the final encounter when a useful option is available.
All Trial of the Sekhemas Bosses
Every floor ends with a fixed boss. Honour carries into the arena, which means the boss strategy begins several rooms earlier. Avoid entering with an Affliction that directly counters the encounter, keep recovery opportunities for the end of the floor, and switch from reward Relics to boss protection when attempting a new progression tier. Review the official Early Access patch notes if an encounter changes after a game update.
Floor 1: Rattlecage, the Earthbreaker. Rattlecage controls space with slams, ground fissures, temporary volcanoes, expanding explosions, and falling rocks. Keep moving around the arena instead of retreating in one straight line. When fissures create volcanoes, relocate to a clean section before attacking again. The charged stomp has a visible wind-up, while the expanding blast sequence requires distance rather than a late roll. Do not rush the final portion of the fight when falling debris and projectiles overlap.
Floor 2: Terracotta Sentinels. This encounter contains Hadi of the Flaming River and Rafiq of the Frozen Spring. Keep their Life totals close and finish them within a short interval because the surviving Sentinel returns to full Life after its partner dies. Hadi uses fire waves and close-range slams, while Rafiq uses cold impacts and delayed ice eruptions. If a simultaneous kill is impossible, killing Hadi first is usually safer because defeating Rafiq activates chilling arena hazards while Hadi is still attacking.
Floor 3: Ashar, the Sand Mother. Ashar combines fast melee attacks, poison projectiles, burrowing movement, and quicksand that reduces mobility. Pressure plates in the arena can release beetles, poison gas, or dart volleys, so fight around the outer area and cross the center only when necessary. Move away from the point where Ashar burrows, avoid walking through the resulting quicksand, and treat the sustained poison barrage as a movement phase rather than a damage window.
Floor 4: Zarokh, the Temporal. Zarokh uses delayed temporal zones, rotating attacks, projectiles, teleports, and arena-wide time mechanics. Save a movement skill for emergencies and avoid filling the entire arena with overlapping hazards. During Time Stop, stop attacking and collect every hourglass before the clock completes its rotation. The character becomes progressively slower, and failure causes an immediate death rather than ordinary Honour loss. Plan a short route around the outer hourglasses before cutting through the middle, and enter the fight without a movement-speed penalty.
Zarokh can trigger the hourglass sequence more than once, so do not spend every movement cooldown during the first occurrence. High damage shortens the encounter, but it does not replace knowledge of this mechanic. A character prepared only to absorb Honour damage can still lose instantly if the hourglasses are missed.
Rewards, Keys and the End-of-Floor Room
Completed rooms can award Bronze, Silver, and Gold Keys. After defeating a floor boss, matching keys open caches in the reward area. Cache contents vary and may focus on equipment, Relics, jewels, Waystones, gold, or other item groups. A higher-grade key is useful only when a matching cache appears, so progression routes should not sacrifice a safe boss entry merely to collect it.
The reward area also contains the systems needed to finish progression. Use the Altar of Ascendancies when the Barya qualifies for additional points, spend remaining Sacred Water where appropriate, and store useful Relics before continuing. Current quality-of-life rules place a Relic Locker in every end-of-floor reward room, a change documented in the official 0.4.0 patch notes.
A four-floor victory can add Unique Relics to the reward pool. These items create challenge runs that lead to special rewards, including valuable Unique items and jewels associated with Sekhemas. Treat them as separate endgame objectives. The Relic setup used to earn Ascendancy Points should prioritize finishing the run, while a farming setup can trade some defense for Merchant options, keys, and item rarity after clears become consistent.
Final Thoughts
The most reliable Sekhemas strategy is to build the run around its final boss before entering the first room. Cap Honour Resistance, add Maximum Honour and recovery, keep the route flexible, and reject Afflictions that disable the character's main protection. Learn Ritual, Chalice, and Escape rooms in cheaper attempts, then practice the fixed boss order until their major telegraphs are familiar. Once a character can reach each boss with a healthy Honour reserve, reward Relics and riskier room choices become useful; before that point, survival is the only reward multiplier that matters.