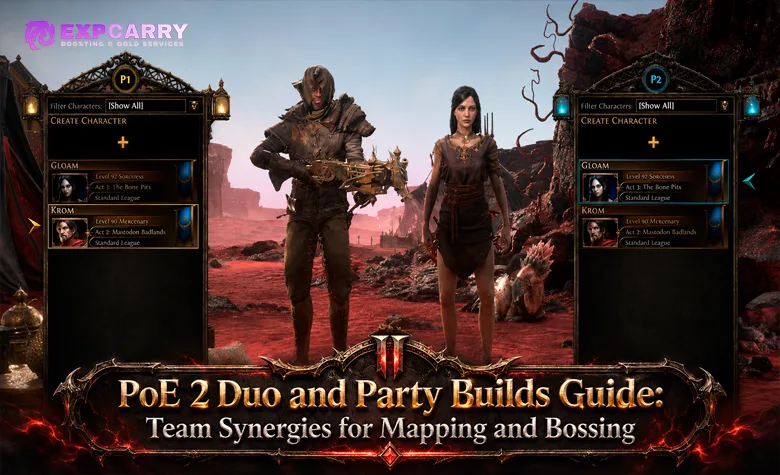
Building a strong duo in Path of Exile 2 means choosing two characters whose skills improve each other's performance without making either player helpless alone. The best combinations go beyond pairing a damage dealer with an aurabot: one character can freeze enemies while another consumes Freeze for additional damage, a caster can ignite Gas Grenade clouds, and an Armour Break specialist can create openings for powerful physical attacks. These interactions are useful throughout the campaign and become increasingly important against tougher enemies in Atlas Maps and endgame boss encounters.
This guide covers the current Early Access 0.5.5h rules as of November 18, 2026. PoE 2's full release is scheduled for December 11, bringing major changes to classes, Support Gems, and the Passive Skill Tree, so those future mechanics are not treated as LIVE builds. The focus here is on practical two-character combinations, damage and support roles, shared buffs and debuffs, campaign progression, boss rotations, and the changes required when expanding into a larger party.
Short answer: For an active two-player team, combine Gas Grenades with a Fire caster, Ice Shot with Fragmentation Rounds, or Armour Break with physical Crossbow damage. Minion builds work well with Shock and defensive auras, while Tactician offers a flexible damage-plus-support option. Build both characters to function independently, avoid duplicating non-stacking ally buffs, and prepare enough damage for increased party monster Life.
PoE 2 Duo Builds: Six Team Combinations for Mapping and Bossing
The strongest duo is not necessarily formed by combining two top-ranked solo builds. A fast mapper and a slow melee specialist can both perform well independently but spend much of their shared session waiting for each other. A more effective pairing combines compatible movement speed, complementary damage, and a skill interaction that creates additional value when the characters fight the same target.
The following combinations use existing skills and Ascendancies rather than unreleased 1.0 additions. Their ratings describe the intended playstyle, not a universal tier list or a promise of identical damage across every equipment budget. The specific interaction matters more than the class label, since some skills can be used outside the class most closely associated with their weapon type.
| Duo combination | Main interaction | Mapping | Bossing |
|---|---|---|---|
| Fire Sorceress + Grenade Mercenary | Flame Wall and burning effects support Gas Grenade explosions. | Strong area damage | Strong with controlled grenade placement |
| Ice Shot Deadeye + Fragmentation Mercenary | Cold damage builds Freeze; Fragmentation Rounds consumes it. | Fast ranged clearing | Strong with coordinated Freeze timing |
| Physical Warrior + Crossbow Mercenary | Armour Break enables stronger physical attacks and High Velocity Rounds. | Moderate to strong | Strong against durable targets |
| Minion Witch + Lightning Stormweaver | Minions create pressure while Shock and resistance reduction support damage. | Strong in dense encounters | Consistent sustained damage |
| Tactician + Ranged Damage Dealer | Banners, sceptre buffs and crowd control complement an independent attacker. | Strong with coordinated movement | Strong defensive and offensive utility |
| Cold Werewolf Druid + Ice Shot Deadeye | Freeze, Arctic Howl and cold-focused attacks support shared target control. | Strong with similar movement pace | Strong control with coordinated payoff skills |
These builds have different gear demands, but none requires the second player to abandon personal damage completely. A player who becomes separated, joins another party, or wants to complete a solo objective should still have a functional clear skill and boss rotation. That requirement also makes a duo easier to level through the campaign, where a pure support character can become overly dependent on a stronger partner.
Fire Sorceress and Grenade Mercenary: Flame Wall and Gas Explosions
A Fire-focused Sorceress and a Grenade Mercenary form one of the clearest cross-character combinations in PoE 2. Gas Grenade creates a Poison cloud that can explode when exposed to burning effects or Detonator skills. Flame Wall creates a wall of Fire that ignites enemies within its area and also grants added Fire damage to projectiles fired through it by the caster or allies. These are complementary mechanics that allow both players to contribute damage while coordinating their abilities.
The Sorceress can develop a Fire spellcasting setup around Flame Wall and a reliable independent damage skill, while the Mercenary focuses on Gas Grenade, grenade recovery, and a Crossbow attack for targets that move out of the clouds. Neither character needs to rely exclusively on the other to complete ordinary encounters. The current Gas Grenade skill data documents its burning and Detonator interactions, while Flame Wall explicitly supports allied projectiles.
Gas Grenade Rotation: Place Clouds, Ignite and Detonate
The opening sequence is simple: the Mercenary places Gas Grenades where enemies are moving or where a boss is expected to remain, then the Sorceress applies a suitable burning effect. The resulting explosions provide additional Fire damage, while the Sorceress continues dealing damage through her own spells. The Mercenary should retain an independent Detonator or another compatible attack for situations where the caster cannot reach the cloud immediately.
During mapping, throw grenades ahead of approaching packs instead of chasing enemies after they have already scattered. Against bosses, wait for a stationary animation or predictable recovery period before committing several grenades. A mobile boss can leave the effective area before the explosion, making coordinated placement and timing more important than simply increasing the number of grenades used.
Fire Duo Gear, Damage Scaling and Weaknesses
The Sorceress should improve spell damage, relevant Fire modifiers, cast speed, and defenses, while the Mercenary prioritizes a capable Crossbow, grenade damage, cooldown management, and reliable survivability. Both characters need functional mana recovery or cost efficiency for repeated encounters. Sharing a damage theme does not mean that every modifier benefits both characters: spell damage does not automatically improve Crossbow grenade attacks, and attack modifiers do not directly improve the caster's spells.
The main weakness is delayed damage. Grenades require placement, clouds must develop, and enemies may move before the intended explosion. The duo benefits from control skills or other ways to keep targets in the affected area, but should not sacrifice its independent damage engines just to improve one combination.
Ice Shot Deadeye and Fragmentation Mercenary: Freeze and Shatter Damage
A cold-focused Deadeye and a Crossbow Mercenary can divide a two-step damage interaction between two players. The Ranger uses Ice Shot and related Cold attacks to build Freeze on enemies, while the Mercenary fires Fragmentation Rounds into Frozen targets. Fragmentation Rounds consumes Freeze and triggers an explosion of shrapnel that converts its Physical damage to Cold, turning the Ranger's control into additional damage. Both characters retain ordinary attacks that function when no Frozen target is available.
This pairing is particularly attractive for players who want fast ranged mapping with a separate method of removing durable enemies. Ice Shot Deadeye is already a functioning mapping archetype in the current Early Access build, and Fragmentation Rounds remains a defined payoff skill. The current Freeze skill reference confirms the relationship between Permafrost Bolts, Fragmentation Rounds, and Freeze consumption.
Freeze Timing: Ranger Setup and Mercenary Payoff
The Deadeye opens with Ice Shot to damage and freeze the pack while the Mercenary targets the most valuable Frozen enemy with Fragmentation Rounds. The resulting shrapnel provides damage against clustered targets, and the Ranger immediately resumes Freeze buildup on surviving enemies. This works best when both players focus on the same section of the battlefield rather than attacking unrelated packs from opposite directions.
The important limitation is that Freeze is a consumable status for certain payoff skills. If the Deadeye intends to use Snipe against a Frozen boss, the Mercenary should not automatically consume the Freeze first. Agree on which player receives the next payoff window, particularly against bosses where creating another Freeze can take longer than it does against ordinary monsters.
Cold Duo Bossing: Freeze Buildup, Snipe and Fragmentation Rounds
Bossing requires a different rhythm from mapping. The Ranger builds Freeze through sustained Cold damage, while the Mercenary maintains independent Crossbow damage and waits for a suitable payoff window. Once the boss is Frozen, either character can use the prepared consuming attack according to the agreed rotation. Repeated Freeze attempts should be coordinated rather than wasted through simultaneous payoff skills.
The Deadeye needs a reliable single-target package instead of expecting Ice Shot's clearing behavior to defeat every boss quickly. The Mercenary should also remain capable of dealing damage when Freeze is unavailable, particularly during encounters with long recovery periods or dangerous movement restrictions. The existing PoE 2 Mapping Builds guide covers Ice Shot as an independent character; the duo-specific advantage is distributing Freeze setup and payoff between two people.
Explore services related to this guide, selected from our Path of Exile 2 catalog.
View All Path of Exile 2 Services

Armour Break Warrior and Crossbow Mercenary: Physical Boss Damage
A Warrior using Armour Breaker and other Physical attacks can create a strong opportunity for a Mercenary using High Velocity Rounds. Armour Break reduces an enemy's Armour, and a Fully Broken Armour state makes the target vulnerable to additional Physical damage from Hits. High Velocity Rounds interacts with Fully Broken Armour by applying Riven Armour, which creates an additional physical damage opportunity. This gives both players a clear combat responsibility against tough enemies without requiring one character to stop attacking entirely.
The Warrior can use a Mace-based Physical build with Armour Breaker and a suitable damage skill, while the Mercenary develops an independently functional Crossbow setup. The interaction is especially relevant for bosses, rare monsters, and other targets that survive long enough for Armour Break to matter. Current High Velocity Rounds data confirms that the skill no longer consumes Fully Broken Armour under the modern version of its mechanic.
Physical Duo Rotation: Break Armour, Apply Riven Armour and Attack
The Warrior initiates the fight and builds Armour Break with appropriate attacks. Once the target reaches Fully Broken Armour, the Mercenary fires High Velocity Rounds to apply Riven Armour and both players continue their main damage rotation. The Warrior can contribute sustained Physical damage instead of acting as a stationary debuff provider, while the Mercenary maintains pressure from a safer distance.
Against groups, the Warrior's ability to apply Armour Break across several enemies determines how smoothly the combination clears. A setup that breaks only one target at a time may feel excellent against bosses but slow in dense mapping. The Mercenary therefore needs an independent area-clearing option rather than relying on High Velocity Rounds to solve every pack.
Physical Duo Bossing: Positioning and Sustained Damage
The Warrior will often fight closer to the boss, while the Mercenary can maintain a longer firing distance. This gives the pair opportunities to divide positional pressure, but melee range still requires strong defenses and knowledge of boss attack patterns. The Warrior should not remain in danger merely to maintain a debuff when the next attack is lethal; both characters need to preserve enough damage uptime to complete the encounter safely.
This is one of the better pairings for players who want both characters to contribute directly to killing durable enemies. It does not require synchronized one-shot damage or a rare interaction between several Uniques. The most important gear upgrades are the Warrior's ability to establish Armour Break and the Mercenary's ability to exploit that opening with meaningful Physical damage.
Minion Witch and Lightning Stormweaver: Shock, Curses and Summoned Damage
A Witch built around minions pairs naturally with a Lightning-focused Stormweaver because the characters contribute damage in different ways. Summoned minions occupy enemies and provide repeated attacks, while Lightning skills can apply Shock and help remove enemies that surround the minion army. Properly applied offensive debuffs can benefit both characters when they damage the same target, allowing the duo to concentrate damage without requiring the Witch to abandon her summoner build.
The Witch should maintain a functioning minion setup through Spirit, minion damage, and suitable defensive equipment. The Stormweaver should retain her own Lightning damage engine, rather than relying on the summons to clear every encounter. This combination can be effective in enclosed encounters where minions provide sustained pressure while the caster attacks from a more controlled position.
Shock and Resistance Reduction for Minion Damage
Shock and applicable resistance-reduction effects create useful opportunities for a mixed party. A Lightning caster can apply Shock to increase the target's damage taken, while an appropriate curse or Exposure effect may improve damage of the relevant elemental type. However, Physical minions do not automatically benefit from lowering Lightning Resistance, and minion-specific scaling is not interchangeable with the caster's spell modifiers.
Choose shared debuffs based on what the minions actually deal. If the Witch relies mainly on Physical minions, generic damage-taken effects and suitable defensive utility may be more useful than stacking Lightning-specific reductions. If the minion setup deals elemental damage, match the debuffs to that damage type and avoid spending valuable skill slots on effects that improve only one character without enough benefit to justify them.
Sceptres, Discipline and Minion-Friendly Defensive Buffs
Minions count as allies for relevant aura and Presence effects, making supportive Sceptres useful in a minion-centered duo. A Sceptre granting Discipline can provide additional Energy Shield to suitable allies within range, while other items may offer regeneration, resistances, or damage bonuses. The correct choice depends on whether the characters and minions actually benefit from the granted stat, and whether the resulting Spirit and equipment costs are manageable.
Do not assume that every buff improves every minion equally. A minion with little relevant Energy Shield scaling may gain less from Discipline than a character designed around that defense, while an ally Attack bonus may be more useful to attacking minions than to a spellcasting partner. Test the effect on the actual party before buying expensive support equipment.
Tactician and Ranged Carry: Banners, Sceptres and Independent Damage
Tactician is a practical option for players who want to contribute meaningful support without building a character that can do nothing alone. Its support-oriented tools can complement a Ranger, Mercenary, or another attack-focused character through Banners, suitable Sceptre effects, and crowd control. The Tactician can also retain Crossbow or other compatible attack skills, making it possible to run ordinary content independently when the party is unavailable.
The most important design decision is how much damage the Tactician is willing to give up for party utility. A character that invests everything into ally bonuses may improve a stronger partner significantly but become frustrating during solo progression. For a two-player team, a hybrid approach often offers better everyday usability than a specialized support setup designed for large, highly optimized farming groups.
Banner Placement and Attack-Based Team Buffs
Banners provide an additional support layer for groups fighting within their effective area. A Tactician can build around compatible Banner skills and defensive utility while contributing personal damage between support actions. This works particularly well when the damage dealer is an attacker who benefits from the chosen Banner effect and the team can remain close enough to receive it.
Positioning matters because a powerful support effect is wasted when the carry repeatedly moves outside its range. Against bosses, establish where the team can safely fight before committing support abilities. During mapping, avoid building a rotation that requires stopping at every small pack to place an effect whose setup takes longer than killing the enemies.
Sceptre Presence Buffs and the 0.5 Non-Stacking Rule
The official 0.5.0 patch notes changed how repeated ally bonuses function in a party. Modifiers affecting Allies in your Presence, including relevant Sceptre and Unique Item modifiers, no longer stack when multiple party members provide the same modifier type. GGG explicitly excluded the damage bonus from Leer Cast from that specific change, so it should not be treated as proof that all Presence modifiers either stack or fail to stack identically.
For a duo, avoid buying two sets of equipment that supply the same ally bonus when only one applicable effect will operate. Instead, divide utility between complementary effects such as damage, defense, recovery, or suitable ailment support. This allows each character to spend more of its gear budget on improving personal performance rather than duplicating ineffective support modifiers.
Cold Werewolf Druid and Ice Shot Deadeye: Freeze, Arctic Howl and Ranged Damage
A Cold-focused Werewolf Druid and an Ice Shot Deadeye form a complementary melee-ranged combination with shared investment in Freeze. The Druid can use cold-themed Werewolf attacks and Arctic Howl, while the Deadeye applies ranged Cold damage and uses suitable payoff attacks against Frozen targets. Arctic Howl also grants allied attacks added Cold damage under its current skill description, giving the combination a genuine team benefit beyond simply choosing the same damage type.
The pair is most effective when the Druid can keep pace with the Deadeye instead of continually arriving after packs are dead. Werewolf movement and close-range attacks provide an active melee role, while the Ranger clears approaching enemies and pressures distant threats. Both characters should retain independent boss damage because relying exclusively on repeated Freeze can become inconsistent against highly durable targets.
Arctic Howl and Freeze Payoff Timing
Arctic Howl is most useful when the team coordinates its Cold damage and target selection. The Druid can freeze enemies that are Primed for Freeze and grant additional Cold damage to allied attacks, while the Deadeye establishes Freeze buildup on dangerous enemies. Arctic Howl does not cause Freeze buildup by itself. When a payoff skill consumes Freeze, the players should decide who uses that window rather than assuming both can consume the same status independently.
In ordinary mapping, the combination can rely on consistent Cold damage and movement rather than a complicated boss rotation for every pack. Against bosses, the Druid needs to understand when it is safe to enter melee range while the Deadeye maintains damage from a distance. This keeps the partnership useful even when the target cannot be repeatedly controlled.
PoE 2 Party Buffs and Debuffs: Auras, Shock, Freeze, Exposure and Curses
Party synergy depends on the exact wording of the underlying mechanic. A benefit that applies to Allies can affect other players and eligible minions, while a modifier affecting only the character using it may provide no direct team benefit. Debuffs applied to enemies can support both players, but their effects are constrained by damage type, duration, source, and stacking rules.
The distinction is especially important when planning two expensive endgame builds around a shared modifier. Two copies of an identical effect may provide no extra benefit, while complementary effects can create a stronger overall result. Current skill descriptions and the official 0.5 changes should take priority over old PoE 1 party assumptions or earlier PoE 2 versions.
| Mechanic | Team interaction | Planning rule |
|---|---|---|
| Presence auras | Apply relevant buffs to eligible nearby allies. | Maintain range and avoid duplicate non-stacking effects. |
| Shock | Applies a damage-taken debuff to the enemy. | Coordinate uptime rather than assume two identical Shocks stack. |
| Freeze | Provides crowd control and enables specific payoff attacks. | Assign priority for skills that consume Freeze. |
| Elemental Exposure | Reduces the relevant elemental resistance on the target. | Match the element to the actual damage the team deals. |
| Curses | Apply an enemy debuff according to their current rules. | Coordinate curse slots and avoid replacing a more useful effect. |
| Armour Break | Reduces enemy Armour and enables Fully Broken Armour interactions. | Use with Physical attacks that can exploit the resulting state. |
| Minions | Count as allies for applicable support and Presence effects. | Choose bonuses that improve the actual minion skill and defense types. |
| Selfless Remnants | Allows supported Remnants to benefit eligible allies instead of the source. | Understand the personal benefit being exchanged for team utility. |
Shock and Freeze: Shared Setup Without Wasting Payoff Skills
Shock is useful when both characters damage the same enemy because it increases damage taken, subject to the actual strength and application rules of the effect. Freeze works differently: it controls the target and can be consumed by particular attacks. A duo should therefore distinguish between maintaining a debuff and using up a combat state that another player needs for their next skill.
Against ordinary monsters, duplicated control is usually less problematic because enemies die quickly. Against bosses, wasted Freeze or poorly timed payoff attacks can reduce the team's damage during its best opening. A simple callout before the next consuming ability is more useful than adding several overlapping status effects without a plan.
Elemental Exposure and Curse Allocation for Bosses
Elemental Exposure and compatible resistance-reduction curses can work together to improve damage of the relevant element. The value depends on the target's resistance and the exact modifiers in effect, not on a universal damage multiplier. PoE 2 also adjusts ailment and Exposure effectiveness against different enemy rarities, so ordinary mapping results should not be used as a guaranteed boss damage calculation.
Agree on which player applies each important debuff and whether the second character needs to reserve skill slots for another form of utility. A Fire-focused duo benefits more from Fire-related resistance reduction than from a Lightning-specific debuff that does not improve its primary damage. If the characters deal different damage types, generic damage-taken effects and survival tools may provide better shared value than specializing both players in one element's resistance reduction.
Acolyte of Chayula: Selfless Remnants and Hybrid Support
Acolyte of Chayula can also contribute to an offensive-support duo through Remnant interactions. Selfless Remnants causes supported Remnants to affect allies in the player's Presence instead of the player generating them when collected, making it possible to trade some personal benefit for team utility. The current game also includes equipment with separate Remnant-sharing modifiers, although these effects must be evaluated under their actual wording rather than assumed to stack freely.
This approach is more specialized than a Tactician Banner setup because it depends on generating, collecting, and maintaining the relevant Remnants. It can support another damage dealer while the Acolyte continues attacking, but the exact benefit depends on the Remnant type and the character's own damage setup. The announced Acolyte rework for 1.0 is not yet playable and should not be mixed into the current version of this hybrid build.
Party Scaling in PoE 2: Monster Life, Item Drops and Map Ownership
Party play increases monster durability, so pairing two incomplete characters is not automatically easier than playing alone. Bosses and tougher enemies can require substantially more total damage in a group, while additional loot provides an incentive to complete content together. A duo becomes efficient when shared damage, control, and movement keep clear times competitive despite the increased enemy Life.
The PoE 2 party reference documents higher monster Life as more players enter an area, including stronger scaling for Unique enemies than normal monsters. Exact loot comparisons depend on item category and the current party rules, so older claims that every extra player provides the same flat Item Quantity or Item Rarity bonus should not be copied uncritically. The practical test is whether the duo gains enough reward and completion reliability to justify the additional time per map.
Waystones, Atlas Progression and Shared Mapping Costs
In group mapping, the player opening the Map Device controls important parts of the instance and associated progression. The party can fight together, but the Waystone and specific Atlas objectives may still belong to the map owner. That makes it important to decide who opens maps and which progression unlocks each character needs before beginning a long session.
Both players should maintain their own supply of suitable Waystones and avoid assuming every map completion grants the same account-specific progression to every participant. Rotate ownership when it is necessary to advance each character's Atlas, and verify personal objective completion after important fights. The separate PoE 2 Atlas Passive Tree guide covers the broader progression systems; the duo-specific issue is keeping both accounts ready for the next shared map.
Loot Distribution and Investment Between Two Players
A productive duo should decide how to divide loot and costs before expensive farming begins. One character may supply the Waystones while the other contributes gear or consumables, but that arrangement does not automatically create an equal economic result. Discuss currency, valuable equipment, and shared upgrades instead of waiting until a rare item drops to decide who receives it.
It is also useful to consider whether the next item upgrade benefits only one character or materially improves the entire team. A better weapon for the main damage dealer may reduce boss time more than a small support upgrade, while stronger defensive gear on the weaker player may prevent repeated failed maps. Investment should follow the current bottleneck rather than a permanent assumption that the carry always receives priority.
PoE 2 Campaign Duo Progression: From Act 1 to the Atlas
The current Early Access campaign consists of four Acts followed by three Interludes. Players can complete the story together, but both characters need enough independent damage, recovery, and defenses to handle quest encounters when the other player is repositioning or dead. The fastest campaign duo is therefore usually two functioning leveling builds with a useful shared interaction, not an endgame carry followed by a character that contributes nothing until rare support equipment becomes available.
Early progression should establish each character's main skill before investing heavily in support specialization. The PoE 2 League Start Checklist covers permanent campaign rewards and individual Atlas readiness; a duo must complete those requirements for both characters rather than treating one player's progression as sufficient. An optional character leveling service concerns personal level progression and does not replace party coordination or the specific synergy planned here.
| Progression stage | Duo objective | Readiness check |
|---|---|---|
| Early campaign | Establish two independent damage skills and basic defenses. | Both players can defeat ordinary enemies and contribute against bosses. |
| Mid campaign | Introduce a shared Freeze, Ignite, Armour Break, or buff interaction. | The combo functions without excessive resource or timing problems. |
| Late campaign | Complete permanent rewards, Ascendancy progression, and defensive upgrades. | Both characters can survive difficult encounters and maintain damage. |
| Early Atlas | Clear manageable Waystones and establish map ownership rules. | Both characters survive regular maps and remain useful when separated. |
| Established mapping | Improve shared buffs, clear speed, and boss damage. | The duo finishes maps reliably without repeated deaths or delays. |
| Endgame bossing | Coordinate debuffs, damage windows, and survival responsibilities. | Both players understand their individual role and the boss mechanics. |
Two Independent Leveling Builds Before Dedicated Support Investment
The best early allocation prioritizes the main weapon or spell setup on each character, sufficient elemental resistance, workable recovery, and a movement skill appropriate to the class. A player can begin offering useful support through Flame Wall, Freeze, curses, or an appropriate Sceptre without converting the entire character into a non-damaging support build. This also makes campaign boss fights less dependent on one player surviving every phase.
When a boss blocks progression, identify whether the problem is damage, defense, or execution before replacing the duo's build concept. Sometimes both characters need better weapons, while in other encounters the team simply needs to stop consuming a status effect before the correct payoff attack is ready. Dedicated campaign boss completion options concern those individual progression encounters, but the team should still maintain functional builds for the content immediately afterward.
Ascendancy Trials, Permanent Rewards and Group Readiness
Ascendancy progression and permanent quest rewards must be planned for both characters. A strong partner can help with combat, but it does not make the other character's missing passive points, Spirit rewards, or defensive weaknesses disappear. Track completion separately and ensure that each player receives the progression needed for their intended build.
Before entering the Atlas, check the duo's clear and single-target damage, resistance coverage, movement speed, Spirit requirements, and sustain. A support item that grants useful party buffs may still be a poor purchase if equipping it removes attributes or defenses needed to keep its owner alive. The first endgame maps should test whether both characters remain useful under ordinary pressure before the team adds expensive content modifiers.
Duo Mapping Strategies: Clear Speed, Control and Dense Encounters
Mapping efficiency depends on how quickly the duo moves from one pack to the next without repeatedly splitting apart or leaving enemies unfinished. Fast ranged combinations work well in open layouts, while minions, persistent effects, and defensive support can be more comfortable in enclosed or high-density encounters. The best division of responsibilities gives each player a reason to participate rather than one player collecting rewards while the other performs every kill.
Map modifiers also determine whether a particular duo interaction remains reliable. A Fire-based combination may struggle against conditions that significantly reduce its effective damage, while a Freeze-dependent team loses value when it cannot establish control consistently. The characters should retain alternative attacks and enough defenses to complete the map when their ideal combo is temporarily unavailable.
Fast Mapping: Ice Shot, Grenades and Wide-Area Damage
Ice Shot and grenade-based combinations benefit from reaching packs quickly and removing enemies before they spread. The team should follow one main route, allowing the ranged player to open fights while the second character targets dangerous rares or creates explosions. Splitting into two distant lanes can reduce the value of shared auras and make coordinated status effects difficult to use.
The main adjustment for fast mapping is avoiding excessive setup. If both characters can clear an ordinary pack independently, there is no reason to perform a full boss-style rotation on every group of monsters. Reserve coordinated Freeze consumption, repeated grenades, or extensive support placement for enemies durable enough to justify those actions.
Dense Mapping: Minions, Persistent Damage and Defensive Support
Minion-centered duos can remain effective in dense encounters where enemies repeatedly enter the same combat area. The Witch's summons provide sustained attacks, while the partner clears dangerous ranged enemies or applies helpful debuffs. This combination can reduce the need for constant repositioning, although excessive minion effects and overlapping enemy abilities can make battlefield visibility harder.
Defensive support becomes more valuable when both characters are taking repeated damage or losing recovery during prolonged encounters. A useful aura, suitable Sceptre, or control effect can prevent deaths without replacing either player's core damage engine. The objective is maintaining continuous attacks and survival, not maximizing the number of buffs displayed in the party interface.
Duo Bossing: Debuff Uptime, Damage Windows and Revival Rules
Boss encounters test different qualities from ordinary mapping. Increased monster Life makes weak single-target damage more noticeable, while dangerous attacks require both players to understand positioning and recovery windows. A team whose damage depends entirely on one brief combo may struggle when the boss becomes untargetable or forces a long movement phase.
The most reliable duo bossing setup assigns responsibility for important debuffs, crowd control, and large damage windows while ensuring both characters can continue attacking independently. The Warrior–Mercenary Armour Break combination is well suited to this approach, while cold duos must coordinate when Freeze is consumed. Fire grenade teams should place their largest damage setup during predictable boss recovery windows rather than relying on a stationary target throughout the encounter.
Boss Damage Rotation: Setup, Payoff and Sustained Attacks
Start by identifying the encounter's safest damage window and which character must perform the setup. Apply the relevant debuff or status, use the intended payoff attack, then continue dealing sustainable damage while preparing the next opportunity. If the boss moves or becomes temporarily untargetable, avoid spending the entire resource pool on attacks that cannot connect.
A good rotation does not need a long list of mandatory actions. It needs a predictable opening, a meaningful payoff, and a fallback skill when the ideal sequence is unavailable. Test that sequence against a durable boss before committing major currency to equipment that only works under perfect conditions.
Party Deaths, Revivals and Endgame Portal Management
Death and revival rules depend on the activity. Campaign party play allows another player to revive a fallen teammate under the applicable conditions, while endgame map and boss encounters have additional respawn and attempt restrictions. Players should not assume that a surviving partner can always revive everyone without consequences during a pinnacle fight.
Both characters therefore need enough defense to survive ordinary mistakes. A support character with exceptional buffs but almost no personal durability can turn every boss attempt into a rescue operation. The group should also check which player owns the encounter and how the current instance handles remaining attempts before starting an expensive endgame boss.
Expanding a Duo into a Three- to Six-Player Party
PoE 2 supports parties of up to six players, but adding members changes both monster durability and the value of shared support. A successful duo cannot simply add four more damage dealers and expect the same clear speed. Larger groups benefit from defining complementary roles, avoiding duplicate auras, and making sure the combined damage is sufficient for increasingly durable enemies.
A practical group can include one or two fast damage dealers, a character focused on durable targets, and players who contribute meaningful defensive or offensive support. Every character still needs to survive the content and justify their place in the party through damage, utility, or both. Groups should also agree on map ownership, loot allocation, and whether specialized support characters are expected to participate in solo content between sessions.
Party Roles: Clear Damage, Single-Target Damage and Support
Clear damage removes ordinary enemies and maintains the mapping route, while single-target damage prevents rares and bosses from turning every encounter into a lengthy fight. Support can improve those roles through buffs, curses, crowd control, or defensive utility. In a small group, the same character may need to perform two functions rather than dedicating an entire equipment set to one narrow task.
As the party grows, the value of better support coverage increases, but duplicated modifiers become a larger problem. The 0.5 non-stacking change makes coordination between Sceptre users particularly important. Before adding another support specialist, identify which new effect they provide rather than assuming that repeating an existing bonus makes it stronger.
Damage Plus Support Without a Mandatory Aurabot
Dedicated support is a valid playstyle, but it is not required for efficient two-player progression. The current game supports hybrids that deal damage while applying a meaningful team benefit, including Tactician Banner builds, Lightning casters providing Shock, and minion builds using suitable ally-focused equipment. These options are more flexible for players who alternate between solo and grouped sessions.
A full support conversion should be treated as an endgame specialization requiring an actual partner, suitable gear, and a tested benefit. It is not a default campaign requirement. Players organizing longer group farming sessions can compare PoE 2 hourly progression sessions with their own available playtime, but neither approach guarantees particular drops or makes a poorly coordinated build combination efficient.
Duo Build Upgrades: Shared Damage Before Expensive Support Gear
Two-player builds need an upgrade plan that improves the team rather than two unrelated solo characters. Begin with the main damage skill and defensive baseline of each player, then strengthen the shared interaction once both characters can clear independently. Expensive support equipment is worth buying only when its effective benefit exceeds the damage or survival that could be gained from a simpler upgrade.
The PoE 2 Build Creation Guide covers choosing individual damage engines, Support Gems, and gear requirements. For a duo, the additional task is confirming that the two completed engines interact properly and remain functional together. The same principle applies when importing individual build files: two valid solo planners do not automatically produce a useful party setup.
| Combination | First priority | Later investment |
|---|---|---|
| Fire caster + Grenade Mercenary | Reliable independent Fire spells and Crossbow damage. | Grenade recovery, damage scaling and more consistent explosion timing. |
| Ice Shot + Fragmentation | Freeze buildup and a reliable Cold-converting payoff attack. | Higher boss damage and coordinated Freeze consumption. |
| Warrior + High Velocity Rounds | Consistent Armour Break and physical damage. | Better damage against Fully Broken Armour and stronger melee defenses. |
| Minion Witch + Stormweaver | Functional minion army and independent Lightning damage. | Useful Shock uptime, targeted debuffs and defensive aura coverage. |
| Tactician + ranged attacker | Two functioning attack setups and basic survivability. | Effective Banner and Presence bonuses without duplication. |
| Cold Druid + Deadeye | Independent Cold skills and sufficient mobility. | More reliable control, allied Cold attack bonuses and boss damage windows. |
PoE 2 Duo Build Mistakes: Duplicate Buffs, Conflicting Payoffs and Slow Partners
Most unsuccessful duos are not caused by choosing the wrong two classes. The problem is usually a mismatch between skill interactions, character movement, or gear investment. A strong solo build can become frustrating when it consumes the debuff another player requires, moves too quickly to receive allied buffs, or contributes little against the party-scaled boss.
- Building a pure support from the start: the character may become unable to progress independently or meaningfully damage bosses.
- Duplicating identical Presence modifiers: the 0.5 stacking changes prevent multiple copies of the same relevant ally modifier from providing automatic additional value.
- Consuming Freeze before the planned payoff: Fragmentation Rounds and Snipe cannot both assume exclusive use of the same Frozen state.
- Using mismatched damage debuffs: reducing an elemental resistance does not automatically improve unrelated Physical damage.
- Combining incompatible movement speeds: a very fast mapper can repeatedly leave a slower partner outside aura range and away from the action.
- Ignoring party-scaled monster Life: two undergeared characters may struggle more against bosses than either expected from solo damage tests.
- Sharing no progression plan: map ownership and individual quest rewards can leave one character behind despite completing activities together.
- Buying untested support equipment: an expensive Sceptre or Unique is not useful merely because its modifier mentions Allies.
- Copying an unreleased 1.0 build: planned class and Support Gem reworks are not part of the current 0.5.5h game.
Before changing the entire duo, identify which problem is actually occurring. If bosses take too long, test damage uptime and debuff coordination; if maps are slow, compare movement and pack coverage; if one player repeatedly dies, improve the weakest defensive layer. Solving one clear bottleneck is usually more productive than replacing both characters because an online build showcase promises a stronger combination.
PoE 2 Duo and Party Builds FAQ
Do two copies of the same ally aura stack in PoE 2? Identical applicable aura effects generally do not provide two independent stacking bonuses, and patch 0.5 specifically prevents multiple party members' identical Presence modifier types from stacking. Some individual exceptions exist, so check the exact item or skill wording before investing in duplicate support equipment.
Can two self-sufficient characters beat a carry and aurabot duo? Two damage-capable characters can be more practical for campaign progression, flexible mapping, and sessions where either player may play alone. A specialized carry and support can become powerful with sufficient gear and coordination, but it is not automatically superior for every budget or encounter.
Does party play increase boss Life? Yes. PoE 2 scales monster Life with additional players, with Unique enemies receiving substantial extra durability. Both characters should contribute real damage or enough effective support to offset that scaling.
Are the announced PoE 2 1.0 classes already available? No. The full release is scheduled for December 11, 2026. Current duo recommendations should use the Early Access skills and Ascendancies that are actually available rather than future Shadow, Duelist, or reworked class mechanics.
Conclusion
The best PoE 2 duo combines two capable characters whose skills produce a meaningful shared advantage. Fire casters and grenade Mercenaries create explosive damage combinations, cold Rangers and Fragmentation Mercenaries coordinate Freeze, and Physical Warriors enable powerful Armour Break interactions. Minion teams, Tactician hybrids, and Cold Druid pairings provide alternatives for players who value sustained damage or support utility. Build independent characters first, coordinate buffs and payoff skills second, and increase endgame difficulty only when the duo can clear and survive together reliably.