Xesht, We That Are One is the pinnacle encounter at the end of Path of Exile 2's current Breach progression. Reaching the boss is no longer a matter of placing an old Breachstone in the Realmgate. The live route starts around the Monastery of the Keepers, turns Breach activity into a Breachstone, opens a Breach Stronghold, leads through its Hives and Fortress, and ends with a Breachlord Sac offered to the Dreamer. The fight then tests movement discipline against Physical, Chaos, Fire, Cold and Lightning threats. This guide explains that complete chain, the timed Twisted Domain, Xesht's attacks, reliable positioning, recovery decisions and the current target-drop pool without presenting speculative drop rates.
The encounter rewards preparation more than blind damage. A character must first clear the timed approach, then distinguish slow tracking attacks from expanding rings, projectile fans, sequential slams and arena-edge hazards. If a character still needs campaign completion, equipment or endgame preparation before attempting this route, broader options are available through the Path of Exile 2 services hub. The strategy below remains useful whether the goal is a first completion, an Atlas unlock or repeated attempts for one build-defining item.
PoE 2 Xesht Quick Answer
Obtain a Breachstone through the Monastery quest or the repeatable Splinter and Genesis Tree process, use it to reveal a Breach Stronghold on the Atlas, complete the Hive and Fortress route, and defeat It That Was Tul and It That Was Esh for a Breachlord Sac. Take that Sac to the Dreamer beside the Genesis Tree in the Monastery of the Keepers. The resulting portal leads to the Twisted Domain, where kills extend a starting timer until the boss arena is reached. Against Xesht, stay away from the outer edge, circle slow tracking attacks, cross the expanding lightning ring deliberately, strafe the cold fan and reserve movement for repeated fist slams. Build readiness around capped elemental resistances, meaningful Chaos Resistance, physical mitigation, ailment protection, recovery and dependable single-target damage.
| Stage | Required Action | Main Failure Risk | Useful Check |
|---|---|---|---|
| Monastery Breach progression | Stabilise Breaches and establish the Breachstone route | Following an obsolete Realmgate guide | Confirm that Ailith, the Genesis Tree and the Dreamer are available |
| Breachstone creation | Use the quest reward or process a full Splinter stack through its Wombgift outcome | Expecting a Splinter stack to be the final boss key | The finished item should reveal a Breach Stronghold |
| Stronghold route | Complete Hives, protect Ailith and clear the Fortress encounter | Rushing past route objectives | Leave only after receiving the Breachlord Sac |
| Twisted Domain | Activate the opening Breach and kill efficiently to maintain time | Losing the run before entering the arena | Keep moving forward and prioritize dense, safe packs |
| Xesht fight | Read manifestations, hand attacks and overlapping sequences | Panic rolling into the next telegraph | Use one controlled response for each committed attack |
What Changed in the Current Breach Route
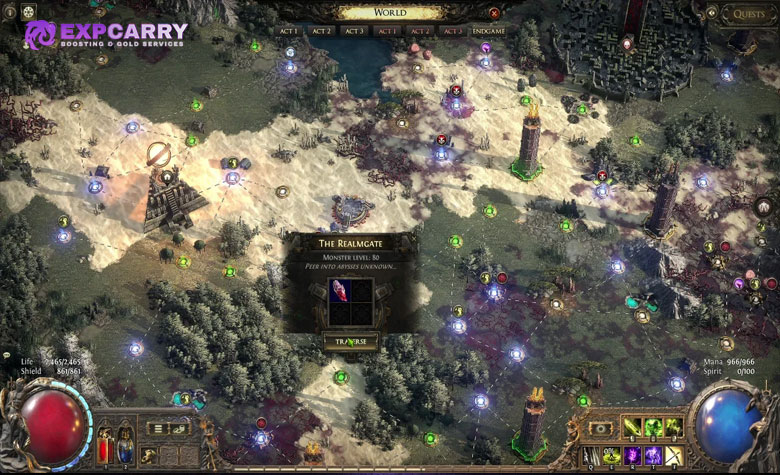
Older Xesht guides describe a Breachstone placed at the Realmgate and several selectable boss difficulties. That information belongs to the previous endgame implementation. The current Breach storyline is centered on the Monastery of the Keepers and a Breach Stronghold revealed on the Atlas. Grinding Gear Games introduced this replacement route in the official Breach endgame rework notes. A current guide should therefore treat the Breachstone as access to the Stronghold, not direct access to Xesht, and it should not promise the former difficulty ladder or its historical attempt structure.
This distinction prevents three expensive errors. Do not carry a current Breachstone to the Realmgate, do not assume that a completed Splinter stack is already the Xesht key, and do not plan rewards around an outdated difficulty selection. The live chain has more intermediate objectives, but it is also easier to troubleshoot because every item has a specific destination: the Breachstone belongs on the Atlas, while the Breachlord Sac belongs at the Dreamer.
Complete Xesht Access Chain
The first route begins when Breach content directs the character toward the Monastery of the Keepers, located south of the Atlas starting region. Ailith introduces the storyline and the nearby Breach maps. Stabilising five Unstable Breaches advances the introductory sequence and supplies the quest Breachstone. Later runs use repeatable Breach materials rather than repeating that one-time quest reward. The official Ancients Breach overview provides the developer-facing summary of Hives, the Fortress and Xesht's domain.
| Access Item or Objective | Where It Comes From | Where It Is Used | What It Unlocks |
|---|---|---|---|
| Quest Breachstone | The introductory Monastery Breach sequence | The Atlas | A Breach Stronghold and its internal map route |
| Revelatory Wombgift | A full stack of Breach Splinters | The Genesis Tree | The repeatable Breachstone creation step |
| Breachstone | The quest or the Genesis Tree process | The Atlas interface | Breach Hives, Sky Hives and a Fortress path |
| Breachlord Sac | The Fortress encounter against It That Was Tul and It That Was Esh | The Dreamer in the Monastery | The portal to the Twisted Domain |
For a first attempt, advance the route in order and verify the reward item before leaving each instance. The access chain is long enough that a mistaken assumption at the Stronghold becomes more costly than a failed boss pull. A player returning from an earlier version should also reopen the relevant Atlas and Monastery interfaces instead of relying on an old stash item or remembered Realmgate sequence.
Explore services related to this guide, selected from our Path of Exile 2 catalog.
View All Path of Exile 2 Services


Quest and Repeat Breachstones
The quest Breachstone teaches the access loop, but repeat access depends on Breach Splinters and the Genesis Tree. Breach monsters can drop Splinters while the player works through eligible content. A complete stack of 300 converts into a Revelatory Wombgift. That Wombgift is taken to the Genesis Tree, where it produces the Breachstone used to expose another Stronghold. The material chain matters because neither individual Splinters nor the Wombgift opens Xesht directly.
Store the stages separately if several runs are being prepared. That makes it easier to see whether the bottleneck is Splinter acquisition, Tree processing, Stronghold completion or Breachlord Sac supply. It also stops a player from pricing an attempt as though the Breachstone were the last step. For long-term farming, count the entire chain and the time spent inside the Stronghold when evaluating whether a Xesht run suits the character.
Breach Stronghold, Hives and Fortress
Using the Breachstone reveals maps inside a Breach domain on the Atlas. The route includes Breach Hives, Sky Hives and Sky Fortresses rather than one direct portal to the pinnacle arena. Hive objectives involve breaching walls and protecting Ailith while the route advances. The Fortress culminates in the paired encounter with It That Was Tul and It That Was Esh. Completing that fight grants the Breachlord Sac needed for Xesht.
Treat the Stronghold as part of the boss attempt, not as disposable travel. Keep enough damage for objective pressure, enough clear speed for dense Breach monsters and enough recovery to avoid consuming all resources before the Fortress. Check the map objective and Ailith's position before chasing stragglers. When walls or defence events control progression, completing the objective is more valuable than clearing every remote monster.
| Stronghold Section | Primary Goal | Positioning Rule | Resource Rule |
|---|---|---|---|
| Breach Hive | Advance the route and complete its Breach objectives | Fight near the active objective instead of pulling into cleared space | Use short cooldowns, but preserve the emergency layer |
| Sky Hive | Handle elevated route pressure and defend Ailith when required | Keep an exit lane around dense packs | Refill charges from safe density before moving on |
| Sky Fortress | Defeat It That Was Tul and It That Was Esh | Separate overlapping elemental telegraphs before committing damage | Arrive with ailment answers and a recovery plan |
| Fortress reward | Secure the Breachlord Sac | Confirm the item before exiting | Move it to a deliberate boss-preparation tab |
Breachlord Sac and the Dreamer
The Breachlord Sac is the actual Xesht access key. Return with it to the Monastery of the Keepers and find the Dreamer's chamber beside the Genesis Tree. The nearby passage may look closed until the required access state and item are present. Offer the Sac to the Dreamer to open the Twisted Domain portal. This is the decisive point at which flask setup, resistances, charms, support choices and inventory space should already be finalized.
An advanced Genesis Tree route can also interact with Breachlord Sac acquisition through a Lavish Wombgift while Reappropriated Offspring is allocated. Because Tree outcomes and character plans vary, this should be treated as an optional specialization route, not the baseline instruction for a first kill. The deterministic Fortress path is easier to explain, verify and reproduce. Players still assembling a functional endgame character can use a PoE 2 starter build progression option as contextual help before risking a completed access chain.
Twisted Domain Timer and Route
The Twisted Domain begins as a timed Breach run rather than an immediate boss room. Interact with the Breach hand near the start to begin the event. The opening clock is 45 seconds. Killing monsters adds time, with rare enemies providing more time than ordinary targets. The practical objective is not total extermination; it is to reach Xesht's arena before the timer expires while killing enough efficient packs to keep the clock alive.
Move along the main route and avoid long reversals for isolated enemies. A strong domain build kills forward, uses area damage on packs already blocking the route and evaluates rare monsters by safety as well as time value. If a rare has defensive modifiers that would consume the remaining clock, continuing toward the next dense group may be better. Monsters killed during the approach contribute to the domain's pooled reward, which resolves at the end, but they do not provide Breach Splinters inside this area. Characters also do not gain or lose experience in the domain, so the run should be judged by access, boss completion and loot rather than experience efficiency.
| Timer Situation | Correct Priority | Common Trap |
|---|---|---|
| Comfortable time and dense packs | Kill while moving toward the arena | Stopping to loot or backtrack before the route resolves |
| Low time near ordinary enemies | Use fast area damage and continue forward | Focusing one durable target while the clock expires |
| Low time beside a dangerous rare | Judge whether its time gain exceeds its kill time and risk | Treating every rare as mandatory |
| Route appears to split | Follow visible progression and avoid cleared branches | Exploring for full coverage during a timed run |
| Arena entrance reached | Enter with movement and recovery resources ready | Arriving after spending every cooldown on the approach |
Xesht Readiness Checklist
Xesht's base threat profile combines Physical and Chaos damage with elemental manifestations from Xoph, Tul and Esh. Cap Fire, Cold and Lightning Resistances for the endgame penalty, then add meaningful Chaos Resistance and a physical defence layer appropriate to the build. Freeze mitigation is valuable against Tul's cold projectiles, while shock reduction or immunity limits the danger of Esh's lightning patterns. Reliable movement speed, a responsive dodge roll and recovery that does not depend on uninterrupted attacking are equally important.
The quest encounter is currently level 79, while the repeatable version is level 82. Xesht is resistant to Fire, Cold and Lightning, so elemental builds should verify that their penetration, Exposure or resistance-ignoring plan works during a boss fight. There is no honest universal Life, Energy Shield or damage-per-second threshold for this encounter. A large effective pool can still fail to repeated ailments, while a high-damage character can lose the domain timer or roll into sequential slams. Readiness means that ordinary mapping does not exhaust flasks, the timed approach can be cleared without detours, and the build can continue dealing single-target damage after moving away from a telegraph. Official gameplay balance notes for the current branch include broader pinnacle resistance adjustments, which is another reason to avoid copying historical damage requirements.
| Readiness Area | Minimum Practical Goal | Self-Test Before the Sac |
|---|---|---|
| Elemental defences | Capped Fire, Cold and Lightning Resistances | Verify values in the endgame state, including any conditional penalties |
| Chaos and Physical defence | Enough mitigation or avoidance to survive imperfect execution | Fight comparable high-tier threats without being forced to retreat after every hit |
| Ailment control | A dependable answer to Freeze and Shock | Confirm the charm, passive or gear condition actually activates when needed |
| Domain clear | Fast forward-moving pack damage | Clear dense Breach content without chasing individual enemies |
| Boss damage | Sustainable output during short safe windows | Maintain damage after repeated repositioning rather than only during a stationary burst |
| Recovery | Life or Energy Shield restoration available during movement | Recover while disengaged instead of relying entirely on hit-based effects |
Arena Positioning
Start from a middle distance with open space on both sides. Xesht uses slow-tracking effects that reward circular movement, but the arena edge can also host hand portals and repeated slams. Standing directly under the boss makes visual reads harder, while hugging the perimeter reduces escape choices. The most reliable default is an offset position that keeps Xesht, the center and at least one open lane visible.
Move with intent rather than continuously rolling. Walk or strafe away from tracking aim, then roll when a ring, slam or committed projectile requires its invulnerability and displacement. After every major attack, return toward usable space instead of continuing to drift outward. Ranged builds should not stretch to maximum range if that hides the boss animation; melee builds should exit through the nearest open side and then re-enter after the effect resolves.
Xoph, Tul and Esh Manifestations
Xesht invokes earlier Breachlords as elemental attacks. Their visual language is more useful than memorizing voice lines because overlapping audio can become unclear. Xoph creates a descending fire orb with a dangerous landing area. Tul releases a fan of cold projectiles toward the player's current direction. Esh creates an expanding lightning circle that resolves as outward-moving rings. Each attack asks for a different movement response, and confusing those responses causes many first-attempt deaths.
| Manifestation | Visual Read | Safe Response | Frequent Error |
|---|---|---|---|
| Xoph Sun Orb | A fiery orb is directed toward a ground destination | Leave the landing zone and do not return before the impact finishes | Continuing a cast because the projectile appears slow |
| Tul Ice Flurry | A spread of cold projectiles forms toward the player | Strafe across the fan or move through a visible gap | Retreating in the same line as the projectiles |
| Esh Shock Nova | A large circle expands before erupting into lightning rings | Time one deliberate crossing through the ring | Running outward beside the ring until the arena edge removes all space |
| Tul and Esh overlap | The cold fan and expanding lightning pattern appear together | Choose a gap, cross the ring once and continue lateral movement | Dodging the ice first without preserving a route through the lightning |
During the Tul and Esh combination, solve the ring first in the movement plan even if the cold fan is visually louder. A ring crossing has a narrower timing requirement, while the fan usually leaves lateral gaps. Freeze protection widens the recovery margin if a cold projectile clips the character, and shock protection reduces the chance that a small lightning mistake magnifies the next hit.
Hand, Beam and Portal Mechanics
Xesht's hand attacks alternate between slow tracking, rapid release and ground commitment. Hand Shot channels two purple flames that track before being flicked toward the ground in a short series. Hand Beam forms a tracking energy mass and then releases a fast shockwave. Crushing Fist opens an arm portal above a target area before the fist slams down. Hand Slam follows the player with a giant open hand and commits after tracking. Edge portals add more slam lanes, so the safest response changes according to whether the attack is still aiming or has already locked.
| Attack | Recognition | Positioning Response | Damage Window |
|---|---|---|---|
| Hand Shot | Two purple flames track before repeated ground shots | Circle at close or middle distance and keep moving through every release | Use mobile damage; stop only after the last shot lands |
| Hand Beam | A single energy mass follows slowly before a quick release | Move around Xesht and dodge after the aim commits | Attack while walking if the build can maintain its arc |
| Crushing Fist | An arm portal appears over a marked ground area | Leave the marker with one clean movement | Resume only after the fist retracts and the ground is clear |
| Hand Slam | A giant open hand shadows the player before dropping | Keep moving, wait for the lock and then step or roll out | Do not channel while the hand is still tracking |
| Clap Cleave | Xesht repositions and closes the wing-like hands into a two-way slice | Track the reappearance and move across the line rather than along it | Commit damage after both directions of the cleave pass |
| Four-fist sequence | Arm portals deliver four consecutive slams | Move once per impact and preserve an open path for later fists | Use only attacks that do not trap the character in place |
The four-fist sequence punishes early roll spam. If every movement charge is spent on the first marker, later portals become unavoidable. Short steps are often enough when the marker is read early. Reserve the roll for a poor angle, an overlap with another attack or the final correction after aim commitment.
Most Dangerous Overlaps
The encounter becomes difficult when individually simple attacks share the same escape lane. Esh's ring can force an inward crossing while Tul's fan discourages a straight path. A tracking hand may push the player outward just as edge portals become active. Repeated fists can also cover the position chosen to avoid a manifestation. Surviving these situations depends on recognizing which mechanic has the tightest deadline.
- For Esh plus Tul, identify a projectile gap and cross the lightning ring once instead of retreating with it.
- For a tracking hand plus an edge portal, arc toward the center and wait for the tracking attack to lock before rolling.
- For sequential fists plus a ground projectile, use short diagonal steps so later markers do not line up across the whole arena.
- For Xoph's landing zone plus a beam, leave the fire area first while circling the beam aim, then dodge the release.
- For any overlap that removes sight of Xesht, prioritize clear space and visibility over one more damage cycle.
A useful priority order is committed impact, expanding ring, repeated slam, projectile lane, then damage uptime. That order is not a rigid script, but it prevents greed from outranking immediate survival. If two effects appear simultaneous, choose movement that solves both before pressing a long animation skill.
Positioning by Build Type
Melee, ranged and minion builds see the same attacks from different angles. Melee characters gain clear access to Xesht's side but can lose sight of hand portals. Ranged characters see more of the arena yet often drift into the perimeter. Minion builds retain damage while moving, though minion clutter can obscure ground markers. The correct position is therefore based on visibility and exit lanes rather than nominal weapon range.
| Build Type | Default Position | Damage Rule | Main Adjustment |
|---|---|---|---|
| Melee attack | At Xesht's side with a route toward open middle space | Use short attack cycles and exit before tracking effects commit | Do not remain behind visual clutter when portals appear |
| Ranged attack or spell | Middle distance on an offset angle | Reposition between casts rather than extending to the wall | Move inward after every outward dodge |
| Damage over time | Middle distance with broad circular movement | Refresh during safe windows and let duration cover mechanics | Avoid refreshing early if it costs the movement needed for a ring |
| Minions | Where the boss animation and floor remain visible | Spend most attention on personal survival and minion uptime | Move if minion bodies hide a fist marker |
| Totem or deployable | Place damage away from the intended escape lane | Refresh tools before a pattern, not during its narrowest timing | Never cross the arena only to save one temporary object |
How to Recover After a Mistake
After taking a major hit, stop treating the next second as a damage window. Move toward clean middle space, identify the current attack, restore Life or Energy Shield, clear the relevant ailment and only then resume output. Running blindly around the perimeter often converts one mistake into contact with a portal slam. Recovery is a positioning action as much as a flask action.
If a Freeze or heavy Slow disrupted the intended route, use the ailment answer first and choose the shortest exit from the active telegraph. If Shock remains after a lightning hit, respect the amplified danger of the next Physical or Chaos attack. If movement resources are depleted, walk around slow tracking effects and save the next roll for a committed ring or slam. The encounter does not require immediate retaliation after every mechanic, so trading an attack cycle for a stable position is usually correct.
Do not rely on historical claims about a fixed number of revivals or the former difficulty system. Check the active instance and portal state presented by the current game client. Plan each entry as valuable, and use any remaining attempt to correct one identified failure rather than changing the whole build impulsively.
Xesht Rewards and Target Drops
Xesht's named pool supports several specialized build directions rather than one universally best reward. The encounter can drop Breach-themed unique items, a Reliquary Key and Lineage Supports associated with Breachlords. Availability does not establish a useful farming rate, and no fixed percentage is presented here. Target value depends on the build, item roll, current economy and whether the player can complete the full access loop consistently.
| Target Drop | Item Type | Build Use Case | Evaluation Question |
|---|---|---|---|
| Beyond Reach | Visceral Quiver | Bow attacks combining physical scaling, extra Chaos damage and ailment interactions | Does the build benefit enough from its conversion package to accept the attack-speed tradeoff? |
| Xoph's Blood | Amber Amulet | Fire builds using Life, Fire Resistance and reduced enemy Fire Resistance in Presence | Can the build keep important targets inside Presence? |
| The Pandemonius | Lapis Amulet | Cold hit builds using penetration and Blind against chilled enemies | Does the skill chill bosses reliably enough to activate the package? |
| Choir of the Storm | Jade Amulet | Lightning critical builds using Lightning Bolt and resistance interaction | Is critical frequency high enough to justify the amulet slot? |
| Hand of Wisdom and Action | Spiral Wraps | Dexterity and Intelligence attack stackers seeking speed and added Lightning damage | Do the current attributes outperform a conventional glove package? |
| Skin of the Loyal | Garment | Characters converting uncapped resistances into Armour, Evasion, Energy Shield and ailment-threshold scaling | Can gear preserve the required uncapped resistance profile without weakening other layers? |
| Controlled Metamorphosis | Diamond | Passive-tree routing that allocates passives within a variable ring without normal connections | Does the revealed ring capture enough valuable passives to offset its resistance penalty? |
| Xesht's Reliquary Key | Reliquary Key | Access to its associated reliquary reward pool | Is opening the key preferable to its current trade value? |
Do not choose a target only because it is rare or famous. Controlled Metamorphosis is a layout item whose value depends on the ring and the planned passive tree. Hand of Wisdom and Action needs genuine attribute investment. The elemental amulets need the corresponding damage and ailment conditions. A target table is therefore a build filter, not a promise that every listed item is profitable on every run.
Lineage Support Targets
The current Xesht reward family also includes four Breachlord-themed Lineage Supports. Each adds an extra-Chaos direction while allowing that Chaos contribution to participate in a specific ailment or debuff. These are narrow build tools, so compatibility must be checked against the active skill, damage tags, ailment plan and support restrictions before assigning value.
| Lineage Support | Damage Theme | Build Target |
|---|---|---|
| Xoph's Pyre | Fire gained as extra Chaos, with Chaos contributing to Ignite and Flammability | Fire skills that deliberately scale the supported ailment package |
| Tul's Stillness | Cold gained as extra Chaos, with Chaos contributing to Freeze buildup | Cold hits seeking stronger control through Freeze |
| Esh's Radiance | Lightning gained as extra Chaos, with Chaos contributing to Shock | Lightning skills that can exploit reliable Shock application |
| Uul-Netol's Embrace | Physical gained as extra Chaos, with Chaos contributing to Armour Break | Physical attacks built around Armour Break uptime |
A Lineage Support should be tested as part of the complete skill link, not compared by its headline alone. The extra damage portion, ailment contribution, opportunity cost and current support set all matter. A support that transforms one optimized setup may be inefficient for another skill sharing the same element.
Breach Atlas Progression After Xesht
The current Breach Atlas progression is not the old loop in which Xesht awarded an Otherworldly Book of Knowledge for a selectable difficulty. Breach Atlas points are earned through the Monastery region's map progression. Defeating the Breach pinnacle boss instead satisfies the boss-kill condition for locked Breach passives, including Tear Open the Rift and Sole Purpose. This makes a first kill strategically useful even when its item drop is not the player's preferred target.
Choose post-kill passives according to the entire Breach loop. More access materials have little value if the character cannot finish Strongholds efficiently. Stronger domain rewards do not help a build that regularly loses the timer. Build the branch around the actual constraint: material generation, map clear, Stronghold objectives, domain routing or boss consistency.
Repeat Farming Logic
A repeatable Xesht plan begins with the cost of replacing every consumed stage. Track Splinters, Genesis Tree processing, Stronghold completion, the Breachlord Sac, the timed domain and the boss fight as one cycle. A fast kill does not make the farm efficient if Hives or the Fortress are unstable. Conversely, a slower boss can still be a sound target when the full route is reliable and several reward outcomes fit the build or market plan.
| Farm Constraint | Best Improvement | Do Not Assume |
|---|---|---|
| Splinter supply | Improve eligible Breach clear and Atlas specialization | That one short sample establishes a stable material rate |
| Stronghold completion | Add clear, objective control and Fortress ailment protection | That boss damage alone solves the route |
| Domain timer | Increase forward-moving area damage and route discipline | That full clearing produces the best access consistency |
| Xesht deaths | Review the exact attack and preserve central space | That more damage fixes unread mechanics |
| Target-drop variance | Set a budget and value several compatible outcomes | Any guaranteed unique, key, support or fixed return rate |
For players who prefer assisted material farming or supervised progression instead of committing immediately to a full boss purchase, a PoE 2 hourly farming service is the relevant contextual option. Regardless of the method, set a stop condition before spending access items. Prices, demand and item values can change, while the mechanics of disciplined route planning remain useful.
Common Xesht Failure Points
Most failed attempts can be assigned to access confusion, timer management, defensive preparation or one repeated positioning error. Identifying the category is more productive than replacing several items after every loss. Record which attack caused the failure, where the character stood and whether the movement resource was available.
- Using an obsolete guide and trying to place the Breachstone in the Realmgate.
- Confusing the Breachstone with the Breachlord Sac and skipping the Stronghold chain.
- Stopping for isolated monsters until the Twisted Domain timer expires.
- Entering with capped elemental resistances but neglecting Chaos damage, Physical hits, Freeze or Shock.
- Running outward with Esh's expanding ring instead of crossing it once.
- Rolling before a tracking hand commits and being hit at the roll destination.
- Spending every movement option on the first fist in a repeated sequence.
- Camping the arena perimeter until hand portals remove the remaining escape lanes.
- Assuming a named unique or Lineage Support has a fixed drop rate or guaranteed profit.
- Expecting the former difficulty ladder, old boss books or a historical revival count.
Correct one repeatable mistake at a time. If the domain timer fails, improve route speed before changing boss defences. If Tul freezes the character, repair ailment protection before adding damage. If Esh's ring causes the loss, practice a deliberate crossing and keep central space. A clear diagnosis preserves currency and makes the next Sac more valuable.
Final Verdict
Xesht is a complete Breach progression test rather than an isolated arena encounter. The reliable route is Breach activity near the Monastery, a quest or repeat Breachstone, the Stronghold and Fortress, a Breachlord Sac at the Dreamer, the timed Twisted Domain and finally the pinnacle fight. Enter with balanced elemental, Chaos, Physical and ailment defences; move from an offset middle position; cross Esh's ring deliberately; strafe Tul; leave Xoph's landing zone; and answer each hand slam only after its aim becomes clear.
For a first kill, prioritize access accuracy and survival over theoretical speed. For repeat farming, measure the entire chain and value several compatible outcomes instead of assuming a drop rate. That approach remains useful as prices move and balance changes, because it is built around verified access steps, readable mechanics and a target list filtered by actual build needs.