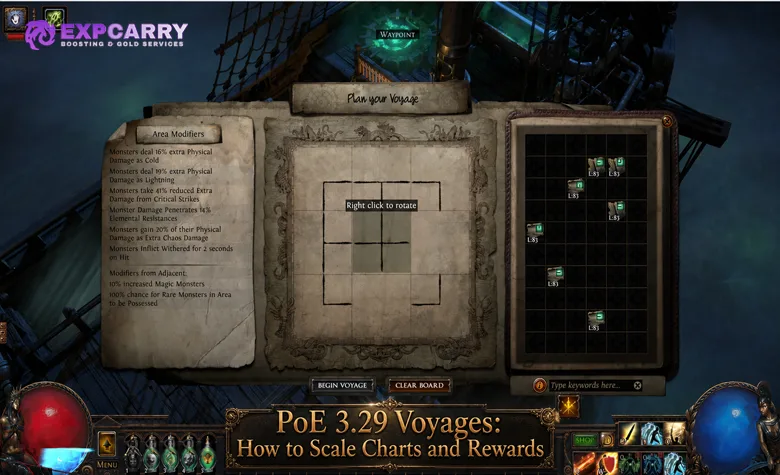
Voyages are the repeatable scaling layer of the Curse of the Allflame league. A normal Chart introduces an area and its reward, while the Voyage Board lets you connect completed Charts, apply their modifiers to one another, and revisit their content as one larger seafloor expedition. Filling every available position with the hardest options is rarely the right move. A good layout gives valuable Charts useful bonuses without creating more danger than your character can handle.
Path of Exile 3.29 launches on July 24, 2026 PDT. Exact modifier values, reward weights, market prices, and the best layouts will become clearer after players test the league.
How PoE 3.29 Voyages Work
A Voyage begins with individual seafloor expeditions. Completing those areas records Charts that can later be connected on the Voyage Board aboard The Sovereign. The official PoE 3.29 patch notes state that a Voyage revisits the connected Charts, grants access to their rewards again, and provides additional ways to amplify those rewards.
- Find and complete individual Chart expeditions.
- Return to The Sovereign and open the Voyage Board.
- Inspect each Chart modifier before committing to a layout.
- Check the current Corruption Currents around the board.
- Connect compatible Charts, using up to nine in one Voyage.
- Run the combined seafloor excursion and clear the connected Chart content.
- Secure the rewards you can safely reach instead of extending a dangerous run without a plan.
A Chart is both playable content and a board component. Its position matters because some effects apply only to nearby Charts, whereas others modify the entire Voyage. Completing a Chart once creates the opportunity to revisit its content through the larger Voyage, but that second run can behave differently because of the board layout.
Connected Charts grant access to their rewards again, but the pre-launch material does not give a fixed number of repeat attempts or an exact duplication multiplier. Read the live Chart and Voyage tooltips before committing a rare destination.
How to Build a Voyage Board That Makes Sense
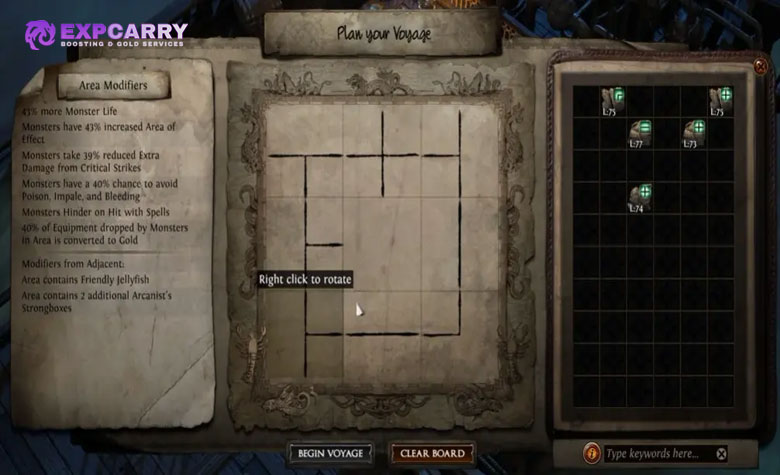
Build the board from the reward target outward. Choose the Chart you most want to revisit, identify every adjacent or global effect that supports it, and only then add optional difficulty. This prevents a visually full board from becoming a collection of weak or conflicting modifiers.
| Modifier type | What it affects | Placement approach |
|---|---|---|
| Adjacent Chart modifier | Only Charts directly connected to it | Place it beside the destination or reward Chart you want to improve |
| Voyage-wide modifier | Every relevant area in the Voyage | Use a flexible position and reserve premium adjacency spaces for local effects |
| Reward conversion | Changes a specified category of drops or rewards | Pair it with Charts that produce the category named by the modifier |
| Monster empowerment | Raises encounter pressure and may improve the associated reward opportunity | Add it only after checking whether the build can survive the combined difficulty |
| Extra encounter | Adds another event, enemy type, or destination | Value it according to clear speed, reward demand, and the rest of the board |
A conversion modifier can be excellent when the target Chart produces many matching drops and nearly irrelevant when it does not. Likewise, an enemy empowerment effect is only profitable if the character finishes the Voyage reliably. The official Curse of the Allflame page presents the board as a planning system in which Chart effects can influence adjacent areas or the expedition as a whole.
- Select the highest-value special destination or reward effect available in your Chart pool.
- Use that Chart as the anchor of the layout.
- Place compatible adjacent modifiers next to the anchor.
- Fit Voyage-wide modifiers into positions that do not consume valuable local connections.
- Compare the total monster pressure with your defenses, damage, recovery, and mobility.
- Remove the least useful danger modifier when several threats overlap.
- Recheck every connection and Corruption Current before starting.
Corruption Currents are shifting effects around the board. They are randomized for each new Voyage and alter adjacent Charts, so a layout that worked previously may not be optimal on the next board. Read every current, identify which positions it reaches, and place the rarest or most valuable interaction first. A strong adjacency space occupied by a mediocre Chart cannot support the destination that actually matters.
A Voyage can contain up to nine Charts, but maximum capacity is not automatically maximum efficiency. Leave out a low-impact Chart when it adds danger without improving the target reward. Judge the finished layout by the rewards you can complete and extract consistently, not by the number of occupied positions.
How to Scale Charts and Voyage Rewards
Voyage scaling combines repeat access, board synergy, and controlled difficulty. The connected expedition lets you claim Chart rewards again, while modifiers can change drops, add encounters, help the player, or empower enemies. The safest method is to scale one valuable interaction at a time and stop before failure risk rises faster than the expected return.
Choose One Reward Plan
Decide what the board is trying to produce before arranging it. Chart effects can transform equipment drops into Gold, summon friendly jellyfish, empower monsters with Wildwood Wisps, release Tormented Spirits, or introduce new encounters. These effects serve different purposes, so combining all of them without a target can waste strong Charts.
Start with the effect that determines the desired reward. Add adjacent bonuses that directly support it, then place Voyage-wide modifiers in the remaining flexible spaces. If a conversion names a specific drop category, connect it to content capable of supplying that category rather than assuming it improves everything.
Separate Rewards From Danger
Reward modifiers change what you receive or add opportunities to receive more. Difficulty modifiers raise encounter pressure, sometimes as part of a stronger reward setup. Evaluate them separately. First determine whether an effect supports the anchor Chart, then decide whether the added monster power is acceptable.
Do not stack several untested sources of monster empowerment in the first attempt. Add one, complete the Voyage, and record clear time, deaths, stalled rare monsters, and missed objectives. If a modifier repeatedly prevents completion, removing it can improve real returns even when its reward text looks attractive.
Scale Consistency Before Maximum Difficulty
A board that your character clears reliably is more useful than an ambitious layout that ends before its premium encounters. Stable recovery, movement, and sustained damage preserve more value than a theoretical maximum multiplier attached to failed runs.
Players who need a stronger character foundation before increasing Voyage difficulty can use a custom PoE build as the single build-support option referenced in this guide. Otherwise, lower the board pressure and improve the weakest part of the character before risking another rare Chart.
Explore services related to this guide, selected from our Path of Exile catalog.
View All Path of Exile Services
Special Charts and Reward Destinations
Special Charts can reveal destinations that are more distinctive than a standard seafloor area. Their reward identity makes them natural anchor pieces, especially when an adjacent modifier directly supports their content. Their exact value will depend on the live reward pool and league economy.
| Destination | What is known | Planning priority |
|---|---|---|
| Abandoned anchor field | A special location associated with hidden treasure | Inspect reward modifiers before surrounding it with adjacent effects |
| Lost Kalguuran shipment | A recoverable shipment found through a special Chart | Use it as an anchor when its displayed rewards match the farming goal |
| Sunken Abyssal pit | An Abyss-themed underwater destination | Prepare for the encounter type and avoid careless difficulty stacking |
| Other unique destinations | Additional special areas are part of the Voyage pool | Read the live tooltip because exact rewards may differ by Chart |
The official Curse of the Allflame announcement presents these destinations as examples rather than a complete loot table. Do not assign a fixed profit value to a special Chart until the live economy establishes demand and supply.
When several special Charts are available, compare their displayed rewards with the adjacent effects on the current board. A theoretically rarer destination is not automatically the right anchor if the Corruption Currents and support modifiers favor another Chart.
Safe Progression From Early Charts to Scaled Voyages
Early Voyages should teach the board rather than test the maximum possible difficulty. Begin with a clear reward target and a manageable set of modifiers. Add complexity only after the character completes that setup without deaths, long stalls, or abandoned objectives.
- Run basic Charts to learn their area flow and encounter demands.
- Create a simple Voyage around one useful adjacent interaction.
- Add a Voyage-wide benefit without introducing several new dangers at once.
- Test one monster empowerment effect on a replaceable layout.
- Use special destinations only when the supporting layout and character are ready.
- Keep notes on completion time and actual rewards before scaling further.
A reliable Voyage character should clear packs quickly, recover after repeated hits, handle resistant rare monsters, and retain enough single-target damage for added encounters. Cap elemental resistances, maintain dependable life or energy shield recovery, use practical movement speed and mobility, and carry answers to ailments or disabling effects shown by the content.
Clear speed matters only while the build remains stable. A defensive upgrade that turns failed Voyages into completed ones can improve returns more than another small damage increase. When one dangerous rare monster can stall the expedition, reduce board difficulty until damage and recovery catch up.
Common Voyage Planning Mistakes
The largest planning errors come from ignoring modifier scope, copying a previous layout after the currents change, or treating early profit claims as fixed facts. Most of them can be avoided by checking the entire board once more before starting the Voyage.
- Do not fill every available position without checking what each modifier affects.
- Do not place an adjacent bonus where it touches the wrong Chart.
- Do not use a conversion beside content that produces few relevant drops.
- Do not stack Wildwood Wisps, Tormented Spirits, and other pressure before testing them separately.
- Do not copy the last board without rereading the Corruption Currents.
- Do not risk a rare destination on a build that struggled with easier Charts.
- Do not assume a pre-launch profit estimate is guaranteed.
Voyages belong to the 3.29 challenge league rather than the current core game. According to the official Curse of the Allflame FAQ, its mechanics, content, rewards, and bosses are exclusive to the challenge league during its active period. Existing Standard characters therefore do not provide access to the current league-specific Voyage system.
Before starting a board, choose one target, read every modifier scope, inspect all Corruption Currents, make sure conversions match the affected content, and remove danger that does not support the reward plan. Recheck the layout whenever the currents change.
Final Thoughts
Voyage planning should change with the board in front of you. Save premium adjacency for effects that improve a chosen destination, place global bonuses where they do not block those connections, and raise the danger only after the previous setup becomes routine. During the first days of 3.29, record which combinations you complete and what they actually return. That personal result log will be more useful than copying a high-risk layout built for another character or a different market.