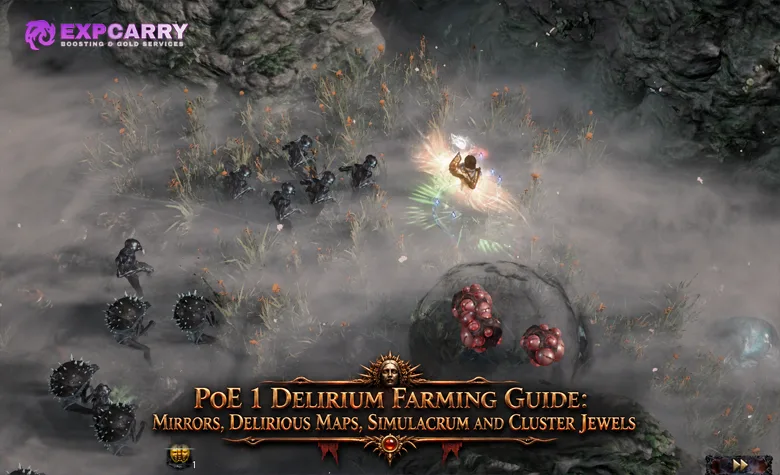
Delirium farming in Path of Exile 1 offers three distinct endgame strategies: clearing temporary Mirrors of Delirium, running permanently Delirious Maps, and surviving the Simulacrum. Each approach rewards different strengths. Mirrors favor fast movement and efficient map clearing, Delirious Maps provide controlled reward categories without a moving fog timer, and Simulacrum challenges characters through 15 increasingly difficult combat waves. The primary rewards include Simulacrum Splinters, Delirium Orbs, Cluster Jewels, currency, and valuable Unique Jewels such as Voices.
Patch 3.30: Covens of Umbra, released November 13, 2026, substantially changes the farming setup. Delirium Orbs now reforge Rare Maps with 5–50% Delirious modifiers instead of applying the old 20% enchantment layers. The Atlas Passive Tree now focuses on Mirror spawn chance, while higher-level areas offer improved opportunities for Delirium Orbs, Cluster Jewels, bosses, and Splinters. This guide explains the current LIVE mechanics, map preparation, combat requirements, reward targeting, Simulacrum progression, and how to evaluate Cluster Jewels before selling or crafting them.
Short answer: Start Delirium farming with Mirrors on open Atlas maps, then move to Delirious Maps using the new 3.30 Delirium Orb system. Collect 300 Simulacrum Splinters to open the 15-wave Simulacrum, and evaluate Cluster Jewels by their passive count, base type, item level, and modifiers rather than selling every Jewel at its base price.
PoE 3.30 Delirium Farming: Mirrors, Delirious Maps and Simulacrum
Delirium creates additional enemies and strengthens existing monsters while the area is affected by its fog. The further a player progresses into the mechanic, the more demanding the encounters become, with stronger enemies and additional rewards. However, the three farming methods have different entry requirements, progression rules, and risks, so they should not be treated as interchangeable versions of the same encounter.
The official Path of Exile 3.30 patch notes introduce the new Delirium Orb rules, higher-level reward improvements, and major Atlas changes. These adjustments make ordinary Mirror farming a lower-investment starting point, while prepared Delirious Maps offer more control over reward categories. Simulacrum remains a separate endgame arena requiring its own access item.
| Method | Access | Main rewards | Recommended character |
|---|---|---|---|
| Mirror of Delirium | Random map encounter, Atlas chance bonuses, or eligible map modifier. | Simulacrum Splinters, Delirium Orbs, Cluster Jewels, Delirium rewards. | Fast mapper with strong area damage and movement. |
| Delirious Maps | Rare Maps modified using Delirium Orbs. | Selected reward categories, Cluster Jewels, Splinters, additional monster loot. | Mapping build capable of handling sustained Delirium difficulty. |
| Simulacrum | Simulacrum item assembled from 300 Splinters or acquired through trade. | Wave rewards, Cluster Jewels, Delirium-exclusive Uniques. | Durable endgame build with sustained clearing and boss damage. |
Choose the method according to the character's strongest abilities. A fast mapper may earn more from repeated Mirrors than from slow Simulacrum attempts, while a powerful defensive build can benefit from wave-based encounters without needing to race moving fog. Delirious Maps sit between those approaches, offering consistent map-wide difficulty and selectable rewards at the cost of Delirium Orbs.
Mirror of Delirium Farming: Fog Movement, Monster Kills and Reward Progress
A Mirror of Delirium appears near the beginning of an eligible area. Passing through it releases moving fog that spreads across the map, creating Delirium monsters and strengthening enemies caught within its influence. Kills contribute toward the reward display, while progressing through the area increases the difficulty of the encounter. Unlike permanently Delirious Maps, the fog eventually dissipates, so the player's route and clear speed directly affect the rewards obtained.
The most efficient Mirror farming builds move toward the map's objective while killing dense monster packs. Standing still to fight isolated enemies can cause the fog to move beyond the character, while excessive backtracking risks leaving the active encounter. The aim is to maintain enough momentum to reach valuable monsters, collect reward progress, and ideally confront the map boss while the fog remains active.
Delirium Fog Routes: Open Maps, Pack Density and Map Bosses
Open or relatively linear maps usually work better for Mirror farming than layouts with multiple dead ends. The fog expands outward from its starting point, making a route that steadily advances through monster packs easier to manage than one requiring repeated returns to earlier rooms. Choose maps where your build can reach the boss efficiently without abandoning large groups of monsters that contribute to Delirium reward progress.
Pack density matters because more enemies provide additional opportunities to advance the reward display. However, a map containing many difficult monsters is not automatically profitable if the character spends too long killing them. Focus on layouts where the balance between monster density, movement, and survival produces reliable completed encounters rather than occasional exceptional runs.
Faster Fog Expansion and Higher-Level Rewards in Patch 3.30
GGG increased the initial expansion speed of Mirror-generated fog and extended the time before it dissipates. Higher-level areas also benefit from increased chances for Delirium Orbs and Cluster Jewels, more frequent Delirium bosses, and larger average Simulacrum Splinter stacks. Starting a Mirror encounter can additionally provide one to three bonus rewards, although this is a chance rather than a guaranteed result.
These adjustments encourage farming higher-level maps once the character can handle them consistently. The faster initial fog spread makes hesitation near the Mirror less attractive, while the increased duration gives capable builds more time to maintain their position within the encounter. Players should still evaluate map modifiers carefully because stronger enemies and increased Delirium difficulty can overwhelm characters that rely only on movement speed.
Omniphobia and Kosis: Delirium Boss Rewards in Atlas Maps
Delirium can introduce two unique bosses: Omniphobia, Fear Manifest and Kosis, The Revelation. These encounters are more dangerous than ordinary Delirium monsters and can appear while the player is progressing through the fog. Their value comes from additional Delirium-related drops, including Simulacrum Splinters and chances at specialized rewards.
Patch 3.30 gives Delirium bosses in Tier 14 and higher maps a small chance to drop Refracting Fog. The bosses no longer need to be killed inside a Mirage for that item to become available. This creates an additional reason for strong builds to pursue Delirium bosses during high-tier mapping, although neither a boss appearance nor a Refracting Fog drop is guaranteed.
Delirium Atlas Passives: Descent Into Madness and That Which You Seek
Delirium uses a different access system from the ten primary league mechanics affected by Threads of Creation. Mirrors of Delirium can still appear randomly in ordinary Atlas maps, and there is no dedicated Delirium Thread in patch 3.30. The redesigned Atlas Passive Tree improves the chance of finding Mirrors rather than providing the older collection of specialized bonuses for fog duration, boss spawns, reward types, and Splinter drops.
Current Atlas data lists two Delirium Notables, Descent Into Madness and That Which You Seek, alongside smaller passives increasing Mirror appearance chance. Their percentages are increased chance modifiers, not flat percentage-point additions. A 50% increased chance does not mean that half of all maps are guaranteed to contain a Mirror.
| Passive | Current modifier | Farming role |
|---|---|---|
| Delirium Chance | 20% increased chance for Maps to contain a Mirror of Delirium. | Improves Mirror frequency; six small passives are available. |
| Descent Into Madness | 50% increased chance for Maps to contain a Mirror of Delirium. | Improves access to ordinary Mirror encounters. |
| That Which You Seek | 60% increased chance for Maps to contain a Mirror of Delirium. | Further improves Mirror encounter frequency. |
The updated passive values are available in the current PoEDB Delirium Atlas data. For a Mirror-focused strategy, these passives are the natural starting investment because more encounters mean additional opportunities to collect Splinters, Orbs, and Cluster Jewels. They should not be confused with Delirious Map preparation, which is performed directly through Delirium Orbs rather than by purchasing dedicated Delirium Threads.
Rare Map Suffix: Area Contains a Mirror of Delirium
Patch 3.30 introduces a Rare Map suffix that explicitly states the area contains a Mirror of Delirium. This provides a way to identify maps with guaranteed Mirror access instead of relying exclusively on random encounters. The modifier is particularly useful when a player wants a controlled batch of Mirror runs without repeatedly opening maps that may contain no Delirium content.
Check the map's other modifiers before opening it. A guaranteed Mirror does not compensate for dangerous damage combinations, recovery restrictions, or a layout where the character cannot efficiently keep pace with the fog. If the goal is consistent Splinter farming, a manageable map with a Mirror can be more useful than a difficult map whose potential rewards are repeatedly lost to deaths or failed encounters.
Explore services related to this guide, selected from our Path of Exile catalog.
View All Path of Exile Services

Delirious Maps in PoE 3.30: Delirium Orbs and Reward Types
Delirious Maps provide an alternative to the moving Mirror encounter. A map modified with a Delirium Orb has Delirium active throughout the area, allowing players to complete the map without racing a fog-dissipation timer. This makes the method suitable for builds with reliable sustained damage that cannot always maintain the movement speed required by ordinary Mirror farming.
Patch 3.30 fundamentally changes the crafting process. Delirium Orbs no longer add enchantments that increase Deliriousness in fixed 20% layers. Instead, they reforge a Rare Map with an explicit Delirious modifier, and each Orb applies a value between 5% and 50%. Multiple Orbs of the same reward type add their percentages together up to 100%, while using an Orb with a different reward type resets the current Delirious percentage. The new Orbs cannot be applied to legacy Maps that retain the old Delirium layers.
Delirium Orb Stacking: 5–50% per Orb and 100% Maximum
Start with a Rare Map and apply a Delirium Orb that matches the reward category you intend to farm. Inspect the resulting Delirious percentage and map modifiers before using another Orb. Additional Orbs of the same type can increase the percentage, but the amount gained is variable rather than a fixed 20% per use.
Changing to a different reward type resets the existing percentage, making mixed-Orb recipes from previous leagues unreliable. This is particularly important when valuable Orbs have already been spent on a map. A player who wants a currency-focused Delirious Map should continue using the appropriate reward type rather than adding an unrelated Orb under the assumption that both reward categories will accumulate.
Delirious Percentage and Reward Breakpoints
The new Orb system grants one reward of the selected type and an additional reward for every 20% Deliriousness on the map. This means the reward count increases at specific thresholds, rather than improving continuously with every percentage point. Reaching a higher percentage without crossing the next reward threshold may still increase difficulty without adding another guaranteed reward of that type.
| Delirious percentage | Rewards of the selected type | Farming consideration |
|---|---|---|
| 5–19% | 1 | Lowest Orb investment; suitable for learning. |
| 20–39% | 2 | First additional reward threshold. |
| 40–59% | 3 | Moderate reward investment. |
| 60–79% | 4 | Higher monster difficulty and reward count. |
| 80–99% | 5 | Demanding encounters requiring a strong build. |
| 100% | 6 | Maximum Delirious percentage and selected reward count. |
For example, a map at 35% Deliriousness has two rewards of the chosen type, while reaching 40% raises that count to three. The table describes the guaranteed reward-type count established by GGG, not the total quantity or market value of every item dropped. Higher difficulty can also reduce farming efficiency, especially when a character reaches 80–100% Deliriousness but struggles to complete the map.
Delirium Orb Reward Types: Currency, Divination Cards, Fossils and Threads
Different Delirium Orbs determine the category of rewards available on the prepared map. A player farming currency should select a different Orb from someone targeting Fossils, Divination Cards, or Threads. The selected category provides a more deliberate farming objective, but it does not guarantee one particular valuable item within that category.
| Delirium Orb | Reward category | Primary use |
|---|---|---|
| Fine Delirium Orb | Currency Items | General currency-focused mapping. |
| Diviner's Delirium Orb | Divination Cards | Card reward farming. |
| Fossilised Delirium Orb | Fossils | Crafting-material farming. |
| Threaded Delirium Orb | Threads | Supplies for other league mechanics. |
| Cartographer's Delirium Orb | Map Items | Map-related rewards. |
| Singular Delirium Orb | Unique Items | Unique equipment opportunities. |
| Timeless Delirium Orb | Legion | Legion reward items. |
| Blighted Delirium Orb | Blight | Blight reward items. |
| Whispering Delirium Orb | Essences | Essence-related rewards. |
The Threaded Delirium Orb replaces the former Skittering reward type, which was associated with Scarabs before their removal. Fragmented Delirium Orbs have also been removed, with existing copies converted to the new Threaded version. These changes make older Scarab-focused Delirium maps obsolete in the current league, and players should select rewards according to the actual 3.30 economy rather than an earlier price comparison.
Simulacrum Farming in PoE 1: 300 Splinters and 15 Waves
The Simulacrum is a dedicated Delirium endgame arena accessed through the Map Device. Players obtain it by combining 300 Simulacrum Splinters or by acquiring the completed item through trade. Entering opens six portals to a randomly selected Simulacrum arena, where waves of enemies become increasingly dangerous and reward-focused as the encounter progresses.
The current PoE 1 Simulacrum has 15 waves. GGG removed the original first 15 waves in patch 3.25 because they had become too easy and time-consuming for characters already capable of reaching the encounter. This is an important distinction from outdated 30-wave guides and from the separate seven-wave Simulacrum system found in Path of Exile 2.
Simulacrum Entry, Wave Activation and Arena Preparation
Place the completed Simulacrum item into your Map Device and enter the instance. Each wave begins through interaction with the Strangely Familiar Entity, giving the player an opportunity to prepare before triggering the next group of monsters. Enemy density, difficulty, and reward opportunities increase through successive waves, with additional dangerous modifiers appearing as the encounter progresses. Collect all loot before activating the next wave, since items left on the ground are destroyed when a new wave starts.
Prepare the character before starting the first wave. Capped elemental resistances, reliable recovery, strong area damage, and enough single-target damage for bosses are more important here than extreme movement speed. The arena provides limited room to escape, and deaths consume portals, so a character that can clear ordinary maps quickly may still struggle against sustained Simulacrum pressure.
Simulacrum Waves 1–15: Monster Scaling and Boss Encounters
The first waves establish the encounter's combat rhythm, while later waves introduce stronger monsters and more dangerous modifier combinations. Delirium bosses Omniphobia and Kosis can appear during wave progression, with Omniphobia possible from wave 3 and Kosis from wave 5. Both bosses are particularly threatening when the arena is already crowded with Delirium monsters and ground effects.
Clear smaller enemies rapidly to reduce battlefield pressure, then concentrate on surviving the remaining rare monsters and bosses. Avoid standing still during large telegraphed attacks, and keep enough space available to reposition when additional enemies appear. A build that depends on stopping for long periods to deal damage needs stronger defenses than a build that can continue attacking while moving.
Completed waves produce rewards corresponding to the encounter's reward progression. Boss-containing waves also provide opportunities for valuable Delirium-exclusive Unique Items, including certain Cluster Jewels. However, neither Kosis appearing nor completion of all 15 waves guarantees that one specific high-value Unique will drop.
Omniphobia and Kosis: Survival Priorities in Later Waves
Omniphobia uses powerful melee attacks and other dangerous offensive abilities, requiring players to avoid remaining directly in front of its attacks for extended periods. Kosis adds additional pressure through large attacks and mechanics that are difficult to manage while other monsters remain alive. Their presence can substantially increase the difficulty of a wave even when the ordinary enemies are manageable.
Maintain a clear escape route and avoid sacrificing all movement space to chase a boss. When several dangerous targets overlap, reduce the ordinary monster population first if doing so creates safer positioning. Do not continue an expensive Simulacrum farming strategy solely because the character can survive the early waves; reliable completion of the later encounters is what determines whether the access cost is justified.
Simulacrum Unique Rewards: Voices, Megalomaniac and Split Personality
Simulacrum has several distinctive Unique Jewel rewards, including Cluster Jewels such as Voices and Megalomaniac, as well as the Crimson Jewel Split Personality. Voices provides additional Jewel Socket passives with different numbers of intervening small passive nodes, making certain variants substantially more valuable than others. Megalomaniac can provide unusual combinations of Notables, while Split Personality rewards specific Passive Tree investment patterns and modifier combinations.
The item name alone is not enough to establish its market value. A Voices variant with fewer small passives can be much more desirable because it requires fewer passive points to access the available sockets. Megalomaniac and Split Personality must be evaluated according to their actual modifiers and the builds capable of using them, rather than assuming every drop is worth a premium price.
Cluster Jewels: Large, Medium and Small Bases, Item Levels and Crafting
Cluster Jewels expand the Passive Skill Tree by adding new passive nodes outside its original layout. They are among the most important recurring Delirium rewards because their modifiers can support specialized builds that ordinary Passive Tree routes cannot easily reproduce. GGG's original Delirium announcement introduced the system, while current 3.30 item data defines the available passive counts and modifier interactions.
The three standard categories are Large, Medium and Small Cluster Jewels. Their size determines how many passive skills can be added and whether additional Jewel Sockets are available for nested clusters. The value of a dropped Jewel depends on its small-passive effect, item level, number of passives, possible Notables, and final crafted modifier combination.
| Jewel type | Added passive skills | Typical build use |
|---|---|---|
| Large Cluster Jewel | 8–12 | Major damage or utility investment with additional Jewel Sockets. |
| Medium Cluster Jewel | 4–6 | Focused Notable combinations and secondary specialization. |
| Small Cluster Jewel | 2–3 | Defensive or specialized small-passive bonuses. |
Cluster Jewel Passive Count: Eight-Passive Large and Specialized Twelve-Passive Bases
For many builds targeting specific Notables, a Large Cluster Jewel with eight added passives is attractive because it can minimize the passive points needed to reach valuable nodes. However, that does not make every eight-passive Jewel automatically superior. Certain builds prefer twelve-passive Large Jewels when scaling the effects of their small passive nodes, especially if the item has a powerful combination of modifiers increasing those bonuses.
Medium and Small Jewels follow the same principle: evaluate how many points must be allocated to obtain the desired benefit. A lower passive count can provide efficient access to Notables, while a larger cluster may be useful when the small passives themselves are the primary target. The correct decision is based on the actual Passive Tree allocation, not simply the highest or lowest number printed on the item.
Cluster Jewel Item Level, Base Type and Notable Modifiers
Item level determines which modifier tiers and combinations can appear when crafting a Cluster Jewel. The small-passive bonus printed on the base determines which category of Notables and affixes the item can support. A high-item-level Jewel with an irrelevant base is often less useful than a lower-item-level Jewel that provides exactly the damage or defensive specialization a build needs.
Before crafting, inspect the base type, passive count, and available modifier pool. Use a current crafting database or trade comparison to check whether the desired Notables can actually roll on that specific item. Spending currency on the wrong base or trying to force a modifier unavailable at its item level will not produce the intended result.
Cluster Jewel Crafting in 3.30: Attack and Cast Speed Modifier Restrictions
Patch 3.30 changes the modifier restrictions affecting certain Cluster Jewels. Modifiers that cause small passive skills to also grant Attack Speed and/or Cast Speed now belong to the same modifier family. As a result, multiple modifiers from that family cannot be rolled together on the same item, including combinations that previously relied on Refracting Fog.
This matters when evaluating older crafting examples and expensive existing Jewels. A combination shown in a pre-3.30 video may no longer be craftable under current modifier-family restrictions. Check the live affix pool before spending currency, and do not treat an older successful craft as evidence that the same combination can still be reproduced.
Cluster Jewel Pricing: Useful Notables, Efficient Pathing and Popular Builds
Cluster Jewel value depends heavily on current build demand. A combination of two useful Notables can be more valuable than a Jewel containing several unrelated modifiers, particularly when the desired passives are efficiently positioned. The base type, item level, passive count, and available Jewel Sockets should be compared with actual trade listings before assigning a price.
For example, a Large Cluster Jewel with strong damage modifiers but inefficient pathing may require too many passive points to justify its use. Another Jewel with fewer impressive-looking modifiers may be preferable if it provides exactly the Notables required by a popular build. Players evaluating particularly rare options such as one-small-passive Voices can inspect available PoE item configurations, including Voices, but the precise variant and current trade value still need to be distinguished.
Delirium Currency Farming: Splinters, Orbs, Cluster Jewels and Simulacrum Rewards
Delirium rewards several categories with different levels of predictability. Simulacrum Splinters and ordinary Delirium Orbs are comparatively straightforward to value, while Cluster Jewels may require inspection or crafting before they can be sold for a useful amount. Simulacrum offers additional Unique rewards, but those outcomes are less predictable and require a stronger character to farm efficiently.
The reworked 3.30 loot system also changes how Delirium reward scaling should be interpreted. Fog no longer grants increased Item Quantity to monsters, with Item Rarity increased as compensation. This is not equivalent to universally increasing the number of Simulacrum Splinters or every other Delirium reward, and older quantity-based farming calculations should not be copied without adjustment.
| Reward | Primary source | Selling or farming decision |
|---|---|---|
| Simulacrum Splinters | Delirium encounters and bosses. | Sell in bulk or assemble 300 into a Simulacrum. |
| Delirium Orbs | Delirium monsters and rewards. | Sell directly or use to prepare targeted Delirious Maps. |
| Normal Cluster Jewels | Delirium monster drops and rewards. | Inspect base type, passives and item level before selling. |
| Refracting Fog | Small chance from Delirium bosses in Tier 14+ maps. | Specialized crafting material with variable trade demand. |
| Voices, Megalomaniac, Split Personality | Eligible Simulacrum boss-wave rewards. | Price individual variants by their actual modifiers. |
| Currency and selected Orb rewards | Mirror encounters, Delirious Maps and Simulacrum. | Compare the output against map and access-item costs. |
Mirror Farming Versus Delirious Maps: Investment and Clear-Speed Trade-Offs
Mirror farming generally requires less direct consumable investment, particularly when the character can take advantage of ordinary spawn chances or the appropriate Atlas passives. Delirious Maps require Delirium Orbs but provide predictable access to the effect and more control over selected reward categories. The difference in profitability depends on the cost of preparing each map, time spent clearing it, and the actual items recovered.
A fast character may favor Mirrors because movement and area damage allow repeated short encounters with minimal preparation. A slower but durable character may prefer Delirious Maps because the fog remains active throughout the entire map. Neither method has a permanent currency-per-hour advantage independent of the league economy and character performance.
Simulacrum Profit: Selling Access Items or Farming All Fifteen Waves
Simulacrum should be evaluated as an investment rather than the automatic final step of every Delirium farming session. A completed Simulacrum has a tradeable value, and using it means giving up the currency that could have been earned from selling the access item. The return depends on the rewards from completed waves, potential Unique drops, time spent clearing, and whether the character can survive the encounter consistently.
Players who cannot complete the later waves may earn more by selling Simulacrums and continuing ordinary mapping. Strong endgame characters can instead compare completed-run rewards with their access costs across several attempts. For ongoing Delirium mapping or repeat Simulacrum sessions, PoE hourly farming sessions are a time-based option rather than a guaranteed currency or Unique-item outcome.
Delirium Farming Profit: Batch Results and Realistic Trade Prices
Measure several consecutive maps or Simulacrum runs before judging profitability. Record the cost of maps, Delirium Orbs, any other consumed inputs, and the trade value of Splinters, Orbs, Cluster Jewels, and other drops. Include preparation, clearing, looting, crafting, and trading time when calculating net income per hour.
Do not count every Rare Cluster Jewel at an optimistic sale price. If an item requires expensive crafting before it becomes desirable, the crafting cost and risk belong in the calculation. The broader distinction between Item Rarity, map loot, and Atlas Drops is covered in the PoE 3.30 Item Rarity Guide; Delirium profitability depends on applying those rules to its actual reward sources.
Delirium Build Requirements: Mapping Speed, Defenses and Simulacrum Survival
Delirium increases monster difficulty while adding additional combat effects and enemy density. Builds that perform well in ordinary maps may struggle when repeated Delirium effects overlap with dangerous rare monster modifiers. Successful farming requires enough damage to maintain the intended pace, dependable recovery, and defenses capable of handling consecutive hits without frequent deaths.
The ideal build profile changes according to the selected method. Mirrors emphasize movement speed and area coverage, Delirious Maps require sustained damage against tougher monsters, and Simulacrum places the greatest emphasis on continuous survival under high monster density. Players still developing their Atlas can prioritize Atlas passive-point progression before investing heavily in a mechanic their character cannot yet clear.
| Build requirement | Mirrors | Delirious Maps | Simulacrum |
|---|---|---|---|
| Movement speed | High priority for following fog and reaching bosses. | Useful, but no moving fog timer. | Useful for repositioning in enclosed arenas. |
| Area damage | Essential for clearing packs quickly. | Important for maintaining manageable enemy density. | Essential for controlling wave pressure. |
| Single-target damage | Important for map bosses and Delirium bosses. | Important against heavily strengthened enemies. | Critical against Kosis, Omniphobia and tough rare monsters. |
| Defenses | Enough to survive while moving. | Strong defenses for sustained Delirium difficulty. | Very high priority for repeated wave combat. |
| Recovery | Must support continuous mapping. | Must function during prolonged fights. | Must remain effective under overlapping monster modifiers. |
Delirium Monster Modifiers: Recovery Reduction, Damage and Crowd Control
Delirium introduces additional monster effects that can punish characters relying on a single defensive layer. Some modifiers interfere with recovery, while others apply movement restrictions, additional damage, or dangerous effects around slain enemies. Their threat increases when ordinary map modifiers already impose substantial defensive penalties.
Choose maps that your character can survive without depending on unusually favorable monster combinations. A build with weak recovery may struggle more in Delirium than its damage output suggests, while a character vulnerable to repeated hits can be overwhelmed by dense packs. Increase Deliriousness only after the character demonstrates reliable clears at a lower percentage.
PoE 3.30 Delirium Farming Route: From First Mirror to Simulacrum
A complete Delirium progression route should begin with stable Mirror encounters and gradually introduce more expensive or difficult content. Starting with fully Delirious Maps or repeated Simulacrum attempts can consume substantial currency before the character has learned the fog, monster modifiers, and reward system. The following sequence prioritizes repeatable farming and avoids unnecessary investment.
- Prepare the Atlas: allocate Delirium Mirror chance passives when focusing on repeated encounters.
- Select suitable maps: favor open or linear layouts with reliable monster density and manageable bosses.
- Activate Mirrors: move through the Mirror, follow the fog, and defeat dense enemy packs while progressing toward the boss.
- Collect rewards: separate Simulacrum Splinters, Delirium Orbs, Cluster Jewels, and valuable currency.
- Evaluate Cluster Jewels: inspect passive count, base type, item level, and Notables before selling or crafting.
- Prepare Delirious Maps: apply a Delirium Orb to a Rare Map, check the resulting percentage, and increase it only when the build can handle the difficulty.
- Target reward categories: choose suitable Orbs for currency, Divination Cards, Fossils, Threads, or other desired rewards.
- Assemble Simulacrum: combine 300 Splinters or compare the completed item's trade value with the cost of purchasing one.
- Enter Simulacrum: prepare defenses and sustained damage before completing the 15 waves.
- Evaluate the results: compare the value of Unique Cluster Jewels, other rewards, and completion time against the access-item cost.
Players who mainly enjoy mapping can stop after the Delirious Map stage and sell their Simulacrum access items. Those pursuing Voices or other Simulacrum-specific rewards can continue into the arena once the character is capable of finishing its later waves. The strongest farming route is the one that reliably converts time and consumables into items with actual trade value, rather than the one with the highest theoretical reward ceiling.
Delirium Farming Mistakes in Patch 3.30
Several older Delirium strategies are incompatible with the current Atlas and map-crafting rules. Copying pre-3.30 Orb recipes, Atlas passives, or Simulacrum wave calculations can lead to wasted currency and unrealistic reward expectations. The most important errors involve access methods, Delirious percentage scaling, Cluster Jewel valuation, and insufficient preparation for difficult encounters.
- Searching for Delirium Threads: Delirium Mirrors remain a randomly available mechanic, while Delirious Maps are prepared with Orbs. There is no dedicated Delirium Thread.
- Using old 20% Orb layering: each Delirium Orb now applies 5–50% Deliriousness to a Rare Map, with the selected reward type affecting how additional Orbs stack.
- Mixing Orb reward types: applying an Orb of a different type resets the existing Delirious percentage instead of preserving all previous investment.
- Copying removed Atlas passives: the current Delirium clusters improve Mirror appearance chance, not the old range of fog duration, Splinter and reward modifiers.
- Following old 30-wave Simulacrum guides: the current PoE 1 encounter has 15 waves after the 3.25 redesign.
- Confusing PoE 1 and PoE 2: PoE 2 has its own Delirium progression, reward items, and Simulacrum rules.
- Underpricing Cluster Jewels: item level, passive count, Notables and socket efficiency can make some Jewels worth far more than ordinary bases.
- Assuming every Voices is equally valuable: variants with fewer intervening small passive skills can have very different market prices.
- Farming 100% Delirious Maps too early: maximum Deliriousness is inefficient when the build cannot finish the map consistently.
Another costly mistake is measuring a strategy through one unusually valuable drop. A rare Voices variant can significantly increase the value of an individual Simulacrum, but that does not represent the expected return from every run. Evaluate Delirium through repeatable batches and realistic selling prices rather than screenshots showing exceptional outcomes.
PoE 1 Delirium Farming FAQ
These answers cover the most important mechanical distinctions between the three Delirium farming methods.
Do Delirium Mirrors still spawn randomly in PoE 3.30? Yes. Delirium remains a mechanic that can appear randomly in Atlas maps, and its current Atlas passives increase the chance of finding a Mirror. Delirium does not have a dedicated Thread type.
How many Delirium Orbs are needed for a 100% Delirious Map? There is no fixed number. Each Orb applies between 5% and 50%, and additional Orbs of the same reward type can raise the total to 100%. Changing reward type resets the existing percentage.
Does PoE 1 Simulacrum still have 30 waves? No. GGG removed the first 15 waves in patch 3.25, leaving a 15-wave encounter. A completed Simulacrum requires 300 Splinters and can also be acquired through trade.
Are all Cluster Jewels valuable in PoE 3.30? No. Value depends on the base type, passive count, item level, modifier combinations, and current build demand. Rare variants of Unique Cluster Jewels such as Voices must be evaluated individually.
Conclusion
Delirium farming in PoE 3.30 offers three viable routes with different requirements. Mirrors suit fast Atlas mapping, Delirious Maps provide selected reward categories through the revised Orb system, and Simulacrum rewards strong endgame characters capable of clearing all 15 waves. The best returns come from managing difficulty, choosing profitable reward types, and recognizing valuable Cluster Jewels rather than automatically maximizing Deliriousness. Start with consistent Mirror clears, increase investment gradually, and run Simulacrum only when its rewards justify the cost.