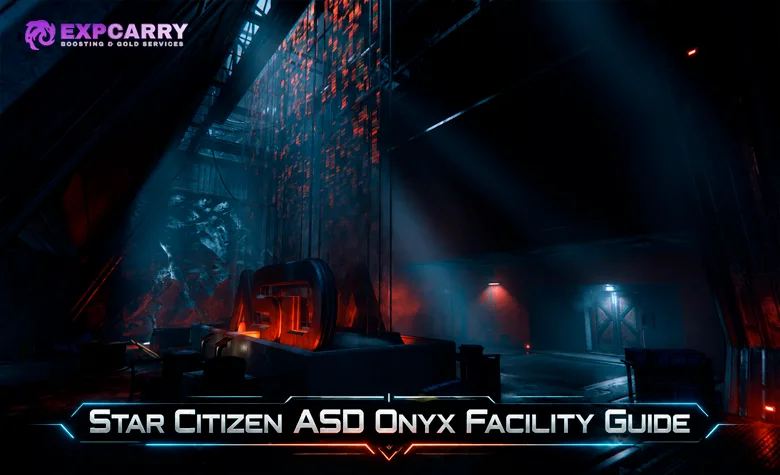
Star Citizen ASD Onyx Facilities are underground research complexes in Stanton containing investigation missions, restricted areas, valuable equipment and dangerous biological experiments. In Alpha 4.10.2 LIVE, access normally begins through a Hockrow Agency investigation contract, followed by landing in one of the facility's two large hangars. Inside, Engineering (Sector A) contains the hazardous Power Core, Research (Sector B) extends across nine sub-levels, and the deeper Site-B complex contains Project Hyperion laboratories and access toward the Yormandi encounter. The ASD Access Card: Excavation provides access to a restricted excavation area, while certain investigation contracts reward ASD Secure Drives used for Wikelo exchanges. Before entering, identify your mission objective, required equipment and extraction route. Different contracts lead through different sections, and finding valuable loot does not automatically complete the investigation.
Short answer: Accept a Hockrow Agency Onyx investigation, travel to its designated facility and request a Large hangar to enter. Follow Engineering for Power Core objectives, Research for laboratory data and access toward Site-B, and use the Excavation Access Card for its designated restricted area. ASD Secure Drives are mission rewards, not door keys.
Where Is the ASD Onyx Facility in Star Citizen?
ASD Onyx Facilities are abandoned Associated Sciences & Development research installations distributed across the Stanton system. Documented locations include moons such as Calliope near microTech, Lyria near ArcCorp and Cellin near Crusader. The facilities share a recognizable underground layout rather than representing a single accessible building at one permanent set of coordinates.
According to facility documentation, Onyx was originally conceived as a location using instanced gameplay. Because the required instancing technology was not available when the content launched in Alpha 4.3, the facility was replicated across numerous locations to allow multiple groups to access it. The appropriate destination for an investigation is therefore determined by the active contract rather than a universal location that every player must visit.
The most reliable way to locate an Onyx site is through the Investigation section of Contract Manager. Hockrow Agency's Jorrit Dossier assignments provide mission information and navigation objectives. The introductory mission has different travel restrictions from later contracts because its destination initially lacks a usable direct quantum marker.
How to Start the Hockrow Agency Investigation
The introductory assignment is Jorrit Dossier: Onyx Personnel Files, issued by Hockrow Agency with Arken Mallor as the lead investigator. Its objective is to access personnel records at an abandoned ASD facility and begin investigating Dr. Logan Jorrit. Alpha 4.10.2 mission records confirm that this assignment is available in Stanton and serves as the starting point for the investigation chain.
To begin:
- Open mobiGlas and enter Contract Manager.
- Find the Hockrow Agency assignment under Investigation.
- Accept Jorrit Dossier: Onyx Personnel Files.
- Check the destination and travel instructions.
- Fly toward the designated facility using nearby quantum destinations when necessary.
- Approach the installation and contact landing services to request a hangar.
The introductory contract explicitly warns that the facility's quantum beacon is disabled, requiring manual flight for the final approach. The subsequent Access Engineering Files assignment describes a workaround that enables direct travel to the appropriate Onyx destination. The wider investigation progresses through personnel and facility records, data-recovery contracts and eventually Project Hyperion. Do not assume every stage uses identical navigation or completion requirements.
How to Enter the Onyx Facility
The surface installation contains two Large hangars and a central structure. The established entrance route is through the hangars, which connect to the underground lobby through elevators. Landing outside the installation does not provide the normal interior access route.
Onyx mission descriptions recommend a ship that fits inside a Large hangar. An oversized ship may be unsuitable even if it has enough cargo capacity for the intended loot. Once your hangar is assigned, land inside, secure your equipment and take the internal elevator toward the lobby.
The hangar area also provides facilities for managing ships and physical cargo. If your objective involves large mission items rather than personal equipment, check the available freight handling before traveling deeper underground. Recovering an object from Site-B may only be one stage of a mission that also requires transportation, data submission or delivery elsewhere.
ASD Onyx Facility Map and Internal Layout
Onyx is divided into two principal wings connected through the lobby, with Site-B reached through the lower Research section. Understanding these connections is more useful than memorizing one route because the destination changes between investigation, loot and Project Hyperion assignments.
The following overview identifies the major navigation landmarks. It is a route outline rather than a coordinate-accurate floor map.
| Area | Main Landmarks | Purpose |
|---|---|---|
| Surface | Two Large hangars, central structure | Ship arrival and departure |
| Main Lobby | Reception, central damaged elevator, medical station | Access to Engineering and Research |
| Engineering — Sector A | Maintenance, Condensers, Fuel Reactor, Power Core | Engineering investigations and Power Core objectives |
| Research — Sector B | Reception, Operations, Xenotechnology, Energy Lab, Data Processing, Medical Lab | Research records and laboratory objectives |
| Research Lower Atrium | Sub-level 9 and elevator to sub-level 1 | Connection toward Site-B |
| Site-B | Entrance, cargo elevator, inspection area, transit platform, security checkpoint | Access to deeper experimental facilities |
| Project Hyperion | Specimen storage, reagent area, experiment chamber | Late investigation objectives |
| Excavation / Yormandi | Restricted excavation and creature encounter areas | Access-card objectives and creature materials |
Sector A is the Engineering wing and Sector B is the Research wing. Follow the in-game sector signs rather than relying exclusively on left-or-right directions from older guides, which sometimes describe the lobby from different viewing positions. The central damaged elevator is an important navigation landmark and is associated with a player-reported restricted shortcut.
Lobby, Medical Station and Safe Preparation
The lobby contains reception facilities, ship-access elevators and a central damaged elevator. A medical area behind the central elevator contains three Tier 1 medical beds in the documented layout. These beds can treat serious injuries, but they should not be treated as an available local respawn or regeneration point. Community reports explicitly distinguish treatment at this station from setting a respawn imprint.
Before entering the deeper wings, check ammunition, medical supplies, armor condition and inventory capacity. The lobby is an appropriate place to organize a group and determine whether the objective belongs in Engineering or Research. Returning here after completing a nearby objective can be safer than carrying unnecessary equipment into the deepest areas.
ASD Onyx Access Cards: What Does Each Card Open?
Onyx uses physical access items and mission-specific codes, but these are not interchangeable. The clearest named access item in the Alpha 4.10.2 equipment database is the ASD Access Card: Excavation. Older patch documentation and player testing also describe cards used for a shortcut toward the Yormandi observation area, although the exact identity of every card mentioned in older reports is not independently established by the current item records.
ASD Secure Drives and the data devices used during investigations have different functions. They store information or represent mission rewards rather than providing general door access.
| Item / Access Method | What It Opens or Does | Verification |
|---|---|---|
| ASD Access Card: Excavation | Provides access to the restricted Excavation site inside Onyx | Confirmed item description in 4.10.2 |
| Science-wing access cards described in 4.3.2 testing | Provided access toward the Yormandi Observation area through a card-controlled passage | Older player-tested behavior; current compatibility is not independently confirmed |
| Reagent Code | Obtained through the Project Hyperion Engineering puzzle sequence | Mission puzzle information; not a physical access card |
| Catalyst Code | Obtained through a selected Research experiment for Project Hyperion | Mission puzzle information; not a physical access card |
| ASD Secure Drive | Investigation reward used by Wikelo collection contracts | Confirmed mission reward; does not unlock a door |
| ASD mission data drives and server devices | Store or transfer investigation data | Mission-objective items; not universal access cards |
The distinction matters because older guides sometimes refer to an unnamed card or placeholder-labeled access item without identifying its final inventory name. Such references are insufficient to establish a complete list of unique LIVE access cards or to assign a different named card to every locked door.
ASD Access Card: Excavation — What It Unlocks
The ASD Access Card: Excavation is a physical access item. Its current description explicitly identifies the Excavation site inside Onyx as the area it grants access to. Alpha 4.10.2 equipment data lists the card as lootable, with no documented standard NPC shop source or crafting blueprint.
Use it at the appropriate restricted access reader rather than assuming it grants permission throughout Engineering, Research and Site-B. The Excavation designation identifies the card's intended access area, but does not establish that every other secured room uses the same credential.
Current item records also identify the card's internal class as FPS_Consumable_KeyCard_Yormandi. This supports its association with Yormandi-related content, but an internal class name is not proof that it opens every shortcut or door associated with the encounter.
Where to Find the Excavation Access Card
The item is obtainable as loot according to current equipment records. No universally guaranteed container spawn has been established for every Onyx run. It is therefore more reliable to search appropriate facility loot and inspect recovered access devices than to assume that a particular office or crate always contains the card.
Player reports from Site-B describe finding cards in small containers around lower transit and storage areas. More recent community observations also mention small blue boxes elsewhere in Site-B as possible sources. These reports associate access cards with the shortcut toward Yormandi, but they do not establish a guaranteed drop rate or identical card availability in every LIVE instance.
If your goal is specifically to reach Excavation, confirm the item's full inventory name before relying on it. Other ASD-related keys, drives and access devices should be treated as separate items unless their descriptions or actual reader interactions establish compatibility.
Yormandi Observation Shortcut: Lobby Elevator Shaft
Community testing following Alpha 4.3.2 described a shortcut connecting the main lobby to the lower Yormandi observation route. Instead of completing the normal Research descent, players could enter the damaged central elevator shaft, follow ventilation passages and reach a card-controlled door.
The documented community route is:
- Return to the central damaged elevator in the main lobby.
- Locate the accessible opening into its shaft.
- Descend carefully and follow the connected ventilation passage.
- Continue toward the maintenance corridor containing the locked reader.
- Use a compatible access card if the current build accepts it.
- Proceed through the unlocked passage toward the observation or excavation connection.
These directions originate from player testing and older update notes, not a separately verified Alpha 4.10.2 route test. Reports also describe doors that may behave differently depending on the side from which they are approached. Confirm the current door behavior before relying on the shortcut as the only extraction route for valuable equipment.
Explore services related to this guide, selected from our Star Citizen catalog.
View All Star Citizen Services


Engineering Wing Route: Sector A and the Power Core
Engineering is built around the abandoned facility's energy infrastructure. Its major sections are the entrance area, Condensers, Fuel Reactor and Power Core. The route includes environmental hazards, damaged paths, elevated platforms and enemies, making it more dangerous than the initial lobby.
The standard route moves from the lobby through Engineering access into maintenance areas, then toward the Condensers and Fuel Reactor before reaching the core. Some passages contain shortcuts or alternate routes, but those should be selected according to the active mission rather than assumed necessary for every visit.
Maintenance Entrance and Condensers
The Engineering entrance contains a main walkway obstructed by rock formations and a cave alternative. The Condensers occupy a large industrial area with pipes, machinery, side rooms and an exit elevator. A control room is situated alongside the condenser structures, while surrounding maintenance areas connect to investigation objectives.
During early Hockrow missions, players search Engineering for terminals, recorders and relevant files. The Access Engineering Files route passes through a pipes section into a warehouse, where a recorder can be found in a locker. A ventilation passage then connects toward additional rooms and weapon-rack locations.
Later Project Hyperion objectives require interacting with machinery. Community walkthroughs describe removing calcified coolant material from three pipe locations, repairing the pipes and completing interactions before the puzzle resets. In the Condensers area, players install three plasma canisters and retrieve the required data. Suitable mining and repair tools are necessary; carrying only combat equipment can prevent completion.
Fuel Reactor and Power-Core Access
The Fuel Reactor connects to the Power Core through industrial structures and damaged passages. A horizontal transit platform provides a route toward the central chamber, while other sections require careful movement across exposed walkways.
For Project Hyperion, the reactor sequence involves ejecting an old plasma fuel cell, clearing calcified coolant, repairing a damaged pipe and positioning a replacement cell. A September 2026 community walkthrough reports that inserting the replacement during an active radiation pulse can destroy it, while a nearby lever can provide another cell. Treat this as an encounter-specific mechanic and follow the current controls rather than manipulating unrelated reactors.
Do not enter the Power Core without observing the radiation cycle. Movement mistakes and delayed interactions with mission equipment can expose players to repeated pulses.
Power Core Radiation Pulses and Safe Movement
The Power Core is a large chamber containing an unstable energy anomaly. Its layout includes three major structures labeled Alpha, Beta and Gamma, with six platforms around the outer chamber. The anomaly produces radiation pulses at approximately 30-second intervals in the documented encounter.
Use available walls, barriers and other solid cover between pulses, then move to the next protected position. The cycle is particularly important when crossing exposed platforms or interacting with Engineering objectives. Remaining in an unprotected section for several pulses can result in fatal radiation exposure.
During the Project Hyperion Power Core puzzle, players activate six gantries in order while their green indicator lights are active. Community testing describes amber indicators for the next gantry and blue lights when the sequence resets. Complete the required linkage and retrieve the Reagent Code according to the active puzzle state. Do not substitute an unverified permanent code for the current encounter instructions.
A shielded bulkhead opposite the anomaly provides an important exit from the chamber. Use ASD markings and the surrounding structures for orientation rather than attempting to cross directly through the energy source.
Research Wing Route: Sector B Floors and Laboratories
Research is the multi-level laboratory section of the facility. Its layout includes reception areas, operations offices, xenotechnology research, an energy laboratory, data-processing facilities, medical laboratories and a central atrium. Movement between sub-levels involves stairs, drop shafts and elevators rather than one uninterrupted staircase.
The deepest floors contain the connection toward Site-B, so players attempting Project Hyperion or the Yormandi encounter must understand how to reach the bottom and locate the correct exit elevator.
| Sub-Level | Area | Navigation / Objective |
|---|---|---|
| 1 | Exit and Site-B access | Connection toward deeper facilities |
| 2–3 | Personnel-only areas | Not accessible through the documented standard route |
| 4 | Reception | Reception desks and elevator shafts |
| 5 | Operations | Offices and drop-shaft access |
| 6 | Xenotechnology and Energy Lab | Research terminals, Vanduul Blade and gravitational anomaly |
| 7 | Data Processing | Server equipment and research records |
| 8 | Medical Lab and Animal Testing | Cloning facilities and escaped Kopion |
| 9 | Central Atrium | Elevator connection back to sub-level 1 |
The relationship between sub-levels 9 and 1 is particularly important. The main elevator at the bottom of the central atrium reaches the upper exit level, from which players can access the connection toward Site-B. Repeatedly jumping into unrelated shafts is less reliable than locating the correct atrium elevator.
Xenotechnology and Energy Lab: Sub-Level 6
The Xenotechnology section includes a suspended Vanduul Blade and a biological processing unit. Nearby facilities connect to the energy research area, where a smaller gravitational anomaly forms part of the laboratory layout. These recognizable landmarks distinguish sub-level 6 from surrounding offices and lower medical sections.
Hockrow investigation contracts use this area for data collection. During the Security Data assignment, players retrieve a storage device from the appropriate office, insert it into a terminal and complete the data transfer. The Seismic Data assignment involves retrieving equipment from the zero-gravity area of the Energy Lab and transferring the relevant information before making the required external delivery.
For Project Hyperion, one completed Research experiment provides the Catalyst Code. The September 2026 walkthrough describes three choices: stabilizing the anomaly in the PWL Gravity Lab, processing five bodies in the XTL Xenotechnology area, or completing the RGL Medical Lab interaction. Players need one valid catalyst rather than all three experiments, subject to the active mission state.
Medical Lab, Animal Testing and Irradiated Kopion
Sub-level 8 contains medical facilities, cloning equipment and animal-testing areas. Lower Research levels contain escaped Kopion, including irradiated variants documented in community walkthroughs. These creatures can threaten players concentrating on terminals, elevators or loot containers instead of watching the surrounding corridors.
Clear nearby hostile creatures before attempting stationary objectives, particularly when an interaction requires additional time. A player using a data terminal may have limited visibility of approaching enemies, so groups should assign another member to watch nearby entrances.
The Medical Lab is also associated with the RGL catalyst option for Project Hyperion. The community route describes reaching the laboratory's terminal while avoiding or dealing with the dangerous resident and nearby creatures. Completing this research interaction is separate from collecting all available loot or defeating every enemy in the surrounding area.
How to Reach Site-B and Project Hyperion
Site-B is the deeper research complex connected to the Research wing. It includes an entrance section, cargo-handling facilities, a security checkpoint and laboratories used for Project Hyperion. The route is longer and more combat-intensive than basic dossier assignments, so prepare enough equipment and time to complete the objectives and leave safely.
Site-B Entrance and Cargo Elevators
From the lower Research atrium, use the elevator to sub-level 1 and follow the connected route toward Site-B. The entrance leads into a large underground cavern containing security facilities and a cargo elevator, which descends toward the main chamber.
At the bottom, the route continues toward cargo inspection and a horizontal cargo transit system. Follow the transit connection to the main Site-B building, where a security checkpoint guards the approach to the laboratories. The upper lobby provides access to Project Hyperion laboratories and storage facilities.
Cargo-moving equipment is relevant to missions involving physical samples. Project Hyperion recombinant containers can be substantial cargo items, with documented RCMBNT variants occupying 2 SCU. Do not assume a personal backpack can transport such an object. Verify the required cargo-handling equipment and extraction route before beginning a retrieval mission.
Project Hyperion: Engineering, Research and Experiment
Project Hyperion is the later investigation assignment associated with Dr. Logan Jorrit's research. The established workflow combines an Engineering Reagent Code with a Catalyst Code obtained from a selected Research experiment before the player proceeds to Site-B. Unlike earlier dossier contracts, this mission requires operating the deeper experimental facilities and submitting the resulting data.
The September 2026 community walkthrough describes the following progression:
- Engineering maintenance: Clear calcified coolant deposits and repair the required pipes.
- Condensers: Install the required plasma canisters and complete the condenser objective.
- Fuel Reactor: Replace the plasma fuel cell between radiation pulses.
- Power Core: Complete the six-gantry sequence and obtain the Engineering Reagent Code.
- Research: Complete one of the supported catalyst experiments and obtain the Catalyst Code.
- Site-B: Travel through the Research exit connection and reach the deeper laboratory complex.
- Experiment: Operate the assigned laboratory controls, complete the experiment and upload the required research results. Collect physical samples when required by the selected activity.
- Extraction: Leave the facility and complete any required cargo delivery or outstanding mission stage.
These steps describe the documented Project Hyperion workflow, not a universal procedure for every Onyx mission. The research-data upload and physical RCMBNT sample acquisition are distinct outcomes; not every mission requires transporting a container. Follow the active objective rather than assuming that producing an experimental sample automatically completes the investigation.
Excavation Area and Restricted Access
Excavation is a restricted part of the Onyx complex associated with the named ASD Access Card: Excavation. The card's current description confirms the intended access area, but available documentation does not establish a complete door-by-door Alpha 4.10.2 map of all readers and connections.
Do not confuse the general Site-B laboratories with every room designated Excavation. Reaching Site-B through the normal Research route does not guarantee that all restricted excavation doors are unlocked. Possessing the Excavation card also does not complete Project Hyperion automatically.
When using the card, identify a compatible reader and confirm the interaction in the current client. Routes based on placeholder-labeled cards from older patches should be treated as possible shortcuts, not guaranteed replacements for the normal Site-B approach.
Yormandi Encounter: Location, Enemies and Creature Loot
The Yormandi encounter is associated with the deeper Site-B cavern and excavation content. Community walkthroughs describe reaching it beyond the main laboratory areas, using catwalks and a descending route toward a separate combat chamber. The encounter is distinct from the introductory investigation missions and requires additional combat preparation.
A September 2026 walkthrough describes a two-phase fight: the first Yormandi appears initially, followed by a second creature after sufficient damage has been dealt. Players then face both enemies while avoiding environmental hazards, including a dangerous deep-water area. Glowing orange or yellow weak points along the creatures' bodies provide useful targets. This is a documented community strategy, not a guarantee that every LIVE encounter instance will behave identically.
Route to the Yormandi Chamber
The standard documented approach uses the Research wing to reach Site-B, then continues through the deeper laboratory and cavern areas. The September 2026 community walkthrough describes leaving the main Site-B laboratory section, following the catwalk and descending toward a cave connected to the Yormandi chamber.
Once the group reaches the chamber, confirm everyone is present before operating the entrance lever. Community reports describe an airlock sequence that closes the entrance as the encounter begins. Players should prepare ammunition, medical supplies and positions before activating it. During combat, prioritize the glowing weak points and avoid the deep-water hazard; reports also describe opportunities to interrupt a creature's attack by damaging its mouth.
The reported shortcut from the central lobby elevator shaft may reduce travel toward the observation area when a compatible card is available and the door functions. Because this route has not been independently tested for Alpha 4.10.2, the normal Site-B approach remains the safer baseline.
Yormandi Eyes and Tongues
Yormandi can provide valuable creature materials, including Yormandi Eyes and Yormandi Tongues. These are separate harvestable items with different collection requirements. They should not be treated as interchangeable simply because they originate from the same creature.
Yormandi Eyes are used in Rayari Incorporated's higher-tier research contracts. In Alpha 4.10.2, the documented Additional Resources For Research contract requires four Yormandi Eyes and offers a chance at a blueprint from a pool including the P8-AR Rifle and Palatino armor pieces. The recorded blueprint pool has a 25% reward chance; completing one delivery does not guarantee a blueprint. Yormandi materials also appear in specialized Wikelo collection requirements.
Before starting a lengthy Onyx run for Rayari rewards, check the applicable contract unlocks, reputation progression and exact required quantities. Collect materials by their full item names and verify the active turn-in conditions. Defeating Yormandi does not automatically unlock a crafting blueprint.
ASD Onyx Loot: Armor, Weapons, Secure Drives and Research Items
Onyx contains physical loot, mission rewards and crafting blueprints. Weapons and armor can be recovered from eligible containers, weapon racks and enemies, while investigation contracts can award research items and blueprints after completion. These acquisition methods are distinct: collecting ordinary loot does not necessarily complete a mission, provide a blueprint or award an ASD Secure Drive.
| Loot / Reward | Documented Source | Important Limitation |
|---|---|---|
| Geist Armor | Facility loot containers in Engineering and Research; eligible blueprint reward pools | Specific pieces, variants and blueprints are not guaranteed per run |
| Zenith Laser Sniper Rifle | Weapon racks, eligible enemy equipment and blueprint rewards | Physical weapons and crafting blueprints are separate rewards |
| Corbel Armor | Associated Onyx loot and investigation blueprint pools | Check the exact variant and acquisition method |
| Fresnel Energy LMG | Associated weapon loot and blueprint reward records | A blueprint does not guarantee a physical weapon drop |
| ASD Secure Drive | Eligible Hockrow investigation completion rewards | Not a standard random container drop |
| Research Data Devices | Assigned investigation terminals and equipment | Usually tied to a specific mission objective |
| RCMBNT Experimental Containers | Project Hyperion-related experimental content | Individual coded variants are distinct physical cargo items |
| Yormandi Eyes and Tongues | Applicable Yormandi encounters | Creature materials, not access cards or Secure Drives |
Community guides identify distinctive orange loot crates and weapon racks as useful locations for Geist equipment and Zenith rifles. More recent reports also describe Corbel variants, Parallax rifles and SOL-III flight armor among Onyx-related loot. However, individual variants and container availability may differ, and these reports do not establish a fixed Alpha 4.10.2 drop rate.
Where to Find Geist Armor
Geist armor is one of the recognizable equipment families associated with Onyx. Community loot walkthroughs identify pieces in Engineering and Research, with the Engineering route around the Power Core and its exit among the relevant search locations.
Older guides describe different armor pieces appearing in different wings. Treat these routes as practical search areas rather than guaranteed current assignments. Geist equipment exists in multiple variants, so inspect the full item name and appearance before assuming the desired set is complete.
Do not confuse lootable Geist armor with crafting blueprint rewards. Several Jorrit Dossier contracts can reward blueprints for particular Geist variants, but acquiring a physical armor piece does not automatically unlock its recipe.
Zenith Laser Sniper Rifle and Other Weapons
The Zenith Laser Sniper Rifle is documented in Onyx weapon racks and equipment loot. Older walkthroughs identify racks near Engineering traversal areas and deeper facility rooms. Elite enemies may also carry valuable weapons, but exact equipment and spawn availability can vary between runs.
Before prioritizing a loot run, determine whether the goal is obtaining a physical rifle or unlocking its crafting blueprint. Jorrit Dossier rewards can include Zenith-related blueprints, and the blueprint reward pool is separate from ordinary weapon-rack loot.
Combat inside the facility can consume considerable ammunition. Consider whether additional loot searches justify the risk once the required mission objective is complete, particularly when carrying valuable recovered equipment.
How to Get ASD Secure Drives
The ASD Secure Drive is a special data item awarded by certain Onyx investigation contracts. Alpha 4.10.2 item records list it as a completion reward for specific repeatable Hockrow research-data assignments. It is not listed as ordinary random loot and has no documented crafting blueprint or standard NPC shop source.
The recorded missions include:
- Jorrit Dossier: Updated Power Usage Data.
- Jorrit Dossier: Updated Energy Anomaly Data.
- Jorrit Dossier: Updated Security Data.
- Jorrit Dossier: Updated Seismic Data.
These missions award an ASD Secure Drive to the player's home location after successful completion. This is separate from the physical evidence handled during an investigation, which may need to be collected, transferred and delivered before the contract finishes.
ASD Secure Drives are required by selected Wikelo collection contracts. The Star Citizen Wikelo Ships Guide explains the relevant ship exchanges and how Secure Drives fit into larger material requirements. Check the active Wikelo contract before collecting or spending drives, since different rewards have different recipes.
Onyx Facility Enemies and Environmental Hazards
Onyx combines FPS combat with hazardous research environments. Enemy encounters vary by wing and mission, while some of the greatest dangers involve radiation, hostile creatures and difficult traversal rather than a single powerful NPC. Prepare for both combat damage and environmental exposure.
Hostile NPCs and Security Forces
Armed hostile NPCs appear throughout parts of the complex, particularly in deeper offices, research areas and Engineering routes. Some encounters involve heavier weapons, elevated firing positions or fixed gun emplacements. These positions are dangerous when players cross exposed walkways or operate mission terminals.
Clear immediate threats before starting lengthy data transfers or repairs. Use cover when crossing open areas and check elevated positions before advancing into larger chambers. In Site-B, groups can assign separate players to combat protection and mission interactions.
Irradiated Kopion and Research Creatures
The Research wing contains escaped Kopion, including irradiated variants documented in community walkthroughs. They are particularly relevant in lower medical and animal-testing areas, where creatures may approach while players search for records or move between floors.
Clear nearby creatures before beginning stationary objectives whenever possible. A teammate watching the approach routes can prevent an otherwise routine data-transfer task from becoming a failed run.
Yormandi is a separate deep-facility threat and should not be confused with ordinary Kopion encounters. Its combat mechanics, creature materials and access route differ.
Radiation Pulses, Falls and Traversal Risks
The Engineering Power Core emits periodic radiation pulses, while the Research wing contains shafts and multi-level traversal routes. These hazards can seriously injure or kill players even when no hostile NPC is nearby.
Move between protected positions during the radiation cycle and inspect lower platforms before dropping through shafts. Entering the wrong passage may prevent easy backtracking, especially when an elevator connects only particular floors.
Bring enough medical supplies to manage injuries without depending entirely on the lobby medical station. A dangerous route becomes more difficult if equipment is lost in a fall or squad members become separated between levels.
Best ASD Onyx Route for Investigation, Loot and Site-B
The most efficient route depends on your objective. Early dossier missions do not require clearing every room, while Project Hyperion requires suitable tools and access to multiple sectors. A loot-focused run can concentrate on the areas containing the desired equipment, provided a return route to the hangar is known.
Route 1: Hockrow Investigation
For investigation progression, follow the active dossier objective instead of attempting a complete facility clear. The introductory Personnel Files assignment establishes access, followed by Engineering and Research investigations and data-recovery tasks. Complete the contract's required transfer or delivery stage before assuming progression has registered.
- Accept the current Hockrow investigation assignment.
- Travel to the designated Onyx site and enter through the assigned hangar.
- Use the lobby to identify the required wing.
- Reach the objective terminal, recorder or data device.
- Complete the interaction and verify mission progression.
- Use the appropriate wing exit to return toward the lobby.
- Leave through the hangar or continue to the specified external delivery.
Do not leave immediately after retrieving an item if the contract requires a subsequent transfer or delivery. Several Jorrit Dossier data-recovery assignments require delivering evidence to a designated external destination rather than completing solely at an Onyx terminal.
Route 2: Engineering and Research Loot
A loot run should focus on recoverable equipment rather than every available encounter. Engineering contains relevant Power Core and weapon-rack areas, while Research and Site-B offer additional armor, weapon and laboratory-related loot locations.
Begin with the wing closest to the intended item source, clear nearby enemies and inspect appropriate containers. When inventory capacity becomes limited or the risk of continuing exceeds the expected reward, return toward the hangar. Extracting fewer valuable items successfully is better than losing an entire collection deep inside the facility.
Community routes provide useful landmarks, but no universally reliable Alpha 4.10.2 container-reset period or hourly loot yield is established here. Do not base a farming calculation on guaranteed crate contents.
Route 3: Project Hyperion and Site-B
Project Hyperion requires more preparation than early investigations because it combines Engineering repairs, Power Core interactions, a Research catalyst and the deeper Site-B experiment. Complete the required Engineering and Research stages before attempting the final laboratory objective.
Prepare a multitool with an appropriate mining attachment, tractor equipment, repair supplies, ammunition and medical items. The September 2026 walkthrough recommends a Dyno multitool with Orbit mining attachment, TruBeam tractor equipment and Cambio SRT repair supplies. Facility fabricators may provide additional tools, but bringing equipment in advance avoids depending on their availability.
After performing the experiment and uploading the required results, follow the active mission instructions for completion. If a physical RCMBNT sample is the intended reward or exchange material, arrange suitable cargo transport. If Yormandi is a separate objective, continue toward the creature chamber instead of assuming Project Hyperion completion automatically provides its materials.
How to Exit the ASD Onyx Facility Safely
Extraction should be planned before entering a route that is difficult to reverse. The main exit is through the underground lobby and its hangar connection, but individual wings have different return paths. Site-B adds elevators and cargo transit sections that can complicate the return to the surface.
Engineering Exit Route
When leaving the Engineering Power Core, locate the shielded bulkhead opposite the central anomaly rather than crossing the hazardous core directly. The documented layout also includes an exit elevator connected to the Condensers section. Choose the available exit appropriate to your current position and return toward the lobby and hangar elevators.
Radiation pulses remain dangerous while leaving the core, so continue using cover until everyone has exited the hazardous chamber. Do not assume the environmental danger disappears immediately after completing a mission objective.
Research Exit Route
The Research wing includes a central atrium with an elevator connecting sub-level 9 to the exit on sub-level 1. This provides a predictable route toward the Site-B connection and relevant exit passages, unlike blindly climbing or dropping through shafts. Identify the appropriate elevator before transporting valuable equipment through lower floors.
If working on sub-level 7 or 8, follow the documented connections toward the central atrium and use the facility's designated exit route. Avoid entering unfamiliar shafts simply because they appear to lead toward another corridor or elevator.
Site-B and Cargo Extraction
Site-B contains connected elevators, transit platforms and cargo-handling equipment. For a physical research sample or large experiment container, identify the route back through these systems. A 2 SCU RCMBNT container cannot be treated like a small personal-inventory item.
Use the normal Research connection when a shortcut has not been verified in the current build. Player-reported card shortcuts may include doors behaving differently depending on direction or patch state, so they should not be the only planned exit for a valuable cargo run.
Back at the hangar, confirm that mission items and recovered equipment are secured. Leave the facility and complete any destination-specific delivery or data submission. Recovering cargo or research data is not equivalent to finishing a contract until the required objective has registered.
ASD Onyx Facility Problems and Troubleshooting
Onyx missions can become difficult because of missing access, incomplete objectives, environmental hazards and elevator issues. When blocked, first determine whether the problem involves a physical door, unfinished mission stage or navigation to the wrong sector.
No Direct Quantum Marker to Onyx
The first Jorrit Dossier mission explicitly warns that the facility's quantum beacon is disabled. Use the provided destination information and nearby quantum markers, then fly the remaining distance manually. Later assignments, including Access Engineering Files, describe a workaround enabling more direct quantum travel.
A missing direct marker during the introduction is therefore not necessarily a broken contract. Confirm the active dossier stage and navigation instructions before abandoning the assignment.
Excavation Keycard Does Not Open the Door
Check the item's full name and confirm that the reader belongs to its designated restricted area. The Excavation Access Card is not a universal key for the entire complex, and an ASD Secure Drive cannot replace it.
If the door belongs to the older Yormandi observation shortcut, verify that the current build supports the route and accepts the recovered card. Placeholder-labeled access items described in older reports do not prove that every similar-looking card opens the same door.
ASD Secure Drive Missing After Investigation
Alpha 4.10.2 records award ASD Secure Drives through specific Jorrit Dossier contracts. For the documented Updated Data missions, the reward is delivered to the player's home location after successful completion. Check the contract status and home inventory rather than assuming the drive must be collected from a terminal inside Onyx.
Physical evidence collected during an investigation is distinct from the final Secure Drive reward. If the assignment still requires an external delivery, complete it before checking for the reward.
Stuck in Research or Site-B
Use floor labels and the known atrium connections to identify the exit rather than continuing through random shafts. Research sub-levels 2 and 3 are inaccessible through the documented normal route, and the elevator connecting sub-level 9 to sub-level 1 is an important landmark.
In Site-B, identify the main building, horizontal transit platform and cargo-elevator connection. If a shortcut door is locked, backtrack through the regular mission route where possible instead of assuming every restricted door must open from both sides.
Star Citizen ASD Onyx Facility FAQ
These answers cover common questions about access, investigation progression and rewards.
Do you need an Excavation Access Card to enter the Onyx Facility? No. The standard facility entrance uses an assigned Large hangar and its internal elevator. The Excavation Access Card is intended for a restricted interior area, not the surface entrance.
Can you obtain ASD Secure Drives without looting them from Onyx? Yes. Eligible Hockrow Updated Data investigations award Secure Drives after successful completion, with the documented rewards delivered to the player's home location. They are not ordinary random container loot.
Can you reach Yormandi without completing Project Hyperion? Community guides describe access toward Yormandi through Site-B and a possible access-card shortcut. However, actual route availability and encounter behavior depend on the current game state, and the shortcut has not been independently verified for Alpha 4.10.2.
Is every ASD Onyx Facility identical? The facilities share a documented standardized layout, but the active contract determines the relevant destination and objectives. Enemy activity, available mission interactions and loot should not be assumed identical on every visit.
Conclusion
Use Hockrow investigations to locate and enter Onyx, then follow the correct sector for the active objective. Engineering leads to the Power Core, Research connects toward Site-B, and restricted Excavation access requires the appropriate card. Distinguish physical loot, crafting blueprints, Secure Drive rewards and Project Hyperion samples. Complete every required data transfer or delivery, verify the current mission state and plan a safe extraction route before entering the deepest sections.