The Battle for Mount Hyjal, also known as Hyjal Summit, is a 25-player Tier 6 raid inside the Caverns of Time. The raid follows a linear path through five bosses: Rage Winterchill, Anetheron, Kaz'rogal, Azgalor and Archimonde. Blizzard has scheduled Mount Hyjal to open globally on August 27, 2026, according to the official TBC Anniversary Phase 3 announcement.
Mount Hyjal is different from most TBC raids because the first four bosses are preceded by eight fixed enemy waves. The raid defends the Alliance camp with Jaina Proudmoore, moves to the Horde camp with Thrall and finishes with Archimonde near Nordrassil. This guide covers all 32 waves, every boss tactic and the complete fixed loot table with direct Wowhead links.
Battle for Mount Hyjal Quick Facts
| Category | Details |
|---|---|
| Raid size | 25 players |
| Required level | 70 |
| Location | Caverns of Time in Tanaris |
| Raid faction | Scale of the Sands |
| Bosses | Five mandatory bosses |
| Enemy waves | Eight waves before each of the first four bosses |
| Total waves | 32 fixed waves |
| Tier 6 tokens | Gloves from Azgalor and helms from Archimonde |
| Final boss | Archimonde |
Mount Hyjal Attunement and Entrance
The raid entrance is inside the Caverns of Time in Tanaris. Phase 3 access requires The Vials of Eternity from Soridormi. The quest sends players to defeat Lady Vashj in Serpentshrine Cavern and Kael'thas Sunstrider in Tempest Keep and collect both Vial Remnants.
Finish the quest and test raid access before the scheduled clear. Players who still need one or both Tier 5 checkpoints can use a structured Mount Hyjal access route to identify the unfinished objective without confusing it with the separate Black Temple attunement.
Recommended Mount Hyjal Raid Setup
A progression roster should prioritize wave control and survival rather than maximum single-target damage. Three dedicated tanks are normally sufficient, but a fourth tank or tank-capable hybrid makes the first clears safer. Seven healers provide a comfortable baseline, while the remaining places can be filled with a balance of melee and ranged DPS.
- One Protection Paladin for large Ghoul, Crypt Fiend and Fel Stalker groups.
- One physical main tank for the five bosses.
- One or two off-tanks for Abominations, Infernals and Lesser Doomguards.
- Seven healers with assigned tank and raid responsibilities.
- Mages and Warlocks for controlled area damage.
- Hunters for Misdirection, Gargoyle control and ranged target switches.
- Reliable interrupts for Shadowy Necromancers.
- Mages or Druids for curses on Banshees and Archimonde.
- Priests for Shackle Undead when a dangerous wave needs additional control.
- Several Shamans for Tremor Totem on Archimonde.
Explore services related to this guide, selected from our TBC Raids catalog.
View All TBC Raids Services


How Mount Hyjal Enemy Waves Work
The first four bosses each have a fixed set of eight waves. The enemy combinations are not random. A new wave normally begins on a timer, so slow damage can cause two waves to overlap. Finishing a wave quickly creates a short out-of-combat window for drinking, resurrection and rebuffing.
The boss arrives after the eighth wave and a short preparation period. Under the standard Classic wave system, resetting the defense event before killing its boss requires the raid to repeat that boss's eight waves. This makes controlled mana use and clean recovery between waves more important than unnecessary damage.
- Start every wave with Misdirection and controlled tank threat.
- Do not begin area damage before tanks have collected the melee enemies.
- Pull ranged enemies toward the tank position with interrupts and line of sight.
- Use Jaina, Thrall and their guards without allowing important NPCs to tank entire waves.
- Leave combat quickly when the final enemy dies so healers and casters can drink.
- Search the base if the enemy counter stops decreasing because Gargoyles or casters may be attacking distant NPCs.
Mount Hyjal Trash Enemy Priorities
| Enemy | Main Threat | Raid Response |
|---|---|---|
| Ghoul | Frenzy and large group pressure | Gather on the area damage tank and kill with controlled AoE |
| Crypt Fiend | Ranged attacks, Web and summoned scarabs | Stack with the main pack or control until tanks are ready |
| Shadowy Necromancer | Shadow Bolt and Unholy Frenzy | Interrupt, crowd control and kill before uncontrolled melee enemies |
| Abomination | Disease Cloud and Knockdown | Assign separate tanks and keep melee outside unnecessary Disease Clouds |
| Banshee | Banshee Curse and Anti-Magic Shell | Decurse quickly and use physical DPS when Anti-Magic Shell is active |
| Gargoyle | Airborne attacks from multiple directions | Send ranged players to collect them before they kill camp NPCs |
| Frost Wyrm | Splashing Frost Breath | Use ranged DPS, spread around its target and kill it early |
| Giant Infernal | Stacking Immolation damage | Use a prepared tank, separate the group and avoid stacking every Infernal on melee |
| Fel Stalker | Mana Burn | Stun, control and kill before healers lose significant mana |
Rage Winterchill Waves
The first eight waves take place at the Alliance camp. The early waves introduce the main undead enemies gradually. Shadowy Necromancers begin appearing in Wave 4, while Abominations enter the event in Wave 6.
| Wave | Enemy Composition |
|---|---|
| 1 | 10 Ghouls |
| 2 | 10 Ghouls and 2 Crypt Fiends |
| 3 | 6 Ghouls and 6 Crypt Fiends |
| 4 | 6 Ghouls, 4 Crypt Fiends and 2 Shadowy Necromancers |
| 5 | 2 Ghouls, 6 Crypt Fiends and 4 Shadowy Necromancers |
| 6 | 6 Ghouls and 6 Abominations |
| 7 | 4 Ghouls, 4 Shadowy Necromancers and 4 Abominations |
| 8 | 6 Ghouls, 4 Crypt Fiends, 2 Abominations and 2 Shadowy Necromancers |
Use the early waves to establish the tanking and area damage rhythm. From Wave 4 onward, crowd control or interrupt the Necromancers while tanks collect the undead pack. During Waves 6 and 7, distribute the Abominations between tanks instead of placing every Knockdown on one player.
Rage Winterchill Boss Tactics
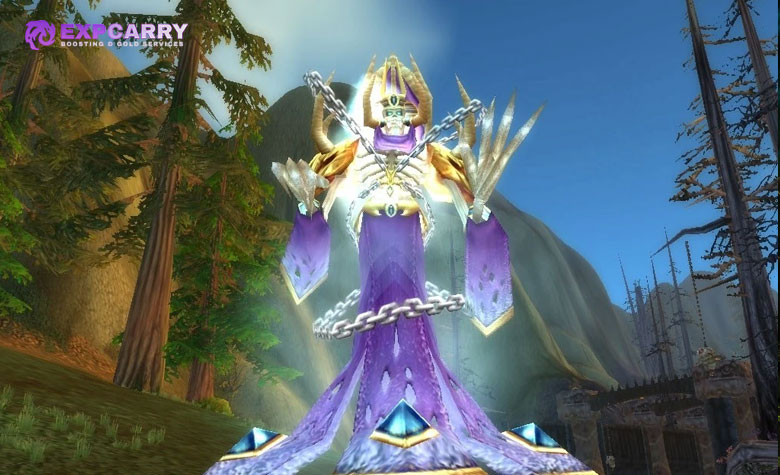
Rage Winterchill is a single-phase encounter. Tank him away from Jaina and keep the raid spread enough to recognize Death and Decay immediately.
- Icebolt: Hits a random player, stuns them for 4 seconds and applies heavy periodic Frost damage. Healers must react immediately. A PvP trinket or Living Action Potion can remove the stun and its damage effect.
- Death and Decay: Creates a large ground effect that removes 15 percent of maximum health every second. Everyone, including the tank, must leave immediately.
- Frost Nova: Roots players within 20 yards. Dispel important targets quickly, especially if Death and Decay is active nearby.
- Frost Armor: Increases Winterchill's armor and slows melee attackers. Blessing of Freedom and Free Action Potion can protect important melee players.
The most dangerous combination is Frost Nova followed by Death and Decay. Keep dispellers ready and avoid spending movement abilities before they are needed. Damage is secondary whenever Death and Decay appears.
Rage Winterchill Loot
| Item | Type |
|---|---|
| Bracers of Martyrdom | Cloth wrists |
| Cuffs of Devastation | Cloth wrists |
| Rejuvenating Bracers | Leather wrists |
| Deadly Cuffs | Leather wrists |
| Bracers of the Pathfinder | Mail wrists |
| Howling Wind Bracers | Mail wrists |
| Stillwater Boots | Mail feet |
| Blood-stained Pauldrons | Plate shoulders |
| Blessed Adamantite Bracers | Plate wrists |
| Furious Shackles | Plate wrists |
| Chronicle of Dark Secrets | Caster off-hand |
| Tracker's Blade | One-handed dagger |
| Time-Phased Phylactery | Black Temple attunement quest item |
Anetheron Waves
The second Alliance camp event introduces Banshees. Remove Banshee Curse immediately and use physical damage against Banshees protected by Anti-Magic Shell.
| Wave | Enemy Composition |
|---|---|
| 1 | 10 Ghouls |
| 2 | 8 Ghouls and 4 Abominations |
| 3 | 4 Ghouls, 4 Crypt Fiends and 4 Shadowy Necromancers |
| 4 | 6 Crypt Fiends, 2 Shadowy Necromancers and 2 Banshees |
| 5 | 6 Ghouls, 2 Shadowy Necromancers and 4 Banshees |
| 6 | 6 Ghouls, 4 Shadowy Necromancers and 2 Abominations |
| 7 | 2 Ghouls, 4 Abominations, 4 Crypt Fiends and 2 Banshees |
| 8 | 4 Ghouls, 4 Abominations, 2 Crypt Fiends, 2 Banshees and 2 Shadowy Necromancers |
Wave 6 can kill a tank quickly if several Necromancers cast Shadow Bolt together while the tank is controlling the melee pack. Interrupt or crowd control the casters before beginning area damage. On Waves 7 and 8, separate the Abominations and allow physical DPS to handle Banshees when their magic shields are active.
Anetheron Boss Tactics
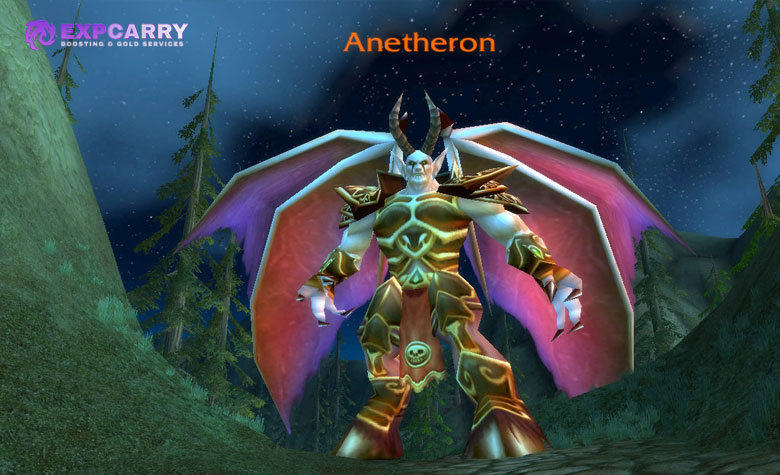
Anetheron requires one main tank and an off-tank for Towering Infernals. Spread healers around the area so Carrion Swarm cannot reduce the healing output of the entire healing team.
- Carrion Swarm: A cone attack aimed at a random player. It deals Shadow damage and reduces healing done by affected players by 75 percent for 20 seconds.
- Inferno: Summons a Towering Infernal near a random player approximately once per minute. The off-tank must collect it immediately.
- Sleep: Puts three random players to sleep for 10 seconds. It cannot be dispelled, but damage can awaken the player.
- Vampiric Aura: Heals Anetheron for three times the melee damage he deals. Maintain Wound Poison, Mortal Strike or Aimed Shot.
Tank the Infernals far away from Anetheron so they do not benefit from Vampiric Aura. A Fire Resistance off-tank is useful when several Infernals must be held. Progression groups should kill each Infernal with ranged DPS, while higher damage groups can keep them controlled and focus on Anetheron.
Anetheron Loot
| Item | Type |
|---|---|
| Anetheron's Noose | Cloth waist |
| Archbishop's Slippers | Cloth feet |
| Hatefury Mantle | Cloth shoulders |
| Enchanted Leather Sandals | Leather feet |
| Don Alejandro's Money Belt | Leather waist |
| Quickstrider Moccasins | Mail feet |
| Golden Links of Restoration | Mail chest |
| Glimmering Steel Mantle | Plate shoulders |
| Pillar of Ferocity | Two-handed staff |
| The Unbreakable Will | One-handed sword |
| Blade of Infamy | One-handed sword |
| Bastion of Light | Healing shield |
Moving From the Alliance Camp to the Horde Camp
After defeating Anetheron, speak to Jaina when the raid is ready to abandon the Alliance camp. Mount immediately and follow the road to the Horde base. Do not remain inside the camp when the evacuation event begins.
At the Horde base, locate Thrall and assign ranged players to watch the rear sections of the camp. Gargoyles can arrive from a different direction than the ground wave and may attack Troll or Tauren NPCs without entering the main tank area.
Kaz'rogal Waves
The Horde waves add Gargoyles and Frost Wyrms. Ranged players should move toward the known air spawn before the previous wave ends, while the main raid controls the ground enemies near Thrall.
| Wave | Enemy Composition |
|---|---|
| 1 | 6 Ghouls, 4 Abominations, 2 Banshees and 2 Shadowy Necromancers |
| 2 | 4 Ghouls and 10 Gargoyles from the rear |
| 3 | 6 Ghouls, 6 Crypt Fiends and 2 Shadowy Necromancers |
| 4 | 6 Crypt Fiends, 2 Shadowy Necromancers and 6 Gargoyles from the rear |
| 5 | 4 Ghouls, 4 Shadowy Necromancers and 6 Abominations |
| 6 | 1 Frost Wyrm and 9 Gargoyles from the front |
| 7 | 6 Ghouls, 4 Abominations and 1 Frost Wyrm |
| 8 | 4 Ghouls, 4 Crypt Fiends, 2 Banshees, 2 Shadowy Necromancers and 4 Abominations |
Wave 5 is a heavy tank damage wave with six Abominations and four Necromancers. Control the Necromancers until the Abominations are stable. Waves 6 and 7 require the ranged team to spread around the Frost Wyrm target and kill the flying enemies before returning to the ground group.
Kaz'rogal Boss Tactics
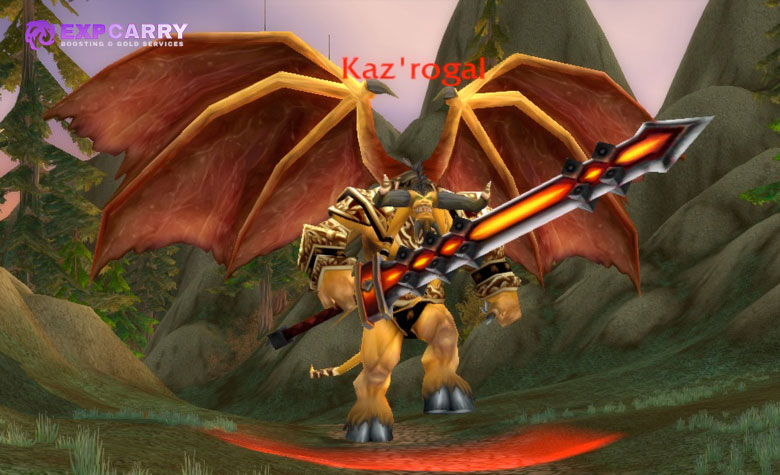
Kaz'rogal is a short damage and mana management encounter. Position him with his back toward Thrall so the NPCs do not stand inside Malevolent Cleave.
- Mark of Kaz'rogal: Drains 3000 mana over 5 seconds from every mana user. A player without enough mana explodes and damages everyone within 15 yards.
- War Stomp: Damages and stuns players within 15 yards for 5 seconds.
- Malevolent Cleave: Strikes targets in front and divides its damage between them.
- Cripple: Reduces movement speed, attack speed and Strength. Normal dispels cannot remove it.
Mana users should remain comfortably above 3000 mana. Use mana potions, Dark Runes, Mana Tide Totem, Shadowfiend and Evocation before the Mark frequency becomes dangerous. A player who is about to explode must move more than 15 yards away from everyone else.
Do not use a Protection Paladin as the only boss tank unless the player has a tested mana plan. Mark can remove the resources needed for threat and defensive abilities. Keep mana-using melee players separated enough to prevent one explosion from killing the full melee group.
Kaz'rogal Loot
| Item | Type |
|---|---|
| Blue Suede Shoes | Cloth feet |
| Leggings of Channeled Elements | Cloth legs |
| Angelista's Sash | Cloth waist |
| Razorfury Mantle | Leather shoulders |
| Black Featherlight Boots | Leather feet |
| Belt of the Crescent Moon | Leather waist |
| Beast-tamer's Shoulders | Mail shoulders |
| Sun-touched Chain Leggings | Mail legs |
| Valestalker Girdle | Mail waist |
| Belt of Seething Fury | Plate waist |
| Hammer of Atonement | One-handed mace |
| Kaz'rogal's Hardened Heart | Shield |
Azgalor Waves
The final eight waves introduce Giant Infernals and Fel Stalkers. These are the most demanding waves in the raid because Infernals create constant area damage while Fel Stalkers attack healer and caster mana.
| Wave | Enemy Composition |
|---|---|
| 1 | 6 Abominations and 6 Shadowy Necromancers |
| 2 | 5 Ghouls, 8 Gargoyles and 1 Frost Wyrm |
| 3 | 8 Ghouls and 8 Giant Infernals |
| 4 | 6 Fel Stalkers and 8 Giant Infernals |
| 5 | 4 Abominations, 6 Fel Stalkers and 4 Shadowy Necromancers |
| 6 | 8 Shadowy Necromancers and 8 Banshees |
| 7 | 8 Giant Infernals, 2 Fel Stalkers, 2 Crypt Fiends and 2 Ghouls |
| 8 | 4 Abominations, 4 Crypt Fiends, 2 Fel Stalkers, 2 Shadowy Necromancers and 4 Banshees |
Use a Fire Resistance tank or divide the Infernals between several tanks on Waves 3, 4 and 7. Stun and kill Fel Stalkers before they repeatedly Mana Burn healers. Wave 6 requires physical DPS to kill Banshees while the raid interrupts or controls the eight Necromancers.
Wave 8 contains several enemy types but fewer copies of each. Assign targets before it begins: tanks collect Abominations and Crypt Fiends, melee handle Banshees, interrupts control Necromancers and Fel Stalkers die before they can drain mana.
Azgalor Boss Tactics
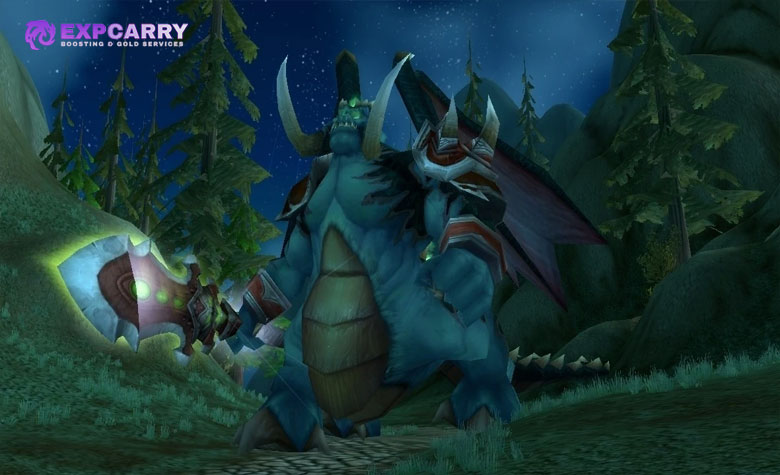
Azgalor is the final boss at the Horde camp and the first Mount Hyjal boss to drop Tier 6 tokens. The encounter requires one boss tank and one or two off-tanks for the Lesser Doomguards created by Doom.
- Doom: Marks a random player and kills them after 20 seconds. The death creates a Lesser Doomguard at the player's position.
- Rain of Fire: Creates a 15-yard fire area and applies Unquenchable Flames to players hit.
- Howl of Azgalor: Silences the raid for 5 seconds. Healers must prepare the tank with healing over time effects before each cast.
- Cleave: Hits players and NPCs in front of Azgalor. Only the main tank should stand there.
Assign a Doom location away from Azgalor. Every marked player runs there before the debuff expires. The Doomguard tank collects the add immediately, while assigned healers and DPS keep it controlled. A Soulstone can return the doomed player to combat, but it does not prevent the death or the add spawn.
Ranged DPS and healers should remain more than 30 yards from Azgalor when possible. This prevents Rain of Fire from selecting their positions. Melee must leave every Rain of Fire immediately and continue moving until they are completely outside its radius.
Azgalor Loot
| Item | Type |
|---|---|
| Gloves of the Forgotten Conqueror | Tier 6 token for Paladin, Priest and Warlock |
| Gloves of the Forgotten Vanquisher | Tier 6 token for Rogue, Mage and Druid |
| Gloves of the Forgotten Protector | Tier 6 token for Warrior, Hunter and Shaman |
| Don Rodrigo's Poncho | Leather chest |
| Shady Dealer's Pantaloons | Leather legs |
| Bow-stitched Leggings | Mail legs |
| Girdle of Hope | Plate waist |
| Glory of the Defender | Plate chest |
| Boundless Agony | One-handed dagger |
Moving to Archimonde
After Azgalor dies, speak to Thrall when the raid is ready to leave the Horde camp. Follow the road toward the Night Elf area and Nordrassil. Archimonde is not preceded by another set of eight waves.
Every player must speak to Tyrande Whisperwind and receive Tears of the Goddess before pulling Archimonde. Place the item on an accessible action bar. Anyone who cannot use the item correctly after Air Burst is not ready for the pull.
Archimonde Boss Tactics

Archimonde is a single-phase survival encounter with a 9-minute enrage timer. The damage requirement is moderate, but one player death can trigger Soul Charge and cause additional deaths. Survival always has priority over damage.
- Doomfire: Moving fire trails begin near Archimonde and travel through the combat area. Contact deals immediate Fire damage and applies a decreasing damage effect that cannot be normally dispelled.
- Fear: Fears the entire raid for 8 seconds approximately every 40 seconds. Tremor Totem, Berserker Rage and PvP trinkets reduce the risk of players running into Doomfire.
- Air Burst: Hits a random player and everyone within 13 yards, launching them into the air. Spread out and use Tears of the Goddess shortly before hitting the ground.
- Grip of the Legion: A long Shadow damage curse. Mages and Druids must remove it immediately.
- Soul Charge: Archimonde gains a class-dependent raid attack whenever a player dies. Multiple deaths can create an unrecoverable chain.
- Finger of Death: Used when no player is inside melee range. The main tank must never leave Archimonde without another valid melee target.
A Protection Warrior is the safest main tank because Berserker Rage can prevent every Fear from removing the tank from melee range. Position Archimonde in open terrain and keep Doomfires away from the tank whenever possible.
Divide the raid into five loose groups. Each group should have access to Tremor Totem, healing and a curse removal player. Members remain close enough for group utility but more than 13 yards apart whenever Air Burst is available.
When targeted by Air Burst, move away from nearby players before the launch. Do not activate Tears of the Goddess immediately after being thrown. Use it shortly before landing so the slow-fall effect remains active when fall damage would occur.
At 10 percent health, Tyrande grants Protection of Elune and the final story sequence begins. Continue attacking while the wisps surround Archimonde, but the raid is protected from his final attacks.
Archimonde Loot
| Item | Type |
|---|---|
| Helm of the Forgotten Conqueror | Tier 6 token for Paladin, Priest and Warlock |
| Helm of the Forgotten Vanquisher | Tier 6 token for Rogue, Mage and Druid |
| Helm of the Forgotten Protector | Tier 6 token for Warrior, Hunter and Shaman |
| Robes of Rhonin | Cloth chest |
| Leggings of Eternity | Cloth legs |
| Midnight Chestguard | Leather chest |
| Mail of Fevered Pursuit | Mail chest |
| Legguards of Endless Rage | Plate legs |
| Savior's Grasp | Plate chest |
| Antonidas's Aegis of Rapt Concentration | Shield |
| Apostle of Argus | Two-handed staff |
| Cataclysm's Edge | Two-handed sword |
| Tempest of Chaos | One-handed sword |
| Bristleblitz Striker | Bow |
| Scepter of Purification | Healing off-hand |
Mount Hyjal Trash Loot
The 32 enemy waves can drop Bind on Pickup epic equipment in addition to reputation and progression materials. Establish loot rules before beginning the defense event because stopping to discuss an item can waste the limited recovery time before the next wave.
| Item | Type |
|---|---|
| Nethervoid Cloak | Back |
| Pepe's Shroud of Pacification | Back |
| Choker of Serrated Blades | Neck |
| Hellfire-Encased Pendant | Neck |
| Boots of the Divine Light | Cloth feet |
| Chestguard of Relentless Storms | Mail chest |
| Claw of Molten Fury | Main-hand fist weapon |
| Fist of Molten Fury | Off-hand fist weapon |
| Hammer of Judgement | One-handed mace |
Wave enemies can also provide Heart of Darkness and Mark of the Illidari. These materials should follow a separate guild distribution rule from ordinary epic equipment.
Mount Hyjal Jewelcrafting Design Drops
Every Mount Hyjal boss has a chance to drop one of eight Bind on Pickup Jewelcrafting designs. These are shared boss drops rather than loot assigned to one specific encounter.
| Design | Required Profession |
|---|---|
| Design: Flashing Crimson Spinel | Jewelcrafting 375 |
| Design: Stormy Empyrean Sapphire | Jewelcrafting 375 |
| Design: Mystic Lionseye | Jewelcrafting 375 |
| Design: Great Lionseye | Jewelcrafting 375 |
| Design: Sovereign Shadowsong Amethyst | Jewelcrafting 375 |
| Design: Shifting Shadowsong Amethyst | Jewelcrafting 375 |
| Design: Inscribed Pyrestone | Jewelcrafting 375 |
| Design: Veiled Pyrestone | Jewelcrafting 375 |
Ancient Gem Veins and Epic Gems
Bring at least one player with 375 Mining. After the second boss in each base has been defeated and the evacuation begins, Ancient Gem Veins can appear along the road toward the next camp. These nodes provide the Mount Hyjal source of raw Phase 3 epic gems.
Decide who mines the nodes and how the gems are distributed before the raid. Do not leave the camp without checking the road, because access to the veins is tied to clearing the Alliance and Horde defense sections.
Tier 6 Tokens and Scale of the Sands Reputation
Azgalor drops Tier 6 glove tokens, while Archimonde drops Tier 6 helm tokens. Tydormu at the Mount Hyjal entrance exchanges the tokens for class set pieces.
| Token | Classes |
|---|---|
| Forgotten Conqueror | Paladin, Priest and Warlock |
| Forgotten Vanquisher | Rogue, Mage and Druid |
| Forgotten Protector | Warrior, Hunter and Shaman |
Mount Hyjal enemies and bosses also award Scale of the Sands reputation. The main character reward is a Band of Eternity ring that upgrades at higher reputation levels. Consistent Hyjal Summit clears combine Tier 6 progression, boss loot, trash drops and reputation within the same weekly lockout.
Mount Hyjal Loot Item Levels
| Loot Category | Item Level |
|---|---|
| Regular boss and trash epics | 141 |
| Tier 6 tokens and set items | 146 |
| Archimonde non-token loot | 151 |
Archimonde weapons and armor are stronger than the normal drops from the first four bosses. Tier 6 tokens use their own item level and should not be classified as ordinary item level 141 boss loot.
Common Mount Hyjal Raid Mistakes
- Counting eight waves before Archimonde: Only the first four bosses have wave events, for a total of 32 waves.
- Beginning AoE before tank threat: Ghouls and Fel Stalkers can immediately kill casters or healers.
- Ignoring ranged enemies: Necromancers and Gargoyles can remain outside the main pack and prevent the wave from ending.
- Using too much mana early: The next timed wave may arrive before healers and casters can drink.
- Leaving Banshee Curse active: The curse reduces physical hit chance by 66 percent.
- Allowing Fel Stalkers to cast freely: Repeated Mana Burns can leave the raid unprepared for Azgalor.
- Stacking for Carrion Swarm: Multiple healers can lose 75 percent of their healing output together.
- Dropping below 3000 mana on Kaz'rogal: Mark can trigger a lethal explosion.
- Spawning Doomguards inside the raid: Doom targets must die at the assigned off-tank location.
- Missing Tears of the Goddess: Air Burst normally kills players who cannot prevent the fall damage.
- Dying on Archimonde: Soul Charge can turn one avoidable death into a full raid wipe.
- Expecting Badge of Justice drops: Raid badges are not part of the initial Phase 3 Mount Hyjal boss loot.
Complete Battle for Mount Hyjal Route
- Enter through the Caverns of Time after completing The Vials of Eternity.
- Speak to Jaina and clear the first eight Alliance waves.
- Defeat Rage Winterchill while moving out of Death and Decay.
- Clear the second Alliance wave set and control Banshees and Abominations.
- Defeat Anetheron with spread healers and an Infernal off-tank.
- Evacuate the Alliance camp and follow the road to Thrall.
- Clear the first Horde wave set while ranged DPS control Gargoyles and Frost Wyrms.
- Defeat Kaz'rogal while keeping every mana user above the Mark requirement.
- Clear the final eight waves with prepared Infernal and Fel Stalker assignments.
- Defeat Azgalor and send every Doom target to the off-tank location.
- Evacuate the Horde camp, mine available Ancient Gem Veins and move toward Nordrassil.
- Collect Tears of the Goddess from Tyrande before pulling Archimonde.
- Defeat Archimonde by surviving Doomfire, Fear and Air Burst without triggering Soul Charge chains.
Final Mount Hyjal Strategy Summary
The Battle for Mount Hyjal is controlled through preparation and repeatable wave assignments. Tanks must gather each ground wave quickly, ranged players must intercept flying enemies and the raid must preserve enough mana to finish every set without an overlap.
The first four bosses each test one central mechanic: Death and Decay on Rage Winterchill, Carrion Swarm on Anetheron, mana management on Kaz'rogal and Doom on Azgalor. Archimonde changes the focus from raid throughput to personal survival. Complete those assignments consistently and Mount Hyjal becomes a reliable source of Tier 6 tokens, item level 151 Archimonde equipment, Scale of the Sands reputation and Phase 3 epic gems.