Illidan Stormrage is the ninth and final boss of Black Temple in TBC Anniversary. The encounter requires precise tank preparation, controlled positioning and fast target switches across five connected phases. Blizzard has scheduled Black Temple to open on August 27, 2026, according to the official TBC Anniversary Phase 3 announcement.
This is not a simple tank and damage encounter. The raid needs a physical main tank capable of preventing Shear, two Fire Resistance tanks for the Flames of Azzinoth and a ranged Shadow Resistance tank for Demon Form. The usual ranged tank is a Warlock. Shadow Resistance is required for this specialist role, not for the entire raid.
Illidan Stormrage Phase Overview
The encounter has five named phases, but Phase 5 does not replace the earlier mechanics. After Illidan reaches 30 percent health, the raid continues alternating between his ground and Demon Forms while handling Maiev Shadowsong and Enrage.
| Phase | Start | Active Tank | Main Mechanics |
|---|---|---|---|
| Phase 1 | 100 to 65 percent | Physical main tank | Shear, Flame Crash, Draw Soul and Parasitic Shadowfiend |
| Phase 2 | At 65 percent | Two Fire Resistance tanks | Flames of Azzinoth, Eye Blast, Fireball and Dark Barrage |
| Phase 3 | After both Flames die | Physical main tank | Phase 1 mechanics plus Agonizing Flames |
| Phase 4 | After the ground cycle | Shadow Resistance Warlock | Shadow Blast, Flame Burst, Aura of Dread and Shadow Demons |
| Phase 5 | At 30 percent | Main tank and Warlock by form | Ground and Demon cycles plus Maiev, Cage Traps and Enrage |
Recommended Raid Setup and Specialist Roles
A learning group normally uses seven or eight healers, with the remaining slots assigned to DPS after all specialist roles are covered. Ranged damage is especially valuable because several phases punish melee positioning or require immediate add switches.
| Assignment | Recommended Choice | Preparation |
|---|---|---|
| Ground main tank | Protection Warrior or Protection Paladin | Reliable block, dodge and parry coverage for Shear |
| Flame tank one | Warrior, Paladin or Druid | Fire Resistance set and practiced movement route |
| Flame tank two | Warrior, Paladin or Druid | Fire Resistance set and practiced movement route |
| Demon Form tank | Warlock | Shadow Resistance, high health and reliable ranged threat |
| Parasite control | Ranged DPS and Hunter | Fixed drop position, Frost Trap and target macro |
| Shadow Demon control | Ranged DPS with slows and burst | Immediate target switch and assigned control abilities |
These are four tanking assignments, but the raid does not necessarily need four conventional tank specializations. The Warlock remains a ranged DPS player outside Demon Form, while the two Fire Resistance tanks are only essential during Phase 2. Before the raid begins, confirm that every specialist has completed the required Black Temple access route and has the correct resistance set equipped.
Preparation Before Pulling Illidan
Assign positions before speaking to Akama. Every player should know the parasite drop location, Phase 2 group, Flame target, Demon Form position and Phase 5 trap responsibility.
- Mark the main tank and keep Illidan facing away from the raid.
- Assign one healer or healing team to each Flame Resistance tank.
- Give the Warlock tank dedicated healers for every Demon Form.
- Create separate target macros for Parasitic Shadowfiends and Shadow Demons.
- Assign a Hunter Frost Trap or another reliable slow to the parasite drop area.
- Divide the raid into small Phase 2 groups with more than 10 yards between groups.
- Choose which player will activate each Cage Trap during Phase 5.
- Decide whether Bloodlust or Heroism will be used on Phase 2 or during a Phase 5 trap.
The ground tank must be able to push Shear off the attack table with block, dodge and parry. Shear cannot be allowed to land and should not be treated as a debuff that healers can simply recover from. Protection Warriors should reserve Shield Block for the cast, while Protection Paladins must maintain the required Holy Shield coverage.
Explore services related to this guide, selected from our TBC Raids catalog.
View All TBC Raids Services


Phase 1 Ground Form From 100 to 65 Percent
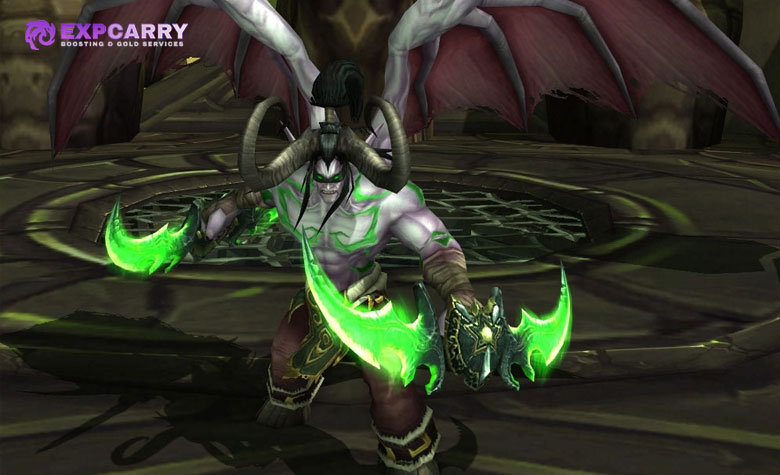
The main tank positions Illidan near the center or another agreed starting point and turns him away from the raid. Melee attack from behind, while ranged and healers maintain enough space to react to Parasitic Shadowfiend.
- Shear: Reduces the main tank's maximum health by 60 percent for 7 seconds if it lands. It can be blocked, dodged or parried, but it cannot miss. The tank must maintain the required defensive coverage for every cast.
- Flame Crash: Illidan jumps and creates persistent blue fire at the impact point. The tank moves Illidan a short distance after every crash without turning the boss toward the raid.
- Draw Soul: A frontal Shadow damage cone that heals Illidan for every player hit. Only the tank should be in front. Maintain one healing reduction effect such as Wound Poison, Mortal Strike or Aimed Shot.
- Parasitic Shadowfiend: Affected players take periodic Shadow damage and spawn two parasites when the debuff expires. They must move to the assigned drop area before the parasites appear.
Ranged DPS must switch to the parasites immediately. Slow and kill them before they reach another player, because contact can spread the infection and create additional parasites. Boss damage stops until the adds are controlled.
Illidan enters Phase 2 at 65 percent health. Stop damage during the transition, allow the tank assignments to change and move into the prepared flight phase positions.
Phase 2 Flames of Azzinoth
Illidan flies into the air and throws both Warglaives onto the platform. Each Warglaive summons one Flame of Azzinoth. A Fire Resistance tank picks up each Flame and keeps it close to the Warglaive that created it.
Traditional progression strategies aim for approximately 365 buffed Fire Resistance on both Flame tanks. Resistance should not come at the cost of dangerously low health or complete threat loss. DPS must allow the tanks enough time to establish threat because their resistance equipment can reduce offensive stats.
- Flame Blast: A powerful frontal Fire attack. Each Flame must face away from the raid and away from the other tank.
- Blaze: Creates dangerous fire around the Flame. Tanks move slowly along their planned route instead of making large corrections.
- Uncaged Wrath: A Flame gains extreme damage and movement speed if dragged too far from its Warglaive. Tanks must remain inside the tether area.
- Charge: Players who move too far from the safe central area can cause a Flame to charge, break its tether and trigger Uncaged Wrath.
- Fireball: Hits a random player and everyone within 10 yards. The raid uses separated groups to limit splash damage.
- Dark Barrage: Places heavy periodic Shadow damage on one player. Healers must identify and focus the target immediately.
- Eye Blast: Illidan sends Eye Beams across the platform. The initial beam and the fire trail are lethal positioning hazards.
The two Flame tanks should move in controlled arcs around their Warglaives. They must avoid Blaze without crossing the other tank's route or moving through an Eye Beam. Large emergency movements are more dangerous than briefly slowing damage.
Ranged DPS should be divided between the two Flames. Melee can attack when the area behind a Flame is safe, but they must leave immediately if Blaze or an Eye Beam blocks the position. Keep the Flames at manageable health levels so one resistance tank is not left under pressure for an unnecessarily long time.
Phase 2 ends only when both Flames of Azzinoth are dead. The raid should return to the Phase 3 spread positions while the physical main tank prepares to pick up Illidan after the threat reset.
Phase 3 Ground Form and Agonizing Flames
Phase 3 begins when Illidan lands after both Flames have been defeated. It includes Shear, Flame Crash, Draw Soul and Parasitic Shadowfiend from Phase 1. Illidan also gains Agonizing Flames.
Agonizing Flames damages a random player and nearby allies, then leaves a long Fire damage effect on affected targets. The raid should maintain at least 5 yards of personal space. The target stays away from other players while healers maintain steady healing until the effect ends.
The main tank continues preventing Shear, moves Illidan out of Flame Crash and keeps Draw Soul pointed away from the raid. Parasite targets continue using the same controlled drop point from Phase 1. Do not allow the additional raid damage to distract ranged DPS from killing the parasite spawns.
After approximately one minute of ground combat, Illidan transforms into his Demon Form and Phase 4 begins. Every transition can reset threat, so all damage must stop until the Warlock tank confirms control.
Phase 4 Demon Form and Warlock Tanking
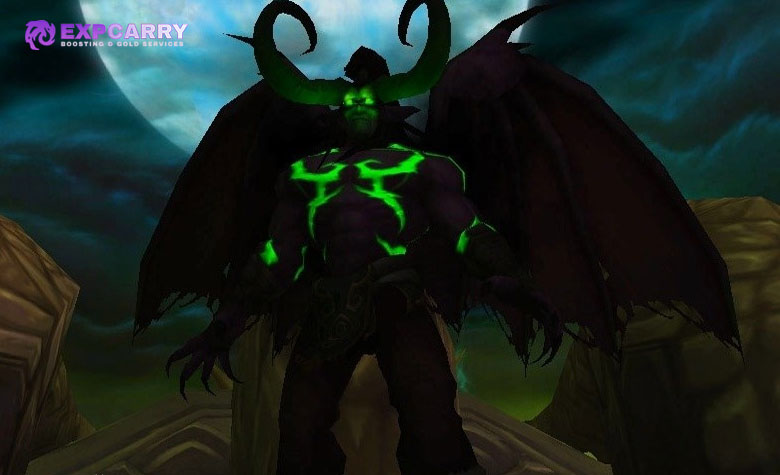
The Warlock tank moves into the assigned ranged position before the transformation and begins generating threat as soon as Illidan becomes active. The Warlock should use high threat ranged spells such as Searing Pain and must remain separated from the rest of the raid.
A traditional setup uses high buffed Shadow Resistance, often near the 365 resistance cap, together with enough health and spell hit to survive and establish reliable threat. This resistance requirement applies to the Warlock tank rather than the full raid.
- Aura of Dread: Damages players within 15 yards of Illidan and increases their Shadow damage taken. Melee must leave the boss before Demon Form becomes active.
- Shadow Blast: Illidan repeatedly attacks the Warlock tank and damages everyone within 20 yards of the target. No other player may stand near the Warlock.
- Flame Burst: Damages every raid member and creates additional splash damage around each player. Everyone must remain at least 5 yards apart.
- Summon Shadow Demons: Four demons appear near Illidan, stun selected players and move toward them. A demon instantly kills its target if it reaches that player.
The Warlock tank stands more than 15 yards from Illidan and at least 20 yards from every other player. Dedicated healers stay inside healing range without entering the Shadow Blast splash area. Healers must also restore the raid before each Flame Burst.
Ranged DPS should prepare damage over time effects, ground slows and controlled area damage at Illidan's position before the Shadow Demons appear. When the demons spawn, all available DPS switches immediately. Follow the visible beams to identify their targets and kill the closest demon first.
Stunned players cannot save themselves, so the rest of the raid is responsible for controlling their demons. Boss damage has no priority until all four are dead. After approximately 60 seconds, Illidan returns to his ground form and the raid repeats Phase 3.
Transition From Phase 4 Back to Ground Form
The physical main tank must be ready at the end of Demon Form. DPS waits through the transformation because the threat table can reset. The tank repositions Illidan, turns him away from the raid and immediately resumes Shear coverage.
Melee should not enter until Aura of Dread has disappeared and the tank has control. Ranged and healers return to the Phase 3 spread while preserving the parasite drop lane. The raid alternates between Phase 3 and Phase 4 until Illidan reaches 30 percent health.
Phase 5 Maiev Shadowsong and Cage Traps
At 30 percent health, Illidan casts Shadow Prison and begins a short story sequence involving Maiev Shadowsong. When combat resumes, Phase 5 begins. The raid continues handling the ground and Demon Form cycles, but Illidan gains Enrage and Maiev begins creating Cage Traps.
A Cage Trap must be activated by an assigned player. The main tank then moves Illidan across the armed trap. When triggered, the trap stuns Illidan and increases his damage taken by 100 percent for 15 seconds.
Illidan can Enrage during his ground form, increasing his damage by 50 percent and attack speed by 30 percent for 20 seconds. The safest trap plan is to keep Illidan near an armed trap and pull him across it as Enrage begins. This prevents the most dangerous tank damage and creates a strong raid damage window.
- Assign one player to locate and activate each trap immediately.
- Keep the path between Illidan and the armed trap free of Flame Crash fire.
- Do not turn Draw Soul toward the raid while moving the boss.
- Continue preventing Shear during all trap positioning.
- Use defensive cooldowns if Enrage begins before the trap is ready.
- Use offensive cooldowns after the trap has successfully stunned Illidan.
Do not ignore Parasitic Shadowfiend or Agonizing Flames while preparing a trap. A parasite outbreak can wipe the raid even when Illidan is close to death. If Illidan changes into Demon Form, return to the Phase 4 formation and let the Warlock tank establish threat again.
Main Tank Tactics
The main tank controls Phases 1, 3 and the ground portions of Phase 5. Their first responsibility is preventing Shear. Positioning and threat are secondary if defensive coverage is about to expire.
- Keep Illidan facing away from every other player.
- Reserve Shield Block or maintain Holy Shield for Shear.
- Move only far enough to leave each Flame Crash patch.
- Warn the raid before moving toward a Cage Trap.
- Keep Illidan close enough to an armed trap to answer Enrage quickly.
- Use major defensive cooldowns if Enrage cannot be trapped immediately.
Fire Resistance Tank Tactics
Each Fire Resistance tank controls one Flame of Azzinoth in Phase 2. Tank movement determines how much safe space remains available later in the phase.
- Pick up the assigned Flame immediately after it spawns.
- Face Flame Blast away from the raid.
- Move in small steps to leave Blaze without filling the platform with fire.
- Remain close to the correct Warglaive and never cross the tether boundary.
- Watch Illidan's position and Eye Beam direction before changing course.
- Communicate when threat is unstable or the movement route is blocked.
Warlock Tank Tactics
The Warlock is responsible for every Demon Form. Threat must be established quickly after each transformation because Shadow Blast targets the highest threat player.
- Equip the planned Shadow Resistance and health set before the pull.
- Move to the assigned tank position before Demon Form begins.
- Stay more than 15 yards from Illidan and separated from the raid.
- Use high threat ranged attacks immediately after the transformation.
- Call when DPS can begin and when Demon Form is ending.
- Never move through the raid while Shadow Blast is being cast.
Healer Tactics
Healers should be assigned by phase instead of improvising every transition. Phase 2 and Demon Form create the highest combined tank and raid pressure.
- Keep the ground tank stable through Illidan's physical attacks and every Shear window.
- Assign dedicated healing to both Flame tanks during Phase 2.
- Focus Dark Barrage targets immediately.
- Maintain healing on Agonizing Flames targets without stacking near them.
- Assign dedicated healers to the Warlock tank during Demon Form.
- Top the raid before Flame Burst while preserving 5-yard spacing.
- Prepare tank cooldowns and emergency healing for Phase 5 Enrage.
The fight is long, so healers must manage mana during the easier parts of Phases 1 and 3. Mana consumables and regeneration cooldowns should be planned before Phase 2 or Demon Form creates emergency pressure.
DPS Tactics
DPS players must treat target priority and positioning as more important than damage meter uptime. Most Illidan wipes happen because players remain on the boss during an add mechanic.
- Wait for threat after every phase transition.
- Kill Parasitic Shadowfiends before returning to Illidan.
- Respect tank threat on the Flames of Azzinoth because resistance gear lowers threat output.
- Move away from unsafe Phase 2 fire instead of forcing melee uptime.
- Maintain 5-yard spacing for Agonizing Flames and Flame Burst.
- Switch instantly to all four Shadow Demons.
- Save controlled burst for dangerous add waves or a successful Cage Trap.
Groups planning repeatable Illidan lockouts should keep the same parasite, Shadow Demon and trap assignments every week. Consistent positioning is more valuable than rebuilding the strategy for every clear.
Bloodlust and Heroism Timing
There are two practical progression timings. Using Bloodlust or Heroism in Phase 2 shortens the dangerous Flames of Azzinoth section and reduces the number of Eye Beams, Fireballs and Dark Barrages the raid must survive. This is usually the safer choice for groups learning the encounter.
Experienced groups can save it for a Phase 5 Cage Trap. Illidan takes double damage while trapped, producing a stronger boss damage window. This option is only efficient if the raid can reach Phase 5 consistently and does not need extra damage to stabilize Phase 2.
Common Illidan Stormrage Mistakes
- Relying on boss miss chance for Shear: Shear cannot miss. The tank needs block, dodge or parry coverage.
- Turning Draw Soul into the raid: Every additional player hit causes damage and heals Illidan.
- Dropping parasites inside the group: The resulting adds can infect more players and multiply rapidly.
- Moving a Flame too far from its Warglaive: Uncaged Wrath normally results in a tank death and wipe.
- Standing near the Warlock tank: Shadow Blast damages everyone within 20 yards of its target.
- Slow Shadow Demon switches: A demon that reaches its stunned target kills that player immediately.
- Treating Phase 5 as a new standalone phase: Ground and Demon Form mechanics continue after Maiev arrives.
- Using a trap only for damage: A trap should cover Enrage unless the raid has a safe alternative.
- Attacking during transitions: Threat resets can send Illidan or his Demon Form attacks into the raid.
Complete Illidan Stormrage Strategy
- Pull Illidan with the physical main tank and turn him away from the raid.
- Prevent every Shear, move out of Flame Crash and keep healing reduction active for Draw Soul.
- Send parasite targets to the fixed drop zone and kill both spawns immediately.
- At 65 percent, move into the Phase 2 groups and let the two Fire Resistance tanks pick up the Flames.
- Keep each Flame near its own Warglaive, face it away and move slowly around Blaze and Eye Beams.
- Kill both Flames, return to the ground formation and wait for the main tank to regain threat.
- Handle Phase 1 mechanics while spreading for Agonizing Flames.
- Before Demon Form, move melee away and place the Warlock tank in the assigned ranged position.
- Spread for Flame Burst, stay away from the Warlock and kill all four Shadow Demons immediately.
- Repeat the ground and Demon cycles until Illidan reaches 30 percent.
- After Maiev arrives, activate a Cage Trap and position Illidan close enough to use it against Enrage.
- Continue all parasite, Shear, Agonizing Flames and Demon Form assignments until Illidan is defeated.
Final Illidan Strategy Summary
Illidan Stormrage is defeated through assignment discipline rather than one difficult damage check. The ground tank must prevent Shear, the Fire Resistance tanks must control both Flames without breaking their tethers and the Warlock must isolate every Shadow Blast during Demon Form.
For the rest of the raid, the priorities are simple: kill parasites, kill Shadow Demons, maintain the required spacing and stop damage during threat resets. Once Maiev appears, use Cage Traps to neutralize Enrage while continuing the Phase 3 and Phase 4 rotation. A raid that follows those priorities can turn a complex five-phase encounter into a repeatable Black Temple clear.