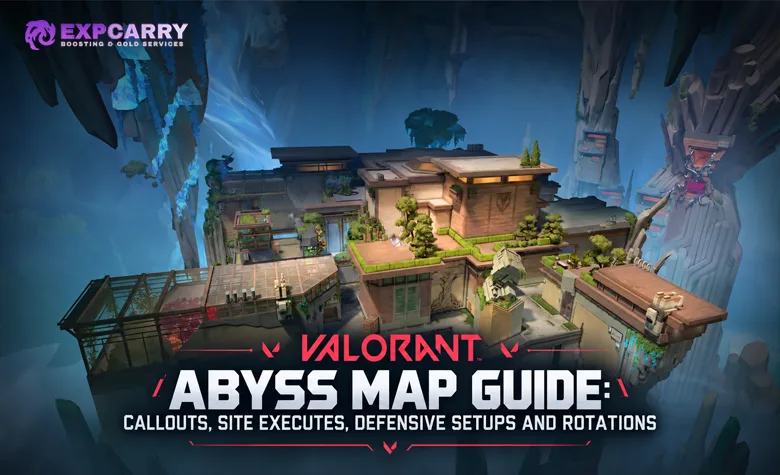
Abyss is back in VALORANT Competitive, and the map rewards teams that treat it as a three-lane information problem instead of two straight site rushes. This VALORANT Abyss map guide is built for the current ranked version in Patch 13.05, following the map's return in Patch 13.04: learn the real callouts, keep pressure on A Main, Mid, and B Main, use site utility before the duelist commits, and choose a plant that matches the space your team actually controls. The most important update for returning players is that the current B Site and Mid are the post-11.08 versions, so older screenshots and "everyone plant and fall back Main" habits are not reliable defaults anymore.
The playbook below focuses on repeatable ranked rounds: one standard A execute, one standard B execute, defensive crossfires, retake routes, rotation triggers, and agent jobs. It does not assume a five-stack or a library of lineups. Ranked and VCT data are used only as supporting signals; geometry, current patch status, and practical utility interactions matter more than a raw pick-rate table.
VALORANT Abyss Map and Callouts
Riot returned Abyss to Competitive and Deathmatch in VALORANT Patch 13.04, replacing Breeze in those queues. Patch 13.04 did not announce a fresh Abyss rework, and Patch 13.05 added no further Abyss geometry changes, so the correct map to learn is the version that already includes the major B Site and Mid changes from Patch 11.08. That distinction matters because many older guides were built around safer Main-heavy post-plants and slower Mid pathing.
For VALORANT Abyss callouts, start with the map's three broad lanes and the names that decide rotations. Abyss has two sites, lethal outer edges, vertical routes, and several duplicate callout names. Always prefix duplicated names with the site letter. "Tower" is ambiguous; "A Tower" and "B Tower" are useful. The same applies to Main, Lobby, and Link. The current minimap uses the following core names:
| Zone | Callouts to learn | What they control |
|---|---|---|
| A side | A Lobby, A Main, A Site, A Tower, A Bridge, A Security, A Link, A Secret, A Vent | Main execute, Tower and Security sightlines, Bridge post-plant pressure, and the Mid-to-A connection |
| Mid | Mid Top, Mid Library, Mid Catwalk, Mid Bottom, Mid Bend | Split timing, defender rotation information, and access toward A or B |
| B side | B Lobby, B Main, B Nest, B Site, B Tower, B Link, B Danger | Main execute, Tower and Link retake routes, site crossfires, and the outer ledge route |
| Spawns | Attacker Spawn, Defender Spawn | Long rotations, late flanks, and regroup paths |
Three pieces of movement geometry deserve special attention. A Site has an ascender up to A Tower. B Main has an ascender toward Mid Bend, which lets players convert B pressure into Mid pressure without walking all the way back through spawn. Mid Catwalk is reached through a risky gap-and-rope route, so it should be treated as a planned shortcut rather than a default rotation. A Secret and B Danger are also death-drop-adjacent shortcuts: strong when they create an unexpected angle, terrible when the spike carrier or an isolated player takes them without a trade.
For attack defaults, use a simple 2-1-2 shape until the defense gives you a reason to change it: two players show A pressure, one controls or probes Mid, and two show B pressure. The point is not to win three duels at once. The point is to stop defenders from freely pushing for information and to make the eventual site hit arrive before the entire defense has rotated. If you only want the map-pool context and broad composition overview, ExpCarry's existing Patch 13.04 Abyss map-pool article covers that separate intent.
A Site Executes and Post-Plants
These Abyss site executes are built around controlling the angles that can immediately punish the planter rather than dumping every ability at the choke. A is easiest to execute when the team removes A Tower and the defender-side sightline before the entry player crosses deep. The common ranked failure is using every smoke and scan at the choke, then letting a Tower player or a late Security-side player fight the planter for free. Your utility should clear the first fight, cut the next two angles, and still leave one tool for the retake.
- Establish A Main without donating the entry. Use a recon, drone, flash, or safe shoulder contact to identify the first defender. Do not send the spike first.
- Cut A Tower and the defender-side long angle. Your controller should remove the angles that can see the planter and the second player crossing. If the defense has already given up one of those spaces, save the extra smoke for post-plant or the retake choke.
- Entry and trade as a pair. The duelist clears the closest site layer while the second rifle stays close enough to trade. A third player should not crowd the same doorway if Mid or Bridge pressure is available.
- Choose the plant after the site is cleared. If only the minimum space is safe, use the protected plant. If A Main remains yours and the site is fully cleared, use a more open Main-visible plant. A Bridge-side plant is a specialist option for rounds where Bridge control is secure, not the automatic "best" spot.
- Keep two post-plant layers. A Main plus one of Site, Bridge, or Tower is stronger than five players retreating into the same lane. The closer layer punishes a smoke defuse; the Main layer protects the spike from range.
The plant position should match the space you own. A protected plant is correct when A Tower or A Security is not fully solved and you simply need the spike down. An open Main-visible plant is stronger when defenders have been pushed away and your rifles can preserve a clean line to the defuse. A Bridge-side plant can create awkward retake angles, but it adds fall risk and makes the planter more vulnerable if the bridge layer is not actually controlled.
A useful ranked post-plant is 2-1-1 plus flank watch: two players preserve A Main, one holds the closest safe site or Bridge layer, one watches the defender route or trades the close player, and the fifth handles the flank or plays surviving utility. Do not turn that into a rigid formation. If you have only three alive, the principle is the same: preserve one long spike line and one close crossfire. Players who are focused primarily on climbing can treat a Valorant rank progression option separately from map practice; the execute itself is designed to work in normal self-play ranked rounds.
Utility should be layered, not stacked. Sova can reveal or drone the Tower and back-site layer before the duelist enters. KAY/O can suppress a defender setup and flash through the choke once the smoke is placed. Clove can cover the required sightlines without demanding perfect global coordination, while Astra can create stronger split timing if the team communicates around stars. Cypher or Vyse should keep flank information alive instead of spending every piece of utility on the first site hit. Patch 13.05 also fixed an issue where dissipating smokes could continue blocking flashes and other line-of-sight abilities, so current smoke-and-flash timing should be practiced using the fixed interaction.
B Site Executes and Post-Plants
B is the section where old Abyss habits cause the most problems. Riot's Patch 11.08 Abyss update explicitly reworked B Site to make on-site play more viable for both sides and to make Main-only post-plants more risky. The site cover was rearranged and Mid pathing toward B was opened up. If your team still plants and sends everyone back to B Main, you are voluntarily giving the retake a simpler problem.
- Clear B Main and B Nest before the hard commit. Use information or a flash to force the first defender off the approach. Keep the spike one layer behind the entry pair until B Tower and the closest site cover are accounted for.
- Smoke B Tower and B Link when they are live. Those are the strongest defender routes into the plant and retake. If one is already controlled by your Mid split, move the smoke to the remaining defender sightline instead of following a memorized picture.
- Sync Main with Mid when possible. A reliable B split is three through B Main and two through Mid toward B Link. Do not let the Mid pair arrive ten seconds early. Count down the contact so the defender has to turn between two threats.
- Plant for the post-plant you can hold. A covered plant is safest when Tower or Link pressure remains. A Main-visible plant is better after the site is fully cleared. A deeper site-side plant works only when teammates are staying on or around site instead of abandoning it.
- Leave at least one on-site line. The modern B Site rewards a Main plus site crossfire. The on-site player does not need to hunt; surviving behind current cover forces retakers to clear two layers before touching the spike.
B Danger can be useful as a late off-angle or a second post-plant layer, but it is not a default hiding place. The ledge limits movement and makes displacement, panic strafing, and utility much more dangerous. Use it when the round state already gives you information about the remaining defenders, not because the angle looks unusual.
The B Main to Mid Bend ascender also changes how a failed B hit should be handled. If the defense dumps multiple pieces of utility into B Main and you still have time, one or two players can pivot into Mid while the rest keep presence. That is more convincing than a full five-player retreat through spawn because B pressure remains audible and the defense has to respect B Link. If the team instead wants to convert the round into a direct fight for wins, ExpCarry's Valorant Wins option is separate from the tactical recommendation; the ranked playbook still assumes you are executing and reviewing the rounds yourself.
Post-plant utility is strongest when it buys a crossfire rather than replacing one. Sova's recon can force a retaker off a comfortable Tower or site clear. KAY/O flashes can punish the first player exiting a smoke. Controller utility can isolate B Link or Tower again when the first smokes expire. A sentinel should keep the late Mid or spawn flank covered so the Main players do not have to turn away from the spike at the worst moment.
Explore services related to this guide, selected from our Valorant catalog.
View All Valorant Services

Defensive Setups
Abyss defensive setups work best when they trade early space for information instead of forcing every anchor to die at the first choke. A safe ranked defense starts from information and survivability. Abyss is large enough that an anchor who dies in the first three seconds can leave the opposite-site players arriving after the plant. Use 2-1-2 as a baseline, then change the distribution when your sentinel utility or the attacker's habits give you reliable information. The goal is not to hold every choke to the death. It is to make the attack spend utility, preserve at least one defender on the site, and keep a clean retake route.
| Area | Baseline setup | Crossfire or fallback | What to avoid |
|---|---|---|---|
| A Site | One player contesting or delaying A Main, one playing A Tower, A Security, or a deeper site layer | Tower plus site creates the basic crossfire; fall toward Link or deeper site when the execute overwhelms Main | Both defenders peeking A Main from the same timing and dying before the rotate |
| Mid | One information player with a rifle, Operator, smoke, recon, or sentinel coverage | Give ground toward B Link or Defender Spawn after calling numbers; re-peek when site teammates can trade | Fighting to the death for Mid after the attackers have already spent utility to take it |
| B Site | One B Main delay player and one B Tower or site-cover player | Tower plus current on-site cover creates the most repeatable crossfire; fall toward Link if the entry utility wins the choke | Playing both defenders deep Main-facing angles that can be cleared by the same recon and smoke cycle |
On A, your first goal is to make the attackers spend something before they can walk through A Main. A smoke at the choke, a sentinel trigger, or one piece of information utility is enough to slow the hit without gambling a life. The second defender should be positioned to punish the player who turns toward Tower or Security. If the attackers commit five players with full utility, give up the first layer and keep the second defender alive for the retake.
On B, the 11.08 geometry makes a Tower plus site-cover crossfire more useful than the old habit of treating the site as a disposable room. A defender on current site cover can force the entry to clear low and close while the Tower player threatens from height. Sentinel utility on B Main, B Danger, or the rotation path should be used for information and delay; exact trap placement should change round to round so the attackers cannot prefire or clear it on autopilot.
Mid is an information job first. If the Mid player sees two or three bodies plus utility, that information is often more valuable than one low-percentage duel. Call the numbers, preserve your life, and move toward the site that needs a second retake lane. If attackers stop showing Mid for several rounds, the Mid defender can take more information and free a teammate to lean toward the site that is being pressured.
Rotations and Retakes
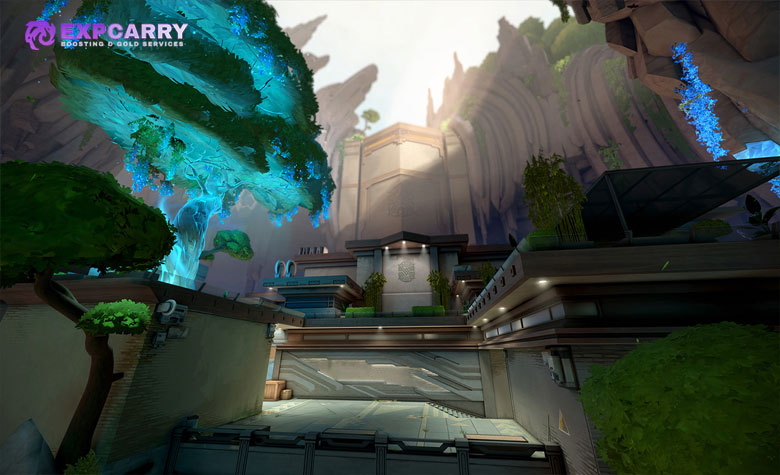
Abyss punishes panic rotations. The correct timing is based on information, not the first footstep. There is no single honest "A to B takes exactly X seconds" number that applies to every round because starting position, Vent state, rope usage, Mid ownership, slows, smokes, and combat all change the route. Use decision triggers instead: rotate when you know the attack has committed enough bodies, spike, or utility that the weak side cannot realistically be the real hit.
- Soft rotate on pressure. If three attackers are heard but the spike is not seen, move the Mid player or closest rotator toward the threatened site while one defender keeps the opposite lane and flank information.
- Hard rotate on spike plus commit utility. When the spike is identified with a full execute, stop preserving a perfect two-site shape. Group enough players to either contest the plant together or retake together.
- Do not rotate through lost Mid alone. If attackers own Mid Library, Catwalk, or the path toward Link, assume a lurker can cut the route. Pair the rotation or use Defender Spawn unless utility clears the path.
- Use the B Main to Mid Bend ascender for controlled pivots. It is valuable when your team owns the surrounding space. It is not a free shortcut if an enemy can hold the rope exit.
- Respect the late-round clock. Once the attackers have used most of the round without planting, defenders should prioritize denying the plant route and surviving. Chasing a flank with twenty seconds left can give them the empty site they need.
For A retakes, regroup before touching the spike. One group should clear the Main and Bridge pressure while the other restores Tower, Security, or the defender-side site layer. Smokes are strongest when they split Main from the spike or cut a surviving post-plant rifle away from its teammate. Use information utility before crossing a death-drop-adjacent angle; a dry swing near Bridge can lose a retake without a normal gunfight.
For B retakes, restore B Tower and B Link control before assuming the defuse area is safe. The attacking team may still have a player inside the reworked site cover, so clear that close layer before staring at B Main. A strong retake enters from two directions: Link or Spawn pressure plus Tower or a controlled Mid-side route. B Danger should be the optional third layer, not the first retake path.
Riot's Patch 13.05 notes, the latest live patch notes as of September 9, did not add a new Abyss geometry pass after the 13.04 return, so the rotation logic above still uses the post-11.08 map. Riot has already teased a larger Patch 13.06, so B cover, Mid pathing, plant zones, and agent balance should be rechecked when those notes go live.
Best Agents and Team Compositions
The best agents for Abyss are the ones that solve the map's recurring jobs: cut long Tower and Link sightlines, reveal layered site positions, cross the first dangerous angle, and preserve flank information across a large map. Current ranked tracking updated on September 9 covers 18,720 Abyss matches and reports a 51.4% attack win rate, with Clove leading the individual win-rate table at 54.8%. Those numbers are useful signals, not a mandatory pick order. Professional data should be treated even more cautiously: VCT 2026 EMEA Stage 2 recorded only five Abyss maps, which is far too small a sample to rank agents reliably.
| Role | Ranked-friendly picks | Alternatives | Why the role matters on Abyss |
|---|---|---|---|
| Duelist | Jett, Neon | Waylay, Iso | Cross long first-contact angles, reach vertical or awkward site space, and create a tradeable entry before defenders settle into Tower crossfires |
| Initiator | Sova | KAY/O, Fade | Reveal or clear Tower, back-site, and Mid layers before the team walks through exposed lanes |
| Controller | Clove | Astra, Omen for coordinated teams | Cut A Tower, A Security, B Tower, B Link, and Mid sightlines without forcing the entry player to fight every angle at once |
| Sentinel | Chamber, Cypher | Vyse, Killjoy | Protect long flanks, delay a Main lane, and let the defense lean without completely losing the opposite side |
| Flex | KAY/O | Fade, second controller, second initiator | Add a second flash, suppression, or information layer so executes and retakes do not depend on one cooldown |
A balanced, utility-complete ranked five is Jett, Sova, Clove, Cypher, KAY/O. Jett gives the team a clean first entry and an Operator option, Sova handles long-range information, Clove provides ranked-friendly smoke coverage, Cypher protects the map behind the attack, and KAY/O adds a second execute and retake layer. This composition is useful because every job remains clear even if the lobby is not running rehearsed lineups; it is a practical composition recommendation rather than a claim that these five agents have the five highest current win rates.
A faster alternative is Neon, Sova, Clove, Vyse, KAY/O. Neon can collapse the time defenders have to reposition, while Vyse gives the defense a different style of choke control and information. A more coordinated team can replace Clove with Astra and use stars to support split timing through Mid, but that trade makes the controller role more communication-dependent. VCT data can illustrate those coordinated ideas, but the current five-map EMEA Abyss sample is too small to rank compositions. Fresh ranked Abyss statistics are the more relevant signal for what ordinary Competitive lobbies are actually converting right now.
Do not pick five agents because a statistics page lists them in order. If the team already has a controller and sentinel, the fifth player usually creates more value by adding information or a flash than by forcing a second selfish duelist. Likewise, a theoretically optimal Astra composition is worse than a simple Clove setup if nobody is calling the execute timing. Players who want extra non-ranked repetitions before risking RR can use Valorant Unrated Matches as a separate progression option, but a custom lobby remains the fastest way to rehearse the exact smokes, plant visibility, and retake routes in this guide.
Conclusion
Abyss becomes much easier when every round has a map-control purpose. On attack, keep believable pressure across A Main, Mid, and B Main, then combine the site hit with information and smokes before the duelist enters. On A, choose between a protected, Main-visible, or Bridge-side plant based on the space you actually own. On B, respect the 11.08 rework: keep an on-site crossfire instead of automatically abandoning the site for B Main.
On defense, delay without donating anchors, preserve Mid information, and rotate on spike or real commit utility rather than footsteps alone. Retakes should restore two lanes before the defuse starts, with A Tower or Security supporting A and B Tower or Link supporting B. For ranked team building, prioritize one reliable entry, one information initiator, one controller, one flank-control sentinel, and a flex tool that helps both executes and retakes. That structure is more repeatable than copying a single pro composition or memorizing one post-plant for every round.