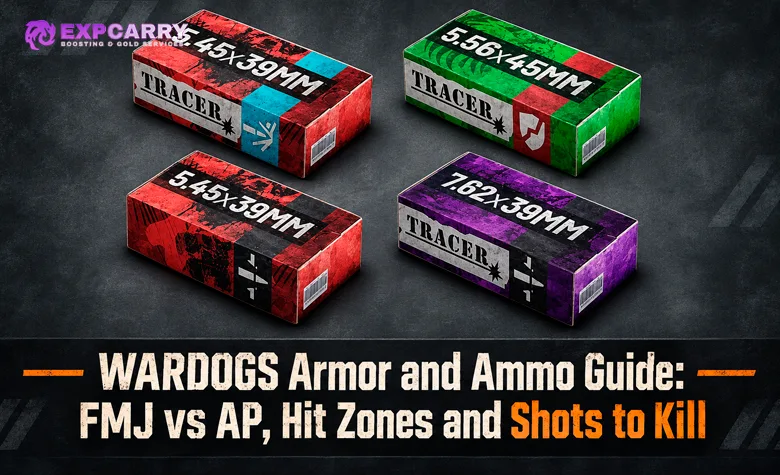
Ever dumped half a magazine into someone in WARDOGS, only to get dropped by a few return shots? Your aim might be fine. The problem is often what you are shooting, where your bullets land, and which ammunition you brought. FMJ, Armor Piercing (AP), and Hollow Point (HP) perform differently against protected and exposed body parts. Weapon class, distance, and armor condition can change the result again. This guide covers the live Season 2 balance introduced in Update 0.2.0 on October 15, 2026, including the armor nerfs and damage adjustments that made older shots-to-kill charts unreliable. The goal is simple: stop wasting rounds on the wrong target zone and buy ammunition that actually fits your next fight.
Short answer: Use FMJ when you need reliable all-round performance, AP when you expect to fight players wearing medium or heavy protection, and HP when you can consistently hit exposed flesh. Check whether your shots are hitting a vest, helmet, or unprotected limb before blaming the gun.
Why the Same Gun Can Feel Completely Different Between Fights
WARDOGS does not treat every landed bullet as identical damage. A shot that connects with an exposed upper chest is a different situation from one that hits a heavy vest, and neither behaves like a hit to an arm or leg. Two enemies can take very different numbers of shots from the same weapon even before you account for your own accuracy.
The main factors are:
- Weapon and caliber: the cartridge provides a starting damage value, but weapon-class modifiers also affect what the bullet does when it lands.
- Ammunition: Standard FMJ, Hollow Point, and Armor Piercing rounds interact with protection differently.
- Hit zone: head, neck, torso, pelvis, and limbs do not all take the same damage.
- Armor coverage: a vest or helmet only protects the zones assigned to that equipment.
- Armor durability: protection wears down under repeated fire, but its damage reduction remains unchanged until it breaks.
- Distance: some weapons lose damage over range, while bullet travel and accuracy affect how many rounds you actually land.
- Target condition: someone already wounded is not the same as a full-health target.
There is another trap: the caliber alone does not tell you a weapon's shots to kill. WARDOGS uses different hit-location behavior across weapon classes. A sniper rifle and a marksman rifle firing the same cartridge can have significantly different body-shot and headshot results. That is why copying a damage figure from one gun onto every weapon using the same ammunition produces bad comparisons.
For the broader question of which guns are worth unlocking and using, see our WARDOGS Season 2 Weapon Tier List. This guide focuses specifically on what happens after a bullet hits.
FMJ vs AP vs Hollow Point: Which Ammo Should You Buy?
The Equipment Vendor separates standard ammunition from specialized loads. The game's own tips describe FMJ as a middle ground, AP as effective against armor, and HP as particularly effective against unprotected body parts. That basic distinction matters more than trying to memorize one supposedly perfect round for every match.
| Ammo | Where it performs best | Main drawback | Best use |
|---|---|---|---|
| Standard FMJ | Mixed targets and general infantry fights | Less effective than AP against stronger armor | Affordable general-purpose loadouts |
| Armor Piercing (AP) | Protected torso and helmet hits, especially against heavier gear | Lower damage against exposed flesh than FMJ | Fighting well-equipped infantry |
| Hollow Point (HP) | Unarmored targets and exposed body parts | Severely weakened by protective equipment | Close-range fights where exposed hits are realistic |
| Tracer variants | Tracking your fire and correcting aim | Visible bullet trails may reveal your position | Situations where seeing the shot path helps |
When FMJ Is Actually Better Than AP
Do not automatically load AP because the name sounds more powerful. Armor Piercing ammunition trades away some damage against bare flesh to perform better through protection. If your opponent has no vest, or you keep landing shots on exposed limbs, that trade can work against you.
FMJ is also competitive against light armor. Community damage models for Season 2 show that switching to AP does not always reduce the number of shots required against low-tier protection. In some matchups, the extra penetration simply fails to compensate for AP's lower starting flesh damage.
For a cheap rifle you expect to lose several times while attacking the Control Zone, FMJ is a sensible default. You do not have to spend more on specialized ammunition just because experienced players are running heavier kits elsewhere on the map.
When Armor Piercing Is Worth Bringing
AP becomes much more attractive when enemies reliably wear medium, heavy, or super-heavy protection and you expect to hit their covered torso or head. In those fights, every bullet stopped by armor is time you cannot afford to waste.
There is a catch: AP effectiveness varies with caliber and weapon behavior. Do not assume every pistol and rifle gets the same benefit against a particular armor tier. Community data extracted for Season 2 indicates that rifle AP can overtake FMJ against medium protection, while some smaller-caliber weapons need a heavier armor matchup before AP clearly pulls ahead.
If you are holding a defended position against expensive enemy loadouts, AP may be worth the investment. If you are roaming with a budget weapon and shooting a mix of armored and unarmored players, paying for AP on every life is harder to justify.
When Hollow Point Shreds—and When It Doesn't
HP is the ammunition for punishing exposed targets. Against bare flesh, its damage advantage can be dramatic. The moment the bullet lands on a protected chest or helmet, though, that advantage can collapse.
This creates a dangerous habit: players see how quickly HP kills someone without armor, then keep using it against opponents wearing expensive vests. The result feels like the weapon suddenly stopped working. It did not. The ammunition is being used against the wrong defense.
HP makes the most sense when you know your target selection and can reliably land exposed hits. For general fights where you cannot see exactly what someone is wearing, FMJ is the safer compromise.
WARDOGS Armor Tiers: What Vests and Helmets Actually Protect
Armor does not surround your entire character with one universal damage reduction. A vest protects specific body regions, while a helmet handles its own coverage. Higher-tier equipment can cover additional areas as well as reduce more incoming damage.
The official Season 2 patch reduced Level 3 armor and helmet damage reduction from 55% to 50%, and Level 4 protection from 65% to 60%. Community client-data references also identify the lower-tier reductions and the protected zones shown below.
| Armor level | Damage reduction on covered zones | Vest coverage | Helmet coverage |
|---|---|---|---|
| No armor | 0% | None | None |
| Level 1 — Light | 30% | Upper chest, lower chest, stomach | Head |
| Level 2 — Medium | 40% | Upper chest, lower chest, stomach | Head |
| Level 3 — Heavy | 50% | Upper chest, lower chest, stomach | Head and neck |
| Level 4 — Super Heavy | 60% | Upper chest, lower chest, stomach, pelvis, upper arms | Head and neck |
The 50% and 60% Season 2 reductions are confirmed in BULKHEAD's official patch notes. The detailed zone mapping and Level 1–2 values come from community analysis of current client data. These percentages describe baseline mitigation of covered hits, not identical final damage for FMJ, AP, and HP.
This is the reason someone in Level 4 armor can survive a burst to the chest but still take serious damage from shots landing elsewhere. Lower arms, hands, and legs remain exposed in the documented coverage model. On the other hand, uncovered does not automatically mean high damage: limb hit zones generally have lower damage multipliers than more vulnerable areas.
A Headshot Is Not Always a One-Shot Kill
Headshots are still worth pursuing, but the helmet changes the calculation. A clean hit to an unprotected head is not equivalent to a hit on someone wearing heavy head protection.
BULKHEAD provided one particularly useful Season 2 example: the Scout Rifle now kills a target without a helmet in one headshot, while a Level 1 helmet requires two headshots. That is an official weapon-specific example, not proof that every sniper or rifle has the same thresholds.
Level 3 and Level 4 helmets also gained stronger protection against suppression. Season 2 gives them 68% and 80% suppression reduction respectively. The Level 4 helmet has practical drawbacks, though: muffled sound, a restricted field of view, and visor fog while sprinting. Greater protection is not completely free.
Explore services related to this guide, selected from our Wardogs catalog.
View All Wardogs Services


Shots to Kill in Season 2: What the Numbers Actually Mean
Shots to kill, usually shortened to STK, is the number of successful hits needed to bring a target down in a defined situation. It is not the same as how many bullets you fire, and it is not a universal property of a weapon. Change the armor, ammunition, hit location, range, or target health, and you can change the answer.
To make that concrete, the table below uses an M4 firing into the upper chest. The damage figures come from community analysis of Season 2 client data, rather than developer-published firing-range measurements. The shot counts are calculated for a simplified target with 100 health, hits at close range, a fresh vest, no healing, and every bullet landing in exactly the same zone.
| Target protection | FMJ damage per hit | FMJ shots to kill | AP damage per hit | AP shots to kill |
|---|---|---|---|---|
| No vest | 27.3 | 4 | 21.8 | 5 |
| Level 1 vest | 19.1 | 6 | 17.9 | 6 |
| Level 2 vest | 16.4 | 7 | 16.6 | 7 |
| Level 3 vest | 13.6 | 8 | 15.3 | 7 |
| Level 4 vest | 10.9 | 10 | 14.0 | 8 |
How to read this table: These are calculations based on community-reconstructed damage values, not developer-published kill guarantees. They assume a single upper-chest hit zone, a full-health opponent, close range, and the listed armor state. Real fights can include mixed hit zones, reduced health, armor deterioration, misses, and range effects. The underlying figures can be checked in the community Season 2 ammunition comparison.
The lesson is more useful than any individual number. Against an unarmored chest, FMJ is ahead of AP in this M4 example. Against a Level 1 or Level 2 vest, switching to AP does not improve the modeled shots-to-kill threshold. Against Level 3 and Level 4 armor, the AP advantage becomes noticeable.
HP provides an even sharper contrast. In the same community model, an M4 Hollow Point shot deals approximately 54.5 damage to an exposed upper chest, giving a modeled two-shot kill against the 100-health target. But its damage drops drastically against protected torso hits. That is why HP can feel outrageous in one encounter and terrible in the next.
Never apply these M4 counts to the FAL, Galil, M14, SVD, or another rifle just because you know its caliber. Their weapon-class and hit-zone behavior can differ, and Season 2 changed several of them directly.
Where to Aim: Head, Chest, Arms, or Legs?
The right answer depends on the target's protection and the ammunition in your magazine. Blindly aiming for the legs is not a guaranteed shortcut around a heavy vest, just as always aiming center mass is not automatically correct.
Chest Shots: Reliable Hits, but Often Protected
The upper torso is a large and natural target during a hectic fight. If your opponent is wearing a vest, though, your rounds must deal with its protection.
FMJ still works here, especially against lighter armor. AP becomes more valuable as the vest gets stronger. If you know the enemy is wearing heavy protection and you have AP loaded, controlled upper-torso hits are usually easier to land consistently than trying to pick out a small exposed body part while under fire.
Headshots: High Reward, but Check the Helmet
A headshot into an unprotected target can end a fight immediately with the right weapon. A helmet can completely change that threshold. The difference between an unhelmeted target and one wearing Level 1 protection is explicitly demonstrated by the Season 2 Scout Rifle change.
Use headshots when the angle, weapon, and your aim support them. Do not count on an old one-tap chart after the patch, and do not assume a helmeted head is an easier kill than an exposed torso without checking the weapon matchup.
Arms and Legs: Bypassing Armor Has a Trade-Off
Exposed limbs do not receive the torso vest's damage reduction. That makes them useful targets when a heavily armored opponent leaves little else visible. However, limbs also have their own hit-location multipliers, and those are generally less favorable than clean hits on vulnerable body regions.
Against a lightly armored player, a well-placed upper-chest hit can still deal more damage than a leg shot. Against someone wearing Level 4 armor, exposed limbs become more interesting—but AP rounds driven into the protected chest may remain competitive.
The practical rule is to shoot the best vulnerable zone you can hit repeatedly. One perfectly aimed leg bullet followed by four misses is worse than several controlled hits to a slightly more protected target.
Distance Changes the Fight Before Armor Even Enters the Picture
Range matters for two different reasons. First, certain weapons lose damage as the target gets farther away. Second, longer shots are harder to land because bullet travel, drop, target movement, and weapon handling make accuracy less forgiving.
Season 2 gives a clear official example: the Super-45 has stronger damage falloff beyond 50 meters, reinforcing its close-quarters role. That does not mean all SMGs share a universal 50-meter cutoff. Different weapons use different range behavior, so one distance rule should never be pasted onto the entire arsenal.
Remember the difference between zeroing and damage. Adjusting your sight zero helps align your aim with the projectile's path at a selected distance. It does not magically restore damage that the weapon loses over range.
There is also bullet penetration through surfaces. WARDOGS warns players that bullets can penetrate objects and ricochet, so a hit through cover may involve circumstances different from an unobstructed shot. Do not use a clean firing-range damage value as a promise for every wallbang.
Armor Durability: Why the Next Burst Can Hurt More
Fresh armor and damaged armor are not always equivalent. Community analysis of WARDOGS protection describes separate durability pools for vests and helmets that are depleted by hits. Damage reduction stays at its full listed value while durability remains above zero. Once protection is broken, subsequent hits to that zone can behave like attacks against unarmored flesh.
This matters most when you and your teammates are pouring sustained fire into the same opponent. Someone who survived the first burst may be much easier to finish, even if the second player uses ordinary FMJ ammunition.
It also explains why an exact shots-to-kill chart needs careful assumptions. A calculation that treats a vest as permanently intact will not accurately model every long engagement if the armor breaks first. Similarly, a target who was wounded moments earlier may die from fewer hits than the table suggests.
Do not confuse armor durability with your own health. A surviving opponent can still be heavily injured, have damaged protection, or have received healing during the fight. You cannot determine all of those states from the appearance of their gear alone.
Best Ammo for Your WARDOGS Loadout
The best purchase is not always the ammunition with the highest potential damage in a perfect test. Your weapon, engagement range, available Cash, and expected opponents all matter. A specialist round you cannot reliably use is just another expense on the next respawn.
| Your loadout or situation | Starting choice | Reason |
|---|---|---|
| Cheap general-purpose rifle | FMJ | Reliable across mixed targets without depending on armor identification |
| Assaulting positions defended by heavily equipped infantry | AP, where available | Better performance against protected torso and helmet hits |
| Close-range fights against lightly equipped or exposed targets | HP | Exploits unprotected hit zones when you can land them consistently |
| Mixed-range fighting with uncertain enemy gear | FMJ | A safer compromise when the next target is unpredictable |
| Precision rifle against helmeted targets | Check that exact weapon and ammo matchup | Headshot thresholds depend on the weapon and helmet, not ammo name alone |
| Budget loadout with limited spare Cash | Prioritize dependable ammo and enough magazines | A better theoretical kill threshold means little if you cannot sustain the kit |
You should also consider the unlock path. Armor and ammunition are tied to the shared WARDOG progression system rather than being freely available just because you have enough Cash. Season 2 moved several equipment unlocks, so check our WARDOGS Progression Guide before planning a kit around gear you have not unlocked.
For a complete economic comparison of weapons, armor, magazines, and replacement costs, our WARDOGS Budget Loadouts Guide handles the price-per-life side. Here, the choice is about damage performance against the target you are actually shooting.
How to Test Your Own Shots to Kill Without Fooling Yourself
If a weapon feels inconsistent, test one variable at a time. A few controlled comparisons tell you more than a dozen random deaths in a crowded Control Zone.
- Choose one weapon and one ammo type. Do not change both between the first and second test.
- Use a consistent target setup. Record the vest level, helmet level, and whether the armor is fresh.
- Keep the range fixed. Start close enough that distance falloff and difficult aim are not dominating the result.
- Aim at one specific hit zone. Upper chest, head, and leg shots are not interchangeable data points.
- Count confirmed hits, not rounds fired. Missing three shots does not mean the weapon needs three more hits to kill.
- Reset the health and protection state. Testing against an already wounded player produces misleading results.
- Repeat with FMJ, then AP, then HP where available. Change only the ammunition and compare the same target.
- Increase the distance afterward. That separates ammo and armor performance from range effects.
For complex matchups, a Season 2 community damage calculator can help narrow down what you want to test. Treat its results as model predictions, not as a replacement for testing the current live build. Check when the data was updated and whether the tool models weapon class, armor coverage, durability, and distance rather than using a single generic damage value for every caliber.
Five Mistakes That Lose Infantry Fights
Most ammunition mistakes are not about buying something terrible. They are about applying one good choice to the wrong situation.
- Loading AP against everyone: AP trades away damage on exposed targets, so it is not a universal upgrade over FMJ.
- Using HP against heavy vests: the bullet may be excellent against flesh but poor against the area you keep hitting.
- Assuming armor protects every body part: helmets, vests, and uncovered limbs have different hit-zone rules.
- Trusting a Season 1 damage chart: Update 0.2.0 reduced several caliber damage values and weakened Level 3–4 armor mitigation.
- Confusing bullets fired with hits required: recoil, missed shots, mixed hit zones, and distance can make a low-STK gun feel slow.
There is a sixth mistake worth avoiding: comparing guns only by their shared caliber. Season 2 deliberately adjusted sniper, DMR, assault-rifle, and LMG damage behavior. Weapon class matters, and the official patch specifically explains why high-caliber automatic weapons were brought closer to their intended roles.
WARDOGS Armor and Ammo FAQ
These answers cover the practical questions that come up when players start comparing ammunition and protection in Season 2.
Does AP ammo always kill faster than FMJ?
No. AP is intended for armor penetration, but it gives up damage against unprotected targets. Against light protection, it may not improve the shots-to-kill threshold at all. Its advantage becomes more important against heavier armor, depending on the weapon and caliber.
Should I always shoot the legs against Level 4 armor?
No. Legs bypass vest coverage, but limb hits have lower damage multipliers. With AP ammunition, repeated upper-chest hits may still be a better option. Choose the zone you can hit consistently.
Does a tracer round do more damage?
Community client-data references model tracer versions with the same damage as their corresponding standard ammunition type. The practical change is the visible projectile trail, which can help with correction but can also reveal your firing position.
Why does my rifle need more shots at longer range?
Some weapons lose damage as distance increases, and long-range accuracy is harder to maintain. Season 2 explicitly increased Super-45 damage falloff beyond 50 meters, but that threshold should not be applied to every gun.
Final Verdict: Match Your Ammo to the Armor, Not the Hype
There is no single best bullet for every WARDOGS fight. FMJ is the sensible everyday choice, AP earns its place when you consistently fight protected infantry, and HP punishes exposed targets when your aim and positioning support it. Before changing weapons, pay attention to the armor covering your hits, the distance, and whether you are actually landing the shots you think you are.
The biggest Season 2 lesson is to stop trusting old damage assumptions. Use the current armor reductions, compare the exact weapon and ammunition combination, and treat shots-to-kill numbers as a defined scenario—not a promise that every opponent will drop after the same number of bullets.