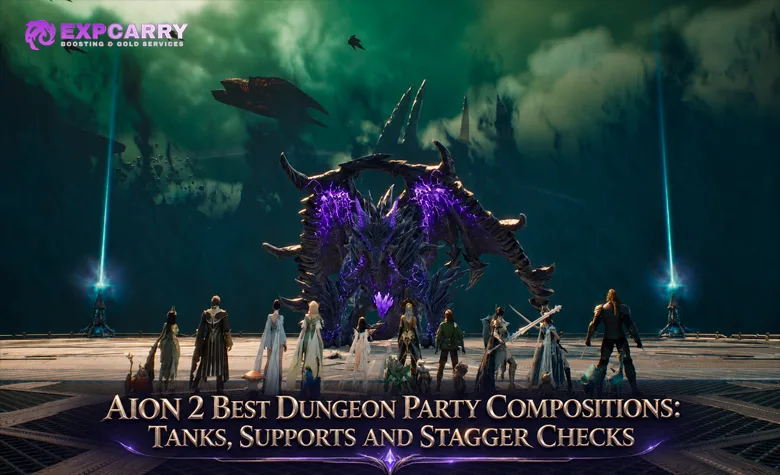
Meeting the Item Level requirement in AION 2 does not mean your dungeon party has enough damage, healing or Stagger to clear the encounter. A group can enter a Hard Expedition and still fail because nobody can hold the boss in position, several players spend their strongest Stagger skills before a required check, or the healer cannot recover from repeated avoidable damage. On the current Global version, Expedition and Transcendence groups support up to five players, making the balance between tanks, supports and damage dealers especially important. Templar, Cleric and Chanter form a popular defensive core, but they are not the only workable combination. The best composition is the one that covers the encounter's actual mechanics while leaving enough damage to finish before Frenzy.
Short answer: For unfamiliar Hard Expeditions, start with Templar, Cleric, Chanter and two reliable DPS players. Replace classes when necessary, but preserve three essential capabilities: stable boss control, sufficient healing and a coordinated answer to Stagger checks and damage timers.
What Every Five-Player Dungeon Party Needs
There is no mandatory class combination for every Expedition. Instead, a successful group must cover several responsibilities that become more demanding at higher difficulty. One character may perform multiple jobs, but that does not remove the need to perform them consistently.
- Boss control: A tank keeps enemy attention predictable, turns dangerous frontal attacks away from other players and moves the boss only when the encounter requires it.
- Reliable recovery: The party needs enough healing to survive unavoidable damage, recover after mistakes and remove dangerous effects when the encounter allows cleansing.
- Consistent damage: Players must keep attacking through movement-heavy mechanics without wasting their strongest abilities on invulnerable targets.
- Stagger contribution: The group needs actual Stagger Gauge Damage available when a boss opens a required interruption window.
- Group utility: Offensive buffs, defensive cooldowns, shields and movement support can increase the value of the entire party.
The distinction between Item Level and combat readiness matters here. Item Level is an entry requirement. It does not establish whether the player has invested in appropriate skills, equipped a useful Stigma setup, maintained Accuracy, learned the rotation or can survive the dungeon's specific mechanics. For the separate entry requirements and dungeon progression routes, see the AION 2 Dungeons Guide.
Best AION 2 Dungeon Party Compositions
These five-player setups provide useful starting points for different situations. They are practical recommendations, not fixed class restrictions or a ranking that proves one party always clears faster. Gear, skill investment, encounter knowledge and available Stagger abilities can change which lineup performs best.
| Party goal | Five-player composition | Main advantage | Important limitation |
|---|---|---|---|
| Learning Hard Expeditions | Templar + Cleric + Chanter + Ranger + Sorcerer | Stable tanking, strong recovery, group buffs and ranged damage | Only two dedicated DPS slots; both players need consistent output |
| Stagger-focused progression | Templar + Cleric + Chanter + Gladiator + Spiritmaster | Several potential Stagger contributors with frontline and ranged coverage | Requires encounter-specific Stigma choices and cooldown coordination |
| Fast Normal farming | Templar + Cleric + Assassin + Ranger + Sorcerer | Three dedicated DPS players for familiar encounters | Less secondary healing and support utility without a Chanter |
| No Templar available | Gladiator + Cleric + Chanter + Ranger + Sorcerer | A properly prepared Gladiator can handle the frontline role | The Gladiator must build and play for tanking, not simply queue as ordinary DPS |
| No Chanter available | Templar + Cleric + Gladiator + Ranger + Sorcerer | Retains tank and primary healer while adding damage and Stagger options | Cleric must cover appropriate party buffs and defensive utility |
| No Cleric available | Templar + Chanter + Gladiator + Ranger + Sorcerer | Can work in familiar content with a healing-focused Chanter | Riskier in sustained-damage Hard encounters; not the default progression recommendation |
The key decision is whether your group is losing attempts to survival, Stagger or the Frenzy timer. A safer composition is valuable when people are learning mechanics. Once the tank controls the encounter and the healer finishes with resources to spare, replacing some defensive utility with damage may produce more reliable clears.
Why Templar, Cleric and Chanter Work So Well Together
The popularity of this trio comes from how the classes divide responsibilities. Templar provides a dependable frontline, Cleric handles primary healing, and Chanter contributes offensive and defensive support while continuing to fight. Together they make mistakes easier to recover from and allow the two remaining players to concentrate on damage and required mechanics.
Templar: Boss Control and Predictable Positioning
Templar is the straightforward tank choice for difficult dungeon progression. The class can maintain Enmity, withstand pressure and provide protection while keeping the boss's attacks directed away from vulnerable teammates. Its value is especially noticeable when an encounter contains frontal cones, frequent boss movement or dangerous periods during which DPS players need to stand in specific positions.
Good tanking is not measured only by personal damage. Turning the boss repeatedly can force melee players to move, make the healer chase targets and cause other players to lose their intended attack windows. A Templar who holds the boss steadily may increase total party damage even when another player produces higher numbers on a training target.
The tank still needs an appropriate Stagger plan. An offensive Templar setup can include Empyrean Lord's Punishment, while a harder encounter may require a more defensive arrangement. The AION 2 Templar Build Guide covers the difference between general tanking, defensive Hard Expedition setups and offensive farming presets.
Cleric: Primary Healing, Cleansing and Emergency Recovery
Cleric is the most dependable starting point when a dungeon repeatedly damages several players or punishes missed mechanics. Its job is to keep everyone alive without abandoning its own damage contribution. That means maintaining useful recovery effects, preparing for predictable damage and avoiding unnecessary healing casts when the party is already safe.
A strong Cleric does not automatically heal every mistake immediately. Sometimes the better decision is to cleanse a dangerous effect, protect a player before the next hit or keep an emergency ability ready. The class can also contribute Stagger through appropriate attacks and Stigma choices, but not if doing so means missing a required heal.
When the group has a Chanter, the Cleric should review overlapping buffs and consider turning a redundant offensive Stigma slot into additional cleansing, protection or recovery. The exact choice depends on the abilities equipped by both supports.
Chanter: Group Buffs, Secondary Healing and Damage
Chanter makes a five-player group more flexible because its contribution is spread across several systems. It provides party-oriented Mantras, offensive windows, supplemental recovery and defensive tools while remaining an active melee combatant. This utility becomes especially valuable when the party's two main DPS players can use those buffs efficiently.
Undefeated Mantra supports party offense and survivability, while Power of the Storm creates an important coordinated burst window. Recuperation provides healing and cleansing utility, and situational Stigmas such as Healing Touch, Impeding Authority or Obliterate can answer a specific encounter problem.
Those alternatives are not free additions to the same build. Global characters currently have four equipped Stigma slots, so choosing additional healing, shielding or Stagger generally means replacing something else. A Chanter who brings the wrong four Stigmas may contribute less than the group expects. The AION 2 Chanter Guide explains the relevant presets and support adjustments.
Explore services related to this guide, selected from our Aion 2 catalog.
View All Aion 2 Services


Do Cleric and Chanter Buffs Stack?
Not every similar party buff provides an additional independent bonus. This is one reason a Templar–Cleric–Chanter composition must coordinate its support skills rather than simply activate every offensive effect at once.
- Undefeated Mantra and Light of Protection: their overlapping party Damage Boost effects do not add together. The higher-level effect takes priority, with Undefeated Mantra taking priority when their levels are equal.
- Power of the Storm and Earth's Blessing: their relevant effects have an incompatibility noted in the skill descriptions. Separate their use instead of assuming simultaneous activation produces both complete bonuses.
- Earth's Promise and Chain of Torment: the corresponding enemy damage-tolerance reduction effects should not be counted as two independent full-strength debuffs.
The practical solution is to check the actual skill levels and active effects before changing a build. If the Chanter's Undefeated Mantra already supplies the stronger overlapping bonus, the Cleric can replace Light of Protection with a useful situational Stigma such as Absolution. If the Cleric's effect is stronger, removing it without checking would be a mistake.
Coordinate major offensive cooldowns around periods when the boss is attackable and the party can stay in range. Do not activate an important group buff just before forced movement, an immunity phase or a mechanic that interrupts everyone’s attacks. Buff uptime and timing often matter more than the number of buff icons visible before the pull.
Which DPS Classes Fit the Party Best?
Once the tank and recovery responsibilities are covered, the remaining party slots should solve the encounter's most difficult offensive problem. That could mean high single-target damage, safer ranged uptime, strong area damage or additional Stagger. Choosing the two highest-ranked classes from a general tier list is not enough if their players cannot perform the required mechanics.
Ranger and Sorcerer: Ranged Damage and Flexible Positioning
Ranger and Sorcerer are useful companions for the Templar–Cleric–Chanter core because both can contribute from range while the tank stabilizes the boss. This makes it easier to maintain damage when the arena contains dangerous melee zones or when the group must spread for targeted attacks.
Neither class is excused from mechanics simply because it attacks at range. A Ranger still needs to handle movement, target selection and appropriate Stagger skills. A Sorcerer must avoid committing a long or charged attack when the target is about to move or become untargetable. Their practical advantage depends on the players maintaining uptime, not only on the classes being ranged.
Gladiator and Spiritmaster: Additional Stagger Options
Gladiator can bring melee pressure, area damage and Stagger utility. Spiritmaster contributes sustained magical damage and has access to a meaningful Stagger option through Jointstrike: Destructive Attack. This pairing is worth testing when your usual group reliably survives the boss but struggles to break the Stagger gauge during a required phase.
The important qualification is that the players must actually equip and use the relevant skills. A class capable of high Stagger on paper does not provide it automatically when the necessary Stigma is missing, its cooldown was spent on ordinary damage or the attack fails to connect.
Assassin and Other Burst-Focused DPS Choices
Assassin can be effective in an organized party that creates reliable opportunities for close-range damage. The class benefits from a tank who keeps the boss stable and support players who protect the damage window. However, a melee-heavy group may need more careful positioning when the boss repeatedly places hazards around itself.
If several players spend too much time moving out of danger, a theoretically stronger burst lineup may finish more slowly than a balanced group with reliable ranged uptime. Evaluate effective damage during the encounter, including deaths and forced downtime, rather than comparing only short training-target tests.
How Stagger Checks Change Party Composition
Stagger is one of the clearest reasons an otherwise well-equipped dungeon group can fail. Certain bosses expose a Stagger gauge during a dangerous cast. The party must deal enough Stagger Gauge Damage to break it before the relevant cast finishes. Ordinary damage against the boss's HP does not automatically solve that requirement, and an ordinary crowd-control effect should not be assumed to work on a boss in the same way as Stagger.
Each class has tools that can contribute to the gauge, including encounter-specific Stigmas and attacks with Stagger effects. The following examples identify useful abilities to check in a player's current Global skill setup. They do not mean every character automatically has the skill equipped or that a single use is sufficient to complete a particular boss check.
| Class | Stagger tools to check | Party-planning priority |
|---|---|---|
| Templar | Punishment (fully charged); Empyrean Lord's Punishment | Reserve a usable Stagger option without compromising boss control |
| Gladiator | Ruinous Blow; Wrath Wave | Coordinate melee access and avoid spending a required Stigma too early |
| Assassin | Savage Fang | Plan how to reach the target during the check |
| Ranger | Arrow Storm and other attacks with listed Stagger Gauge Damage | Maintain a clear firing position when the gauge opens |
| Sorcerer | Hellfire (fully charged); Divine Burst | Allow enough time for the attack to complete |
| Spiritmaster | Jointstrike: Destructive Attack | Check the Stigma setup and summon-related activation requirements |
| Cleric | Bolt (fully charged); dedicated Stagger Stigma options | Contribute when healing demands allow it |
| Chanter | Fracturing Blow; Obliterate | Swap a flexible Stigma slot when the group needs more Stagger |
Do not calculate a guaranteed party Stagger total from class names alone. Skill rank, charged attacks, equipped Stigmas, the actual tooltip, available cooldowns and boss behavior determine which attacks can land during the check. Some high-Stagger abilities require a Stigma slot that the player's usual farming build does not include. Verify the current in-game descriptions before treating a proposed rotation as guaranteed.
How to Coordinate a Stagger Check
Assign responsibilities before the boss reaches the mechanic. A simple callout plan is usually more effective than asking all five players to react independently after the gauge appears.
- Identify the check: Confirm which boss animation or cast opens the Stagger gauge. Do not mistake an ordinary damage phase for a required interruption.
- Reserve the necessary skills: Keep enough high-Stagger attacks available for the mechanic. Avoid spending a crucial Stigma immediately before the check just to improve personal DPS.
- Assign the opening response: Decide which players will use their strongest reliable Stagger tools as soon as the gauge becomes vulnerable.
- Keep a backup contribution: A player who misses, gets displaced or has to heal may not complete their assigned attack. Give another party member a clear follow-up responsibility.
- Use the resulting window: When the boss is successfully staggered and becomes vulnerable, commit appropriate offensive abilities instead of wasting the opportunity on unnecessary repositioning.
A failed check does not always mean the party needs another high-damage class. If two players used their Stagger skills before the mechanic, changing their timing may solve the encounter without changing the composition. If every player executes correctly but the gauge still remains, then examine Stigma choices, skill upgrades and whether another character can contribute more reliably.
Healing and Defensive Requirements for Hard Dungeons
Hard Expedition survival depends on more than the healer's output. The tank must avoid unnecessary damage, DPS players must respect dangerous telegraphs, and everyone needs to leave room for emergency recovery. A Cleric and Chanter cannot make a group permanently safe if players repeatedly ignore mechanics or force the healer to chase them across the arena.
For progression, a useful division of responsibilities is to let the Cleric handle the main recovery plan while the Chanter contributes supplemental healing and prepares a defensive response for known party-wide damage. If a mechanic requires immediate cleansing, decide whose skill will be used first and which ability remains available afterward. Avoid spending both supports' strongest recovery tools on the same minor damage event.
Positioning also affects support value. A Chanter's nearby party effects cannot be assumed to cover teammates who have moved far outside their effective range. The Cleric similarly needs a safe position from which to reach players without stepping into the boss's frontal attacks. Ranged DPS should spread when required by the encounter, but not wander so far that normal recovery becomes difficult.
The October 28 Global patch reduced boss Attack in Normal Expeditions and lower Transcendence stages, and also reduced Attack and Damage Boost in Hard Expeditions and higher Transcendence stages. Those changes make some incoming damage more manageable, but they do not remove Stagger checks, movement requirements or the need to defeat bosses before Frenzy. The figures and affected content are listed in NCSOFT's official October 28 Global patch notes.
What to Do When Your Party Is Missing a Role
Waiting for one specific class is not always necessary. A substitute works when the character can perform the missing job with the build and skill set they actually have. Treat the following options as conditional substitutions rather than permission to ignore the encounter's requirements.
No Templar: Can Gladiator Tank?
Yes, a properly prepared Gladiator can take the frontline role in many five-player groups. The important difference is whether the player has selected suitable defensive and Enmity tools, understands boss facing and can survive the required hits. A Gladiator built entirely for maximum damage should not be assumed to provide the same stability as a dedicated tank setup.
If you use a Gladiator tank, preserve a dependable healer and consider keeping Chanter support while learning a difficult boss. Test whether the Gladiator can hold the boss without forcing the rest of the party to stop attacking or constantly reposition.
No Cleric: Can Chanter Handle Healing?
A Chanter can provide meaningful healing and protection, but replacing a Cleric changes the group's margin for error. The player may need to equip Healing Touch, Impeding Authority or other recovery-oriented tools instead of part of the usual offensive setup. This costs Stigma flexibility and can reduce the value of bringing a Chanter primarily for damage buffs.
The substitution is more reasonable in familiar Normal content where incoming damage is controlled and the party already handles mechanics cleanly. In an unfamiliar Hard Expedition with sustained party damage, limited revives or frequent dangerous effects, bringing a dedicated Cleric remains the safer recommendation.
No Chanter: How Does the Cleric Build Change?
Without a Chanter, the Cleric becomes more important as the provider of recovery and party support. Light of Protection can be useful when no stronger overlapping Chanter effect is present. The remaining DPS slot can increase the group's total damage or supply additional Stagger, depending on the problem you are trying to solve.
A five-player group with Templar, Cleric and three strong DPS characters can clear demanding content if those players understand their responsibilities. The absence of Chanter does not create an automatic failure condition; it simply removes a flexible source of group offense, movement support and secondary protection.
What About Two Tanks, Two Clerics or Duplicate Classes?
Duplicate roles are not automatically useless. A Gladiator can fill a damage slot alongside a Templar, and a second Cleric can offer additional recovery in a group that genuinely needs it. However, using more slots for defense usually leaves fewer players to meet a strict damage timer. Similar party buffs may also overlap rather than provide twice the benefit.
Before accepting a duplicate support class, ask what problem the extra player solves. If the group already survives comfortably but reaches Frenzy, another dedicated DPS or a stronger Stagger contributor is often more useful. If the party dies before its first major damage window, additional recovery or protection may be justified while players learn the encounter.
How to Adjust Your Party for Different Dungeons
The safest composition changes with the dungeon's mechanics. A party that clears introductory Conquest content comfortably may still need to change skills or role assignments for Hard Expeditions and higher Transcendence stages. Use the following situations to decide what should change before a difficult run.
Krao Cave Hard: Prepare for the Final Stagger Check
Ultimate Berk's dangerous cast is a strong example of why the group must save Stagger abilities. A lineup with excellent damage can still fail if everyone arrives at the check without the necessary skills available. Bring players who can respond reliably, assign the interruption beforehand and avoid using all high-Stagger cooldowns on routine damage just before the mechanic.
The encounter also requires movement and correct use of safe areas, so adding more Stagger does not eliminate the need to perform the rest of the fight. The Krao Cave Hard Mode Guide covers the specific boss attacks and positioning details.
Draupnir Hard: Movement and Stagger Must Work Together
Transcendent Bakarma combines movement demands with Stagger pressure. Players who are still recovering from a shockwave or moving out of a dangerous zone may not be ready to use their planned Stagger ability immediately. Assign a dependable first response and make sure at least one other player can compensate if the original attacker is displaced.
Cleric and Chanter together can make the fight more forgiving, but they do not replace correct jump timing, positioning or offensive uptime. If your group reaches Bakarma consistently and then fails there, review the timing of Stagger skills and movement before replacing every DPS player. The Draupnir Hard Mode Guide explains the individual encounters.
Urugugu Canyon and Vakron Hard: Respect the Frenzy Timer
Urugugu Canyon and Vakron Sky Island Hard Modes became available on Global with the October 28 update. Their published entry requirement is Item Level 2,700, and the encounters use a four-minute boss Frenzy timer with a limit of three revives per player. A very defensive party may survive the opening mechanics but still fail because its damage is too low.
Start with a stable tank and healer. Keep a Chanter if the group's buffs and secondary protection improve effective damage and uptime. If the encounter is already mechanically controlled but the timer remains the main problem, test a third dedicated DPS or a more offensive tank/support preset rather than adding another defensive slot automatically. Do not trade away essential healing before the group can survive the mechanics reliably.
Transcendence: Consistent Damage Matters More Than a Perfect Opener
Higher Transcendence stages reward sustained damage, predictable positioning and efficient recovery. A group that spends half the fight reviving players or chasing a moving boss may perform much worse than its combined Combat Power suggests. Choose characters who can maintain their rotation through the encounter and still answer required mechanics.
Before replacing a class, compare the actual reason for failure. If the group repeatedly dies, prioritize positioning and recovery. If players survive but lose too much time to movement, improve uptime and boss control. If a required gauge is not breaking, adjust Stagger assignments and Stigma choices first.
Why a Party With Enough Item Level Keeps Wiping
The wipe pattern usually reveals whether the group needs a different composition or simply better execution. Review the point of failure rather than making every player increase Item Level without a specific upgrade target.
| What happens | Likely problem to investigate | First adjustment |
|---|---|---|
| Boss constantly turns toward DPS or healer | Unstable Enmity or positioning | Review tank skills, opening sequence and unnecessary movement |
| Several players die during predictable party-wide damage | Defensive cooldowns or healing timed poorly | Assign protection and recovery before the mechanic |
| Stagger gauge remains when the cast finishes | Missing Stagger skills, spent cooldowns or missed attacks | Equip relevant tools and assign a coordinated sequence |
| Everyone survives but the boss enters Frenzy | Insufficient effective damage or excessive downtime | Review DPS uptime, overlapping buffs and defensive slots |
| Healer cannot keep everyone in range | Players spreading unnecessarily or boss movement | Set clear positions and movement directions before pulling |
| Damage drops after a support player dies | Lost party effects and interrupted recovery | Protect the support position and restore necessary buffs after revival |
Combat Power or Item Level comparisons are most useful when the party understands its failure. If a DPS player has impressive equipment but repeatedly dies before the main damage phase, that character's effective contribution is low. If a Chanter uses the correct offensive abilities but forgets an important Mantra after resurrection, the entire group may lose value. Fixing those issues can be more effective than searching for a replacement with a slightly higher displayed number.
Five-Minute Party Preparation Before a Hard Expedition
A brief discussion before the first pull can prevent repeated wipes. Each player should know what they are expected to do during the encounter's most dangerous moment, not only what damage rotation they normally use.
- Confirm the frontline: Decide who holds Enmity, where the boss will face and who moves first when the arena changes.
- Confirm recovery: Identify the primary healer, secondary recovery options, available cleanses and the response to a fallen player.
- Check party buffs: Make sure the Chanter's Mantras are active, review overlapping Cleric effects and decide when major offensive buffs will be used.
- Inspect Stagger loadouts: Ask every player which reliable Stagger skill they have equipped and whether it will be ready for the required phase.
- Assign the mechanic call: One player should announce the dangerous cast or movement sequence clearly enough that others can react together.
- Set the damage plan: Decide whether burst cooldowns belong on the pull, after a successful Stagger or during another known vulnerability window.
- Review the first failure: After a wipe, identify the specific missed mechanic before changing the entire composition or spending resources on upgrades.
The purpose is not to turn every dungeon into a formal raid. It is to prevent five players from making different assumptions about the same boss mechanic. A party with clear responsibilities can make effective use of classes that would look less attractive in a simplistic tier list.
AION 2 Dungeon Party Composition FAQ
These questions address the most common uncertainties when a group has the required equipment but cannot decide which classes to recruit.
Is Templar, Cleric and Chanter the mandatory dungeon meta?
No. It is a strong, forgiving core because the three classes cover tanking, primary healing and support. A Gladiator can replace a Templar when built for tanking, while a Cleric and three DPS can work without Chanter support. The encounter and the players' actual builds matter more than a fixed class list.
Can two Clerics replace a Cleric and Chanter?
Two Clerics can provide additional recovery, but they do not automatically reproduce Chanter's unique utility, and overlapping buffs should not be counted twice. The extra healing is useful only when it solves a real survival problem. Against a strict Frenzy timer, the lost damage or support flexibility can become a disadvantage.
Do higher Item Level and Combat Power guarantee enough Stagger?
No. Stagger depends on the skills that deal Stagger Gauge Damage, whether they are equipped and available, and whether the attacks connect during the boss's check. Better equipment can improve general combat performance without correcting a badly timed or missing Stagger ability.
Should a Chanter focus on damage or healing in Hard Expeditions?
With a dependable Cleric, Chanter can maintain offensive buffs and damage while keeping situational support available. Without a Cleric, the Chanter may need additional healing and protection Stigmas, reducing offensive flexibility. Choose the setup based on the actual incoming damage and the group's survival record.
Conclusion
The best AION 2 dungeon party is not simply five characters who meet the entry requirement. For unfamiliar Hard Expeditions, Templar, Cleric, Chanter and two dependable DPS players provide a strong starting point. Once the group understands the encounter, adjust its composition according to the real problem: tank stability, healing, Stagger timing or damage before Frenzy. A correctly prepared alternative class is more valuable than a theoretically perfect party whose players cannot execute the required mechanics.