This AION 2 Templar guide provides five sword-and-shield builds: a main PvE tank, an offensive dungeon tank, a solo and AoE setup, an Arena control build and an Abyss party protector. You will find Korean skill-specialty choices, rotation priorities, Stigma substitutions, safe in-game macros, equipment and stat priorities, Arcana planning, Pantheon collectibles, pet rolls and a boss list covering mechanics and loot. The mechanical reference is the later KR/TW Templar (수호성), incorporating its September 4 and September 16, 2026 balance changes. Global Advanced Access starts September 30, followed by the free-to-play opening on October 5. The full retail Global skill coefficients and late regional progression cannot be verified from the completed level-37 test; check their tooltips before committing rare upgrades.
Short answer: For group PvE, build enough Block, HP and Damage Tolerance to survive, then maintain Enmity through Taunt, Punishment and your Vicious Strike/Judgment loop. For damage-oriented KR builds, work toward Judgment 3/4/5, Vicious Strike 3/4/5 and Punishment 3/4/5; for PvP, trade part of that offense for Grapple, Doom Shield, control resistance and party protection.
| Build | Skill focus | Stigma direction | Stat direction |
|---|---|---|---|
| Main PvE tank | Taunt, Vicious Strike, Judgment, Warding Strike, Shield Smite | Taunt, Shield of Protection, Second Skin, Nezekan's Shield or a damage/threat swap | Block, Damage Tolerance, HP, Accuracy |
| Offensive PvE tank | Judgment, Vicious Strike, Pummel, Punishment | Taunt, Shield of Protection, Battlefield Banner, defensive flex | Reliable survival, then Attack, Smite, Frontal Damage |
| Solo / AoE | Vicious Strike cleave, Shield Smite, Grapple and Assault Fury if equipped | Grapple, Assault Fury, Doom Shield, Shield of Protection or recovery | Attack, AoE uptime, MP and enough Block to chain pulls |
| Arena / small PvP | Shield Rush, control chains, timed Judgment; Capture if available | Doom Shield, Grapple, Armor of Balance, Second Skin; trade a slot for Taunt when its debuff matters | Accuracy, HP, PvP Damage Tolerance, then pressure |
| Abyss / group PvP | Engage, isolate, intercept damage, protect the frontline | Comrade in Arms, Nezekan's Shield, Grapple, Armor of Balance or Second Skin | HP, tolerance, control resistance, usable Accuracy |
Loadout rule: Each row is an investment template, not proof of the starting number of Global Stigma slots. Equip only the slots the release client shows. Skill-specialty numbers below are option indices from the later Korean client, not hotbar keys or character levels. Names can differ in the official Global localization.
Templar Role, Weapon and How Tanking Works
Templar is the dedicated frontline tank, using a longsword and shield. Its job is not only to remain alive: it must make enemy attacks predictable for the group, establish and retain Enmity, face bosses away from other players and reserve protection for dangerous mechanics. Templar can contribute meaningful damage once its defensive requirements are met, but a dummy-DPS setup is incomplete if the boss repeatedly turns toward a healer.
Separate the class systems before assigning points. Vicious Strike, Judgment, Punishment and Shield Smite are ordinary combat skills; Warding Shield and Ironclad Defense are passives; Taunt, Shield of Protection, Doom Shield and Nezekan's Shield belong to the Stigma selection. Arcana, gear and Daevanion can contribute further skill levels or stats. A hotbar position does not turn an ordinary active into a Stigma, and an offensive Stigma occupies a place that might otherwise protect the party.
The KR Changes That Affect Templar Builds
Templar received successive adjustments in Korea, so mixing a July rotation with a September ability description gives misleading results. August 26 reworked the Judgment/Shield interaction and Punishment; September 4 changed which attack chains refresh important cooldowns. The September 16 follow-up then deliberately increased the cancel delay on Pummel, Punishing Strike and Judgment, alongside compensating PvE damage changes. These are regional changes and an updated reference for build logic, not announced Global retail damage coefficients.
- Vicious Strike chain, specialty #4: the September 4 version reduces Warding Strike cooldown by two seconds, rather than Punishment cooldown.
- Pummel / Punishing Strike, specialty #4: reduces Punishment cooldown; since September 16, the effect also applies on Pummel, not only Punishing Strike.
- Punishing Strike specialty #5: September 16 replaced its extra activation with additional damage on hit. Older extra-hit explanations need revision.
- Punishment: Executor's duration became 20 seconds on September 4; the skill received a further 10% regional PvE damage increase on September 16.
- Shield Smite: can be used while moving in the September 4 regional version, with a 20% PvE damage increase on September 16.
- Taunt: the September 16 KR change tied its added Enmity to damage dealt rather than the earlier flat model. Accurate hits and a working offensive loop still matter to a tank.
The detailed changes can be checked against the September 4 Korean notice reproduced by Inven and the September 16 translated regional patch notes. A September 2 build using the temporary cooldown routing should not be treated as the September 16 build. The September 16 update also increased the PvE damage of Warding Strike and Annihilate by 10% each, while Noble Armor's duration and cooldown were both reduced from five to two minutes.
Best Templar Skills and Specialty Choices
The strongest investment depends on whether survival, threat or offensive uptime is limiting your current content. The KR skill layout presents specialty options as skills rise through their progression breakpoints, and an advanced setup can equip three compatible options on a sufficiently developed skill. Do not spend toward a numerical combination until you have compared the actual effects and available slots in Global.
| Skill | KR target | Reason / alternatives |
|---|---|---|
| Judgment | 3 / 4 / 5 for offensive PvE | Offensive effect, critical-hit support and removal of its cooldown in the regional options. A lifesteal choice can replace an offensive option while learning. |
| Vicious Strike chain | 3 / 4 / 5 for developed PvE | #3 favors fewer targets; #4 shortens Warding Strike after September 4; #5 adds the Threatening Blow chain finisher. Supports both damage and Enmity. |
| Pummel / Punishing Strike | 3 / 4 / 5 as a mature reference | #3 favors concentrated damage; #4 shortens Punishment on the updated regional chain; #5 became extra on-hit damage on September 16. Earlier MP-saving or healing choices suit weaker solo gear. |
| Punishment | 3 / 4 / 5 in an offensive build | #3 improves Skill Speed, #4 permits movement, #5 supports reliable hits. Its Executor state is an important part of the sustained attack plan. |
| Shield Smite | 2 / 4 for the resource loop | #2 removes its MP cost and returns MP on a hit in the researched KR version; #4 supports cooldown reduction. Inspect the bonus follow-up available at your actual skill level. |
| Warding Strike | Survival options before full offense | Provides HP recovery and a protective state; regional specialties include a shorter cooldown, Block, ongoing healing or help for nearby party members. |
| Defiance | Manual emergency skill | Removes listed dangerous controls and provides temporary protection. Do not bury it inside a routine attack macro. |
Skill-point order for the tank: create reliable Vicious Strike and Shield Smite loops, keep Judgment usable, and then raise Punishment/Warding Strike according to your most common difficulty. Since the August 26 KR rework, Judgment is activated through a shield attack rather than requiring a stunned or knocked-down target. If the party loses the boss, improve Taunt usage, Accuracy and threat-generating attacks before pursuing an additional offensive passive. If you die to a specific hit, invest in the mitigation or defensive specialty that actually answers it. On a developed offensive KR setup, Judgment, Vicious Strike and Punishment are common level-20 targets; they are not required at character creation.
Which Passives Should You Upgrade?
For a progression main tank, Warding Shield (Block and healing on a successful block), Enhance Health, Ironclad Defense and Guarding Seal directly address survival. Fury turns successful blocks into a party PvE damage buff in the regional version; Insulting Roar improves Enmity and frontal Attack, while Impact Hit offers offensive pressure. Korean damage-oriented Templar authors commonly invest in Fury first, then compare Insulting Roar with Impact Hit; their precise order varies with equipment and party needs. Survival Willpower and Block Pain provide further status-resistance or damage-resistance opportunities. Keep the defensive foundation that prevents real boss wipes, then invest in offensive passive breakpoints once that condition is met.
Explore services related to this guide, selected from our Aion 2 catalog.
View All Aion 2 ServicesBuild 1: Main PvE Tank for Expeditions and Sanctuary

This configuration is for holding a boss rather than competing with party damage dealers. It combines consistent Enmity with rotating mitigation and predictable facing. A tank who blocks an attack but drags the boss's frontal cone across the group has not completed the job.
Skill setup: Vicious Strike 3/4/5 as a later-KR target, Judgment with usable specialties, Shield Smite #2 for MP return, Warding Strike for mitigation and Punishment to maintain Executor. Stigma priority: Taunt, Shield of Protection, Second Skin and a flexible protection slot. Use Nezekan's Shield if group shielding is the bottleneck, or Doom Shield if an engagement and personal barrier are more useful. If you have fewer available slots, preserve the tools the upcoming encounter actually requires; the four named choices are not mandatory simultaneous starter equipment.
Boss opening: approach from the safe side, establish the boss's attention with Taunt when needed, keep its front away from allies, use the Vicious Strike chain and a shield attack to enable Judgment, then work Shield Smite into the MP loop. Spend Punishment/Executor when you can continue attacking. Pre-position Warding Strike or Shield of Protection for a known incoming mechanic and keep a second defense available rather than pressing everything together. Re-establish threat after transitions and add spawns before they reach the backline.
Gear: longsword, guard and armor with enough Block, Damage Tolerance/Resistance and HP to handle the encounter, plus practical Accuracy to land the attacks that generate Enmity. Offensive rolls matter after the baseline works. On a difficult boss, the value of avoiding a wipe exceeds a small theoretical increase in personal damage.
Build 2: Offensive PvE Tank and Fast Dungeon Clears
Once you survive every required mechanic and hold Enmity comfortably, part of the defensive budget can become damage. This is not a different class role; it is a tank who has met the encounter's defensive requirements and can afford to spend more time attacking.
Skills: Judgment 3/4/5, Vicious Strike 3/4/5, Punishment 3/4/5, Pummel with the September cooldown interaction, and Shield Smite 2/4 as the regional target. Keep the same Enmity foundation. Stigma direction: Taunt and Shield of Protection stay available; compare Battlefield Banner or Executing Blade against a second major defense when the encounter allows it. Battlefield Banner is a Stigma whose regional effect converts Defense into Attack, not an ordinary passive. Replace its slot for Second Skin or Nezekan's Shield when progression content demands it.
Offensive priority loop: establish Executor with Punishment at a moment that will allow follow-up attacks; use Judgment when enabled by a shield attack; advance Vicious Strike to refresh Warding Strike; use Pummel/Punishing Strike to support Punishment uptime; press Shield Smite for resource recovery; repeat while observing boss timing. The September 16 KR patch reduces the incentive to force obsolete Pummel-to-Judgment mouse-cancel timing. If your rotation stops generating threat, change the build before demanding that the damage dealers hold back indefinitely.
Stat transition: maintain the needed Block and effective HP, then improve weapon quality, Accuracy, Attack, Smite and Frontal Damage Boost where frontal uptime makes that bonus useful. A late-KR fully enhanced weapon, guard or Combat Power screenshot is not a Global gear target.
Build 3: Solo Leveling and AoE Farming Templar
Solo Templar needs enough offense to avoid very long fights while retaining the class's safety. Large packs are only efficient when their travel, resource use and recovery remain manageable. Choose repeatable content that your Global character can actually access rather than copying a Chapter 1 farming route.
Skill emphasis: Vicious Strike cleave, Pummel for repeated damage, Shield Smite for MP management, Judgment when its shield-attack condition is available and Warding Strike for the dangerous pull. Stigma direction: Grapple for bringing eligible enemies into a compact area, Assault Fury for area control, Doom Shield for an engage, and Shield of Protection when mitigation is required. Swap a damage/control choice for Second Skin when the pull is too punishing.
Practical pack loop: select a modest cluster, use Grapple only on eligible targets, align enemies in front of the shield, start the cleave chain, use Shield Smite before MP becomes a bottleneck and finish with your available area tools. Keep Warding Strike for the pack that can actually threaten your HP. Against a single tough field target, exchange an AoE specialty for a fewer-target or sustained-damage option. A stable circuit is more useful than a larger pull that repeatedly consumes resurrection resources.
For Arcana, keep cards that complete your main skill breakpoints and provide recovery or damage appropriate to the route. A defensive set that is essential to boss tanking need not be destroyed to build a faster solo setup: retain an alternative when the current preset interface allows it.
Build 4: Arena and Small-Scale PvP Control Templar
Templar is most disruptive when it decides who can move freely, protects its own response to counter-control and keeps pressure on a vulnerable target. Building only HP can leave the opponent with no reason to fight; building only dungeon DPS can make a slow melee character easy to disengage from.
Stigma direction: Doom Shield for approach and a barrier, Grapple for a positional play, Armor of Balance against relevant impact control and Second Skin for mitigation. Replace one according to the opponent: Taunt offers a regional Shrinking/Provocation package, while Executing Blade is an offensive debuff option. Treat those as substitutions, not extra always-equipped slots. Ordinary skills: Shield Rush is a separate mobility/control tool, while Capture appears in the expanded regional skill list; use it only if present in your Global skill window. Judgment and follow-up attacks provide pressure after you have landed the setup.
Engagement: identify the opponent's likely escape, enter only when your own approach is available, use one control to draw out a reaction and reserve another for the confirmed kill or peel opportunity. Keep Defiance and Armor of Balance on independent keys. If the first control misses, repair Accuracy and your angle before stacking additional damage. Against a healer, coordinate the team's anti-healing and target selection rather than pretending Templar's PvE aggro creates a permanent forced-target mechanic in every PvP mode.
Stats: Accuracy to make key skills connect, HP and PvP Damage Tolerance to absorb the counter-burst, then Attack and useful PvP Damage Boost. Block and Evasion can help under the current rules, but no historical KR percentage is a universal Global Arena threshold.
Build 5: Abyss and Large-Scale PvP Party Protector
In mass PvP the Templar becomes a protective and disruptive frontline. It needs to survive concentrated damage, pull or isolate a target and prevent teammates from being erased while the group crosses an exposed area. That is a different resource problem from an Arena duel.
Stigma selection: Nezekan's Shield for group protection, Comrade in Arms to share part of an ally's incoming damage, Grapple for positional control and Armor of Balance or Second Skin for the expected enemy burst. Doom Shield is an engagement swap; Assault Fury or Empyrean Lord's Punishment adds area disruption if your group's defensive coverage is already sufficient. Do not equip every name from a late KR screenshot without checking current availability and slots.
Group sequence: move with your frontline, identify the allied player who needs protection, reserve a shield for the enemy's actual commitment, use Grapple only when it does not pull extra enemies onto your healer, then keep the priority target occupied while your damage dealers act. Use recovery and defensive tools before a lethal hit rather than after being disabled. For coordinated pushes, the group should know whether you are engaging or peeling; those objectives require different timing.
Stats and supporting systems: Max HP, PvP Damage Tolerance, control resistance and reliable Accuracy have priority when the enemy focuses you. Build Pantheon Life/Justice/Freedom according to the specific deficiency, retain a defensive pet preset where available and use offensive equipment only after the core protection survives.
AION 2 Boss List: Skills, Mechanics and Loot for Templar
The following list covers documented Sanctuary encounters in the KR/TW service. Boss availability, item levels, skill names and reward pools may differ in Global. The Templar should always distinguish blockable attacks from mandatory positioning, color, object and group mechanics.
Loot warning: The July 1, 2026 KR update removed separate intermediate-boss clear rewards from Abyssal Forge: Ludra and Corroded Decontamination Facility. Their completion rewards were consolidated into the final Od Energy reward stage. The loot entries below identify the relevant boss or instance reward pool; a listed item is not guaranteed on every clear.
| Boss | Main skills and mechanics | Templar strategy | Loot / rewards |
|---|---|---|---|
| Core (Fusion Reactor) Abyssal Forge: Ludra | Circular AoE, X-shaped arena attack, constant add spawns and additional reactors that shield the central core. | Control adds, avoid crossing attack lines and let assigned players destroy the additional reactors. | No separate intermediate clear reward under the revised KR system. Rewards are collected through the final Ludra clear. |
| Isolation Specialist Rahu Abyssal Forge: Ludra | Timed transferable debuff, damaging ground pools, narrow safe-sector attack, arena split and Abyssal Predator adds. | Coordinate debuff transfers, keep the targeted attack away from the safe sector and help position the boss's linear attack to eliminate adds. | No separate guaranteed intermediate clear chest; included in progression toward the final Ludra reward pool. |
| Abyssal Wings Ketu Abyssal Forge: Ludra | Moving laser walls, exploding spirits, falling orbs, red/blue eye checks and Soul Stone protection against sustained arena damage. | Destroy spirits before the walls reach them. Look toward the red eye and away from the blue eye. Use Soul Stone protection for the dangerous damage phase. | No separate guaranteed intermediate clear chest after the regional reward changes. |
| Eternal Ludra Abyssal Forge: Ludra | Frontal attacks, tail strikes, red/blue orbs, alternating inner/outer arena explosions, safe-tile puzzle, slash lines, colored tethers and protective platforms. | Face the dragon away from the party. Handle the red orb with an appropriate defensive response when assigned, destroy blue orbs and follow the safe-zone mechanics. | Ludra's Blade of Extinction, Ludra's Scale Sword, Abyssal Longsword, Abyssal Guard, Abyssal Bracelet and other equipment and materials from the applicable reward pool. |
| Devouring Klawfly Corroded Decontamination Facility | Poison stacks, webs, purple orbs, a poisonous pull, numbered jumps, stone-cover mechanic and poisonous breath. | Remove dangerous Poison stacks, coordinate destruction of five of the six stones and use the remaining stone as cover for the major attack. | Separate intermediate clear rewards were removed in KR. Equipment and materials are obtained through the revised instance reward system. |
| Black Blood Blatt Corroded Decontamination Facility | Hook pulls, Bleeding, linear and circular attacks, near/far explosions, colored protection phases and summoned slimes. | Keep frontal hooks away from the party, manage Bleeding and follow the correct color and slime mechanics. | No separate guaranteed intermediate clear chest under the revised KR system. |
| Terminator Bargott Corroded Decontamination Facility | Triple expanding AoE, Acid Rain, poison pools, shared-damage zones, rolling charges, pulling orbs, numbered bombs, chains and rotating laser attacks. | Keep poison away from safe areas, enter shared-damage circles, coordinate numbered bomb positions and avoid the rolling attacks. Preserve defenses for unavoidable damage. | Heroic- and Unique-grade weapons, bracelets and additional equipment, including items from the Corroded Sovereign and Afflicted Bakarma families. |
| Iscariel Chalice of Muspel | Red/green color assignments, separated bombs, matching-color portals, shield-breaking attacks and targeted AoE patterns. | Follow the assigned color, keep bomb targets separated and direct the portal mechanic toward the boss to remove its barrier. | No direct loot from this gatekeeper in the documented Hard-mode encounter; defeat it to reach Kaldrix. |
| Scourage Kaldrix Chalice of Muspel | V-shaped frontal cleaves, a follow-up on the closest player, shared-damage attacks, Brilliant Flames, colored shields and orbs, lava hazards and flight phases. | Coordinate main-tank and off-tank positioning, prevent overlapping frontal attacks, follow color assignments and enter shared-damage zones. | Lava Heart Weapon (Extend), Lava Heart Barrier, Kaldrix Brooch and other difficulty-dependent rewards. Red Dragon was a special first-clear Pet reward, not ordinary repeatable loot. |
| Triton the Returned Snowfield of Sorrow | Manifested Wrath creates explosive crystals; Bittercold Wrath is a major damage phase; Cold Harvest involves Warmth Orbs. | Maintain safe routes around crystals, use Warmth Orbs according to the encounter mechanic and save protection for sustained damage. | The regional instance database lists Basilus equipment and Atiel weapons in Triton's intermediate-boss reward pool. Global availability is unconfirmed. |
| Storm Legion Commander Deltras Snowfield of Sorrow | Frozen Bind, Crystal Point, Ice Crystal Fall, Gaze, Core of Winter and a sword/ice-wall mechanic. | Keep positioning predictable, follow assigned crystal and sword positions, avoid overlapping targeted attacks and preserve group protection for the appropriate phase. | Deltras's Seal, Liberated White Night equipment, weapon-related upgrade materials and difficulty-dependent rewards from the regional pool. |
Regional progression note: Snowfield of Sorrow was introduced in Korea on September 9, 2026. The September 16 patch reduced Triton and Deltras HP by 10% on Easy difficulty and corrected several encounter mechanics. Its KR entry item levels are 5,800 (Easy), 6,000 (Normal) and 6,200 (Hard); these are not confirmed Global launch requirements.
For further encounter details, consult the Ludra dungeon guide, the Corroded Decontamination guide, the Chalice of Muspel Hard guide and the Snowfield of Sorrow reward database. The boss list is a regional reference, not a guaranteed Global launch schedule.
Templar Stigmas: Which Ones to Equip and Why
A Templar has more useful Stigma choices than it can normally run at once. A real setup is therefore a decision about the fight, not a checklist of everything in the skill database. The current global launch slot count and exact level caps must be read from its retail Mastery/Stigma interface; the March 2026 Korean expansion and later Chapter 1 progression do not establish that starting state.
| Stigma | Function | Consider it when... |
|---|---|---|
| Taunt | Single-target threat plus debuff; KR Enmity rule changed September 16. | You need dependable boss attention or the relevant player debuff. |
| Shield of Protection | Frontal mitigation and Block interaction. | A boss has predictable frontal damage or your resource loop benefits from blocks. |
| Second Skin | Timed protection, including Damage Tolerance in regional versions. | A large hit or unavoidable damage is threatening the tank. |
| Nezekan's Shield | A barrier for the tank and nearby allies. | Party-wide survival matters more than another offensive action. |
| Doom Shield | Engage, damage, control and personal barrier. | You need a gap closer or extra protection around contact. |
| Grapple | Pulls eligible enemies and helps control positioning. | Grouping adds, protecting the backline or making a PvP pick. |
| Armor of Balance | Impact-related control resistance. | The fight includes a threatening control window. |
| Comrade in Arms | Redirects part of a protected ally's incoming damage to you. | Coordinated PvP or a party member needs help surviving focus. |
| Battlefield Banner / Executing Blade | Offensive buff / target-debuff options. | Your tanking requirements are already met and the party benefits from additional pressure. |
| Assault Fury / Empyrean Lord's Punishment | Area pressure and control. | Farming or group engagement needs more AoE disruption. |
One classification warning: Punishment is a regular Templar active skill, whereas Empyrean Lord's Punishment is a different named Stigma. Do not accidentally use a Stigma slot for the wrong entry when following an English translation. Similarly, passive Insulting Roar is not a second confirmed standalone Global AoE-Taunt Stigma. Use the actual available skills and their displayed effects.
Templar Macros: Korean Practice Without Obsolete Cancels
Current Korean discussions make a useful distinction between the built-in Skill Macro and external mouse scripts. A September 20 Inven author describes using the in-game macro with skill reservation while manually controlling major defensive and charged actions, and notes that manual inputs can produce a higher ceiling. The embedded screenshots do not provide a complete, universally readable export string. The layouts below are editorial templates based on the documented split-control approach, not fabricated verbatim top-player imports.
| Situation | Suggested short queue | Keep on separate manual keys |
|---|---|---|
| Beginner / leveling | Vicious Strike chain → Pummel chain → Shield Smite when usable | Judgment conditional trigger, Warding Strike, Defiance, heals and Taunt. |
| Dungeon sustained loop | Vicious Strike chain → Pummel chain → Shield Smite; test Judgment separately | Punishment charge/Executor, Taunt, Shield of Protection and all major boss defensives. |
| Solo AoE | Vicious Strike cleave → Pummel → Shield Smite | Grapple pull, Assault Fury, Doom Shield, Warding Strike and emergency recovery. |
| Arena / Abyss | Optional short damage filler only after contact. | Grapple, Doom Shield, Taunt, control break, ally protection and all reactive defense. |
Setup method: use the game's Skill Macro menu, place two ordinary compatible attacks in priority order, bind the result to a reachable key and verify real hit registration. Add one skill at a time. If a conditional action stalls the queue, remove it. Test with your own frame pacing and ping rather than copying an external author's mouse delay. Punishment can consume time in a charge sequence: manual use avoids spending the Executor opportunity at the wrong moment. Shield of Protection, Second Skin, Nezekan's Shield and Defiance should remain reactive.
September 16 warning: Korea explicitly increased the Pummel/Punishing Strike/Judgment cancel delay to curb mouse-macro exploitation. Do not advertise a pre-patch ultra-fast Pummel-to-Judgment cancel as the current best rotation. The September 20 Korean in-game macro discussion is useful for the distinction between automatic filler and manual high-value skills, not proof of a fixed universal one-button DPS gain. Avoid third-party scripts that automate gameplay beyond the client's supported controls.
Best Templar Stats, Sword, Guard, Manastones and Soul Binding
The first priority is the defensive problem that actually causes failed runs. Block is an important shield-tank stat; HP supports effective survival and the later KR HP-scaling barriers, but neither replaces Damage Tolerance against attacks that cannot be handled by an ordinary Block. Accuracy matters because missed threat-generating attacks lose more than just personal damage. Offensive refinements become worthwhile when the current encounter is stable.
| Stat | Main PvE tank | Offensive / solo | Arena / Abyss |
|---|---|---|---|
| Block / shield defenses | Core mitigation when the incoming attack can be blocked. | Keep enough to avoid recovery downtime. | Useful but not a substitute for survival against all enemy attacks. |
| Damage Resistance / Tolerance | Important for boss hits and unavoidable damage. | Maintain a baseline before adding offense. | Prioritize PvP-appropriate mitigation under focus fire. |
| Max HP | Raises the survival pool and supports regional HP-scaling barriers. | Enough to complete repeatable pulls. | Major frontline and ally-protection consideration. |
| Accuracy | Reliable damage and Enmity application. | Avoid missing the targets you are farming. | Critical for control and meaningful pressure against Evasion. |
| Attack / Weapon Damage | Secondary after threat and survival work. | Raises clear speed. | Useful after hit chance and defensive requirements. |
| Smite / Frontal Damage | Optional damage once the fight is secure. | Consider with real positioning and existing rolls. | Frontal conditions can be unreliable in mobile fights. |
| Combat Speed / cooldown options | Helps maintain a functioning skill loop. | Can improve uptime. | Only when the extra attacks do not compromise survival. |
Equipment order: acquire a serviceable longsword and guard, then improve the pieces you expect to keep. On the guard and armor, favor the defensive lines needed by your current content. Use Manastones and Soul Binding to close the remaining Block, HP, tolerance or Accuracy gap before pursuing marginal damage perfection. Check the Global transfer preview before spending heavily: enhancement, Soul Binding, Potential and socketed stones are separate systems, and their transfer behavior should not be assumed identical. For the system-level decisions, see the existing AION 2 Gear Progression guide.
Templar Arcana: Korean Sets and Skill Rolls
Arcana should complete the build, not become an expensive rarity contest. For a Templar, an accessible card that finishes Judgment, Vicious Strike or Punishment may be more valuable than a higher-grade card with irrelevant skill levels. The current Korean board includes later additions that did not exist at the original regional launch, so only equip the parts actually unlocked in Global.
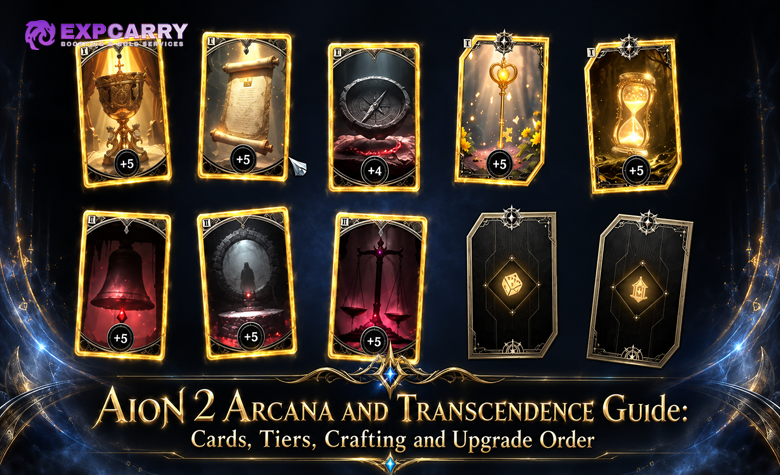
Regional offensive example: an August Korean Templar post describes a mature eight-part plan with four Guardian and four Punishment pieces. Its allocation is Guardian on Chalice, Parchment, Key and Hourglass; Punishment on Compass, Bell, Mirror and Scales. It targets the Parchment first for high rolls in Vicious Strike, Judgment and Punishment, then uses other parts, rings and passives to finish useful skill-level breakpoints. That is one documented late-KR player configuration, not a consensus Global starting recipe or evidence that every part is present at launch. The post and its item logic are available in the original Korean Arcana discussion.
Defensive alternative: later regional players also discuss Guardian and Indomitable-style defensive combinations when Block or survival is the problem. Check the actual set tooltip: NCSOFT's introduction of Indomitable Dedication described a Weapon Damage Tolerance effect in the KR system. Do not exchange a working defensive set for an offensive bonus solely because another player's high-end dummy parse is larger. A good first Global path is to fill every available part, protect useful main-skill rolls, complete a set whose threshold can actually be reached, and only then fund expensive synthesis or enhancement. The verified AION 2 Arcana guide covers the wider card economy and material families.
Best Pantheon Statues and God Stats for Templar
Pantheon consists of collectable Statues, Colossi and Artwork that award God stats when placed. It does not equip a second shield or independently establish a tank's Block cap. The useful choice depends on your current failure: a defensive Templar benefits from Life (HP) and Justice (Defense), while Freedom (Accuracy/Evasion) can help a PvP build connect and survive. Once survival is settled, Destruction (Attack Increase), Time (Combat Speed) and Illusion (Cooldown Reduction) support pressure and rotation availability.
There are concrete later-KR collectibles to identify rather than inventing statue names. Guardian Lord Nahma grants Destruction 50, Time 50 and Justice 50 in the regional collection reference; Kromede's Desire and Zikel's Apparition show the same stat trio at 45 each. For a more offensive preset, Ascended Atheron awards Destruction, Time and Wisdom 50 each, with Tyrant Tassin and Kaisinel's Illusion providing the same offensive direction at lower totals. These are examples from a later-KR Pantheon reference, not guaranteed Global day-one acquisition targets. Place smaller obtainable Artwork and Statues that solve your current God-stat deficit instead of waiting to complete a rare Colossus.
Templar Pets, Genus Insight and Wings
Select pets by their available progression and actual Genus Insight rolls, not by the name or appearance of the companion. Korean Templar players report balancing Block and maximum Attack with Smite and Frontal Damage on an offensive pet board, while keeping Accuracy or weapon-related rolls in another setup. That is a useful example of role-specific planning, not a published universal Global best-in-slot pet or a reliable prescription for numbered Genus slots.
For the main PvE tank, compare attainable Block, HP and survival-oriented bonuses against offensive alternatives. For a stable offensive tank, Attack and damage rolls become more useful if the shield's defensive contribution is already sufficient. In PvP, retain a different pet or loadout with Accuracy, HP and appropriate protection when the live client supports those options. Wing cosmetics and wing combat/collection stats are also separate: inspect the actual equipped effect before attributing a numerical advantage to an appearance. Global's pet progression and roll pool may differ from current KR/TW.
Templar Leveling, Daevanion and Upgrade Order
A developing tank should invest in one functioning attack and mitigation cycle before chasing a final regional Arcana board. The Korean service later expanded its skill and Stigma progression, but Global's initial ceilings and seasonal features must come from its own client. This order keeps early spending purposeful.
- Learn the combat foundation: maintain Vicious Strike and Pummel, practice aiming the boss away from allies and use Shield Smite to support MP when its useful option is available.
- Stabilize survival: raise Warding Shield, Enhance Health and the next defensive skill that answers your current problem. Use Taunt intentionally, not continuously without a reason.
- Improve key active breakpoints: advance Vicious Strike and Judgment, then Punishment and the Pummel cooldown interaction if it exists in the version you play.
- Equip an encounter-ready Stigma core: begin with threat and protection, then substitute mobility or damage only when it is safe.
- Fill available Arcana slots: seek skill levels for the main loop, keep a sensible set effect and avoid extracting the only useful defensive alternative.
- Use Daevanion on bottlenecks: choose skill-level, survival or offensive nodes by actual displayed effect instead of copying later regional board coordinates.
- Refine keeper gear: weapon/guard, useful armor, then Manastones and Soul Binding. Compare survivability, hit rate and threat in real encounters, not only item-level growth.
- Build separate PvP tools: reserve a control-and-protection arrangement once the client permits presets; do not use a single boss-DPS queue in Arena.
The Stigma and Daevanion guide explains unlocks, shards and the broader progression systems. Templar's class-specific priority is to finish the effect that makes the next real fight reliable.
Templar Mistakes That Cause Wipes or Waste Upgrades
These errors matter more than small differences between two otherwise valid attack rolls, especially when moving from Korean video references into a new Global client.
- Confusing Punishment, the normal active, with Empyrean Lord's Punishment, the Stigma.
- Copying September 2 Vicious Strike cooldown text after the September 4 change redirected it to Warding Strike.
- Assuming Pummel specialty #5 still grants an additional Punishing Strike activation after September 16.
- Using a pre-September 16 mouse-cancel clip as proof of today's fastest Pummel/Judgment rotation.
- Building maximum HP while neglecting Block, tolerance and the encounter's actual damage type.
- Stacking all defensives before the fight's dangerous mechanic begins.
- Ignoring Accuracy and threat-generating attacks, then treating Taunt alone as permanent control of every boss.
- Spinning frontal boss attacks through the party while repositioning.
- Copying late KR Stigma, Arcana or Pantheon screenshots as guaranteed Global launch content.
- Giving a defensive pet board the same rolls as a speed-farming preset without checking why each exists.
AION 2 Templar FAQ
These additional questions concern how the class interacts with account and group decisions rather than repeating the individual build sections.
Does Templar have to lead every party?
No game rule establishes mandatory party leadership for the tank. Templar usually needs to communicate pull pace and boss position because those directly affect its work, but a different member can manage the party interface and call mechanics.
Can the same Arcana card serve a tank and a solo-damage preset?
Yes, when its available skill rolls or set contribution suit both jobs. The tradeoff is whether that card completes a defensive set, an offensive specialty or both. Keep alternate cards when the available loadout system permits them; do not extract a useful tank card just because it loses a damage comparison.
Conclusion
AION 2 Templar is built around controlled enemy attention, reliable shield mitigation and timely party protection. Learn the modern KR relationship between Vicious Strike, Warding Strike, Pummel and Punishment, then adapt the same foundation to offensive PvE, solo play or PvP by changing Stigmas and defensive budget. Complete a useful skill loop before pursuing expensive Arcana, pet or Pantheon perfection, and let the Global retail client establish the final numbers and available pieces.