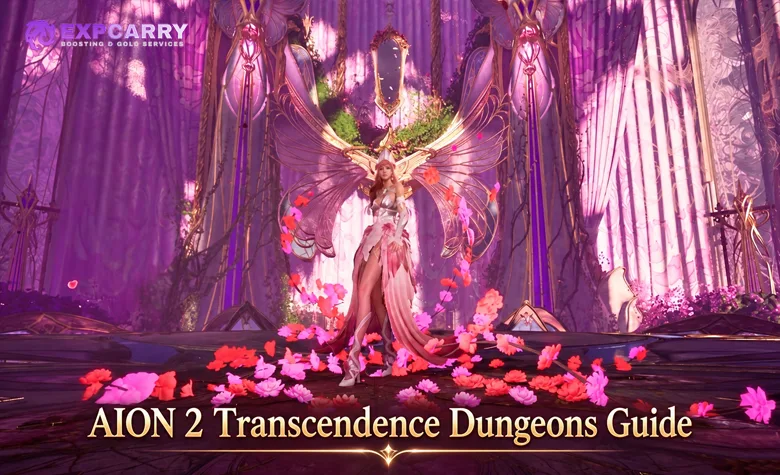
AION 2 Transcendence dungeons are challenging group activities focused on Arcana farming, timed progression, increasingly difficult boss encounters, and valuable character-development materials. The September 2026 Global Playtest contains two original Transcendence instances: Deus Research Base and Shattered Arkanis. Both feature four difficulty stages, three main bosses, enemy-clear objectives, and distinct Arcana reward pools.
This guide explains how to enter Transcendence, complete each dungeon, handle all six main bosses, manage difficulty modifiers, and choose an efficient Arcana farming route. Entry information comes from Global Playtest database version 1.0.21.0, while advanced encounter mechanics are supported by KR/TW gameplay references. Founder's Pack Advanced Access runs from September 30 through October 4, 2026, followed by the official Global launch on October 5. Final retail requirements and reward availability must be checked in the released client.
Short answer: Start with Deus Research Base to obtain Bell, Compass, and Chalice Arcana, then progress through Shattered Arkanis for Mirror, Parchment, and Chalice rewards. Learn the Stage 1 mechanics before increasing difficulty, and prioritize reliable clears over repeatedly failing a higher stage.
| Dungeon | Main bosses | Arcana families | Main challenge |
|---|---|---|---|
| Deus Research Base | Gelcos, Nazmun, Atiel | Bell, Compass, Chalice | Positioning, linked players, a shrinking platform, and final Stagger execution |
| Shattered Arkanis | Siliator of Deceit, Ruthilis of Pain, Talisra of the Void | Mirror, Parchment, Chalice | Chakram collisions, electrical hazards, colored droplets, protective domes, and object destruction |
What Are Transcendence Dungeons in AION 2?
Transcendence is a separate group PvE system built around challenging encounters and Arcana progression. Unlike ordinary Expedition farming, its primary long-term attraction is obtaining cards and associated materials used to develop another layer of character power.
Each dungeon contains several boss encounters and an enemy-clear requirement. Players accumulate progression points by defeating enemies and important intermediate targets, allowing the final encounter to become available once the necessary objectives are complete.
Runs also have a performance component. Efficient routing, avoiding unnecessary deaths, and completing encounters without excessive delays become increasingly important as difficulty rises.
Transcendence dungeons should not be confused with Arcana enhancement or other card-development terminology. Dungeon completion supplies rewards that can subsequently be used in the separate Arcana progression system.
Transcendence vs Expedition
Both activities involve instanced PvE, but they serve different progression purposes. A character may need equipment from Expeditions to enter a more demanding Transcendence stage, while Transcendence rewards help develop Arcana and other systems.
- Expedition: A major route for equipment upgrades, dungeon materials, and ordinary group progression.
- Transcendence: A progression route centered on Arcana, difficulty stages, and more demanding dungeon execution.
- Sanctuary: A separate category featuring larger-group encounters and its own equipment rewards.
These activities complement each other. Improving Arcana can strengthen a character for future equipment farming, while better equipment creates additional room to advance through higher Transcendence stages.
How to Unlock Transcendence Dungeons
Transcendence becomes relevant during advanced character progression, once the character meets the selected instance's level, equipment, and party requirements. The September Global Playtest database lists Deus Research Base and Shattered Arkanis as separate instances supporting groups of two to five players.
Both Stage 1 entries display a required equipment level of 1,600 in Global Playtest version 1.0.21.0. This is a test-client value, not a guaranteed permanent Global retail requirement. The currently displayed activity requirement takes priority over older regional guides.
| Requirement | Deus Research Base | Shattered Arkanis |
|---|---|---|
| Activity | Transcendence | Transcendence |
| Players | 2–5 | 2–5 |
| Difficulty variants | 4 | 4 |
| Stage 1 equipment requirement | 1,600 (Global Playtest v1.0.21.0) | 1,600 (Global Playtest v1.0.21.0) |
| Stage 1 reward cube claim cost | 40 Odyle Energy (test data) | 40 Odyle Energy (test data) |
| Primary Arcana rewards | Bell, Compass, Chalice | Mirror, Parchment, Chalice |
Regional difference: Some KR/TW guides list lower entry requirements for the original dungeons, including 1,200 equipment level at Stage 1. Regional progression was revised across several updates. The September Global Playtest database lists 1,600 instead. Always use the requirement displayed by your current Global client.
Where to Enter Transcendence
Transcendence has its own activity selection rather than being an ordinary Exploration or Conquest difficulty. Open the Transcendence activity through the dungeon interface, select the desired instance, inspect its stages, and check the entry and reward requirements before forming a group.
A practical preparation sequence is:
- Reach the required character and equipment progression for the activity.
- Open Transcendence and select Deus Research Base or Shattered Arkanis.
- Inspect the available difficulty stages and their effects.
- Check the remaining reward claims and required resources.
- Equip a suitable PvE preset with survival, movement, and Stagger utility.
- Form a group and establish important boss assignments before starting.
Meeting the minimum equipment requirement does not guarantee that your party can comfortably clear every stage. A functioning skill rotation, useful Stigmas, defensive controls, and mechanical knowledge remain important.
How Do the Four Transcendence Difficulty Stages Work?
The original Transcendence dungeons underwent several regional difficulty revisions. Older guides describe up to ten stages, while the later four-stage structure is also reflected in the September Global Playtest database.
Higher stages introduce a more demanding combination of enemy strength, special effects, encounter execution, and rewards. Additional boss mechanics may also become active. The exact requirements must be read from the selected dungeon's current interface.
| Stage | Main objective | Recommended preparation |
|---|---|---|
| Stage 1 | Learn the route, boss mechanics, and basic enemy-clear requirements. | Functional PvE equipment, defensive skills, and enough damage to complete the final encounter. |
| Stage 2 | Handle additional difficulty conditions alongside the normal dungeon mechanics. | More consistent group damage and reliable control of dangerous enemy packs. |
| Stage 3 | Complete the dungeon under greater pressure from advanced effects. | Improved equipment, stronger Arcana, and coordinated cooldown usage. |
| Stage 4 | Execute the advanced encounter structure with minimal mistakes. | Established boss assignments, sufficient Stagger contribution, and dependable group survival. |
What Are Transcendence Stage Effects?
Stage Effects are additional combat conditions that change how players approach the dungeon. Their exact names and availability have changed across regional versions, so an old KR Stage 7 modifier should not automatically be assigned to Global Stage 3.
Documented regional examples include:
- Persistent death zones: Certain defeated enemies leave damaging areas that make the surrounding position unsafe.
- Enemy empowerment: Surviving enemies can become more dangerous when nearby monsters are defeated.
- Accumulating damage effects: Taking certain boss attacks can create additional debuff pressure.
- More demanding Stagger mechanics: Advanced encounters can require stronger coordination to complete the relevant gauge.
In a documented September 2026 regional Stage 4 Shattered Arkanis reference, the escalation includes damaging puddles left by elite enemies from Tier 2, empowerment of surviving nearby monsters from Tier 3, and enhanced boss Stagger mechanics at Tier 4.
These are useful advanced-mechanic references, not confirmation that every modifier has identical values or unlock timing in Global retail.
How Do Timed Clears and Ranking Work?
Transcendence combines encounter completion with run efficiency. Regional versions have also featured performance and ranking systems, but Global ranking availability, thresholds, and associated rewards should be verified separately in the live client.
Efficient groups should focus on avoiding unnecessary deaths and reaching the final boss without spending time defeating enemies that do not contribute meaningfully to the required progress.
The correct approach is not to skip everything. If the final encounter remains locked because the progression requirement has not been met, the group must return to unfinished objectives.
Do not reproduce ranking thresholds or seasonal rewards from a previous Korean season as guaranteed Global rewards.
Explore services related to this guide, selected from our Aion 2 catalog.
View All Aion 2 Services


How to Clear Transcendence Dungeons Efficiently
Both original Transcendence dungeons contain more than a sequence of boss arenas. Enemy packs and intermediate encounters contribute toward unlocking the final objective, making route planning part of successful farming.
Understanding the Enemy-Clear Point System
Deus Research Base provides a useful example. In a documented Stage 1 regional run, regular enemies contribute two progression points, while each important intermediate boss contributes 45 points.
That version requires 110 points. Defeating both intermediate bosses supplies 90 points, leaving 20 points to obtain from regular enemies. At two points per enemy, the party needs ten additional regular kills, provided no other point sources or requirements alter the total.
The precise point requirement can change with stage or version, so inspect the active counter before deciding how many additional enemies must be killed.
The general route principle is:
- Identify the required intermediate encounters.
- Choose a path that avoids unnecessary backtracking.
- Defeat enemy packs that contribute efficiently toward the required total.
- Activate useful travel points along the route.
- Check the objective counter before moving toward the final boss.
- Save important offensive and defensive cooldowns for the final encounter when possible.
Should Your Group Use a Runner?
Experienced groups sometimes assign one mobile player to move ahead and activate useful Kibilisks while the remaining party clears enemies and completes the necessary objectives.
This is particularly relevant to the larger Shattered Arkanis layout. When executed correctly, the group can use the unlocked travel points to reduce unnecessary movement between encounters.
However, the runner strategy is not mandatory. A group learning the instance may benefit more from staying together, controlling enemy packs, and understanding the route before attempting aggressive movement optimizations.
Do not sacrifice repeated deaths to save a small amount of travel time.
Deus Research Base Dungeon Guide
Deus Research Base takes place inside Atheron's secret research facility. The dungeon contains three main boss encounters: Gelcos, Nazmun, and the final boss Atiel.
Its most important difficulty is the final platform encounter, where incorrect positioning or insufficient damage can result in a party wipe even after the earlier bosses have been defeated successfully.
Recommended Deus Research Base Route
Work through the facility while collecting the required enemy-clear progress. Prioritize dangerous enemies that can interrupt movement, apply persistent damage, or complicate the group's next pull.
In particular, Soul Binder-type enemies deserve attention in documented advanced regional encounters because their control and linking effects can make otherwise manageable packs considerably more dangerous.
Before pulling an intermediate boss, make sure the remaining group has caught up and possesses enough HP and resources to begin the encounter.
Boss 1: Gelcos
Gelcos is a positioning encounter built around targeted movement, charges, and dangerous attacks involving its whip. Players must pay attention to the boss's selected target and avoid placing persistent damage in the middle of the party's intended movement route.
| Mechanic | What happens | How to respond |
|---|---|---|
| Targeted charge | Gelcos selects a player before charging and performing a follow-up attack. | The marked player should move away from the party's main position. Other players must stay clear of the charge path. |
| Whip attack | A broad attack threatens players around the boss. | Watch the indicator, avoid the strike, and keep available movement space clear. |
| Pull and follow-up | Advanced variants can darken the surrounding ground and pull players toward Gelcos before a whip attack. | Move out quickly or use an appropriate Dodge or defensive skill. |
| Electrical hazards | Additional damaging areas restrict the arena. | Maintain spacing and avoid retreating automatically into another hazard. |
Practical strategy: Keep Gelcos away from positions the party needs for subsequent attacks. The targeted player should control the direction of dangerous movement rather than dragging the boss through the entire group.
Ranged players must remain aware that maximum distance does not automatically provide safety. Some targeted attacks specifically punish predictable positioning.
Boss 2: Nazmun
Nazmun introduces more explicit area-control mechanics, including rotating attacks, lasers, and dangerous objects near the boss. The fight rewards players who watch the sequence rather than reacting only after receiving damage.
The important documented mechanics are:
- Rotating lasers: Move with the available safe space or jump over the applicable sweeping attack.
- Sequential beams: Watch for consecutive line attacks rather than assuming the first beam completes the sequence.
- Summoned bombs: Avoid standing in overlapping danger zones, especially when fighting in melee range.
- Targeted control effect: A marked player may need to separate from teammates to avoid spreading the resulting damage or Stun.
Do not spend your final movement resource on an ordinary attack if a rotating laser or another forced movement check is about to begin.
For healers, the priority is preventing consecutive damage. A player who repeatedly gets hit by every part of a laser sequence may require considerably more resources than the encounter normally demands.
Final Boss: Atiel
Atiel is the defining Deus Research Base encounter. Its arena gradually becomes less forgiving, and the party must resolve linking mechanics, share assigned damage, avoid dangerous waves, and complete the final Stagger requirement before the remaining platform is destroyed.
The encounter is particularly dangerous because ordinary positioning errors become increasingly expensive as the available fighting area shrinks.
How to Handle Atiel's Chain Mechanics
Atiel can connect selected players through visible chains. The correct response depends on which mechanic is active:
- Player-to-player chain: Linked players move apart to break the connection.
- Player restraint: When a player is chained to the platform for an incoming shared attack, the remaining party should stack on the affected player to share the damage.
- Boss-linked phase: When players receive blue chains connecting them to Atiel, stay close enough to the boss to avoid the distance-related damage.
The party caller should identify which link is active before issuing movement instructions. Treating every chain as a simple instruction to run away can create unnecessary deaths.
How to Survive the Shrinking Platform
Atiel repeatedly threatens the outer arena. During the encounter, powerful attacks destroy sections of the platform, leaving progressively less room for avoiding subsequent mechanics.
When the boss moves toward the center and prepares its dangerous sequence:
- Stop committing long attacks and check the remaining platform.
- Move away from the section that is about to disappear.
- Watch for outward-traveling waves and respond with the appropriate jump or Dodge.
- Avoid being displaced toward the outer edge.
- Restore party health only after completing the mandatory movement.
- Resume damage from the remaining safe area.
Do not assume resurrection can recover every platform-related death. Falling or being removed by certain encounter mechanics can leave the character unrecoverable through ordinary in-combat revival.
Atiel's Final Stagger and DPS Check
Advanced regional references describe a final section at approximately 20% HP, when Atiel moves toward the center and threatens to destroy the remaining arena. The party must complete the Stagger mechanic before the lethal platform destruction resolves.
Prepare for this section in advance:
- Keep important Stagger abilities available when the final phase is approaching.
- Do not consume every offensive cooldown immediately before the final mechanic.
- Ensure the healer has enough resources for the remaining unavoidable damage.
- Use the successful Stagger window to maximize useful group damage.
- Maintain safe positioning even when the boss has very little HP remaining.
Main cause of failure: The group survives the earlier mechanics but reaches the final phase without enough available damage, Stagger contribution, or safe platform space to finish the encounter.
Shattered Arkanis Dungeon Guide
Shattered Arkanis takes place in a fragment of the former Arcanis Air Temple that has been corrupted by the Void. It contains three main encounters: Siliator of Deceit, Ruthilis of Pain, and Talisra of the Void.
Compared with Deus Research Base, Shattered Arkanis places greater emphasis on coordinated object interactions, positioning around persistent environmental hazards, and correctly executing color-based mechanics.
Recommended Shattered Arkanis Route
The dungeon has a comparatively open layout, so uncontrolled movement can waste a substantial amount of time. Clear enemies according to the required progression counter and activate useful Kibilisks before moving between important encounters.
For experienced five-player groups, a mobile runner can activate travel points while the remaining four players clear the necessary enemies. For a first clear, moving together is easier to coordinate.
Do not allow an aggressive route to create unnecessary deaths through uncontrolled enemy packs or accumulated difficulty modifiers.
Boss 1: Siliator of Deceit
Siliator's most important encounter mechanic involves dangerous chakrams that follow selected players. Those players must coordinate their positioning so the objects collide instead of allowing them to continue pursuing the group. A separate bouncing-blade attack also punishes players standing too close together.
How to Complete the Chakra Collision Mechanic
In the documented advanced encounter, Siliator uses dangerous flank attacks before releasing two rotating chakrams that begin following assigned players.
The objective is to bring the two objects together.
- Identify the two marked players and their targeting lines.
- Keep unmarked players away from the moving chakram paths.
- Have the marked players approach from positions that allow the objects to cross.
- Align the targeting paths so the two chakrams collide.
- Move away from remaining danger once the interaction resolves.
One practical method is for the two marked players to form crossing paths near the boss, effectively creating an X-shaped intersection. The important part is making the objects collide, not simply running away from them indefinitely.
During the same encounter, avoid standing inside the initial flank indicators when the chakrams appear. Their contact damage can be significant.
Returning Chakrams and Additional Attacks
Another major sequence places multiple dangerous chakrams around the arena. After a delay, they return toward Siliator along visible paths.
Continue moving while the projectiles are active, then position between the return lines or use an appropriate defensive response. The boss also has frontal and targeted area attacks, so avoid assuming the rear of the arena is permanently safe.
Complete the required object interaction before returning to uninterrupted damage.
Boss 2: Ruthilis of Pain
Ruthilis focuses on controlling arena space through electrical hazards and repeated targeted attacks. Its most dangerous sequences become harder when players leave persistent damaging areas in positions needed for the next mechanic.
| Mechanic | What happens | Recommended response |
|---|---|---|
| Quadrant attack | The boss attacks one quarter of the arena and leaves a persistent electrical hazard. | Move into the next usable area before the attack resolves. |
| Repeated quadrant sequence | Additional sections become dangerous in a clockwise pattern. | Follow the available safe space and avoid crossing previous hazards. |
| Targeted circles | Players receive several consecutive area attacks. | Keep moving and avoid overlapping your path with teammates. |
| Delayed electrical effect | Being hit by an applicable attack can apply a delayed effect that releases an electrical ring. | Recognize the debuff and jump over the follow-up wave. Avoid immediately regrouping if your delayed explosion is still pending. |
| Leaping attack | Ruthilis targets a distant player with a dangerous landing and surrounding attack. | Avoid the initial impact and prepare for the associated surrounding attack. |
| Line attacks | Advanced variants target players with heavy directional damage. | Separate appropriately and avoid dragging the attack through the party. |
Practical strategy: Do not stand still after avoiding the first electrical attack. The encounter often requires several consecutive movements, and returning too early can place you inside the next dangerous section.
Players affected by an additional delayed mechanic should avoid immediately stacking with the healer or another teammate. Resolve the individual effect first, then regroup when safe.
Final Boss: Talisra of the Void
Talisra combines colored droplets, protective domes, dangerous waves, and object-destruction mechanics. The fight rewards teams that agree on assignments before combat begins.
Its two major color phases are particularly important. In the documented advanced regional encounter, they occur at approximately 75% and 30% HP, although their exact implementation must be confirmed against the Global retail difficulty.
How to Handle Talisra's Colored Droplets
During the color mechanic, purple and white droplets move toward the center of the arena. Players must intercept their assigned color to accumulate the corresponding effect.
For a four-player group, the documented strategy divides the players evenly between the two colors.
- Assign purple and white collectors before starting the encounter.
- Move toward your designated droplets when the mechanic begins.
- Collect the required color consistently through the collection waves.
- Avoid collecting the opposite color, which can stun you and remove accumulated stacks.
- After the collection sequence, position the resulting protective domes near the agreed area.
- Leave enough separation between domes. Placing them too close together can cause them to disappear.
For a five-player party, establish assignments according to the actual color and object requirements shown by the encounter. Do not assume every player must collect an object independently.
How to Survive the Protective Dome Mechanic
After the collection phase, Talisra displays a sequence of colors through its raised crystal before releasing dangerous arena-wide attacks. Players must use the corresponding protective dome for each attack.
The procedure is:
- Watch the color sequence displayed by the boss.
- Identify the order before the first attack resolves.
- Enter the corresponding protective dome.
- Move to the next required color for the following attack.
- Repeat until the full sequence has finished.
In the documented advanced version, the first major color phase requires two consecutive color checks, while the later phase requires three. The same dome can be used again when its color repeats.
Players standing in the wrong protection or outside the required dome can die regardless of their ordinary defensive stats.
Important: Place the protective domes close enough for players to move between them, but not so close that their placement causes them to disappear. Establish the positions before the fight rather than improvising after the color sequence begins.
Light Spear and Diamond Jail Mechanics
Talisra also introduces dangerous object-based attacks that require immediate target switching. During the documented Light Spear sequence, four spears appear around the boss. The light-colored spear directly in front of Talisra must be destroyed before the dangerous cast completes, or the party risks a lethal explosion.
Assign the priority target and focus damage rather than spreading attacks across several objects. The advanced regional reference describes a short cast window, so immediate target switching is important.
Another advanced mechanic traps a player inside a Diamond Jail. Other party members receive directional projectile indicators that must be aimed toward the trapped player to break the restraint.
When this happens:
- Identify the trapped player.
- Stop attacking unrelated targets.
- Position the marked players so the required directional projectiles strike the Diamond Jail.
- Allow the mechanic to resolve before resuming ordinary damage.
- Prepare for the next wave or color sequence.
These interactions are not ordinary DPS checks. Correct positioning and target selection determine whether the party can continue the encounter safely.
Other Talisra Attacks to Watch
Outside the major color and object mechanics, Talisra uses several attacks designed to punish stationary players and poorly organized positioning.
- Frontal attacks: Avoid remaining directly in front of the boss unless assigned to handle the corresponding pressure.
- Traveling ring waves: Watch for outward and inward waves, then jump or use the appropriate movement response as each approaches.
- Persistent pillars: Move into the available safe space rather than standing through repeated damage.
- Targeted line attacks: Direct dangerous indicators away from teammates.
- Movement and teleport attacks: Reposition before attempting to restart a long damage sequence.
Once the final color mechanic is complete, maintain enough discipline to finish the encounter without losing players to ordinary attacks.
AION 2 Transcendence Rewards and Loot
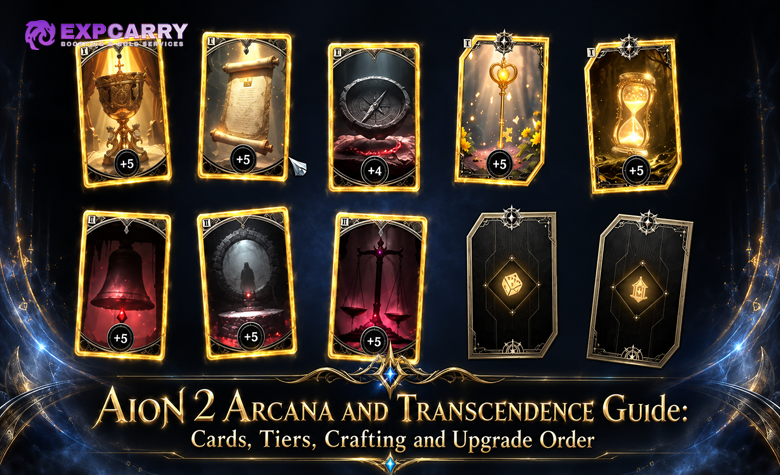
Arcana is the defining reward category of the original Transcendence dungeons. Each instance provides different card families, making dungeon selection relevant to the player's missing Arcana slots and desired set combinations.
The September Global Playtest reward index also includes Kina, Enhance Stones, Silentium, Soul Codex, Amplify Stone Fragments, and other development materials. Individual bosses and completion reward cubes have separately listed reward pools; their drops should not be treated as identical or guaranteed.
Deus Research Base Arcana Drops
Deus Research Base contains Bell, Compass, and Chalice Arcana families in its indexed reward pools. These appear in Vigor and Magic variants.
- Arcana: Bell of Vigor
- Arcana: Bell of Magic
- Arcana: Compass of Vigor
- Arcana: Compass of Magic
- Arcana: Chalice of Vigor
- Arcana: Chalice of Magic
The grade and availability of each card depend on the selected reward pool, source, and difficulty. An item appearing in the database is not a guarantee that it will be obtained on every completion.
Shattered Arkanis Arcana Drops
Shattered Arkanis provides a different selection of original Arcana parts. Its indexed pools include Mirror, Parchment, and Chalice cards.
- Arcana: Mirror of Vigor
- Arcana: Mirror of Magic
- Arcana: Parchment of Vigor
- Arcana: Parchment of Magic
- Arcana: Chalice of Vigor
- Arcana: Chalice of Magic
Chalice is shared between the two original dungeons. This makes the remaining required Arcana part a useful consideration when deciding where to spend limited reward resources.
Which Transcendence Dungeon Should You Farm?
Choose the dungeon that advances your actual Arcana setup rather than automatically selecting the activity with the highest available stage.
| Reward target | Relevant dungeon | Why |
|---|---|---|
| Bell Arcana | Deus Research Base | Included in the original Deus reward family. |
| Compass Arcana | Deus Research Base | Included in the original Deus reward family. |
| Mirror Arcana | Shattered Arkanis | Included in the Shattered Arkanis reward family. |
| Parchment Arcana | Shattered Arkanis | Included in the Shattered Arkanis reward family. |
| Chalice Arcana | Both original dungeons | Available in the indexed pools for both activities. |
| General progression materials | Both | Compare the current reward cube, stage, and remaining claims. |
Can Stage 1 Drop Rare Arcana?
The September Global Playtest reward tables include Rare Arcana opportunities in the Stage 1 pools for Deus Research Base and Shattered Arkanis.
This is an important distinction from older regional launch recommendations, which sometimes treat the introductory stage as worthwhile only for common cards or practice.
Rare Arcana remains chance-based. The existence of a reward entry does not mean that the selected card is guaranteed after one clear.
Check the retail reward preview before planning a farming route around a particular grade or individual card.
How Does Odyle Energy Work in Transcendence?
The September Global Playtest database lists a cost of 40 Odyle Energy to claim the Stage 1 completion reward cube in each original Transcendence dungeon. This is a reward-claim cost, not a payout of 40 Odyle Energy to the player.
The important distinction is between entering an activity and claiming its corresponding rewards. NC's July 2026 regional update removed the previous Expedition and Transcendence entry-ticket requirement and shifted reward acquisition to Odyle Energy. Claim limits and resource costs must still be checked against the Global client.
Before spending your resources:
- Inspect the selected difficulty's reward cube.
- Check the required Odyle Energy and remaining claims.
- Confirm that the available Arcana family matches your progression target.
- Compare the reward against another accessible Transcendence stage.
- Claim the reward only when it contributes to your planned progression.
Do not assume that temporary Korean Arcana Growth Support events or increased material rewards are part of the permanent Global launch economy.
What Should You Do With the Arcana You Obtain?
Obtaining a card is only the first part of the Arcana progression system. Its actual value depends on the individual effects, available skill bonuses, and compatibility with the rest of the equipped combination.
A practical approach is to fill accessible slots first, then pursue useful set effects and additional skill levels. Avoid consuming an alternative card before confirming that it does not support another build or a valuable set.
Detailed enhancement, extraction, synthesis, and card development are covered separately in the AION 2 Arcana Guide.
Recommended Party Setup for Transcendence
The original Transcendence instances support groups of two to five players in the September Global test-derived data. Although the activity permits smaller groups, learning the more demanding mechanics is generally easier with a coordinated party that covers damage, recovery, and important utility.
A practical five-player setup should distribute the following responsibilities:
- Frontline: Maintains predictable boss positioning and helps control incoming attacks.
- Healing: Handles repeated group damage, cleansing, and emergency recovery.
- Damage dealers: Provide sustained damage while completing important object and movement mechanics.
- Stagger contribution: Several players retain appropriate skills for encounters that require the group to fill a gauge.
- Mechanic caller: Communicates important assignments during chain, chakram, color, and platform phases.
Templar and Cleric provide recognizable frontline and dedicated healing options. Chanter contributes supplementary support, while the other classes can fulfill different damage and utility responsibilities according to their selected builds.
No single class combination automatically resolves the important mechanics. Individual execution remains essential.
What Should Each Class Focus On?
The following recommendations describe practical responsibilities rather than mandatory class assignments.
| Class | Main contribution | Important encounter consideration |
|---|---|---|
| Gladiator | Melee damage and Stagger contribution. | Preserve assigned skills for Atiel's final mechanic or other mandatory checks. |
| Templar | Frontline positioning and protection. | Direct dangerous boss attacks away from the remaining group. |
| Assassin | Melee damage and mobility. | Avoid remaining committed to a long combination during platform or object mechanics. |
| Ranger | Ranged damage and mobile assignments. | Maintain a clear route for chakram, droplet, and targeted positioning mechanics. |
| Sorcerer | Magical damage and area attacks. | Control enemy packs without creating dangerous overlapping effects. |
| Spiritmaster | Sustained damage and elemental utility. | Prioritize mandatory mechanics over completing a summon rotation. |
| Cleric | Healing, cleansing, and resurrection. | Complete movement and color mechanics before committing to long recovery animations. |
| Chanter | Party buffs, damage, supplementary recovery, and protection. | Coordinate major defensive effects with the dedicated healer. |
Best Transcendence Farming Strategy
Transcendence is most efficient when dungeon selection and stage progression support a specific character-development goal. A higher difficulty is not automatically the correct farming choice if it causes repeated failures or substantially longer clears.
Recommended First-Clear Route
For a character entering the original Transcendence system, establish basic Arcana progression before investing heavily in difficult-stage optimization.
- Complete Deus Research Base Stage 1: Learn the enemy-clear system, intermediate bosses, and Atiel's final mechanic.
- Obtain useful initial Arcana: Inspect the Bell, Compass, and Chalice cards available through the reward pool.
- Complete Shattered Arkanis Stage 1: Learn the chakram, electrical, and color-based boss mechanics.
- Develop the missing Arcana parts: Compare Mirror and Parchment alternatives with the cards already obtained.
- Improve equipment and skills: Address practical damage, resource, or survival limitations before increasing difficulty.
- Advance to the next stage: Repeat the dungeon at a higher difficulty once the current mechanics are reliable.
- Specialize the farming route: Focus on the instance supplying the specific Arcana family your main build still needs.
When Should You Increase Difficulty?
A party should consider advancing when the current stage can be completed repeatedly without exhausting every defensive resource or relying on several emergency resurrections.
Before selecting the next stage, check:
- Whether everyone understands the complete boss sequence.
- Whether the group can complete the existing enemy-clear requirement efficiently.
- Whether damage is sufficient for the final encounter.
- Whether required Stagger skills are available when needed.
- Whether the additional modifier creates a problem the party can realistically manage.
- Whether the improved reward pool justifies the added difficulty.
A reliable clear that advances the desired Arcana setup is more useful than repeatedly losing the opportunity to complete the activity.
What Should You Upgrade Before Stage 4?
Prioritize improvements that address the actual reason your group struggles. Additional damage is valuable, but it cannot compensate for repeatedly failing a mandatory color or platform mechanic.
A practical preparation order is:
- Improve the weapon and basic equipment required for the selected difficulty.
- Establish the main PvE skill rotation and useful Stigma loadout.
- Equip functional Arcana in the available slots.
- Develop relevant skill-level bonuses and beneficial set effects.
- Maintain sufficient defensive stats for unavoidable damage.
- Assign important object and Stagger responsibilities before entering.
- Practice the full boss mechanics before attempting aggressive timed routes.
Common Transcendence Mistakes to Avoid
Most inefficient runs result from combining poor route preparation with mistakes during mandatory boss mechanics. Avoid the following problems before attempting higher stages.
- Using an outdated ten-stage regional guide: The September Global Playtest contains four original difficulty variants.
- Copying old entry thresholds: Later regional updates and Global test requirements do not always match.
- Confusing Deus Research Base with its later Expedition counterpart: These are separate activities with different progression contexts.
- Ignoring the enemy-clear counter: The final boss may remain unavailable until the required progress is complete.
- Killing unnecessary packs: Extra combat can reduce run efficiency and increase the risk of deaths.
- Failing Atiel's chain mechanics: Different links require different positioning responses.
- Standing near Atiel's collapsing platform edge: Recovery becomes extremely difficult when the safe area disappears.
- Allowing Siliator's chakrams to chase players indefinitely: The marked players should complete their collision assignment.
- Ignoring Ruthilis's persistent electrical zones: The remaining safe space becomes increasingly limited.
- Collecting the wrong Talisra color: Opposite-color interactions can remove accumulated stacks and disrupt the protective-dome mechanic.
- Placing protective domes too close together: Incorrect placement can cause them to disappear.
- Failing to switch targets during object mechanics: Some encounters require destroying or interacting with a specific object rather than continuing to attack the boss.
- Spending Odyle Energy without checking rewards: Choose an activity that contributes to your current Arcana plan.
- Assuming newer KR/TW Arcana parts are Global launch rewards: Content generations and regional progression must be separated.
AION 2 Transcendence FAQ
These additional answers address practical questions about accessing and progressing through the original Transcendence system.
Is Transcendence the same as a normal Expedition?
No. Transcendence has its own activity progression and is particularly associated with Arcana rewards. The two systems support different parts of character development.
Can you enter Transcendence with fewer than five players?
The September Global Playtest database lists two to five players for both original dungeons. However, completing advanced encounters with a smaller group depends on actual damage, recovery, and mechanic execution.
Are additional regional Transcendence dungeons guaranteed for Global launch?
No. The Korean and Taiwanese services contain later additions such as Sunken Temple of Life, Mirror of Scarlet Desire, Abyssal Horn Den, and Noiran's Hidden Legacy. Their regional release history does not establish their Global opening schedule.
Do all Transcendence dungeons drop the same Arcana parts?
No. The original Deus Research Base and Shattered Arkanis reward pools contain different card families, although Chalice appears in both. Check the selected difficulty's current reward preview for the exact available grades.
Conclusion
AION 2 Transcendence progression begins with learning dungeon routes and understanding the relationship between boss mechanics, difficulty modifiers, and Arcana rewards. Deus Research Base introduces important positioning and platform mechanics, while Shattered Arkanis places greater emphasis on coordinated object interactions and color-based survival. Establish reliable Stage 1 clears, obtain useful Arcana for your main build, and advance through higher stages when the group can consistently complete the required mechanics. Final requirements, reward costs, and availability should always follow the Global retail client.