
Aion 2 Best Solo Farming Spots: Gold and Materials by Gear Level is a solo farming guide built around repeatable lanes that stay useful even when tuning and economy shift. It avoids rumor coordinates and one-server jackpots. Instead, it focuses on documented instanced targets that players repeatedly run in Aion 2 (standard dungeons-services">dungeons like Fire Temple and Draupnir, Conquest dungeons like Krao Cave, and Transcendence dungeons like Deus Research Base) plus a simple material loop model that converts into gold because it sells consistently.
currency-farm">Currency note: Aion 2 uses Kinah as the primary spendable gold currency. Players may shorten it in chat, but it is the same currency. The goal is not "highest drop value." The goal is repeatable profit per hour with low downtime, low wipe risk, and fast conversion.
How This Solo Farming Guide Works
This guide is organized by gear level because the most common solo farming mistake is moving up too early. If you force content you cannot clear consistently, you trade higher theoretical payout for lower real payout. The move-up rule is simple: only step up when you can chain the loop for an hour with stable run time, near-zero reset risk, and minimal downtime between runs.
Every recommendation below is written as a decision, not a fantasy "best spot." You will see what to run, why it pays, what to prioritize during the run, and the warning signs that mean you should step down. When the guide names an instanced target, it is because that target is repeatedly farmed content in Aion 2 and fits a repeatable solo lane logic: short travel, predictable clears, and loot that converts.
Best Solo Farming Spots by Gear Level
This section is the core of the guide. Read the tier that matches your current reality, not the tier you wish you could farm. The move-up rule stays the same at every stage: you move up when you can chain the loop for an hour with low death risk, stable run time, and minimal downtime between runs. If you cannot do that, you are not farming, you are testing, and testing is fine, but it is slower money.
Instanced farming lanes by gear level (the reliable core)
Early gear (pre-endgame, low item level): your goal is a stable currency floor, not hero clears. Prioritize standard dungeons that can be soloed cleanly in a private run with stable time and near-zero risk. In Aion 2, normal mode dungeons are the correct starting lane because they are fast, repeatable, and forgiving when you are still building item level. Your solo baseline must be boring: low reset risk, predictable time, and clean exits. If you are wiping, you are testing, not farming, and you should step down until completions are stable.
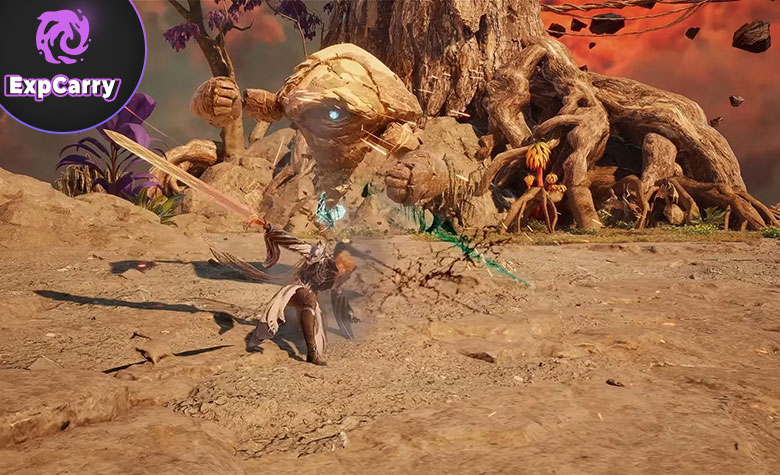
Spot 1: Fire Temple (normal mode speed lane). Run this when you need the cleanest repeatable loop to build your daily rhythm: enter, clear, loot, exit, convert, repeat. The lane works because it is fast and consistent when you keep pulls conservative and treat the run like a timed lap. Your priority is completion consistency, not pushing speed. Leave this lane and step down if deaths force long recovery breaks or if your run time is unstable run to run.
Early conversion focus: your gold comes from fast conversion, not from rare miracles. Keep only items you can sell reliably, vendor the low-value filler immediately, and avoid expanding your run with detours that add travel and sorting time. If your bag flow becomes messy, shorten the route until every run ends with the same clean selling routine.
Mid gear (endgame entry, stable baseline): this is where repeatable farming becomes a real solo production lane, but only if your clears are stable. Your next step is to add a second standard dungeon for rotation, then move into Conquest content once your item level supports consistent clears. At this tier, your objectives are (1) completion consistency and (2) average time. Tighten routing, remove unnecessary risk pulls, and reduce mistakes that force recovery breaks. If your completion time swings wildly run to run, you are still in the testing phase and should simplify your route or step down to the previous tier that stays stable for a full hour.
Spot 2: Draupnir (normal mode rotation lane). Run this when Fire Temple is fully stable and you want a second repeatable dungeon to keep uptime high. The value here is not theoretical drops, it is whether you can maintain a stable run cycle for a full hour. Treat early attempts as testing, then only promote it to your real farming lane when runs become boring: predictable clear time, predictable resource use, and clean exits. Leave this lane if your run time swings, if mechanics force frequent deaths, or if one failed run erases the benefit of multiple successful runs.
Spot 3: Krao Cave (Conquest baseline for real upgrades). Run this when your item level is high enough that you can clear reliably without resets and you want a lane that actually pushes gear and profit forward. This is not a starter lane. Treat it like a promotion: you move into it when normal dungeons are already boring and consistent and you can keep the same boring consistency here. The way it pays is simple: you convert predictable dungeon output into Kinah quickly by keeping your laps consistent and your sell routine strict. Prioritize safe, repeatable pulls, keep boss attempts clean, and cut any optional side path that adds risk without improving your average. Leave this lane if you start resetting runs, if a boss causes repeated failures, or if one mistake regularly turns into a long recovery break that ruins your profit per hour.
Mid gear rotation rule: you are allowed to rotate, but you are not allowed to gamble. If a run feels unstable today, drop to the previous tier for the rest of the session. Farming is production. Production rewards boring consistency.
High gear (advanced lanes and efficiency): high gear shifts the problem from survival to efficiency and conversion. The best high-gear solo routine is usually a chain: run the highest tier you can clear with near-zero reset risk, then spend the rest of your session on a material loop that remains liquid on your server. This is where Transcendence lanes become realistic (for example Deus Research Base), while Krao Cave and standard dungeons remain strong fallback lanes when a harder tier is inconsistent. If a harder tier causes occasional failures, those failures often erase the benefit of a higher payout over the course of an hour. Your advantage at high gear is control: if a lane slows down, you switch immediately to keep uptime high.
Spot 4: Deus Research Base (Transcendence efficiency lane). Run this when your item level and build can keep near-zero reset risk for the Transcendence stage you are farming. The way it pays is by compressing your session into clean completions with minimal downtime: you enter, clear with discipline, convert output, and immediately loop again. Your priority is not bigger pulls, it is eliminating waste: avoid risky chain pulls that can cause deaths, avoid extended downtime between runs, and keep selling integrated into the loop. Leave this lane if you cannot maintain stable clears, if failures start appearing even occasionally, or if your average profit per hour drops below your mid-tier lanes once you include resets and downtime.
High gear chain rule: keep one primary lane and one fallback lane. If your primary lane becomes unstable for any reason, switch immediately to the fallback to protect your hourly rate. Your advantage is control, so use it.
Best Material Loops That Actually Convert
Materials are often the most reliable solo lane because they can be repeated without waiting on rare luck, and they have repeat buyers. The correct way to build a material loop is not to chase the rarest node. It is to pick a small set of crafting-relevant materials that move consistently on your server, then run a short circuit that keeps travel time low and inventory management simple. If your server economy is unstable, prioritize broad-demand materials tied to regular gear improvement and consumables, because those have repeat buyers even when prices dip.
Material loop model (works at any gear level): pick one safe circuit you can repeat without interruptions, keep travel minimal, and stop the loop when bags are full, not when you get bored. A good loop produces steady, predictable output that sells in repeat batches. A bad loop produces random output with long travel time and constant detours. Keep the circuit short enough that you can time it, average it, and improve it.
Material loop pairing rule: pair an instance lane with a material lane. Use the instance lane for concentrated loot and upgrade items. Use the material lane to guarantee liquid output when instance drops are slow. If your market is saturated on one material category, switch to a different broad-demand category instead of forcing price wars.
Selling rules and tracking profit (the part most players ignore)
![]()
Solo farming is only profitable when selling is treated as part of the loop. If you farm for hours and sit on slow-moving items, your profit per hour collapses. The fix is strict rules: favor items that sell reliably, list in consistent batch sizes, and keep your bag clean so you do not lose time sorting after every run. Your pricing goal is not to win one listing. Your goal is to convert output quickly and return to the lane.
| Rule | Why it matters | Decision test |
|---|---|---|
| Sell speed beats rarity | Slow movers are not profit per hour, they are storage risk | If it does not sell reliably, it is not part of your loop |
| Track averages, not spikes | One lucky run lies about real income | Time three full runs or three full circuits, then average |
| Downtime is the real tax | Travel and sorting destroy your hourly rate | If you cannot chain runs, simplify loot or step down |
| Stability first, speed second | Resets erase the value of harder content | If failures happen, you moved up too early |
Conclusion
The best solo farming in Aion 2 is not one magic location. It is the right repeatable lane for your current gear. In early gear, establish a stable currency floor with normal mode dungeons you can actually complete consistently and a simple material circuit that keeps travel and sorting low. That baseline funds your next power step without wipe risk and without wasted sessions.
In mid gear, rotate between stable normal dungeons and only promote yourself into Conquest farming like Krao Cave once your clears are boring and consistent. Then optimize your average time by tightening routing and cutting unnecessary risk. At the same time, treat materials as a real lane: stable demand and fast selling reduce reliance on rare drop luck.
In high gear, you win by chaining clean completions and converting output fast. Run the best tier you can solo safely for an hour without resets, pair it with a liquid material loop, and cut downtime aggressively so your session is mostly completions rather than travel and inventory management. Follow the stability-first move-up rule and track averages instead of lucky spikes, and you will always have a solo routine that produces gold and materials every session.