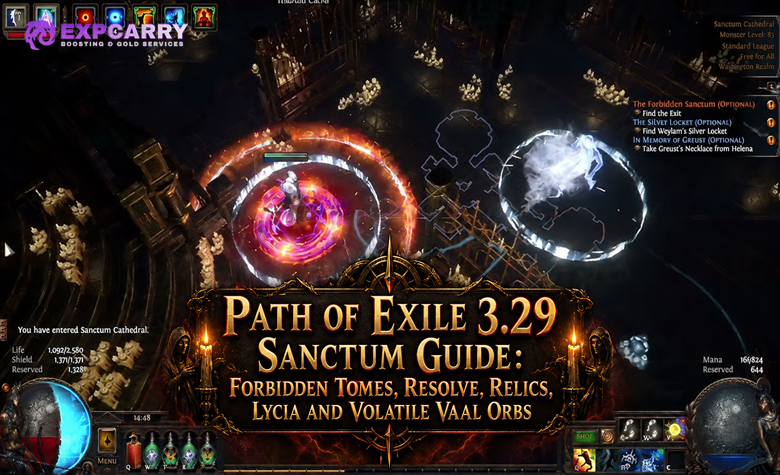
This best PoE 3.29 Righteous Fire Marauder Chieftain build is a durable league starter designed for comfortable campaign progression, Atlas completion, dense mapping, and steady endgame development. Righteous Fire burns nearby enemies while the character moves through packs, Fire Trap supplies the missing single-target damage, and Hinekora, Death's Fury turns dense groups into powerful fire explosions.
The build does not require a mandatory Unique Item to activate Righteous Fire or enter Maps. Its first equipment goals are Life, Fire Resistance, Life Regeneration, and enough Maximum Fire Resistance to control the skill's self-damage. Later versions add Cloak of Flame, an Elder Helmet for Fire Trap, Ignite Proliferation, Endurance Charges, maximum elemental resistances, and a recovery-on-block shield.
Pre-release notice: This guide was verified on July 24, 2026, before live PoE 3.29 league data was available. Righteous Fire, Fire Trap, and the Chieftain Ascendancy receive no direct balance changes in the official Content Update 3.29.0 patch notes. The build uses an established setup updated for the new socket system, but early Allflame performance and item prices still require live verification.
PoE 3.29 Righteous Fire Chieftain Build Overview
| Category | Build Setup |
|---|---|
| Base Class | Marauder |
| Ascendancy | Chieftain |
| Main Skill | Righteous Fire |
| Single-Target Skill | Fire Trap |
| Damage Type | Fire Damage over Time and Burning Damage |
| Weapon Setup | One-handed Sceptre and Shield |
| Core Defenses | Life Regeneration, Maximum Resistances, Endurance Charges, physical damage conversion, Block, and Life recovered on Block |
| Required Unique Items | None for the campaign or initial Maps |
| Best Content | Atlas progression, dense mapping, Harvest, Ritual, Blight, Expedition, Delirium, Strongboxes, and Heist |
| Main Limitation | Lower single-target damage than dedicated bossing builds |
Righteous Fire Chieftain is one of the best PoE 3.29 starters for players who prioritize consistency and low mechanical input. It is not the strongest choice for repeatedly farming Uber bosses. Its advantage is the ability to progress with ordinary rare equipment while forgiving positioning mistakes that would kill a faster but more fragile character.
Strengths
- No mandatory Unique Item or transfigured gem is required to begin.
- Mapping involves activating Righteous Fire and moving through enemies rather than repeatedly targeting every pack.
- Tasalio simplifies elemental resistance gearing by allowing Fire Resistance modifiers to support Cold and Lightning Resistances.
- Valako converts Maximum Fire Resistance investment into Maximum Cold and Lightning Resistance.
- Hinekora explosions become exceptionally effective in dense encounters.
- Fire Trap continues dealing damage while the player concentrates on movement and boss mechanics.
- The character has a clear progression path from inexpensive rares to a recovery-based block setup.
- The build is suitable for trade league and has a realistic SSF foundation.
Weaknesses
- Boss damage is noticeably lower than the build's mapping performance.
- Righteous Fire cannot be activated safely until Fire Resistance and regeneration are prepared.
- Ramako provides its Fire Resistance override only while the character is stationary.
- Hinekora explosions depend on monsters dying and therefore contribute little against an isolated boss.
- Maps that disable regeneration or heavily reduce recovery can break the build.
- Several late defensive upgrades must be assembled together before the block transition works correctly.
- Maven and other recovery-disabling encounters require more care than ordinary mapping.
- Expensive investment improves the build, but other archetypes have a higher damage ceiling.
Players comparing several opening strategies can review the current best PoE 3.29 league starters. Righteous Fire should be selected for safe mapping and uncomplicated progression rather than maximum boss damage.
How Righteous Fire Chieftain Works
Righteous Fire applies a persistent fire aura that burns the character and nearby enemies. Its enemy damage is based partly on the character's Maximum Life and Maximum Energy Shield, while its self-damage is mitigated by Fire Resistance and other reductions to damage over time. Life Regeneration must recover more Life than the remaining self-damage if the build is expected to feel stable.
Maximum Fire Resistance is therefore both a defensive stat and a sustain tool. Raising it reduces the damage taken from Righteous Fire as well as hostile fire damage. Valako, Storm's Embrace causes modifiers to Maximum Fire Resistance to apply to Maximum Cold and Lightning Resistances, allowing one resistance plan to protect against all three elements.
Spell Damage does not increase Righteous Fire's own burning damage. The useful offensive modifiers are Fire Damage, Burning Damage, Damage over Time, Fire Damage over Time Multiplier, generic Damage over Time Multiplier, Elemental Damage, Area Damage, and Maximum Life. Spell Damage remains useful to Fire Trap because that gem specifically allows Spell Damage modifiers to affect its damage over time effect.
Mapping and Hinekora Explosions
Activate Righteous Fire after entering an area, use Shield Charge for long movement, and pass through normal packs. Hinekora, Death's Fury gives enemies killed by the player or their Totems a 10% chance to explode for 250% of their Maximum Life as Fire Damage. The explosion can Ignite, and that Ignite can spread to surrounding enemies.
Obtain a reliable source of Ignite Proliferation through a Searing Exarch glove implicit or the Fan the Flames Cluster Jewel notable. The explosion uses the character's global chance to Ignite, so reaching 100% chance makes successful Hinekora triggers much more dependable. Monster density is effectively an offensive resource: more enemies create more opportunities to trigger an explosion and begin a chain.
For magic packs, resistant rares, and map bosses, apply Punishment and throw Fire Trap beneath the target. The trap's Burning Ground overlaps with Righteous Fire, allowing both damage over time effects to operate together. Reapply Fire Trap as its ground effect expires, but do not stand still throwing traps when repositioning would prevent a lethal hit.
Using Ramako Against Tough Enemies
Ramako, Sun's Light sets nearby monsters' Fire Resistance against damage over time to -20% while the character is stationary. The wording is an override rather than another resistance reduction. Flammability and Fire Exposure do not push that resistance lower while Ramako is active, which is why the finished Chieftain normally uses Punishment instead of building its boss setup around additional resistance reduction.
Pause briefly beside a durable target to activate Ramako, place Fire Trap, and continue dealing damage with Righteous Fire. Frostblink is valuable because it repositions the character instantly and allows the stationary condition to begin again without a long walking animation. Do not remain stationary through an attack that the character cannot safely absorb merely to preserve Ramako.
Boss Rotation
- Enter the arena with Righteous Fire active only if regeneration remains positive under the encounter's conditions.
- Use Enduring Cry before the dangerous phase when Endurance Charges or emergency recovery are needed.
- Move close enough for Righteous Fire and Ramako to affect the boss.
- Apply Punishment.
- Throw Fire Trap beneath the boss and keep it inside the Burning Ground.
- Pause whenever safe to activate Ramako, then use Frostblink to avoid major attacks.
- Refresh Fire Trap and Punishment without sacrificing movement during lethal mechanics.
- Use a manually controlled burning-removal flask if Righteous Fire must be disabled for recovery.
Gem Links, Ascendancy, Passive Tree, Bandits, and Pantheon
The standard setup places Righteous Fire in the Body Armour and eventually moves Fire Trap into an influenced Helmet with built-in support modifiers. Campaign links can be assembled gradually; a complete six-link is not required to finish the story.
Righteous Fire Links
Campaign Four-Link: Righteous Fire - Burning Damage Support - Elemental Focus Support - Increased Area of Effect Support
Use Efficacy Support when more damage is preferable to coverage. During early leveling, equip whichever compatible damage supports are available rather than delaying the Righteous Fire transition for a perfect set of gems.
Recommended Five-Link: Righteous Fire - Burning Damage Support - Elemental Focus Support - Lifetap Support - Swift Affliction Support
Recommended Six-Link: Righteous Fire - Burning Damage Support - Elemental Focus Support - Lifetap Support - Swift Affliction Support - Increased Area of Effect Support
Lifetap gives Righteous Fire the Duration interaction required for Swift Affliction and provides a damage bonus while the Lifetap buff is active. Keep the Lifetap linked to Righteous Fire at full level. Generate the buff consistently through Shield Charge or Frostblink linked to a low-level Lifetap Support. Replace Increased Area of Effect with Efficacy when additional single-target damage matters more than mapping radius.
Fire Trap and Utility Links
Early Fire Trap Four-Link: Fire Trap - Lifetap Support - Swift Affliction Support - Controlled Destruction Support
The long-term target is an Elder-influenced Helmet with modifiers that support socketed gems with Burning Damage and Concentrated Effect. Socket the same four-gem setup into that Helmet to create an efficient pseudo six-link. Continue using the regular Fire Trap gem: Fire Trap of Blasting removes the Burning Ground that supplies most of the damage required by this build.
Movement: Shield Charge - Faster Attacks Support - Lifetap Support
Instant Repositioning: Frostblink - low-level Lifetap Support
Utility: Punishment - Lifetap Support
Charges and Recovery: Enduring Cry
Guard Skill: Use Molten Shell when Armour is high enough to support it. Use Steelskin when playing the lower-Armour Cloak of Flame version without substantial Armour investment.
Stone Golem is useful during the campaign because it contributes regeneration. Remove it when it begins dying frequently in high-tier Maps. Blood Rage is an optional mapping tool for Attack Speed and Frenzy Charges, but its additional degeneration should not be introduced until the character already has comfortable recovery.
Auras and Reservation
- Purity of Fire: The central aura for Fire Resistance and Maximum Fire Resistance.
- Tempest Shield: Adds Spell Block and prevents Shock.
- Flesh and Stone: Use Sand Stance for additional protection against surrounding enemies.
- Summon Skitterbots - Unbound Ailments Support: Provides reliable Chill and Shock effects once reservation is available.
- Vitality: Useful while leveling and whenever more flat regeneration is required.
- Purity of Elements: A practical campaign aura before the final resistance and ailment setup is complete.
- Malevolence: A late offensive addition that should be activated only after obtaining enough Reservation Efficiency.
Do not enable every listed aura immediately. Reservation passives, gear, and Cluster Jewels determine which combination fits. If an aura support is not explicitly required, avoid accidentally linking it to Lifetap, Increased Duration, or another support that raises its reservation.
PoE 3.29 Socket Rules
Content Update 3.29 changes socket management. Any gem can now be placed into any equipment socket, even when the gem and socket colours do not match. Equipment sockets are white by default, while matching a red, green, or blue gem to a socket of the same colour grants that gem an additional 10% Quality.
This means campaign equipment should be judged by links and modifiers rather than discarded because it has the wrong colours. Treat matching coloured sockets as a later optimization for permanent equipment. Chromatic Orbs force non-white sockets, so spending them on temporary campaign items is rarely efficient.
Chieftain Ascendancy Order
- Tasalio, Cleansing Water: Take this after the Normal Labyrinth. Fire Resistance modifiers also apply to Cold and Lightning Resistances at half value, and the character becomes unaffected by Ignite.
- Hinekora, Death's Fury: Take this after the Cruel Labyrinth for faster campaign and map clearing. Damage-first players may take Ramako here and delay Hinekora.
- Ramako, Sun's Light: Take this after the Merciless Labyrinth. Nearby monsters have -20% Fire Resistance against damage over time while the character is stationary.
- Valako, Storm's Embrace: Complete the setup after the Eternal Labyrinth so Maximum Fire Resistance modifiers also raise Maximum Cold and Lightning Resistances.
Hinekora before Ramako is the smoother general progression order because explosions accelerate clearing. Ramako first is reasonable when campaign bosses and rare enemies are causing more trouble than normal packs.
Passive Tree Priorities
- Take nearby Maximum Life, Life Regeneration, and Fire Resistance nodes.
- Allocate the Fire Mastery that regenerates Life according to uncapped Fire Resistance before activating Righteous Fire.
- Add Fire Damage, Burning Damage, Area Damage, and Damage over Time nodes along the natural route.
- Take Maximum Fire Resistance and Reservation Efficiency as Purity of Fire and additional auras become available.
- Obtain enough Dexterity for Fire Trap through the tree, an amulet, or equipment suffixes.
- Add Endurance Charges and charge-related defenses.
- Use Spiritual Aid only when the weapon plan includes meaningful Minion Damage scaling.
- Take Jewel Sockets after obtaining jewels with Life and at least one useful damage or defensive modifier.
- Transition into Block and Glancing Blows only after obtaining a shield with Life recovered on Block.
- Add Fire Damage Cluster Jewels and a reservation Cluster Jewel for Malevolence only after the basic character is complete.
Do not take Critical Strike, Attack Damage, or generic Spell Damage nodes for Righteous Fire. A modifier should either scale the burning aura, improve Fire Trap, or solve a defensive requirement.
Bandits and Pantheon
Bandits: Help Kraityn for 8% increased Movement Speed when smoother campaign and mapping movement is preferred. Kill all three and take Eramir's Passive Skill Point when the finished passive tree needs another allocation. The reward can be changed later with a Book of Reform.
Major Pantheon: Soul of the Brine King is the default until Freeze and Stun are solved elsewhere. Soul of Arakaali is a useful alternative when damage over time and Chaos Damage over Time are the larger threats.
Minor Pantheon: Soul of Ralakesh is the general recommendation for Bleeding and Corrupted Blood protection. Soul of Shakari is appropriate when Poison and Chaos Damage are causing more deaths.
Explore services related to this guide, selected from our Path of Exile catalog.
View All Path of Exile Services

Righteous Fire Chieftain Leveling Guide
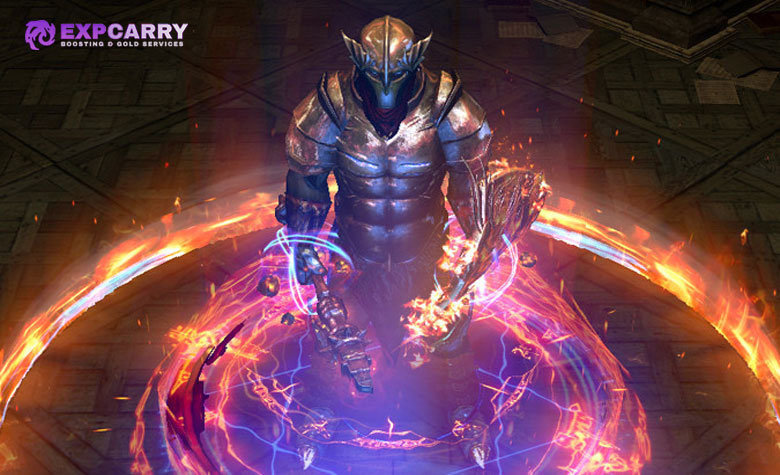
The Marauder should not activate Righteous Fire immediately after obtaining the gem. The transition happens when Fire Resistance and Life Regeneration can sustain the self-damage. Until that point, level with an ordinary melee skill and prepare the required equipment.
Act 1 and Early Act 2
Begin with Ground Slam and move into Sunder when it becomes available. Link the attack to Chance to Bleed Support and Faster Attacks Support as sockets permit. Use a two-handed weapon with current physical damage and replace it regularly; this weapon is temporary and does not need to resemble the final Sceptre and Shield setup.
Collect at least two Iron Rings and spare red gems. Selling an Iron Ring together with a red gem produces a Ruby Ring. Two Ruby Rings provide an immediate Fire Resistance foundation for the Righteous Fire swap.
Complete Intruders in Black after defeating Fidelitas in the Chamber of Sins and purchase Righteous Fire from Yeena. Craft Fire Resistance on equipment with open suffixes and take the Fire Mastery that converts uncapped Fire Resistance into flat Life Regeneration. Approximately 120% uncapped Fire Resistance is a practical early target, but the real test is whether Life remains stable after activating Righteous Fire in a safe combat area.
If Life continues falling rapidly, turn the skill off and keep using Sunder. Add more Fire Resistance, Vitality, flat regeneration, or Maximum Fire Resistance before testing again. Do not assume that capped 75% Fire Resistance alone is enough.
Acts 3 and 4
Complete the Normal Labyrinth and take Tasalio. Purity of Elements is a comfortable campaign aura because it helps cap resistances and handles elemental ailments while equipment is weak. Use Vitality when additional regeneration is needed.
Complete the Library quest and purchase Fire Trap, Burning Damage Support, Elemental Focus Support, Efficacy Support, Swift Affliction Support, Lifetap Support, and other missing utility gems. Begin leveling Fire Trap even if Dexterity temporarily prevents it from becoming the main single-target skill.
Use Flammability before Ramako is allocated. At approximately level 40, move Fire Trap into a four-link and use it against bosses and durable rares. Add Stone Golem for regeneration after it becomes available.
Acts 5 to 10
Repair elemental resistances after both Kitava penalties. Tasalio makes this easier, but the character still needs a large Fire Resistance total for capped Cold and Lightning Resistances and for the regeneration Mastery. Start replacing leveling pieces with gear that has Maximum Life, Fire Resistance, Chaos Resistance, and Life Regeneration.
Take Hinekora from the Cruel Labyrinth for clear or Ramako when single-target damage is the immediate problem. After allocating Ramako, replace Flammability with Punishment and begin practicing short stationary damage windows followed by Frostblink repositioning.
Complete the Merciless Labyrinth before entering Maps if the character is strong enough. Start using Enduring Cry for charge generation and recovery. Before fighting Act 10 Kitava, prepare replacement equipment for the final resistance penalty.
Enter Maps with capped elemental resistances, positive regeneration while Righteous Fire is active, a functional Fire Trap link, corrected flasks, and enough unreserved Mana or Life to use every utility skill. A prepared Righteous Fire league starter build should reach this point with its gems, Ascendancy, basic equipment, and defenses working as one setup rather than as unrelated upgrades.
Gear, Crafting, Flasks, and Upgrade Priorities
Life, regeneration, and resistances come before luxury damage. Righteous Fire feels poor when an expensive offensive item replaces the equipment that was keeping its self-damage under control.
| Slot | Campaign and Early Maps | Endgame Direction |
|---|---|---|
| Weapon | Sceptre with Elemental or Fire Damage, Life-related utility, and useful crafted modifiers | Rare Sceptre with Fire Damage, Fire Damage over Time Multiplier, Damage over Time Multiplier, and useful Fire gem levels |
| Shield | Rare Life and resistance shield, Rise of the Phoenix, or another defensive Unique | Shaper-influenced Armour shield with Maximum Life and Life recovered on Block |
| Helmet | Life, Fire Resistance, other resistances, and regeneration | Elder-influenced Helmet supporting Fire Trap with Burning Damage and Concentrated Effect |
| Body Armour | Life, resistances, Armour, and the best available links | Six-linked Cloak of Flame for physical damage conversion and Hinekora Ignite support |
| Gloves | Life, resistances, Dexterity, and regeneration | Searing Exarch Ignite Proliferation with a useful damage over time or defensive second implicit |
| Boots | Movement Speed, Life, Fire Resistance, and other required resistances | Higher Movement Speed, Life, regeneration, Chaos Resistance, and Maximum Fire Resistance utility |
| Amulet | Life, attributes, Fire Resistance, and regeneration | Marble Amulet with Fire gem levels, Fire Damage over Time Multiplier, Life, or a strong defensive Unique |
| Rings | Life, Fire Resistance, attributes, and regeneration | Life, Fire Damage, regeneration, Chaos Resistance, and Damage over Time Multiplier from appropriate crafting |
| Belt | Immortal Flesh or a rare belt with Life and resistances | High-Life rare belt with regeneration, Life Recovery Rate, resistances, and a useful Abyss Jewel where applicable |
| Jewels | Maximum Life with one useful damage, Dexterity, or resistance modifier | Maximum Life, Fire Damage over Time Multiplier, Damage over Time Multiplier, Burning Damage, and Chaos Resistance |
Weapon and Fire Trap Helmet
A Sceptre is preferred because its elemental implicit benefits both Righteous Fire and Fire Trap. Wand Spell Damage does not scale Righteous Fire. Fire Damage, generic Elemental Damage, and damage over time modifiers are more reliable shared stats.
Fire gem levels are primarily valuable for Fire Trap and Righteous Fire radius breakpoints rather than being a direct multiplier to the Life-based Righteous Fire burn. Compare weapons using the complete build instead of assuming that every +1 gem modifier is automatically superior to Fire Damage over Time Multiplier.
For the endgame Helmet, obtain an Elder-influenced base at an item level capable of rolling useful Burning Damage and Concentrated Effect support modifiers. Craft until both support effects and at least one defensive modifier are present. A perfect Helmet is expensive, so stop at a functional result instead of repeatedly risking the entire budget for the highest possible tiers.
Shield and Block Transition
Rise of the Phoenix is a useful bridge because it assists Maximum Fire Resistance and sustain. Replace it with a Shaper-influenced shield after obtaining Life recovered on Block, good base Block, Maximum Life, and enough resistances to keep the rest of the character functional.
Do not allocate Glancing Blows first and hope to find the correct shield later. Glancing Blows makes blocked hits deal part of their damage instead of preventing them completely. The setup becomes powerful when frequent blocks also recover Life, which is why the shield and passive-tree transition should happen together.
Cloak of Flame and Ignite Proliferation
Cloak of Flame converts part of incoming physical damage into Fire Damage. Chieftain's high Maximum Fire Resistance then mitigates the converted portion efficiently. The Body Armour also supports the duration of Ignites created by Hinekora explosions, making it both a defensive and mapping upgrade.
Ignite Proliferation on gloves is one of the largest clear-speed upgrades. Roll the Searing Exarch implicit only after obtaining gloves worth keeping. Fan the Flames provides an alternative when the glove implicit is unavailable, but using both is unnecessary.
Flask Setup
- Divine Life Flask: Use an instant or fast recovery modifier for emergencies.
- Quicksilver Flask: Improves campaign and mapping speed.
- Ruby Flask: Reduces incoming Fire Damage and makes Righteous Fire easier to sustain during dangerous moments.
- Granite Flask or Rumi's Concoction: Use when Armour and Block are meaningful parts of the current setup.
- Amethyst Flask: Helps correct weak Chaos Resistance.
- Flexible Flask: A Sulphur, Basalt, or another defensive flask can be selected according to current equipment.
Useful flask suffixes include Movement Speed, Attack Speed for Shield Charge, Armour, Life Regeneration, and protection against Poison or Bleeding. Keep a separate flask capable of removing Burning for Maven and similar encounters. Do not automate that flask during ordinary mapping because it can disable Righteous Fire at the wrong moment.
Recommended Upgrade Order
- Cap elemental resistances and achieve positive regeneration with Righteous Fire active.
- Obtain a four-link for Righteous Fire and a separate four-link for Fire Trap.
- Replace weak campaign gear with Life, regeneration, Fire Resistance, and Movement Speed rares.
- Add a useful Sceptre, Rise of the Phoenix or another suitable shield, and Immortal Flesh if inexpensive.
- Obtain a five-link and then a six-link for Righteous Fire.
- Equip Cloak of Flame without breaking Life, attributes, or resistances.
- Add Ignite Proliferation through gloves or Fan the Flames.
- Reach the planned Maximum Fire Resistance and complete Valako.
- Craft or purchase the Elder Fire Trap Helmet.
- Acquire the recovery-on-block shield and transition into Glancing Blows.
- Upgrade the Sceptre, amulet, rings, and jewels with damage over time multipliers.
- Add Cluster Jewels, Malevolence, awakened supports, and matching coloured sockets after the core build is complete.
Players who want the passive tree, gems, regeneration, and equipment balanced around a specific currency limit can use a custom Path of Exile build. Any custom version should preserve RF sustain before adding expensive damage modifiers.
Endgame Defenses, Map Mods, and Common Mistakes
The finished Chieftain combines several defensive layers rather than relying on regeneration alone. Purity of Fire and Valako support high maximum elemental resistances. Endurance Charges reduce physical and elemental damage taken. Cloak of Flame moves part of physical hit damage into the character's strongest resistance. Block and Spell Block reduce the frequency of full hits, while Life recovered on Block repairs damage during dense encounters.
Chaos Resistance still needs direct investment because Tasalio and Valako do not solve it. Tempest Shield prevents Shock, Tasalio makes the character unaffected by Ignite, and the upgraded Brine King Pantheon can solve Freeze. Bleeding, Corrupted Blood, Poison, and reduced recovery require separate equipment, flask, Jewel, or Pantheon solutions.
Dangerous Map Modifiers
- Players Cannot Regenerate Life, Mana, or Energy Shield: Treat this as an unusable modifier for the normal RF setup.
- Reduced Life Recovery Rate: Can turn positive Righteous Fire sustain into continuous Life loss.
- Reduced Maximum Resistances: Increases both enemy elemental damage and the self-damage remaining after Fire Resistance.
- Reduced Effect of Non-Curse Auras: Can weaken Purity of Fire and lower the Maximum Fire Resistance expected by the build.
- Reduced Chance to Block: Dangerous after the character becomes dependent on recovery through blocking.
- Monsters Avoid Elemental Ailments: Makes Hinekora Ignite chains and proliferation less reliable.
- Monsters Cannot Be Cursed: Removes Punishment from the single-target setup.
- High Monster Fire Resistance: Slows damage while moving because Ramako applies only during stationary windows.
Righteous Fire itself does not hit and therefore does not reflect damage. Fire Trap is deployed by a trap, but the complete character may still use other skills that hit. Verify every auxiliary skill before declaring an Elemental Reflection Map completely harmless.
Common Build Mistakes
- Activating Righteous Fire immediately after obtaining the gem without enough regeneration.
- Stacking capped Fire Resistance but ignoring uncapped Fire Resistance used by the regeneration Mastery.
- Buying Spell Damage for Righteous Fire instead of Fire, Burning, Area, or Damage over Time modifiers.
- Using Fire Trap of Blasting and losing the Burning Ground required for single-target damage.
- Expecting several Fire Trap Burning Grounds from the same skill to multiply damage indefinitely.
- Using Flammability or Exposure while assuming they push Ramako's stationary resistance below -20%.
- Moving constantly during a safe damage window and never activating Ramako.
- Standing still through a lethal boss attack solely to keep Ramako active.
- Taking Glancing Blows before obtaining Life recovered on Block.
- Ignoring global Ignite Chance and wondering why Hinekora explosions do not create reliable chains.
- Running every recommended aura without the necessary Reservation Efficiency.
- Spending Chromatic Orbs on temporary 3.29 gear even though white sockets accept every gem.
- Using a burning-removal flask automatically and repeatedly disabling Righteous Fire.
- Assuming high elemental resistance also solves physical, Chaos, Bleeding, Poison, and recovery-related threats.
- Investing heavily into RF damage when the real single-target bottleneck is an underleveled Fire Trap or weak Elder Helmet.
Final Righteous Fire Chieftain Recommendation
Righteous Fire Chieftain remains one of the best PoE 3.29 league starters for safe mapping, new-player progression, and low-input farming. Begin with a regular melee leveling skill, prepare Fire Resistance and regeneration in Act 2, and activate Righteous Fire only after the self-damage is controlled. Add Fire Trap for bosses, Hinekora for dense clearing, Ramako for stationary damage windows, and Valako for the final maximum-resistance foundation. Prioritize sustain, Life, resistances, and working gem links before purchasing offensive equipment. The most important map upgrades are a six-linked Righteous Fire setup, Ignite Proliferation, Cloak of Flame, an Elder Fire Trap Helmet, and a recovery-on-block shield. These upgrades solve different parts of the build and should be added in an order that does not break existing defenses.
The build can earn Voidstones and complete normal endgame encounters, but it should not be presented as a top Uber-boss farmer. Its real strength is turning ordinary and densely populated Maps into safe, consistent progression while requiring fewer repeated inputs than most meta builds. Live PoE 3.29 results should be checked before committing expensive currency to experimental Allflame crafts or a high-investment variant.