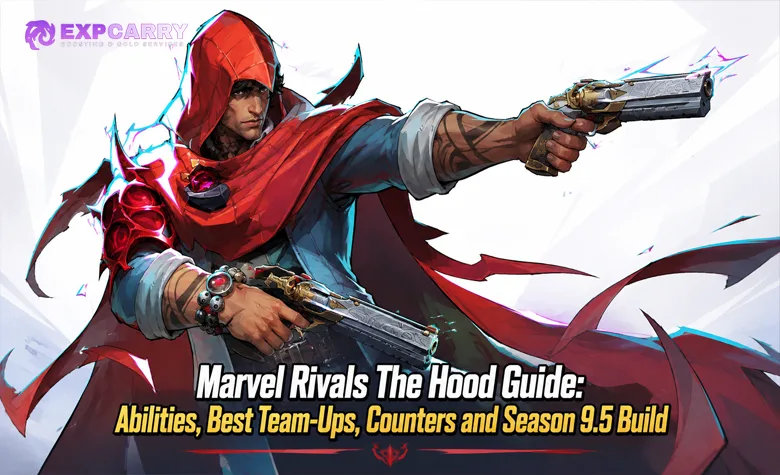
The Hood is a damage-focused Vanguard who wins fights by turning a safe firing lane into a short, violent power spike. His pistols build Demonic Energy, his Veil changes how both teams trade through a choke, and a full meter automatically transforms him into a life-stealing gun platform. The difficult part is not learning what each button does. It is reaching full energy when a real target is available and keeping an escape route for the moment the enemy dives him.
Season 9.5 added The Hood on August 7, 2026. The official Season 9.5 patch notes identify him as the update's new hero, while later sections of this guide use his live hero data rather than pre-release leaks. Players returning after the larger seasonal overhaul can also review the related Marvel Rivals Season 9 changes, especially the rebuilt Team-Up system.
This is not a conventional equipment build. Marvel Rivals does not give The Hood purchasable weapons, armor, runes, or stat points during a match. His Season 9.5 build is the practical combination of Team-Up selection, team composition, positioning, ability order, and control setup.
The Hood's Role in Marvel Rivals Season 9.5
The Hood has 600 Health and the standard 6 m/s movement speed, but he should not be played like a permanent shield tank. Mantle of Oblivion lasts only one second, and Void Walk is a short repositioning tool with a 15-second cooldown. His durability comes from denying a critical burst, weakening shots through Abyssal Veil, and recovering through Half-Demon lifesteal. If those tools are spent carelessly, 600 Health disappears quickly under coordinated fire.
His best position is one step behind or beside a sturdier frontline Vanguard. From there, The Hood can pressure the same angle as his Duelists, farm Demonic Energy on exposed targets, and protect nearby allies from a predictable burst or incoming attack. He is particularly comfortable in poke compositions and on maps with defined sightlines. Open space without nearby cover is much less forgiving because his pistol damage begins falling off after eight meters and his ultimate leaves him committed to a visible firing position.
The basic fight plan is simple: place Abyssal Veil where both teams must shoot through it, land pistols through the Veil, move above 50 Demonic Energy to gain the first set of bonuses, and enter Half-Demon State at 100 energy with an enemy still in range. The execution is less simple because the transformation triggers automatically. A player who finishes charging while the enemy has already escaped wastes the strongest part of the kit.
The Hood Abilities and Demonic Energy
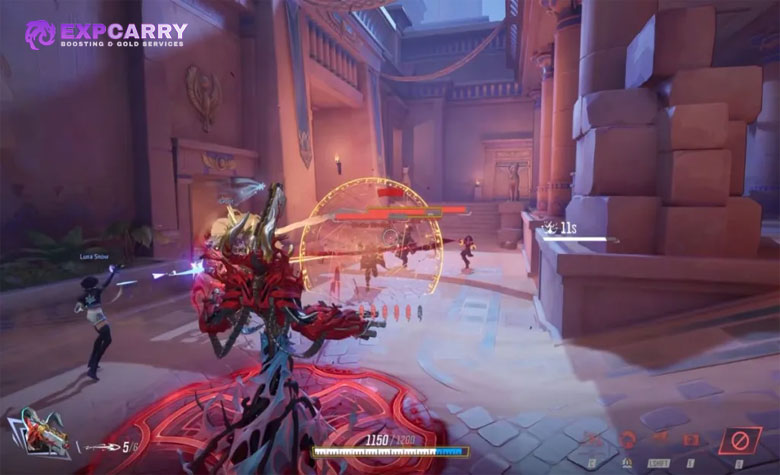
The current values below come from the official The Hood hero page. The important numbers are included to explain decisions, not to turn the guide into a second tooltip screen.
| Ability | What It Does | Best Practical Use |
|---|---|---|
| Accursed Pistols | Fires 40-round dual pistols. Each hit gives 2 Demonic Energy. Above 50 energy, the fire interval improves from 0.2 to 0.15 seconds while damage per round changes from 26 to 21. | Build energy from a protected mid-range angle and pressure large or predictable targets. |
| Leaded Transformation | Automatically replaces the pistols at 100 energy with two rapid demonic rifles, infinite ammunition, 10% lifesteal, and up to 100 Bonus Health generated through damage. | Close distance before the transformation, then keep both rifles on the same target for the full damage and recovery window. |
| Mantle of Oblivion | Creates a sphere that blocks incoming enemy attacks for up to one second. Its radius grows from 2 to 3 meters above 50 energy, and blocked damage helps fill the meter. | React to one important attack, save a nearby ally, or buy the instant needed to reach cover. It is not a sustained barrier. |
| Abyssal Veil | Creates an 8-meter-wide Veil for six seconds. Enemy projectiles passing through deal 35% less damage and 20% less healing. Enemies crossing it take 60 damage and are Blinded for one second. Accursed Pistols gain extra Demonic Energy through the Veil, while Leaded Transformation bullets gain an additional 10% lifesteal. | Split a firing lane, protect a choke, accelerate energy gain, and strengthen Half-Demon sustain by shooting through it. |
| Void Walk | Grants up to 1.2 seconds of free flight, adds 20 Demonic Energy, and deals 40 damage in a 4.5-meter radius on return. The Hood gains 40% movement speed during the ability, with the bonus decaying to zero over two seconds after it ends. | Escape a dive, reach high ground, change an ultimate angle, or deliberately finish the energy meter. |
| Demon of the End | Enters a 1,000-Health Full Demon State and can fire up to six piercing shots. The first five deal 90 plus 10% of the target's maximum Health; the final shot deals 140 plus 15%. | Fire through grouped enemies and barriers while generating up to 200 Bonus Health for The Hood and nearby allies through successful hits. |
Demonic Energy is the thread connecting the entire kit. Pistol hits add two energy, shots passing through Abyssal Veil receive another 0.75 per hit, Void Walk adds 20 immediately, and Mantle converts a portion of blocked damage into energy. Above 50, the pistols fire faster and Mantle covers a larger area. At 100, Ruinous Pact forces Leaded Transformation, so the final few points should be treated like an ultimate setup rather than harmless meter farming.
The range profile matters. Accursed Pistols begin losing damage after eight meters and fall to 55% at 20 meters. The transformed rifles retain more of their damage at range, falling to 80% at 20 meters, but sustained fire spreads after consecutive shots. The Hood can participate in a distant poke fight, yet his most dangerous transformation is still a close or mid-range window where both rifles connect.
The Hood Season 9.5 Build and Combos
For lane control, New Moon's Shadow works well with a second frontline Vanguard and a poke-oriented backline because it adds another projectile-blocking tool without asking The Hood to dive first. Chaos Collision is the more aggressive alternative when the map rewards flanks or the team can immediately follow his teleport. Choose between them in the spawn room according to the enemy's damage pattern, the map, and your team's plan rather than treating either option as mandatory.
For a normal lane exchange, place Abyssal Veil between the teams, stand close enough that your shots travel through it, and fire at the easiest target rather than chasing a tiny backliner across the screen. Use Mantle only when a meaningful burst sequence or important attack is about to land. If the meter reaches roughly 80, check your range, nearby support, and escape route before using Void Walk. Its 20 energy can trigger Half-Demon State immediately.
When Leaded Transformation starts, hold both primary and secondary fire. The two demonic rifles are controlled independently even though the in-game description does not make that interaction obvious. Using only one input sacrifices a large part of the transformation's damage, lifesteal, and Bonus Health generation. At close range, keep both triggers held and track the center of the enemy's body. At longer range, shorter bursts control spread more reliably than spraying until the form ends.
A practical pressure sequence is Abyssal Veil, pistol fire through the Veil, Mantle against the enemy's reply, and Void Walk only when it either secures a safe position or completes the meter. An escape sequence reverses that logic: Mantle blocks the first dangerous hit, Void Walk crosses to cover or high ground, and Abyssal Veil cuts the pursuing team's projectile damage. Do not spend all three merely to reach an enemy support unless your team is already engaging.
Demon of the End works best from a raised angle or behind nearby cover. Void Walk can create that angle immediately before the cast, but doing so also removes the easiest exit after the ultimate ends. Its shots pierce enemy heroes and barriers, so align multiple targets and fire without waiting for shields to drop. Walls and broken line of sight still stop the play. The last shot has the largest maximum-Health component, making it especially important against Vanguards.
Players who understand the kit but struggle to reproduce these timings in ranked games can use Marvel Rivals coaching to review positioning, crosshair control, and cooldown decisions around their own matches. The useful lesson is not a copied combo; it is learning when the same combo is unsafe.
Explore services related to this guide, selected from our Marvel Rivals catalog.
View All Marvel Rivals Services


Best Team-Ups and Teammates for The Hood
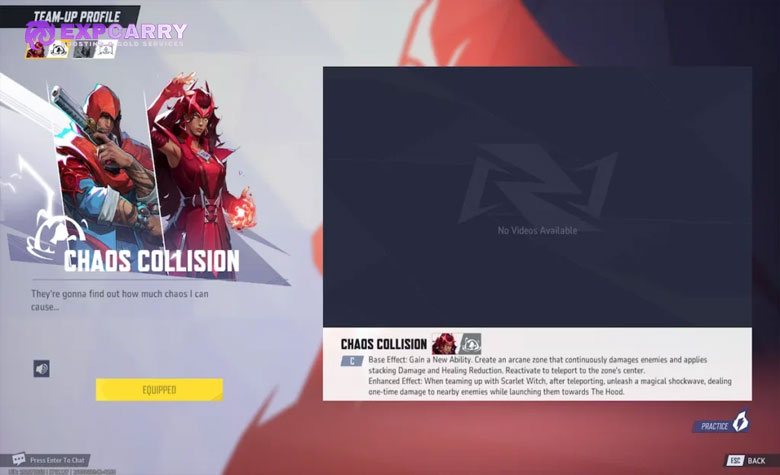
Season 9 rebuilt the Team-Up system around selectable abilities with base and enhanced effects. The Hood chooses Chaos Collision or New Moon's Shadow in the spawn room. Each has a base effect even without its corresponding partner, then gains an enhanced effect when the correct hero is on the team.
New Moon's Shadow with Moon Knight is particularly useful for choke points and projectile-heavy opponents. Its base version upgrades Abyssal Veil into a Lunar Barrier with 200 Health. The barrier detonates when broken, damages enemies, and applies damage and healing reduction. Moon Knight raises the barrier to 300 Health and makes The Hood's attacks passing through it bounce up to three times, with 50% less damage on each bounce. This pairing is strongest when enemies group around an objective; it does much less on wide maps where targets approach from several angles.
Chaos Collision with Scarlet Witch creates a five-meter zone that hits enemies twice per second, applying 5% damage and healing reduction per hit up to a 40% maximum. Reactivating the ability teleports The Hood to its center. Scarlet Witch adds a 60-damage shockwave after the teleport and launches nearby enemies toward him. Pick it for aggressive rotations, backline access, or a planned disengage. Dropping the zone deep behind the enemy without team support usually turns the teleport into a trap.
The Hood also enhances Team-Ups selected by other heroes. Jubilee's Hellfire Sparks keeps her Void Magic Mark from being cleared while The Hood is the enhanced partner, allowing her hitscan attack form to be sustained and giving her accurate ranged pressure with self-healing. Cloak & Dagger's Oblivion Shroud becomes wider with The Hood and grants allies a 15% Damage Boost after they pass through the enhanced Veils. Magik's Void Pentagram also receives an enhanced effect from The Hood: the Limbo Demons summoned through Stepping Discs gain 100 additional Health and 2.5 meters of extra attack range. All three can provide meaningful synergy depending on the rest of the composition.
Outside direct Team-Ups, a durable Vanguard such as Doctor Strange, Magneto, Groot, or Peni Parker can hold the first line while The Hood builds energy from a safer lane. Mobile Duelists are useful when they can finish targets softened by Veil fire, but a team made entirely of flankers may leave The Hood exposed. For a broader view of role strength and alternative picks, use the Marvel Rivals Season 9 tier list as context, not as a replacement for map and matchup decisions.
In ranked play, the simplest shell is one main Vanguard, The Hood, two damage dealers covering different ranges, and two Strategists. If a group is assembling that composition around a target division, Marvel Rivals rank progression is one available route; solo players should instead keep a backup Vanguard ready for matches where The Hood's sightline-dependent style does not fit the map.
The Hood Counters and Difficult Matchups
Current community-tracked matchup data lists Wolverine, Cloak & Dagger, and Iron Fist among The Hood's hardest counters. That is useful directional evidence rather than an official balance verdict: results change with rank, map, composition, and the available match sample.
Wolverine is the clearest threat because his mobility and maximum-Health pressure punish Vanguards who cannot create distance. The official Season 9.5 balance update also increased his Rage gain and slowed its decay. Save Void Walk for the part of his engage where you actually need separation, and do not depend on Mantle to survive a prolonged melee exchange.
Iron Fist attacks from inside the space where Abyssal Veil's projectile reduction provides little help. If Void Walk is unavailable, he can stay on The Hood through a close-range fight and deny clean transformed-rifle tracking. Place the Veil across his approach so the Blind triggers when he crosses, then move toward teammates instead of trying to win an isolated duel.
Cloak & Dagger is both a strong ally and an awkward opponent. Their healing can outlast unfocused pistol damage, while Cloak's disruption and defensive utility can spoil a transformation or protect a target during Demon of the End. Force out defensive cooldowns with ordinary fire before committing the ultimate, and change targets if one enemy is receiving continuous protection.
Hard crowd control and fast dive are the general answers beyond those three names. The Hood's ultimate is powerful but conspicuous, and a prepared team can break line of sight, attack from another angle, or control him between shots. Barriers alone are not the answer because Demon of the End pierces them. Solid map cover is. When facing The Hood, spread so one shot cannot pass through several teammates, pressure him after Void Walk, and cross Abyssal Veil from a side angle rather than trading through its full duration.
Player feedback from the Season 9.5 community discussion highlights a similar pattern: The Hood feels dangerous when he controls a lane and enters Half-Demon State with a viable target in front of him, but much less stable when heavy dive reaches him before that window. His counterplay is therefore more about timing and geometry than finding one automatic hero pick.
Common The Hood Mistakes
The most expensive beginner mistake is firing only one rifle during Leaded Transformation. Test both inputs in the practice range before entering a match, and move secondary fire if the default binding makes simultaneous tracking uncomfortable. The form's lifesteal only matters when bullets land, so shooting two guns into empty space is not better than shooting one.
- Charging to 100 without a target: Stop feeding easy pistol hits when the enemy is already retreating. Hold the last part of the meter until the next engagement is forming.
- Using Void Walk as routine movement: Its 15-second cooldown is The Hood's main answer to divers, high ground, and bad ultimate positions. Walking to the fight is often the stronger play.
- Placing Abyssal Veil behind the firing line: The Hood's bullets must pass through the Veil to gain its offensive bonuses, while enemy projectiles must pass through it to be weakened. Place it between both teams, not on top of allies who have already taken cover.
- Holding Mantle too early: One second is enough to deny a key moment but too short to waste on routine poke. React to a meaningful threat instead of using it as sustained protection.
- Treating Demon of the End as invulnerability: The form is durable, not safe. Cast with allied support, a clear sightline, and nearby cover for the end of the animation.
- Forcing a Team-Up on the wrong map: New Moon's Shadow prefers lanes and grouped targets; Chaos Collision prefers planned movement and coordinated follow-up. Swap in the spawn room when the match asks for a different tool.
Hero proficiency is a useful reason to keep practicing one character without judging every session by rank alone. Players who want the cosmetic and title progression while spending less time on repetition can review the Marvel Rivals proficiency option, but mechanical improvement still comes from deliberately testing Veil placement, energy timing, and both-rifle tracking.
Conclusion
The Hood is strongest when played as a damage-oriented off-Vanguard, not as a shield planted permanently on the objective. Build Demonic Energy through a protected Veil, reserve Mantle for the attack that matters, and use Void Walk with a clear purpose. At full energy, hold both firing inputs and fight at a range where the transformed rifles can actually sustain him.
New Moon's Shadow is strong for Season 9.5 lane control, while Chaos Collision gives coordinated teams a more aggressive teleport and debuff tool. Moon Knight and Scarlet Witch directly enhance The Hood's own Team-Up choices, while Jubilee, Cloak & Dagger, and Magik gain valuable enhanced effects when paired with him. A sturdier Vanguard also gives The Hood room to operate. Against Wolverine, Iron Fist, heavy dive, or hard control, protect Void Walk and play closer to teammates. Those decisions matter more than any static tier placement, and they are what turn The Hood from an exposed damage dealer into a Vanguard who controls the shape and timing of a fight.