This Path of Exile beginner guide follows one practical rule: build one complete character instead of testing every system at once. Choose a current beginner build, use one main damage skill, keep its linked Support Gems together, take compatible passive nodes, and upgrade life, elemental resistances, movement speed, and flasks as the campaign becomes harder. Your first objective is not perfect equipment. It is a stable character that can finish all ten Acts, complete the campaign Labyrinths, and enter Maps without an obvious defensive or damage gap. The guide uses the confirmed Path of Exile 3.29 rules announced for Curse of the Allflame, launching on July 24, 2026.
Path of Exile Beginner Priorities
A new character becomes much easier to manage when every early decision supports the same build. These priorities keep damage, defenses, and campaign progression moving together without forcing a beginner to learn every system immediately.
- Choose a build before choosing a class. The class determines your passive tree starting point and available Ascendancies, but the build determines how the character actually deals damage and survives.
- Use one main clearing skill and make it stronger with linked Support Gems. Add a movement skill, defensive skill, and reservation skills only when your resources can sustain them.
- Prioritize links, life, elemental resistances, movement speed, and a suitable weapon or caster item during the campaign.
- Complete quests that award passive points, unlock your Ascendancy through the Labyrinth, and repair resistances after Acts 5 and 10.
- Treat the campaign as preparation for Maps. Learn what scales your main skill instead of collecting unrelated bonuses.
How to Choose Your First Path of Exile Class
Path of Exile has seven base classes. Six are available when you create your first character, while Scion is unlocked during Act 3. Every class uses the same passive skill tree but begins in a different location. A class does not permanently lock you to melee, bows, spells, or minions. Any class can use a Skill Gem when it meets the gem's attribute and equipment requirements, but some starting positions and Ascendancies support a build far more efficiently than others. The current options can be checked in the official Ascendancy Classes overview.
| Class | Starting attributes | Common build identities | Ascendancy choices | Beginner note |
|---|---|---|---|---|
| Marauder | Strength | Melee attacks, armour, life, fire builds | Juggernaut, Berserker, Chieftain | Juggernaut and Chieftain can provide forgiving defensive foundations when paired with a proven build. |
| Ranger | Dexterity | Bows, projectiles, speed, evasion, flasks | Deadeye, Warden, Pathfinder | Fast and flexible, but many bow builds punish weak weapons and poor positioning. |
| Witch | Intelligence | Spells, minions, Energy Shield, elemental or chaos damage | Necromancer, Occultist, Elementalist | A clear entry point for spell and minion builds because their damage can scale strongly from gem levels. |
| Duelist | Strength and Dexterity | Melee, bleed, impale, block, attack speed | Slayer, Gladiator, Champion | Well positioned for many attack builds, but regular weapon upgrades remain important. |
| Templar | Strength and Intelligence | Elemental spells, totems, critical strikes, minions | Inquisitor, Hierophant, Guardian | Versatile, although resource-heavy spell or totem setups can require more planning. |
| Shadow | Dexterity and Intelligence | Critical strikes, traps, mines, poison, Energy Shield and evasion | Assassin, Saboteur, Trickster | Strong for technical builds, but less suitable for improvising without a tested passive and gem plan. |
| Scion | Strength, Dexterity, and Intelligence | Hybrid and specialized builds | Ascendant, Reliquarian | Starts near the center of the tree and is usually easier to understand after completing another build first. Reliquarian is the Scion's second Ascendancy, and its passive options change from league to league. |
The safest first choice is not a universally strongest class. It is the class required by a current starter build with a complete leveling path, realistic campaign gear, and a clear transition into Maps. Use this guide to compare current starter options before creating the character. A build advertised around expensive Unique Items, a late-game gem, or maximum Path of Building damage is not automatically suitable for a new account.
How Skills, Skill Gems, and Support Gems Work
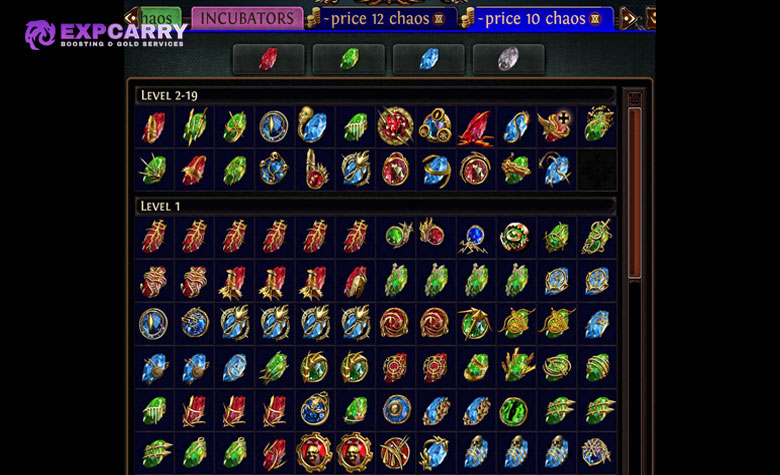
In Path of Exile, most usable skills come from gems socketed into equipment. An Active Skill Gem grants an attack, spell, minion, aura, curse, movement skill, or another ability. Support Gems modify compatible Active Skill Gems when they are placed in linked sockets on the same item. The Support Gem must be able to support the skill, and its tooltip identifies important restrictions. Grinding Gear Games provides a basic explanation in the official Path of Exile game overview.
A four-link normally holds one Active Skill Gem and three Support Gems. A six-link can connect one active gem to five supports. More supports are not useful if they do not apply to the active skill, and they can increase its resource cost. Read gem tags such as Attack, Spell, Projectile, AoE, Minion, Duration, Fire, Cold, Lightning, Physical, and Chaos to understand which modifiers are likely to interact.
PoE 3.29 Socket Rules
Patch 3.29 changes the old color restriction. According to the official Path of Exile 3.29.0 patch notes, any gem can be placed in any equipment socket even when the gem and socket colors do not match. Equipment sockets are white by default. Red, green, and blue sockets can still appear, and a gem gains +10% Quality when its color matches the socket color.
Links still matter. A Support Gem in an unlinked socket does not modify the active gem beside it. White sockets make a setup functional, while matching colors provide an optimization bonus. During the campaign, prioritize the correct number of linked sockets before spending currency to chase colored sockets.
Gem Experience, Levels, and Attributes
Gems socketed in equipped items gain experience as you defeat enemies. Leveling an Active Skill Gem usually improves its damage or effect, while leveling a Support Gem improves the modifier it provides. Higher gem levels also raise attribute and character-level requirements. If a gem's requirement exceeds your available Strength, Dexterity, or Intelligence, it becomes unusable until the requirement is met.
Do not level every utility gem automatically. Some build guides keep a gem at a specific level to control attribute requirements, mana cost, trigger thresholds, or another interaction. If a guide specifies a maximum gem level, do not accept the next level-up prompt, or disable automatic leveling on platforms that support it.
Explore services related to this guide, selected from our Path of Exile catalog.
View All Path of Exile Services


Build a Simple First Skill Setup
A beginner character does not need every available key filled. It needs a small set of skills with separate jobs.
- Main damage skill: your best linked setup for clearing packs and damaging bosses.
- Movement skill: a compatible travel skill for crossing gaps, leaving dangerous ground, or moving between packs.
- Defensive skill: a Guard Skill, defensive buff, or another tool recommended by the build.
- Reservation skills: auras, Heralds, or other persistent effects that reserve mana and support the build's damage or defense.
- Boss utility: a curse, mark, exposure source, totem, banner, or secondary damage skill when the build benefits from it.
Start with the main skill and its best available supports. Add utility one piece at a time. If you cannot repeatedly use the main skill, reduce reservation, remove an expensive support, use an appropriate Mana Flask, or solve the resource problem through gear and passives. A theoretical damage increase is not an upgrade when the character cannot sustain it.
The Passive Tree and Ascendancy
All classes share one large passive tree. Your class determines where you start, not which nodes you are allowed to take. This freedom is powerful, but it also makes random allocation costly. Follow a path that connects efficient damage, life or Energy Shield, and the defensive mechanics used by your build.
Take nearby useful nodes instead of traveling across the tree for one attractive notable. Do not mix unrelated damage plans such as minion damage, bow damage, spell damage, and melee critical strikes on the same first character. A focused tree makes ordinary equipment useful because every upgrade supports the same plan.
Ascendancy is a second, smaller passive tree unlocked through the Lord's Labyrinth. The first completion of each Labyrinth difficulty grants two Ascendancy Points, for up to eight from the four Labyrinth tiers. Complete the campaign Trials of Ascendancy required for the first three Labyrinths, then run each Labyrinth when your defenses and single-target damage are ready. The Eternal Labyrinth does not require Trials found in Maps, but it does require completion of the previous Labyrinths, character level 68, and one Offering to the Goddess. Labyrinth progress is a permanent source of character power, not an optional side activity to ignore until deep endgame.
Beginner Gear Priorities
Campaign equipment should solve immediate problems. An item with several useful basic modifiers is often better than a Unique Item that does not support the build. Check the following priorities whenever progress slows.
- Main links: keep the required Active Skill and Support Gems together. In 3.29, socket color no longer prevents gem placement, but links are still mandatory.
- Resistances: raise Fire, Cold, and Lightning Resistance toward the normal 75% maximum. Kitava also penalizes Chaos Resistance, so improve it when practical even if capping the three elemental resistances is the first campaign priority.
- Maximum Life or the build's main defense: add Life to rare gear for most beginner life builds. Energy Shield builds should follow their guide's transition timing instead of switching too early.
- Movement speed: boots with movement speed make both combat and campaign traversal safer.
- Damage source: attack builds need suitable weapons with improving damage. Many spell and minion builds care more about gem levels, cast speed, minion modifiers, or relevant spell modifiers than the weapon's local attack damage.
- Attributes and resource sustain: add only enough Strength, Dexterity, Intelligence, mana, or regeneration to keep the planned setup working.
Do Not Judge Equipment by Rarity Alone
A Rare item is not automatically better than a Magic item, and a Unique is not automatically better than either. Rarity describes how modifiers are generated, not whether they help your character. During leveling, a simple item with the right link, life, and resistance can be more valuable than a visually impressive drop with irrelevant modifiers.
Keep Your Flasks Current
Flasks are reusable equipment, not disposable potions. Replace low-level Life and Mana Flasks as stronger bases become available, then add Utility Flasks that support your defenses or speed. Check flask modifiers and make sure you have a reliable answer to dangerous ailments or debuffs required by your build and current content. Do not reserve a flask slot for mana once the build no longer needs it.
Currency and Crafting Without Wasting Resources
Path of Exile uses currency items for both crafting and trade. Early on, learn what an orb does before applying it. Orbs of Transmutation and Alteration work with Magic items, while Orbs of Alchemy, Essences, and Orbs of Binding can create useful Rare equipment. Chaos Orbs and other valuable currencies are usually poor choices for repeatedly rerolling disposable campaign gear.
The Crafting Bench is the most controlled way to fix a basic problem. In 3.29, a bench is available in every town from Act 2 onward. Use an open modifier slot to add missing resistance, life, an attribute, or another build-relevant stat. Before crafting, hold the advanced-modifier key to inspect the item and confirm that it can accept the desired modifier.
Essences are useful because they guarantee one listed modifier while rerolling the rest of the item. Use low-value campaign Essences on a suitable base when you need an upgrade, but save expensive or unfamiliar crafting resources until you understand their trade value and purpose.
Path of Exile Campaign Progression
The campaign contains ten Acts. You do not need to clear every monster or complete every optional encounter, but you should collect permanent character rewards and keep the build functional at each difficulty jump.
| Stage | Main goals | Gear and build check |
|---|---|---|
| Acts 1 and 2 | Establish a leveling skill, obtain movement utility, begin the planned passive route, unlock basic crafting, and make the Act 2 bandit choice specified by the current build. | Use a workable linked setup, current flasks, movement-speed boots when available, and relevant weapon upgrades for attacks. |
| Acts 3 and 4 | Complete required Labyrinth trials, prepare for the first Labyrinth, and assemble the core gem setup as vendors and quest rewards expand. | Check attributes, mana sustain, elemental resistances, and single-target damage before major bosses. |
| Act 5 | Finish passive-point quests and defeat Kitava. | Kitava applies a permanent -30% penalty to all resistances, including Chaos Resistance. Prepare replacement gear or bench crafts before moving on. |
| Acts 6 to 9 | Repair resistances, continue Ascendancy progression, unlock Pantheon powers through the story, and complete remaining passive-point quests. | Upgrade the main links, life, flasks, movement, and the build's weapon or caster gear whenever damage or survival falls behind. |
| Act 10 | Finish campaign bonuses, prepare for the final Kitava fight, and organize the first mapping setup. | The second Kitava penalty adds another -30% to all resistances, for a total -60% penalty to Fire, Cold, Lightning, and Chaos Resistance across the two encounters. |
| Early Maps | Begin Atlas progression, complete remaining Labyrinth goals, improve gear efficiently, and learn which content suits the build. | Cap elemental resistances, maintain a reliable main link, solve resource sustain, and verify that both clearing and boss damage work. |
Use the in-game /passives command after the campaign to audit quest rewards that grant passive points. It is easy to miss an optional quest while moving quickly through an Act. Also revisit gem vendors when the leveling guide calls for a new setup. After completing Fallen from Grace in Act 6, Lily Roth provides access to a broad selection of purchasable gems, excluding special acquisition cases.
Mandatory and Optional Objectives
Not every campaign activity has the same long-term value. Permanent character rewards, essential unlocks, and resistance repairs should take priority, while low-value farming and unnecessary optimization can wait until the character reaches Maps.
Do Not Skip These
- Quests that award passive skill points. Audit them with /passives.
- The Act 2 bandit decision required by your current build. Rewards can change between patches, so do not copy an old choice blindly.
- The campaign Labyrinth trials required for the first three Labyrinths, plus Labyrinth completions for Ascendancy Points. Map Trials are not required to enter the Eternal Labyrinth.
- Core gem and vendor unlock quests needed by the build.
- Resistance repairs after Acts 5 and 10, including attention to Chaos Resistance once elemental resistances are under control.
- Pantheon unlocks relevant to your defensive plan.
Usually Optional During the First Push
- Full clearing every zone after the quest objective is complete.
- Farming a specific campaign Unique Item when the build can progress with Rare gear.
- Spending large amounts of currency to perfect temporary equipment.
- Running every league mechanic when it repeatedly slows or kills the character.
- Optimizing colored sockets before links, defenses, and item modifiers are stable.
How to Prepare for Campaign Bosses
Before a major boss, check the character rather than repeating the encounter unchanged. Make sure the main skill has its intended supports, the relevant weapon is current, flasks are appropriate, and elemental resistances are not far behind. Place a portal before the encounter when the area allows it.
During the fight, prioritize movement and readable attack patterns over constant damage. Use short damage windows, keep the cursor and camera focused on the boss, and stop standing still when a large telegraph begins. Persistent damage, minions, totems, brands, and other build-specific tools can create damage uptime while you reposition, but only when they are part of the planned build.
If the boss barely takes damage, inspect the build's scaling. Attack characters may need a better weapon. Spell and minion characters may need higher gem levels or correct supports. If the character dies to ordinary hits, fix life, resistances, flask usage, and defensive passives before adding more damage.
Common Beginner Mistakes
Most failed first characters are not ruined by one bad item or passive point. They fall behind because several small problems accumulate, such as weak links, scattered damage scaling, outdated equipment, or ignored defensive requirements.
- Starting without a current build plan: an old passive tree or gem setup may no longer match the patch.
- Scaling several damage types: passive points spread across unrelated mechanics produce a character that does everything poorly.
- Ignoring links: nearby sockets do not interact unless the sockets are visibly linked.
- Over-reserving mana: a strong aura setup is useless when the main skill cannot be used consistently.
- Keeping an outdated attack weapon: many attacks depend heavily on weapon damage, so a new weapon can be the largest campaign upgrade.
- Equipping every Unique Item: a Unique should solve a build requirement or provide a meaningful interaction, not replace good Rare gear by default.
- Ignoring resistance penalties: both Kitava encounters reduce all resistances, including Chaos Resistance, so a previously safe character can become fragile immediately after either fight.
- Spending valuable currency on temporary items: use inexpensive deterministic fixes and save uncertain resources until their value is understood.
- Skipping Labyrinth and passive-point quests: these rewards provide guaranteed power that does not depend on random drops.
- Copying endgame gear too early: follow the leveling section of a guide before attempting its finished equipment setup.
First Map Readiness Checklist
After Act 10, Maps become the main progression system. Before pushing the Atlas, confirm that the character meets these practical conditions:
- Fire, Cold, and Lightning Resistances are restored to the normal 75% cap after the second Kitava penalty, while Chaos Resistance is raised as high as the available gear reasonably allows.
- The main skill has a functional four-link or better setup with compatible supports.
- The character has a movement skill and at least one planned defensive layer beyond raw damage.
- Life, Energy Shield, recovery, and flasks are appropriate for the selected build.
- Mana or another skill cost can be sustained during packs and bosses.
- The build can kill a single durable target instead of relying only on wide clearing damage.
- The passive tree, Ascendancy choice, and gear all scale the same primary damage plan.
- A loot filter is enabled so useful bases, currency, Maps, and upgrades remain visible without inspecting every drop.
Begin with low-tier Maps and upgrade the weakest bottleneck first. If monsters take too long to kill, check weapon damage, gem levels, links, and offensive passives. If deaths are the problem, repair resistances, life, recovery, flask setup, and the defenses specified by the build. Atlas progress becomes much smoother when each purchase or craft solves a measured weakness instead of adding an unrelated luxury modifier.
Final Progression Plan
Your first Path of Exile character needs consistency more than complexity. Select a current starter, keep one main Skill Gem linked to compatible supports, take a focused passive route, complete permanent campaign rewards, and upgrade defenses before a difficulty spike becomes a wall. By the end of Act 10, the character should have capped elemental resistances, a functioning main link, sustainable skill costs, current flasks, and a clear Ascendancy plan.
Once those foundations are stable, Maps provide the space to improve gear, finish Ascendancy progression, specialize the Atlas, and learn advanced crafting. The first successful character does not need to be perfect. It needs to reach the next checkpoint reliably and make every future upgrade easier to understand.