The Labyrinth is the core progression system that unlocks a character's primary Ascendancy class and awards Ascendancy Passive Points in Path of Exile 1. A character completes campaign Trials of Ascendancy, enters one of four Labyrinth difficulties, survives traps and three encounters with Izaro, then uses the Altar of Ascendancy to claim the reward. Completing all four standard difficulties gives eight Ascendancy Passive Points in total.
This guide is specifically for the original Path of Exile, not Path of Exile 2. It explains every campaign Trial location, the current Eternal Labyrinth requirement, practical readiness targets, trap survival, Izaro's carry-over mechanics, primary and Bloodline Ascendancy choices, and the modern Divine Font reward. It also corrects an important outdated detail: the Labyrinth no longer awards helmet, glove, or boot enchantments.
Patch status: This evergreen guide was checked against the Path of Exile 3.29 patch notes on August 23, 2026. Patch 3.29 did not change the Labyrinth access rules, Ascendancy Point rewards, or Divine Font system described below. This version also accounts for the Bloodline Ascendancy system, the Divine Font changes introduced in 3.28, and the Luminary Ascendancy added for the Scion in 3.29.
PoE 1 Labyrinth Quick Answer
There are four standard Labyrinth difficulties. Each difficulty awards two Ascendancy Passive Points the first time that character completes it. Campaign Trials unlock the first three versions, while the Eternal Labyrinth requires the previous three completions, character level 68, and one Offering to the Goddess. Map Trials are not required to unlock Eternal Labyrinth access.
| Labyrinth | Area Level | Access Requirement | Ascendancy Reward |
|---|---|---|---|
| Normal Labyrinth | 33 | Complete the six Trials in Acts 1 to 3 | First 2 points |
| Cruel Labyrinth | 55 | Complete Normal Labyrinth, reach level 40, and finish the three Trials in Acts 6 and 7 | Points 3 and 4 |
| Merciless Labyrinth | 68 | Complete Cruel Labyrinth, reach level 50, and finish the three Trials in Acts 8 to 10 | Points 5 and 6 |
| Eternal Labyrinth | 75 | Complete the previous Labyrinths, reach level 68, and spend one Offering to the Goddess | Points 7 and 8 |
The area level is not a universal readiness guarantee. A character with poor resistances, weak flask recovery, or insufficient single-target damage can struggle even when overlevelled. Conversely, an experienced player with a coherent build may complete a Labyrinth near its natural campaign point. Treat the preparation targets later in this guide as safety recommendations rather than hard entry requirements.
All Campaign Trials of Ascendancy Locations
The campaign contains twelve required Trials: six for Normal, three for Cruel, and three for Merciless. Campaign Trial completion only needs to be done once per league, so subsequent characters in the same league benefit from that Trial progress. Labyrinth completions and Ascendancy Points remain character-specific.
| Required For | Act | Trial Location | Main Lesson |
|---|---|---|---|
| Normal | Act 1 | The Lower Prison | Introduces spike traps, Bleeding, and timed movement |
| Normal | Act 2 | The Crypt Level 1 | Introduces spinning blades |
| Normal | Act 2 | The Chamber of Sins Level 2 | Introduces sawblades |
| Normal | Act 3 | The Crematorium | Introduces furnace traps and timed burning floors |
| Normal | Act 3 | The Catacombs | Introduces blade sentries |
| Normal | Act 3 | The Imperial Gardens | Introduces dart traps, Poison, and movement slowing |
| Cruel | Act 6 | The Prison | Revisits spike traps after the first resistance penalty |
| Cruel | Act 7 | The Crypt | Revisits spinning blades with denser layouts |
| Cruel | Act 7 | The Chamber of Sins Level 2 | Revisits sawblades with more movement pressure |
| Merciless | Act 8 | The Bath House | Revisits furnace traps in a late-campaign zone |
| Merciless | Act 9 | The Tunnel | Revisits blade sentries with tighter safe space |
| Merciless | Act 10 | The Ossuary | Revisits dart traps and completes the campaign Trial set |
Each Trial contains a plaque at the entrance and a completion plaque at the end. Touch the final plaque and confirm that the Trial is marked complete before leaving. If a Trial was skipped while rushing the campaign, use the world map to identify the missing symbol and return to the listed zone. Players who prefer to finish the acts without repeated backtracking can combine these checkpoints with a structured PoE 1 campaign progression route.
How to Unlock and Enter Every Labyrinth
The Aspirants' Plaza is the entrance hub for the Labyrinth. After the six Normal Trials are complete, interact with the Statue of the Goddess in the Sarn Encampment or use the Aspirants' Plaza waypoint once it is available. Select the Labyrinth difficulty at the activation device, confirm that its requirements are met, and enter the first room.
Normal Labyrinth should usually be completed near the end of Act 3 or during Act 4, once the character has a reliable main skill and an updated Life flask. Cruel requires character level 40 in addition to Normal completion and its three later Trials in Acts 6 and 7. Merciless requires character level 50, Cruel completion, and the final three campaign Trials, with the last one located in the Act 10 Ossuary. Completing Merciless before the final Act 10 boss is often safer because the second permanent resistance penalty has not yet been applied.
Eternal Labyrinth follows different rules. It does not ask the player to find or complete six different Map Trials. Grinding Gear Games removed that unlock condition in the official Path of Exile 3.16 Labyrinth changes. The current standard requirement is completion of the previous three Labyrinths, character level 68, and one Offering to the Goddess. The Offering is consumed when the run is opened, so a failed attempt needs another one.
Map Trials can still appear in yellow-tier and higher maps and can provide Offerings, but they are optional for access. This distinction matters because many old guides still tell players to find six named Trials in Maps before attempting Eternal Labyrinth. That advice has been obsolete since 3.16.
Explore services related to this guide, selected from our Path of Exile catalog.
View All Path of Exile Services


Labyrinth Preparation and Practical Readiness Targets
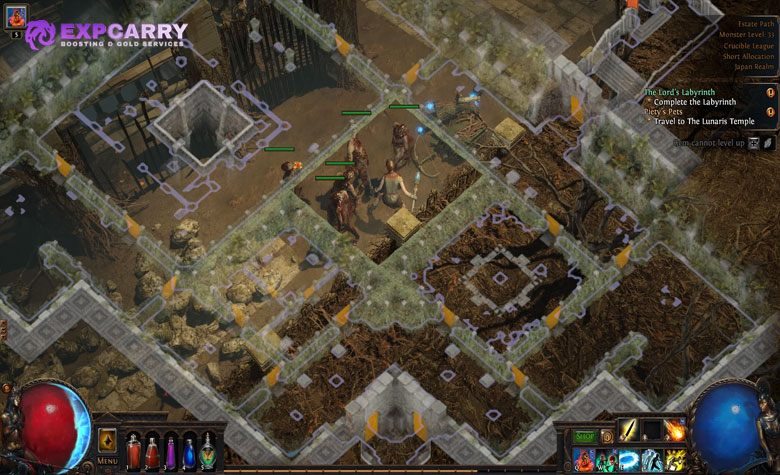
Labyrinth success depends on three different checks. The character needs enough effective health and recovery to survive traps, capped or near-capped elemental resistances plus adequate mitigation for monsters and Izaro, and enough single-target damage to shorten dangerous boss phases. A large Life total cannot compensate for severely uncapped resistances, and high damage cannot protect a character that has no answer to Bleeding after a spike or cleaver hit.
| Stage | Comfortable Level | Suggested Life or Equivalent | Preparation Priorities |
|---|---|---|---|
| Normal | 33 to 40 | About 1,000 to 1,500 | Updated Life flask, useful movement skill, and roughly 50% to 75% elemental resistances |
| Cruel | 55 to 60 | About 2,000 to 2,500 | Capped elemental resistances after Act 5, Bleeding removal or immunity, and stable damage |
| Merciless | 65 to 70 | About 2,800 to 3,500 | Capped resistances, dependable sustain, quick movement, and enough boss damage for Izaro |
| Eternal | 75 or higher | About 3,500 to 4,500 | Capped resistances, coherent layered defence, strong recovery, and tested single-target damage |
These figures are guidelines, not universal minimums. Energy Shield builds should compare the total usable pool and recovery rather than copying the Life column. Characters with strong mitigation can be comfortable below the upper values, while builds that stop to channel or attack in place may want more protection.
Carry at least one strong recovery flask and a dependable answer to Bleeding. Add movement speed on boots and use a movement skill appropriate for the route. Regeneration is unusually valuable because it restores resources between trap cycles without requiring monsters. Before committing to an Ascendancy route, compare its early defensive and offensive value with the rest of a coherent PoE 1 league starter plan; the best early allocations are the ones that solve the character's immediate weakness.
How Labyrinth Traps Actually Deal Damage
Labyrinth traps are not one interchangeable damage source. Some hit, some deal damage over time, and several create movement or debuff pressure that makes a second trap more dangerous. This is why stacking Armour alone does not make every trap harmless. Armour can help against physical hits, but it does not mitigate all physical damage over time.
| Trap | Main Threat | Low-Risk Response |
|---|---|---|
| Spike traps | Physical hits, Bleeding, and a brief movement lock | Wait for the spikes to retract, cross once, and remove Bleeding before continuing |
| Sawblades | Very high physical damage over time along moving lanes | Watch the track, follow behind a passing blade, and step into the next safe pocket |
| Spinning blades | Very high physical damage over time from patrolling blades | Move around the patrol rather than racing through its centre |
| Furnace floors | Burning damage over time while floor sections are active | Cross during the inactive cycle and pause on safe tiles |
| Dart traps | Physical projectile hits, Poison, and strong movement slowing | Use walls as cover, change direction after a volley, and avoid crossing several firing lines at once |
| Sentinel traps | Persistent area effects and debuffs in endgame Labyrinth content | Deal damage to the sentinel to disable it temporarily, then cross before it reactivates |
Many Labyrinth traps scale their damage with the player's Life and Energy Shield, so a larger health pool alone does not turn every section into a safe sprint. Recovery, timing, movement control, and knowledge of the pattern provide the real advantage. Minions can distract monsters, but they do not solve a trap lane for the player.
A Safe Method for Crossing Trap Rooms
Start every trap section by stopping before the first damaging tile. Observe one full cycle and identify the next safe platform, doorway, or section of untouched floor. Cross only to that point, recover, and repeat. This short-movement method is slower than holding a movement key, but it prevents one mistake from chaining into several hits.
- Clear nearby monsters first. A small pack can body-block the character or consume flask charges at the worst moment.
- Identify the trap type and direction. Sawblades follow visible tracks, while floor traps use a timed cycle.
- Choose one safe destination. Do not aim for the far side when a secure platform is available halfway across.
- Move after the danger passes. Following behind a blade is safer than trying to outrun one moving toward the character.
- Recover before the next segment. Allow regeneration and Energy Shield recharge to work when the room permits it.
- Use movement skills deliberately. A gap-crossing skill can bypass terrain, but doors, railings, and trap-specific barriers can still block it.
Do not panic-spam flasks while standing on an active trap. Move to safe ground first unless immediate recovery is necessary. Also avoid repeatedly clicking a distant point through a complicated room; pathfinding may send the character into a trap that was not part of the intended route.
Izaro Guide: Three Fights and Carry-Over Mechanics
Every Labyrinth run contains three Aspirant's Trial encounters with Izaro. The first two fights introduce an additional mechanic, such as conduits, elemental essences, charges, idols, gargoyles, lieutenants, portals, or fonts. The exact combination changes with the daily layout.
Those mechanics can carry into later fights. If the player leaves a mechanic active when Izaro retreats, the following encounter becomes more dangerous. For example, empowered supports may continue helping Izaro, or persistent objects may add damage and pressure to the final arena. The reward system can grant extra Treasure Keys for deliberately leaving mechanics active, but that is a farming decision, not the safest first-completion strategy.
For a low-risk run, neutralize every visible mechanic before pushing Izaro to his phase threshold. Watch his weapon animations, move out of telegraphed attacks, and keep enough distance to see ground effects. Do not spend the entire fight next to a wall because the arena edge reduces escape options. Fast builds should also avoid dealing so much damage immediately that they fail to understand which mechanic remained active.
Izaro's damage becomes much easier to manage when the character can attack while repositioning. Totems, mines, traps, minions, brands, and damage over time builds can keep dealing damage during movement, but direct-attack and channelled builds can still succeed by using short damage windows. The priority is consistency: one controlled minute is better than a ten-second attempt that ends to a telegraphed slam.
Ascendancy Points, Class Choice, and the Altar
The first completion of each standard difficulty awards two Ascendancy Passive Points. Normal provides points one and two, Cruel provides three and four, Merciless provides five and six, and Eternal provides seven and eight. Repeating the same difficulty does not award additional points.
After defeating the final Izaro encounter, enter the reward room and use the Altar of Ascendancy before leaving. On the first completion, select one of the primary Ascendancy classes available to the character's base class, then allocate the earned points. The Scion currently has three primary Ascendancy options: Ascendant, Reliquarian, and Luminary. On later completions, the same altar opens the Ascendancy passive tree so the new points can be assigned.
Since version 3.27, Bloodline Classes are secondary Ascendancies unlocked character-by-character by defeating specific endgame bosses or encounters. A Bloodline can be paired with any primary Ascendancy and uses the same normal Ascendancy Passive Points, so it does not increase the eight-point total earned from the Labyrinth. Version 3.29 added two more Bloodline Classes, one of which is exclusive to the Curse of the Allflame challenge league. An Ascendancy allocation should support the build's current stage, not merely its final endgame version. If the character's intended skill, defence, or attribute plan has changed, a tailored PoE 1 custom build framework can help check whether the primary Ascendancy, Bloodline, passive tree, and equipment direction still fit together.
How to Respec or Change an Ascendancy
Ascendancy passive points can be refunded, but each point costs five normal passive refund points, or the corresponding gold respec cost where gold respeccing is available. That makes a complete eight-point primary Ascendancy respec substantially more expensive than moving a few ordinary passive nodes. Plan the order before spending Orbs of Regret, gold, or other available respec resources.
To change to another primary Ascendancy class available to the same base class, refund all allocated Ascendancy points, complete any Labyrinth difficulty, and interact with the Altar of Ascendancy in the final room. The character can then select a different available primary subclass. The base class itself cannot be changed, so a Witch cannot become a Duelist even though a Witch can switch between her own primary Ascendancy options.
The run used for a primary Ascendancy class change does not need to be Eternal Labyrinth. A lower difficulty is usually faster and safer once all Ascendancy points have been refunded. Bloodline switching is separate: after the relevant Bloodline has been unlocked, changing to another Bloodline at its associated altar refunds the old Bloodline tree for free.
Labyrinth Enchantments Were Replaced by the Divine Font
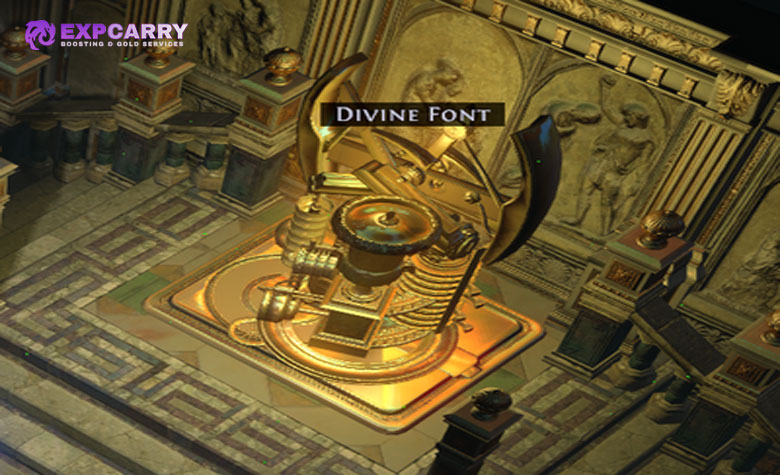
Older Path of Exile 1 guides describe repeatedly running Eternal Labyrinth for a random helmet enchantment, with additional enchantments for gloves and boots. That reward system is no longer current. In version 3.23, Grinding Gear Games removed Labyrinth equipment enchantments as obtainable Labyrinth rewards and changed the Divine Font into a gem-crafting device. The official Path of Exile 3.23 patch notes document that transition.
The current Divine Font can transform eligible gems into Transfigured Gems, add Quality or Experience, exchange gems through specific outcomes, or sacrifice a gem for one or more Treasure Keys. In version 3.28, the craft that transforms a non-Transfigured Skill Gem into a Transfigured version was improved so that, when multiple Transfigured versions exist, the player can select the preferred one; the old Support Gem to Awakened Support outcome was removed. Eternal Labyrinth remains the main farming tier and grants two Divine Font uses by default.
| Old Expectation | Current PoE 1 Reality |
|---|---|
| Enchant a helmet for a specific skill bonus | New Labyrinth helmet enchantments are not awarded; use the Divine Font for gem crafting |
| Receive random glove or boot enchantments | These are not part of the current standard Labyrinth reward loop |
| Farm alternate-quality gems from older systems | Transfigured Gems now provide alternate skill behaviour |
| Ignore gems before entering the Labyrinth | Bring or prepare eligible gems so useful Font options can be used immediately |
Legacy enchanted items can still exist in permanent leagues, but that does not mean the enchantment can be created today. When reading a build guide, check whether it asks for a legacy Labyrinth enchantment or a current Transfigured Gem. This single check prevents many failed gearing plans.
Eternal Labyrinth and Special Offerings
A normal Offering to the Goddess opens the standard area-level-75 Eternal Labyrinth and is the correct route for earning the final two Ascendancy Points. Special Offerings open harder area-level-83 variants intended for experienced farming. They are not required for the eight-point Ascendancy progression.
| Offering | Variant | Main Purpose |
|---|---|---|
| Offering to the Goddess | Standard Eternal Labyrinth | Final Ascendancy completion and normal Divine Font rewards |
| Dedication to the Goddess | Eternal Labyrinth of Potential | Additional Divine Font crafting options for corrupted gems |
| Gift to the Goddess | Eternal Labyrinth of Opportunity | Eight Divine Font uses for dedicated gem farming |
| Tribute to the Goddess | Eternal Labyrinth of Fortune | Enriched Labyrinth rewards for reward-focused farming |
The advanced variants have stronger monsters, traps, and Izaro encounters. They are not required for Ascendancy progression and do not raise the eight-point Ascendancy cap. Complete the standard Eternal version first, learn the daily route, and treat the area-level-83 versions as optional endgame farming content.
Daily Layout, Darkshrines, Keys, Argus, and Side Rooms
The Labyrinth layout changes daily. Room connections, trap combinations, side objectives, secret passages, and reward opportunities change with it. Plinths inside the Labyrinth display the current room and its nearby connections, so use them to confirm the route instead of relying only on memory from a previous day.
Darkshrines grant positive effects for the current run. A result may weaken part of the Labyrinth, improve rewards, or make later encounters safer, but the exact outcome is not guaranteed before activation. Silver Keys open Silver Doors, while puzzles, gauntlets, and hidden passages can lead to additional rewards. These detours are optional and usually add risk to a first completion.
Treasure Keys open Izaro's chests in the final reward room. Keys can come from the boss and selected side objectives. Argus is an optional dangerous enemy found in Merciless and Eternal layouts; defeating him awards a Treasure Key. A fragile character should skip Argus and long side paths until the Ascendancy Points are secure. The efficient first-run objective is to reach three Izaro encounters alive, use the Altar, and only then consider reward farming on later runs.
Death, Logout, Portals, and Party Rules
The Labyrinth does not allow ordinary portal travel. Dying, logging out, disconnecting, crashing, or otherwise leaving an active Labyrinth prevents that character from returning to the same run. Progress through rooms and Izaro phases is not saved, so the next attempt begins from a new Labyrinth instance. A failed Eternal run also means spending another Offering to the Goddess.
Stash access in the staging areas can help with inventory management, but it does not create a return portal to town. Prepare flasks, gems, and equipment before starting. In Hardcore, death has the normal character consequence, which makes optional rooms and reward mechanics a much larger decision.
Parties can enter and progress together, but a dead member cannot simply portal back into the run. Keep the group close enough that doors and room transitions do not separate vulnerable characters. One fast player should not rush several rooms ahead while another member is crossing traps without support.
Low-Risk Labyrinth Progression Route
The safest progression plan treats each Labyrinth as a character upgrade rather than a reward-farming session. Complete the required campaign Trials as they appear, prepare specifically for the next difficulty, and use a direct route on the first successful run.
- Normal: Finish all six early Trials, upgrade the Life flask, enter after the build has a stable main link, and allocate the first two Ascendancy Points toward the strongest early route.
- Cruel: Correct resistances after Act 5, obtain Bleeding protection, complete the three Trials in Acts 6 and 7, and use the new points to improve damage, recovery, or defence.
- Merciless: Complete the Trials in Acts 8 to 10 and, when practical, run the Labyrinth before defeating the final Act 10 boss. Skip Argus and unnecessary detours.
- Eternal: Reach level 68, finish the previous Labs, obtain a normal Offering, then enter once the character has capped resistances, reliable sustain, and tested single-target damage.
- After eight points: Farm the Divine Font, Darkshrines, Argus, special Offerings, and extra Treasure Keys only when the character can absorb the additional risk.
During every first completion, neutralize Izaro's phase mechanics rather than preserving them for extra keys. Take short routes, stop between trap cycles, and use the Altar of Ascendancy before evaluating loot. This sequence puts the permanent character reward ahead of optional profit.
Common Labyrinth Mistakes
- Searching for six Map Trials to unlock Eternal: They have not been required since version 3.16. Previous Labyrinth completions, level 68, and one Offering are the key requirements.
- Expecting a helmet enchantment: The current Divine Font modifies gems. New Labyrinth helmet, glove, and boot enchantments are no longer awarded.
- Assuming Armour stops every trap: Armour helps with physical hits, but not every trap deals a hit. Damage over time, recovery, and movement still matter.
- Entering immediately after a resistance penalty: Monster and Izaro damage can expose uncapped elemental resistances even when the trap rooms feel manageable.
- Rushing an unseen pattern: Trap cycles are predictable. Watching once usually saves more time than restarting an entire run.
- Leaving Izaro mechanics active by accident: Unresolved mechanics can strengthen later phases. Neutralize them on a first completion.
- Taking every side path: Silver Doors, Argus, puzzles, and Darkshrines can be useful, but each detour adds exposure before the Ascendancy reward is secured.
- Forgetting to use the Altar: Defeating Izaro is not the final administrative step. Claim or allocate the Ascendancy reward before leaving the room.
Conclusion
Path of Exile 1 Labyrinth progression is straightforward once old information is removed. Complete six campaign Trials for Normal, three for Cruel, and three for Merciless. Then finish the previous difficulties, reach level 68, and spend one Offering to enter Eternal Labyrinth. Each first completion grants two Ascendancy Passive Points, for a total of eight; once a Bloodline is unlocked, those same eight points can be split between the primary Ascendancy and the Bloodline if desired.
Safe completion comes from preparation and controlled movement: cap resistances, bring dependable recovery and Bleeding protection, cross traps one segment at a time, and neutralize Izaro's mechanics during the first two fights. Use direct routes until all Ascendancy Points are secured, then explore Darkshrines, Argus, special Offerings, and additional rewards.
Finally, remember that modern Labyrinth rewards are gem-focused. Traditional Labyrinth equipment enchantments are legacy content, while the Divine Font now creates or selects Transfigured Gems, improves gems, exchanges eligible gems through specific crafts, or converts gems into other rewards. With that distinction clear, the Labyrinth becomes a predictable character milestone instead of a confusing set of outdated requirements.