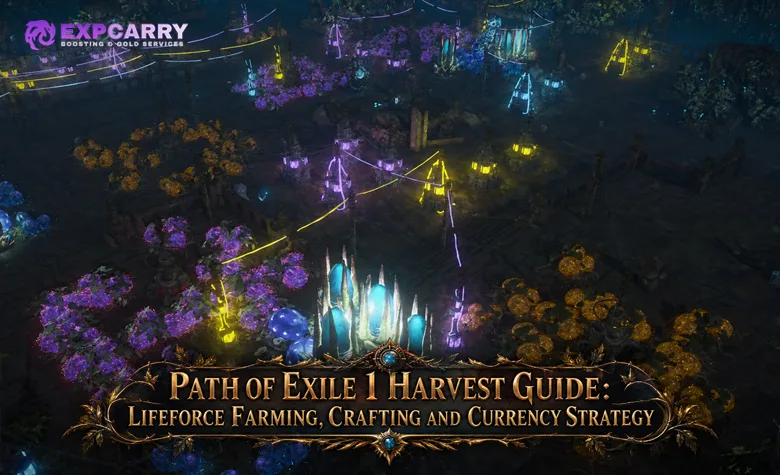
Path of Exile 1 Harvest is both a farming mechanic and a crafting economy. You enter the Sacred Grove from maps, choose which crops to harvest, kill the spawned monsters, collect tradeable Crystallised Lifeforce, and either spend that Lifeforce at the Horticrafting Station or sell it to players who need it for their own crafts. The mechanic becomes profitable when those decisions are connected: crop selection determines the regular Lifeforce you generate, map and Atlas investment determine how much the normal Grove produces, and the market determines whether a craft is worth more than the resources consumed.
The safest Harvest strategy is not to spend every drop immediately. Farm in batches, separate Wild, Vivid, Primal, and Sacred Crystallised Lifeforce, account separately for Crystallised Rancour, price the resources you would otherwise sell, and use them only when a craft has a defined purpose. This guide covers the current PoE 1 Harvest loop in 3.29: crop choice, Crop Rotation, Atlas passives, Harvest Scarabs, map quantity and pack size, Sacred Blossoms and Oshabi, Crystallised Rancour from the Overgrown Grove Atlas Anomaly, useful Horticrafting options, and a practical currency framework for deciding when crafting beats selling.
How Harvest Works in Path of Exile 1
Modern Harvest is much simpler than the original Harvest league. The Sacred Grove can appear inside maps, where each Harvest presents paired crops. You choose one crop to activate, the other normally wilts, and the selected plants become Harvest monsters. Those monsters drop Crystallised Lifeforce that can be stored, traded, or spent later at the Horticrafting Station in your hideout.
The major modern structure came from the 3.19 Harvest rework, which replaced one-use crafting rewards with itemised, tradeable Lifeforce. That change is still the foundation of the system: the Grove is the farming side, while the Horticrafting Station is the spending side.
The Sacred Grove is a crop-choice encounter
When you enter a normal Sacred Grove, inspect both crops before activating either one. Higher-tier plants are more valuable because stronger Harvest monsters generally produce more valuable Lifeforce rewards, and Tier 4 plants are Harvest bosses that can drop Sacred Blossom. If one side clearly contains stronger plants, the higher-tier crop can outweigh a color preference.
If both crops are similar, color becomes the next decision. Wild, Vivid, and Primal Lifeforce pay for different groups of crafts, and their trade prices can diverge. In trade leagues, check the current market instead of assuming that one color is permanently the most profitable.
There are three regular Lifeforce colors
Wild Crystallised Lifeforce comes from purple Harvest plants, Vivid Crystallised Lifeforce from yellow plants, and Primal Crystallised Lifeforce from blue plants. All three are tradeable currency items used at the Horticrafting Station. Sacred Crystallised Lifeforce is a separate high-end resource obtained from Oshabi, while Crystallised Rancour is another special Harvest crafting currency that remains available in 3.29 through the Overgrown Grove Atlas Anomaly.
| Lifeforce | Source | Common crafting themes | Farming decision |
|---|---|---|---|
| Wild Crystallised Lifeforce | Purple Harvest plants | Fire, Life, Attack and selected conversion or utility crafts | Prefer when Wild market value or your planned Wild craft justifies passing on the competing crop. |
| Vivid Crystallised Lifeforce | Yellow Harvest plants | Cold, Physical, Chaos, Speed and several conversion crafts | Prefer when Vivid demand is strong or your project needs repeated Vivid reforges or conversions. |
| Primal Crystallised Lifeforce | Blue Harvest plants | Lightning, Defence, Caster, Critical and influence-related options | Prefer when Primal is more valuable to your build or current market than the alternative crop. |
| Sacred Crystallised Lifeforce / Crystallised Rancour | Oshabi / Overgrown Grove Atlas Anomaly | Premium add/remove and influence crafts / special reforges, modifier conversions and other Rancour recipes | Price these separately from normal juice because they come from special encounters and support different high-value crafts. |
The three regular Lifeforce colors remain the basis of most Harvest crafting, but they do not create a permanent price ranking. Build popularity can suddenly increase demand for one tag, while farmers targeting the same color can increase its supply. Sacred Lifeforce and Crystallised Rancour should be evaluated separately because their acquisition methods and recipe pools differ from ordinary Lifeforce.
The original seed garden is legacy content
Old Harvest guides may still describe planting seeds, connecting Collectors, storing Condensed Lifeforce, placing Dispersers, or building a permanent garden. Those systems belonged to the original Harvest league and are not the current mapping loop. The original Harvest expansion is useful historical context, but its garden-building instructions should not be followed in the live game.
Current players find an already established Sacred Grove in maps. There is no reason to buy old seed infrastructure, plan garden layouts, or save Condensed Lifeforce for crop growth.
How to Choose Harvest Crops

Crop selection should follow a simple hierarchy: first protect unusually valuable high-tier plants, then compare Lifeforce color value, then consider how the choice affects later crops if Crop Rotation is allocated. Normal Harvest and Crop Rotation use different decision logic, so do not mix the two strategies.
Normal Harvest rewards visible crop quality
Without Crop Rotation, crops can naturally contain plants of different tiers. Check both sides of the pair before starting the encounter. A crop with a Tier 4 boss or substantially better plant tiers is usually worth taking even if the competing color is currently slightly more expensive on the market.
When the tier quality is close, select the color you value more. In trade league, price all three regular Lifeforce types in the correct league before a farming batch. In Solo Self-Found, replace market price with internal need: choose the color that pays for the crafts your current gear projects actually require.
Crop Rotation reverses the normal priority
Crop Rotation causes Harvest crops in your maps to begin with Tier 1 plants. Harvesting one color then has a chance to upgrade plants of different colors. The correct sequence is therefore to harvest colors you do not want first and preserve the target color for as late as possible.
The official 3.22 patch notes introduced Crop Rotation with exactly that cross-color upgrade rule. If you are targeting Vivid, for example, you generally consume Wild and Primal crops first so the surviving Vivid crops can receive upgrades. Harvesting the target color early wastes its chance to benefit from later cross-color upgrades.
Crop Rotation is a targeted and higher-variance strategy
Crop Rotation is not automatically more profitable than ordinary Harvest. It trades natural plant tiers for an upgrade chain whose result depends on crop colors, the number of available Harvests, whether useful crops survive, and how many upgrade events land on the color you saved. A weak Grove can produce very little; a favorable sequence can produce a highly upgraded final crop.
Use Crop Rotation when you understand the crop order and deliberately want one color or a high-variance Harvest project. For a simple low-investment farm that prioritizes steady liquid Lifeforce, ordinary Harvest is easier to execute and easier to evaluate.
Best Atlas Passives for Lifeforce Farming
A Harvest Atlas tree should concentrate on three goals: make the Grove appear reliably, increase the number and quality of Harvest monsters, and improve the Lifeforce output of the normal map encounter. The exact route depends on how many Atlas points you have and whether a Harvest Scarab already guarantees the Grove.
Heart of the Grove improves high-tier opportunities
Heart of the Grove gives Harvest crops increased chance to contain a Tier 4 plant and also gives Harvests a chance for the unchosen crop not to wilt. The first effect raises access to Harvest bosses and therefore Sacred Blossom opportunities; the second occasionally lets you take both sides of a crop pair.
This is valuable for both normal Harvest and boss-oriented farming. It is especially relevant when your strategy includes Harvest Scarab of Cornucopia or when Sacred Lifeforce is part of the farming target.
Bumper Crop and Bountiful Harvest add more monsters
Bumper Crop gives the Sacred Grove a chance to contain an additional pair of Harvest crops, while Bountiful Harvest gives harvested plants a chance to spawn an additional monster. Both effects create more opportunities for Harvest monsters and Lifeforce rather than merely increasing the chance to find the mechanic.
These are strong general-purpose nodes for players who have already decided Harvest is a primary mechanic. If you are only touching Harvest occasionally, spending many travel points to reach every Harvest notable can be less efficient than specializing a dedicated Atlas loadout.
Doubling Season directly targets Lifeforce quantity
Doubling Season gives Lifeforce dropped by Harvest monsters in maps a chance to be duplicated. Small Harvest passives can also increase Lifeforce quantity. These effects scale the reward you actually sell or craft with, so they are core choices when Harvest is the main income source.
Players who are still missing enough Atlas passive points to reach the complete Harvest package can use the verified PoE Atlas progression service for unfinished objectives. For self-play, prioritize the passives that improve reward output before adding optional secondary mechanics.
Drought nodes help bias colors
Primal Drought, Vivid Drought, and Wild Drought reduce the chance for the named plant color to grow. Their value comes from suppressing a color you do not want, not from directly increasing a target color. This distinction matters when designing a Crop Rotation setup because the colors harvested first determine which surviving colors receive upgrade chances.
Do not copy a Drought setup blindly. A color that was weak economically last week may become expensive after a popular crafting strategy or build emerges. Recheck Lifeforce prices before committing the Atlas tree to aggressive color bias.
Explore services related to this guide, selected from our Path of Exile catalog.
View All Path of Exile Services


Harvest Scarabs and Map Preparation
Current Harvest has three dedicated Scarabs: the base Harvest Scarab, Harvest Scarab of Doubling, and Harvest Scarab of Cornucopia. They serve different budgets. The base Scarab provides encounter consistency, Doubling converts additional monster durability into duplicated Lifeforce, and Cornucopia targets Tier 4 plants and boss access.
| Scarab | Current effect | Best use | Main risk or cost |
|---|---|---|---|
| Harvest Scarab | Area contains the Sacred Grove | Low-cost Harvest rushing or trees that spend fewer points on natural Grove chance | The Scarab slot is wasted if another source already guarantees the encounter. |
| Harvest Scarab of Doubling | Lifeforce dropped by Harvest monsters is duplicated; Harvest monsters have 100% more Life | Strong builds farming enough Lifeforce per map to justify the Scarab price | Doubling monster Life can destroy hourly efficiency on weak single-target builds. |
| Harvest Scarab of Cornucopia | If the area contains the Grove, it can add up to one additional Tier 4 seed of each type if possible | T4 boss, Sacred Blossom and Oshabi-oriented farming | Higher investment and more dangerous Harvest encounters; not the default low-budget juice farm. |
Scarab choice should be priced as part of the farm. A Doubling Scarab you found yourself is not free: using it has the opportunity cost of selling it. If the duplicated Lifeforce you expect is worth less than the Scarab plus the extra time caused by stronger monsters, sell the Scarab or save it for a better map batch.
Use the base Harvest Scarab for consistency
The base Harvest Scarab guarantees the Sacred Grove. This is ideal for a batch strategy because every map contains the mechanic you allocated Atlas points to support. It can also let you spend fewer Atlas points on encounter chance and redirect those points toward Lifeforce quantity, map modifiers, influence, or another compatible reward layer.
ExpCarry's current PoE 1 Atlas farming guide uses low-cost Harvest as one of the practical 3.29 entry farms. Keep this Harvest article focused on the Grove itself; use the broader Atlas guide when deciding which second mechanic, influence, or map layout to combine with it.
Use Doubling only when the build can absorb the life penalty
Harvest Scarab of Doubling duplicates Lifeforce drops but gives Harvest monsters 100% more Life. The reward is straightforward, but the hidden cost is time. If an ordinary Grove takes one minute and the Doubling version takes three, you may earn more Lifeforce per map while earning less per hour.
Test a small batch before buying many Scarabs. Compare Lifeforce per map, total map time, deaths, and current Scarab cost. Strong single-target damage makes Doubling much more attractive because the additional monster Life barely changes the route.
Cornucopia is for T4 and Sacred Blossom farming
Harvest Scarab of Cornucopia attempts to add Tier 4 seeds of available Harvest types. Tier 4 Harvest bosses can drop Sacred Blossom, so Cornucopia shifts the farm toward Oshabi access instead of merely maximizing ordinary Lifeforce stacks.
Use it when Sacred Lifeforce or boss access has enough value to justify the Scarab. If you only want bulk regular Lifeforce, the cheaper base Scarab or a Doubling setup can be more direct. Price the Blossom and Sacred Lifeforce route separately from normal juice so one rare boss drop does not distort the value of an ordinary Harvest batch.
Map quantity and pack size increase Harvest value
Harvest rewards scale with map quantity and pack size, making well-rolled maps more rewarding when your build can handle them efficiently. Player Item Quantity on your character is not a substitute for these area-level map stats. Sacred Blossom drop chance from Tier 4 bosses also scales with area quantity.
Roll maps for quantity and pack size only as far as your build can run them safely. A dangerous eight-mod map that causes deaths, skips a boss crop, or forces you to abandon the Grove is worse than a lower-investment map completed quickly. Harvest monsters can become dangerous when strong map modifiers stack with high-tier plants.
A Fast Lifeforce Farming Loop
Harvest farming becomes efficient when most of the session is spent opening maps, reaching the Grove, killing crops, and depositing Lifeforce. Long detours, constant price checks, and over-clearing maps can erase the advantage of a liquid mechanic.
- Price the batch before starting. Record map, Scarab, fragment, rolling, and Map Device costs at current market value.
- Prepare safe quantity and pack size. Roll maps for meaningful area rewards without accepting modifiers your build cannot handle.
- Guarantee or raise Grove access. Use the base Harvest Scarab when it is cheaper and more efficient than relying on natural spawn chance.
- Reach the Grove quickly. If your route includes boss-first or altar value, do only the steps that improve the planned farm.
- Inspect every crop pair. In normal Harvest, protect the better visible plant tiers; with Crop Rotation, plan the full color order before clicking.
- Kill and loot efficiently. Do not leave Lifeforce behind, but avoid unnecessary inventory sorting inside the Grove.
- Exit when the strategy is complete. A Harvest rush stops being a Harvest rush if every map is full-cleared for unrelated low-value drops.
- Price the output after the batch. Compare Lifeforce revenue with total inputs and total session time, not with one lucky map.
If the objective is a fixed amount of farming time rather than learning or optimizing one specific map route, ExpCarry's PoE Hourly Boost covers agreed farming and mapping goals. For self-play, keep the same accounting discipline: twenty measured maps are more informative than remembering the best Grove from the session.
Choose speed before extreme map investment
Harvest output per map rises with investment, but profit per hour can fall when preparation becomes too expensive or monsters take too long to kill. Start with a repeatable low-cost setup, establish your Lifeforce per hour, then add Doubling, map quantity, or pack size and measure whether the result actually improves.
A high-investment setup should earn its extra cost through larger Lifeforce returns, better T4 access, or valuable overlap with another mechanic. If it only makes the map harder, return to the cheaper route.
Track each Lifeforce color separately
Do not value all Harvest juice at one average rate. Wild, Vivid, and Primal can trade at different ratios, and a color-targeted strategy can look better or worse depending on the current market. Record each color separately and price it in bulk after the batch.
This also makes Crop Rotation testing possible. Compare a normal Harvest batch with a Crop Rotation batch using actual Lifeforce by color, not only the total number of units dropped. A strategy that produces fewer total units can still win economically if a larger share lands in the color with stronger current demand.
Sacred Blossom, Oshabi, Sacred Lifeforce and Crystallised Rancour

The normal high-end Harvest loop begins with Tier 4 plants. The three regular Harvest bosses are Ersi, Mother of Thorns for Wild, Janaar, the Omen for Primal, and Namharim, Born of Night for Vivid. These bosses can drop Sacred Blossom, and the Blossom drop chance scales with area quantity.
Sacred Blossom opens the Oshabi encounter
Place a Sacred Blossom in the Map Device to open the Oshabi, Avatar of the Grove encounter. This is separate from an ordinary map Grove. The modern access method replaced the original Harvest-league system where players grew the Heart of the Grove over many cycles.
Heart of the Grove Atlas investment and Cornucopia are useful because they increase access to Tier 4 plants, which gives more attempts at the Sacred Blossom step. The Blossom itself is tradeable, so you should also compare its sale price with the expected value of running Oshabi.
Sacred Lifeforce and Crystallised Rancour are premium crafting inputs
Sacred Crystallised Lifeforce is obtained from Oshabi and is used together with large amounts of regular Lifeforce for premium Horticrafting options such as tagged add/remove crafts and an influence reforge. Crystallised Rancour is a separate special resource. In 3.29 it can be obtained from Tier 4 Harvest encounters inside the Overgrown Grove Atlas Anomaly and is used for additional reforges, resistance or elemental-damage conversions, and other special recipes. Atlas Anomalies are separate from ordinary map Groves and are not modified by your Atlas Passive Tree or fragments.
Do not consume either special resource merely because you own it. Price the Sacred Lifeforce or Crystallised Rancour, the regular Lifeforce, the base item, any meta-crafts already invested, and the expected failure or recovery cost before clicking an expensive craft. If selling the resource funds a guaranteed upgrade with more character value, keeping the crafting project for later can be the better economic decision.
Best Harvest Crafts to Spend Lifeforce On
Harvest crafting is strongest when it reduces randomness in a project that already has a good base and a defined target. The Horticrafting Station becomes available after you complete a Harvest plot and then functions like a permanent crafting bench in your hideout: select a craft, supply the required Lifeforce and, where required, Sacred Lifeforce or Crystallised Rancour.
For the fundamentals of bases, prefixes, suffixes, modifier tiers, influences and general crafting risk, use the ExpCarry PoE 1 crafting guide. Harvest should be treated as one specialized crafting tool inside that larger system.
| Harvest craft type | Good use | When to avoid it |
|---|---|---|
| Tagged Rare reforge | Correct base has several acceptable outcomes sharing a supported tag; regular Lifeforce covers the core tags while some additional tags require Crystallised Rancour | You need one exact rare modifier and most possible outcomes are unusable. |
| Resistance or elemental-damage conversion | Item is already strong but has an eligible elemental resistance or damage modifier of the wrong element | The item has no eligible modifier, replacing it is cheaper, or the value does not justify the regular Lifeforce plus Crystallised Rancour cost. |
| Fragment or currency-category conversion | You have stranded resources in one supported type and need another type from the same category | The expected conversion value is worse than simply trading the original stack. |
| Add/remove tagged modifier | Eligible non-Influenced endgame item has valuable affixes and a carefully planned target mod pool | You have not checked every removable modifier, open affix, meta-craft interaction and failure state. |
| Influence reforge or Rancour-specific craft | The item is specifically prepared for an influence reforge or one of the special Rancour recipes | You are experimenting on an expensive item without confirming eligibility, resource cost and possible outcomes. |
Tagged reforges are the workhorse crafts
Basic Harvest reforges reroll a Rare item while guaranteeing at least one modifier with the selected tag where a valid tagged modifier exists. Regular Lifeforce covers the familiar Fire, Cold, Lightning, Physical, Life, Defence, Chaos, Attack, Caster, Speed and Critical options. Crystallised Rancour expands the current recipe pool with additional special reforges, including options for tags such as Minion, Elemental, Attribute, Mana and Drop.
For example, a Life reforge can be reasonable when an armour piece needs Life plus any combination of useful resistances and attributes. It is a poor plan when you need one exact influence modifier that the basic reforge cannot guarantee.
Resistance and elemental-damage swaps now use Crystallised Rancour
Harvest still provides deterministic elemental conversion utilities, but the current recipes require regular Crystallised Lifeforce together with Crystallised Rancour. They can convert eligible Fire, Cold or Lightning resistance modifiers, and current Rancour recipes also include similar-tier elemental damage conversions. These crafts are valuable when the item is otherwise excellent but one eligible elemental modifier is wrong for the finished build.
Always compare the complete craft cost with replacing the item. Converting a useful modifier on a high-value Rare can save an expensive rebuild; using Rancour on mediocre early-map gear is usually poor value. Check the item's exact modifier and eligibility before buying the resources.
Premium add/remove crafts need a complete plan
High-end Harvest add/remove crafts can remove a random modifier and add a modifier with a chosen tag on an eligible non-Influenced Rare item. They cost large amounts of the relevant regular Lifeforce plus Sacred Crystallised Lifeforce, so they should be part of a planned sequence rather than an exploratory click.
Influenced items use a separate Harvest reforge that includes an Influence modifier; do not treat it as the same operation as the tagged add/remove recipes. Harvest also interacts with meta-crafting restrictions, so before an expensive craft, verify prefix and suffix state, modifier tags, item eligibility, meta-craft rules and every realistic failure state. The old Harvest option that Synthesised an item is no longer part of the 3.29 crafting pool.
Use conversions when they remove a real acquisition bottleneck
Harvest can transform several categories of resources, including supported Fossils, Oils, Catalysts, Essences, Timeless Splinters or Emblems, Delirium Orbs, league-specific Astrolabes, selected fragments and other supported materials. These crafts are strongest when you have a surplus of one result and an immediate shortage of another. They are weaker when the market lets you sell the original stack and buy the desired resource at a better effective ratio.
The old Harvest Scarab reroll craft was removed during the 3.24 Scarab rework. In addition, the Harvest craft that Synthesised an item was removed in 3.29. If an old crafting list recommends either option, that instruction is outdated.
When to Craft and When to Sell Lifeforce
The economic decision is not "Is this Harvest craft good?" It is "Is this craft worth more than selling the Lifeforce, Sacred Lifeforce or Crystallised Rancour and buying another upgrade?" Harvest resources are liquid enough to have a visible opportunity cost, especially when a recipe consumes one of the special currencies.
Use Lifeforce when the project is defined
Spend Harvest resources when the item base is correct, the item level and influence state are correct, the desired outcome is known, and the craft has enough acceptable results to justify its expected cost. Deterministic fixes are easier to evaluate. Repeated reforges require a larger calculation because every failed roll consumes more resources.
A useful formula is: expected crafting cost equals base cost plus Harvest resources consumed per attempt multiplied by expected attempts, plus meta-craft costs and recovery costs. Compare that result with the realistic price of buying the finished item.
Sell Lifeforce when liquidity is more useful than variance
Sell when you do not have a defined craft, the base item is wrong, the completed upgrade can be bought more cheaply, or current Harvest-resource prices are high enough to fund a more important guaranteed upgrade. Selling is also sensible when you need capital for map supplies, Scarabs, build-enabling items or another crafting system.
The ExpCarry PoE 1 Currency Guide applies the same principle to core currency: a resource is worth using only when the expected result beats its trade value or solves an immediate progression problem more efficiently.
Count the value of Lifeforce you farm yourself
Self-farmed Harvest resources are not free in trade league. If 10,000 Lifeforce could be sold, spending those 10,000 units on a craft has the same opportunity cost as buying them from another player. The same logic applies even more strongly to Sacred Lifeforce and Crystallised Rancour because each unit may carry substantial market value.
If you need additional liquid trade capital for a planned endgame item or crafting sequence, ExpCarry's PoE Divine Orb option is the related currency service. For self-farming, keep Harvest revenue liquid until a specific craft offers more expected value than a guaranteed purchase.
Solo Self-Found uses the same logic without a sale price
In SSF, replace "sell value" with "next-best use." Harvest resources still have opportunity cost because spending them on one item means they are unavailable for another. Use rare colors, Sacred Lifeforce and Crystallised Rancour on progression blockers or high-impact projects rather than repeatedly rerolling replaceable gear.
SSF also makes color targeting more valuable. If one craft is the only practical route to fix a key item, bias farming toward the Lifeforce that craft requires instead of maximizing a theoretical trade value that does not exist in your league.
Harvest Currency Strategy by Progression Stage
The right use of Harvest changes as the character progresses. Early mapping favors liquidity and cheap fixes; established characters can justify repeated tagged reforges; advanced crafters can justify Sacred Lifeforce, Crystallised Rancour and meta-crafting because the item value is high enough to support the additional cost and risk.
Early Atlas: sell most Lifeforce and fix obvious problems
Early in maps, character upgrades usually have very high value per currency spent. A few thousand Lifeforce sold in bulk may buy a weapon, six-link, resistance fix or defensive item that improves every future map. Use cheap Harvest crafts only when they solve an immediate gear problem more cheaply than trade.
At this stage, the farming priority is consistency: enough Atlas points for Harvest rewards, safe maps, a guaranteed Grove when economical, and fast liquidation. Do not accumulate expensive crafting projects before the build can farm comfortably.
Established farmer: batch the juice and compare projects
Once your core gear is stable, save larger Lifeforce batches and evaluate several crafting projects at once. A tagged reforge becomes attractive when you already own the correct fractured, influenced, or high-item-level base for the specific recipe you intend to use and multiple outcomes are upgrades or saleable results.
Keep separate stash goals for farming capital and crafting capital. If using all Lifeforce on one item leaves you unable to buy the next Scarab batch, the craft is too large for the current bankroll. Reserve enough liquid currency to continue the farming loop even after a crafting attempt fails.
Endgame crafter: price every failure state
Premium Harvest crafting can be extremely powerful, but its correct comparison is not the cost of one successful click. Include failed add/remove outcomes, replacement bases, meta-crafts, Sacred Lifeforce, Crystallised Rancour, regular Lifeforce, and the price of restoring a recoverable item state.
Profit crafting should use realistic sale prices, not the highest listing on trade. An item listed for a large amount but unsold for days is not equivalent to liquid currency. Harvest is profitable when the expected sale value after failure costs remains above the complete input cost.
Common Harvest Farming Mistakes
Harvest is mechanically simple enough that most losses come from economic, crafting or routing mistakes rather than from misunderstanding combat. Correcting these errors usually improves profit without changing the build.
Choosing crops only by color.
In normal Harvest, check plant tiers first. A valuable Tier 4 or stronger crop can be worth more than a small current price advantage for the other color.
Using Crop Rotation like normal Harvest.
Crop Rotation starts crops at Tier 1 and rewards harvesting unwanted colors first. Taking your target color early removes its opportunity to receive later upgrades.
Assuming one Lifeforce color is always best.
Trade ratios change with crafting demand and farmer supply. Price Wild, Vivid and Primal again before a large batch.
Using Doubling on a build with poor single-target damage.
The Scarab duplicates Lifeforce but also gives Harvest monsters 100% more Life. Longer fights can erase the extra reward per map.
Treating self-found Scarabs and Harvest currency as free.
Regular Lifeforce, Sacred Lifeforce, Crystallised Rancour and Scarabs all have opportunity cost in trade league.
Spending Sacred Lifeforce or Crystallised Rancour without checking the full craft.
Premium Harvest crafts are expensive and some outcomes can damage an otherwise valuable item. Confirm eligibility, modifiers, meta-crafts and failure states first.
Following old seed-garden guides.
Planting seeds, Condensed Lifeforce infrastructure and permanent garden layouts are legacy Harvest mechanics, not the current map encounter.
Using removed crafting advice.
The Harvest craft that rerolled Scarab stacks was removed in 3.24, and the Harvest Synthesise craft was removed in 3.29.
Path of Exile 1 Harvest FAQ
These answers focus on the practical questions players encounter while farming Harvest resources or deciding whether to craft with them.
What are the main Harvest Lifeforce types?
Wild Crystallised Lifeforce is associated with purple crops, Vivid with yellow crops, and Primal with blue crops. Sacred Crystallised Lifeforce is a separate high-end resource from Oshabi. Crystallised Rancour is another special Harvest crafting currency, obtained in 3.29 through the Overgrown Grove Atlas Anomaly.
How do I unlock the Horticrafting Station?
Find the Sacred Grove in maps and complete a Harvest plot. The Horticrafting Station can then be placed in your hideout and used with the required Harvest resources.
Do map quantity and pack size increase Harvest rewards?
Yes. Harvest rewards scale with map quantity and pack size. Player Item Quantity on your character does not replace these area-level stats, and Sacred Blossom drop chance from Tier 4 bosses also scales with area quantity.
What does Harvest Scarab of Doubling do?
It duplicates Lifeforce dropped by Harvest monsters in the area, but those monsters also have 100% more Life. It is best when your build can absorb the extra monster durability without losing much map speed.
How does Crop Rotation work?
Crops begin at Tier 1. Harvesting one color can upgrade plants of different colors, so harvest colors you do not want first and preserve your target color for later.
How do I fight Oshabi?
Tier 4 Harvest bosses can drop Sacred Blossom. Use the Blossom in the Map Device to open the Oshabi encounter.
Should I sell Harvest resources or use them for crafting?
Sell when you have no defined positive-value craft or a guaranteed trade upgrade is better. Use them when the craft fixes a valuable item efficiently or the expected crafting value exceeds the Lifeforce, special-resource, base and failure costs.
Why did my Harvest appear to drop no Lifeforce?
First check whether Refiner's Bargain or another relevant Atlas setup is converting regular Lifeforce instead of granting it normally, then check the loot filter and the exact map and Atlas configuration. Individual low-tier plots can also produce much less than a strong high-tier Harvest, so judge the setup across a batch rather than one encounter.
Conclusion
Path of Exile 1 Harvest works best as one connected farming and crafting economy. In normal Harvest, choose crops by plant quality first and Lifeforce value second. With Crop Rotation, reverse the logic by harvesting unwanted colors first and preserving the target color for upgrades. Scale normal map Harvest with Atlas passives, safe map quantity and pack size, and Scarabs that match your build: the base Scarab for consistency, Doubling for strong characters that can handle extra monster Life, and Cornucopia when Tier 4 bosses and Sacred Blossom access are the goal.
Once the resources reach your stash, treat them as currency before treating them as crafting material. Use regular tagged reforges when they solve defined problems, account for Crystallised Rancour when using current special reforges or elemental conversions, reserve Sacred Lifeforce and premium add/remove or influence crafts for planned endgame projects, and sell Harvest resources whenever their liquid value buys a larger guaranteed upgrade. The best Harvest farmer is not the player who spends the most Lifeforce; it is the player who knows when the crop, craft, Scarab, special resource and market price all justify the next click.