




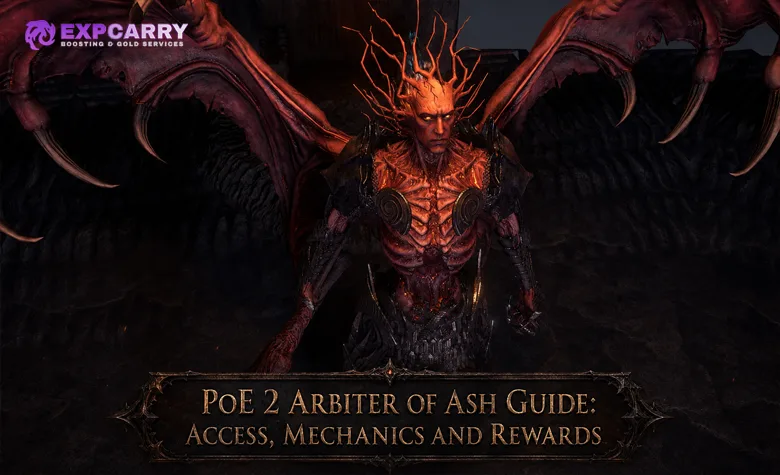
The Arbiter of Ash is the first Fortress Pinnacle Boss in the current Path of Exile 2 endgame route. The encounter takes place in the Burning Monolith and tests movement, visual recognition, recovery discipline, and sustained single-target damage. It is not simply a fire-resistance check: the boss combines physical and fire damage with arena-wide safe-zone mechanics, projectile patterns, recovery denial, Chilled Ground, and temporary cold or chaos damage bonuses.
This guide covers the current quest and repeatable access routes, build readiness, both combat phases, the most dangerous attacks, recovery after mistakes, notable rewards, and a practical repeat-farming loop. It deliberately excludes the retired Arbiter Atlas tree, the old difficulty ladder, and the obsolete Calamity Fragment route. Players who need broader progression support can compare current Path of Exile 2 assistance options, while the sections below remain focused on completing the encounter yourself.
PoE 2 Arbiter of Ash Quick Answer
Reach the Precursor Fortress, collect the two quest Crisis Fragments from its Western and Eastern Enigma Chambers, and use them with the fragment already installed at the Burning Monolith. This opens the lower-level quest encounter with unlimited revivals. Later kills require one Ancient, one Faded, and one Weathered Crisis Fragment from the Iron, Copper, and Stone Citadels. The repeatable encounter is higher level and permits only two revivals.
- Prioritise capped Fire Resistance, a reliable effective life pool, physical mitigation, movement speed, and recovery that works outside damage windows.
- Treat Flame Seed circles as temporary safe zones: the explosion covers the area outside each circle.
- For Flaming Gales, identify the clear strip before the red mist becomes lethal and move with each new orientation.
- During the sword phase, counter the active Chill or Blackflame Seed with the opposite seed instead of trying to ignore the arena-wide effect.
- Do not spend repeat fragment sets until you can identify the safe strip, seed circles, sword beam, and recovery-denial state on sight.
What Changed in the Current Endgame
Content Update 0.5.0 moved the Burning Monolith and the Arbiter of Ash into the Fortress. It also separated Pinnacle encounters into deterministic quest versions and harder repeatable versions. The same update removed Primary, Secondary, and Tertiary Calamity Fragments from the obtainable access loop. GGG records these changes in its Content Update 0.5.0 patch notes.
The practical result is simple: the Arbiter of Ash is no longer the final core Atlas boss, does not have a dedicated Arbiter passive tree, and does not use a four-step difficulty ladder. The first kill is a Fortress progression objective and unlocks stronger Tablet crafting. Repeat kills use normal Crisis Fragments and exist primarily for boss rewards. Any guide that tells you to allocate Arbiter points, raise the boss to Difficulty 4, or assemble Calamity Fragments describes an earlier endgame.
How to Unlock the Quest Encounter
The quest route begins after the Fortress rises on completion of your first Tower. The Burning Monolith is now a fixed Fortress location, so the first Arbiter attempt does not require finding all three original Citadels in the infinite Atlas.
- Enter the Precursor Fortress and progress toward the Burning Monolith.
- Inspect the Monolith gate. One of its three quest fragments is already installed on the first visit.
- Clear the route to the Western Enigma Chamber and obtain its quest Crisis Fragment.
- Clear the route to the Eastern Enigma Chamber and obtain the other quest Crisis Fragment.
- Return to the Burning Monolith, install the two missing fragments, and open the central gate.
This entry opens the quest version of the boss at the lower current encounter level. It allows unlimited revivals, making it the correct place to learn safe-strip recognition, Flame Seed timing, and the phase-two sphere response. For a compact view of this route and every other current Pinnacle key chain, use the PoE 2 Pinnacle Boss access hub.
Repeat Access and Crisis Fragment Sources
After the quest clear, the Burning Monolith requires a complete set of three normal Crisis Fragments. Each fragment comes from a different original Citadel boss. These items are tradable, so a farmer can run all three Citadel types, buy a missing fragment, or sell an incomplete set instead of waiting for one specific Citadel.
| Citadel | Boss | Fragment | Repeat-farm role |
|---|---|---|---|
| Iron Citadel | Count Geonor | Ancient Crisis Fragment | One of three required Monolith keys |
| Copper Citadel | Jamanra, the Abomination | Faded Crisis Fragment | One of three required Monolith keys |
| Stone Citadel | Doryani, Royal Thaumaturge | Weathered Crisis Fragment | One of three required Monolith keys |
Insert one fragment of each type at the Burning Monolith to start the Infinite Farm version. This encounter is higher level than the quest version and gives two revivals. The three old Calamity Fragments are not an alternative current key set, and there is no separate Calamity-based Uber Arbiter route to target.
Arbiter of Ash Readiness Checklist
A build is ready when it can survive an ordinary hit without losing control of the pull, cross the arena quickly, recover between patterns, and maintain single-target damage without standing still through telegraphs. Character level alone does not prove readiness. The quest encounter is level 74, while the repeatable version is level 82, but gear quality and execution matter more than matching a nominal level.
| Readiness area | Minimum practical standard | Why it matters |
|---|---|---|
| Fire defence | Cap Fire Resistance and add maximum resistance or other fire mitigation when the build can do so efficiently | Most arena hazards and many direct attacks are fire based |
| Physical defence | Use a real mitigation layer rather than relying only on Fire Resistance | Sword slashes and several attack components still carry physical damage |
| Cold and chaos coverage | Do not enter with severely neglected Cold or Chaos Resistance | The sword phase can grant the boss temporary extra cold or chaos damage |
| Effective life | Survive a non-telegraphed hit with enough remaining pool to reposition | A build that dies to every minor projectile cannot learn overlapping mechanics |
| Ailment response | Bring a dependable answer to Ignite or enough protection to survive its follow-up damage | A direct hit can remain dangerous after the player has left the impact area |
| Movement | Use responsive movement speed and a movement option you can control precisely | Flaming Gales and sequential Flame Seeds demand fast, accurate relocation |
| Recovery | Carry a dependable recovery plan and know when Blackflame disables it | Blindly pressing a Life Flask during recovery denial does not solve the danger |
| Damage uptime | Deal stable boss damage in short windows instead of requiring long stationary channels | The transition restores the boss and phase two reduces safe uptime |
If the character fails several rows, improve the build before consuming repeat sets. A player who wants help converting a mapper into a boss-ready setup can use contextual PoE 2 build preparation support, but the most valuable preparation remains learning which defensive gap caused the last death.
Arena Rules and Damage Windows
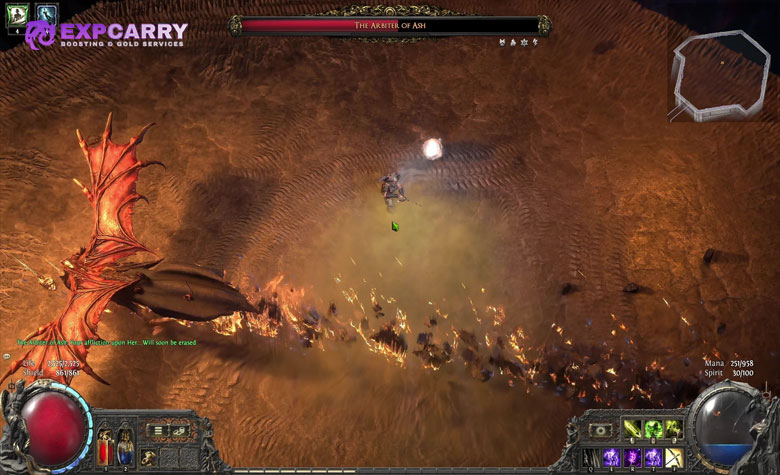
The arena is circular, and many lethal patterns are easier to read when the boss remains visible near the centre of the screen. Avoid hugging the outer edge without a reason: it reduces your view of projectiles, makes the next safe strip harder to locate, and can turn a short move into a full-arena sprint. Mid-range positioning gives melee builds room to re-enter and ranged builds enough time to read projectiles. The Burning Monolith does not grant experience, and deaths inside it do not remove experience, so learning pulls should be judged by mechanic progress rather than the experience bar.
- Damage during long beam channels, after a completed slam, and after a Flame Seed explosion has resolved.
- Stop attacking as soon as red mist, a falling seed, a sphere activation, or a flight animation begins.
- Do not spend all movement charges on routine repositioning. Keep one response available for a distant safe zone or overlapping pattern.
- Use controlled steps through projectile gaps. Repeated panic rolls can move you from one safe lane into the next projectile ring.
- Keep ground effects and the boss weapon in view. Phase-two failures often happen because the player watches the health bar instead of the sword.
Some attacks are intentionally poor candidates for defensive shortcuts. The falling Flame Seed cast cannot be interrupted, and Flaming Gales cannot be blocked, so solve both through positioning. Current telegraphs are more forgiving than their original versions: the official 0.5.4b boss improvements extended the first Flame Seed window after the large laser and moved the lane-pattern voice cue to the start of the skill.
Phase One Mechanics
The first active phase teaches the visual language used throughout the fight. The Arbiter uses a forward fire beam, slow projectiles, projectile-producing orbs, Flame Seeds, Flaming Gales, sword attacks, and aerial slams. The safest approach is to circle at mid-range, punish the end of a committed animation, and immediately give up damage uptime when an arena mechanic begins.
- Fire Beam: the Arbiter channels a long beam forward. Move perpendicular to the line, then attack from the side or rear while the channel finishes.
- Bullet Hell: slow fire orbs travel through the arena and periodically release smaller projectiles. Move through visible gaps and avoid standing where several projectile paths overlap.
- Falling Flame Seed: a seed descends into a marked ring. The large explosion hits outside that ring, so enter the circle before detonation and leave only after the blast resolves.
- Falling Flame Seed Combo: several seeds arrive in sequence as the boss relocates. Track the next circle, move after the current detonation, and avoid committing to a long cast between circles.
- Flaming Gales: red mist covers most of the arena while a clear strip remains. Move into the strip before the gale triggers, then turn with the boss and find the next strip when the pattern changes direction.
- Sword Combo and Sword Slash: the boss advances through multiple cleaves or creates a forward shockwave. Move around the boss rather than retreating in a straight line through the full sequence.
- Flying Slam: the Arbiter leaves the ground and lands in a large area. Keep moving until the landing marker is committed, then cross out of the impact zone.
The main phase-one failure is treating a safe circle or clear strip as a place to stand permanently. These are temporary solutions to one detonation. The boss can layer another attack over the safe area, so keep watching his weapon and be ready to delay entry until the beam or slash has passed.
Phase Transition and the Full Heal
Near the middle of the encounter, the Arbiter becomes immune, returns to the centre, changes from the hand sceptre to a sword, and begins the second phase. Current encounter tuning also restores the boss to full life during this transition. The official Content Update 0.4.0 notes confirm both the revised transition and the Tablet-crafting unlock tied to defeating the boss.
Do not spend long cooldowns into the immunity animation or assume the displayed mid-fight health means the kill is nearly complete. Use the transition to refill resources that can recover, reposition toward mid-range, locate the first sphere pair, and prepare for overlapping sword mechanics. A build with weak sustained damage may feel comfortable in phase one and still fail because the second health bar must be cleared under much lower uptime.
Phase Two Mechanics
Phase two retains earlier attacks and adds sword-beam combinations, chain-reacting projectile rings, Chill and Blackflame Seeds, enhanced Flame Seed traps, and a multi-slam sequence. The priority changes from maximising damage to resolving the arena state first. Spheres and safe zones control whether recovery and movement remain functional; the boss can be damaged after those problems are stabilised.
- Sword Beam: the Arbiter points the sword and projects a long beam while a wide gale occupies much of the arena. Leave the weapon line first, then remain inside the surviving clear lane.
- Donut Bullet Hell: a flaming orb emits rings of projectiles. Contact can trigger a chain reaction across the ring, so move through a visible gap instead of clipping the edge and trying to tank several explosions.
- Chill Seed: when the boss activates the white sphere, Chilled Ground covers the arena and his attacks gain extra cold damage for a limited duration. Reach the opposite Blackflame Seed to cancel the persistent ground state.
- Blackflame Seed: when the boss activates the purple sphere, the arena effect prevents Life and Energy Shield Recovery, and boss hits can apply additional recovery denial for a limited duration. Reach the opposite Chill Seed, avoid further hits, and recover only after the effect ends.
- Slow Flame Seed: a large safe ring appears, but the Arbiter may fire a Sword Beam through it before the outer explosion. Wait near the ring, let the beam clear, and enter during the remaining window.
- Combo Slam: the boss crosses the arena with a line of fire and follows with three aerial slams of increasing area. Keep moving between committed impact zones and save your longest movement option for the later, larger landing.
The sphere response is not a damage race. The activated ground effect persists until the opposite seed cancels it, while the boss damage bonus is temporary. If Blackflame is active, prioritise not being hit because normal Life and Energy Shield recovery can be unavailable. If Chill is active, shorten animations and stop greedily attacking because the action-speed penalty makes familiar dodge timings later than expected.
Most Dangerous Attacks and Correct Responses
The following table condenses the attacks most likely to end an otherwise controlled attempt. The response column describes a repeatable movement rule rather than a build-specific immunity or assumed tank threshold.
| Attack | Primary telegraph | Correct response | Common failure |
|---|---|---|---|
| Flaming Gales | Red mist fills the arena except for a narrow strip | Enter the clear strip and follow its new direction on each repetition | Trying to block the gale or reacting after the strip has rotated |
| Falling Flame Seed | A descending seed and a marked circular zone | Enter the circle before the outside detonation | Running away from the marker because it resembles hostile ground |
| Slow Flame Seed with Sword Beam | Large safe ring while the sword lines up with it | Wait outside the beam line, then enter after it passes | Entering the ring immediately and being pinned by the beam |
| Donut Bullet Hell | Central orb emits a complete projectile ring | Identify one gap and cross it with a single controlled movement | Touching one projectile and triggering an overlapping chain |
| Blackflame Seed | Purple sphere activation and dark arena ground | Touch the opposite seed, avoid hits, and wait for recovery to return | Spamming recovery while its effect is disabled |
| Chill Seed | White sphere activation and chilled arena ground | Touch the opposite seed and use shorter actions until the damage bonus expires | Using normal timing while action speed is reduced |
| Combo Slam | Flight, a line across the arena, then repeated landings | Move after each landing is committed and preserve mobility for the largest slam | Rolling too early and having no response for the final impact |
| Sword Beam | The sword points forward before the beam and gale | Sidestep the weapon line, then settle into the surviving lane | Retreating directly away while remaining aligned with the beam |
Positioning by Build Type
Every build solves the same arena, but the safest damage window changes with range and setup time. The goal is not to force identical positioning; it is to preserve visibility, avoid long animation locks, and reach temporary safe zones without crossing the boss unnecessarily.
- Melee builds should orbit close enough to move behind beam attacks but far enough to see the sword and ground rings. Attack after the end of a cleave sequence, not during the first swing.
- Ranged builds should use mid-range rather than the arena edge. Extra distance helps with projectiles, but excessive distance makes Flame Seed circles and rotated gale strips harder to reach.
- Minion builds should keep the character focused on mechanics instead of following the boss into every reposition. Refresh essential commands during safe channels and preserve movement for the player.
- Channelled or setup-heavy builds should divide their rotation into short packets. Cancel damage when a seed begins falling rather than hoping the cast finishes before detonation.
- High-recovery builds must still respect Blackflame. Recovery denial temporarily removes the layer that normally makes small hits safe.
How to Recover After a Mistake
Recovery begins by naming the current problem. Do not respond to every mistake with the same flask and dodge sequence. A projectile hit, Chilled Ground, Blackflame, a missed safe strip, and a failed pull require different corrections.
- After a minor hit, stop attacking, move perpendicular to the next boss-facing line, and recover during a committed beam or completed slam.
- After a heavy hit without recovery denial, create distance without moving to the extreme edge. Restore the life or Energy Shield buffer before resuming damage.
- During Blackflame, cancel the arena effect with the opposite seed and avoid additional boss hits. Do not judge a Life Flask or regeneration layer as broken while recovery is explicitly disabled.
- During Chilled Ground, cancel it with the opposite seed and use shorter skills until normal action speed returns. A familiar movement input may complete too slowly under Chill.
- If a beam crosses a Flame Seed circle, wait beside the ring, let the beam pass, then enter. The correct recovery is delayed entry, not a desperate early roll into the safe zone.
- If projectile rings overlap, stop circling blindly. Find one visible gap, cross once, and reposition after the ring passes.
- After death, identify one cause before reviving: missed strip, wrong seed, early ring entry, movement charge starvation, or insufficient raw defence. Change one behaviour on the next pull.
The quest version is designed for learning because it allows unlimited revivals. The repeat encounter offers only two revivals, so repeated deaths to the same visual cue are a signal to return to the quest lesson, review the mechanic, or improve the build before spending another full fragment set. A new pull should be treated as a clean attempt; do not plan around preserving partial boss damage through death.
Rewards and First-Kill Progression
The first clear provides a permanent endgame progression benefit: it unlocks the ability to craft Tablets beyond two modifiers, up to the current Tablet limit. This is the reliable reason to complete the quest encounter even if the character is not yet ready to farm the repeat version efficiently. The boss no longer awards points for a dedicated Arbiter tree because that tree was removed.
The repeat encounter's named reward pool contains build-defining items rather than one universally best drop. Notable outcomes include Morior Invictus, Solus Ipse, Sine Aequo, Ab Aeterno, Sacred Flame, and Prism of Belief. The Arbiter can also provide Arbiter's Ignition, other Lineage Supports, higher-level Uncut Gems, and the Arbiter's Reliquary Key. Exact availability, weighting, rolls, and market value can change with live balance and economy conditions, so no named item should be treated as guaranteed unless the game explicitly marks it that way.
| Reward | What makes it relevant | Evaluation rule |
|---|---|---|
| Morior Invictus | Defensive body armour with multiple Augment Sockets and random socket modifiers | Judge the actual socket modifiers, not only the item name |
| Solus Ipse | Helmet that expands how additional copies of Lineage Supports can be used across skills | Value depends on the build's Lineage setup and attribute budget |
| Sine Aequo | Gloves built around faster Immobilise buildup and damage against Immobilised enemies | Strong only when the build can exploit Immobilise consistently |
| Ab Aeterno | Boots with a distinctive Dodge Roll and movement tradeoff | Read the full interaction before replacing conventional boots |
| Sacred Flame | Sceptre for fire-focused damage and allied Presence effects | Compare the roll and whether the build benefits from its aura package |
| Prism of Belief | Corrupted Diamond that grants levels to one specific skill | The selected skill and roll determine usefulness |
| Arbiter's Ignition | Boss-specific Lineage Support for Fire Spell skills that Ignite | Check compatibility with the exact supported skill and Archon plan |
For farming decisions, price the exact roll rather than relying on a generic loot-list ranking. A poorly matched Prism of Belief can be less useful than a well-rolled armour piece for the current market, while a niche Lineage Support may gain value when popular builds change.
Repeat Farming Strategy
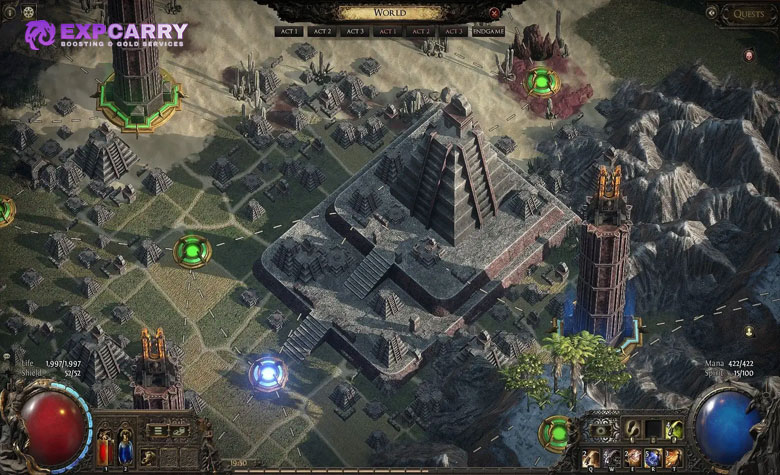
Repeat farming is a conversion problem: turn three different Citadel clears or purchased fragments into one Monolith attempt, then convert that attempt into a kill often enough to justify the input. Because fragment prices and unique values move with the league economy, there is no evergreen fixed-profit claim.
- Track Ancient, Faded, and Weathered fragments separately so duplicate stock does not look like complete sets.
- Compare the cost of the missing fragment with the value of selling your incomplete stock. Trading can be more efficient than searching indefinitely for one Citadel.
- Learn the quest fight before opening repeat sets. Two repeat revivals leave little room for basic pattern discovery.
- Batch several complete sets only after the kill is consistent. Consecutive pulls preserve timing memory and reduce preparation overhead.
- Record the failure category after every loss. If the same mechanic ends two runs, pause fragment spending and solve that mechanic first.
- Evaluate drops by current rolls and demand, then include unsold inventory when calculating results. Do not count an optimistic listing price as realised profit.
Players who prefer to outsource a portion of Citadel discovery, mapping, or fragment preparation can use flexible PoE 2 farming assistance. For self-farmers, the same principle applies: separate access farming from boss attempts and run each activity in focused blocks.
Common Failure Points
Most failed Arbiter runs come from an outdated access plan, a false readiness signal, or one repeated mechanical error. Use this list before blaming damage alone.
- Following an old guide that still uses Arbiter Atlas points, Difficulty 4, or Calamity Fragments.
- Assuming Fire Resistance solves the whole fight while physical, cold, chaos, and recovery-denial threats remain uncovered.
- Running away from a Falling Flame Seed circle instead of using its interior as the temporary safe zone.
- Trying to block Flaming Gales or interrupt the seed cast even though those responses do not solve the mechanics.
- Entering a phase-two Flame Seed ring before checking whether the sword beam is aimed through it.
- Ignoring the opposite sphere while Blackflame disables recovery or Chill delays every action.
- Spending every movement charge on routine damage uptime and having none for the final Combo Slam.
- Using the boss health bar as a progress estimate before accounting for the full heal at the phase transition.
- Consuming more repeat sets after identical deaths without changing gear, positioning, or response timing.
Final Verdict
The current Arbiter of Ash encounter is a Fortress progression boss first and a repeat-farming target second. Unlock the deterministic quest version through the two Enigma Chambers, use its unlimited revivals to learn safe strips and seed timing, then move to the three-Crisis-Fragment repeat loop only when the build can recover from ordinary hits and resolve phase-two arena states consistently.
The winning priority is stable across builds: read the arena, solve the active sphere or safe zone, preserve one movement response, recover outside Blackflame, and deal damage only after the mechanic is controlled. That discipline secures the Tablet-crafting unlock, protects expensive repeat entries, and turns the Burning Monolith from a fragment sink into a manageable boss farm.


