
PoE 2 Pinnacle Boss access now follows two clear routes. The first clear comes through a deterministic endgame quest and uses a quest key with unlimited revivals. Later clears use a tradable key, open a harder version of the encounter, and allow only two revivals. The exact key source and activation point depend on the boss, so old Realmgate and splinter instructions no longer describe the current endgame.
This page is the parent hub for every current Pinnacle Boss route. Use the access table to identify the required questline, key, and destination, then open the dedicated encounter guide for fight mechanics and rewards. Trial bosses and prerequisite encounters are listed separately because they do not follow the standard Atlas Pinnacle access model.
How PoE 2 Pinnacle Boss Access Works
The current system separates progression from repeat farming. Atlas mechanic questlines lead to a one-time quest version of their Pinnacle encounter. This route is deterministic, the boss is fought at the lower of its two current encounter levels, and the instance permits unlimited revivals. After the quest clear, the same boss can be challenged through a repeatable key obtained from the mechanic's endgame loop. Repeatable keys are tradable, open a higher-level encounter, and provide two revivals.
Pinnacle encounters do not grant experience, and dying inside them does not remove experience. A first kill also awards six passive points for the encounter's Atlas tree when that mechanic has its own tree. These rules apply to the current Atlas Pinnacles introduced or reorganised with Return of the Ancients; the Trialmaster and Zarokh remain tied to their respective Trials instead.
| Access type | How it is obtained | Encounter rules | Best use |
|---|---|---|---|
| Quest access | Complete the boss mechanic's endgame questline and collect its quest key or required quest items | Lower-level version with unlimited revivals | Learn the encounter and secure the first-clear progression reward |
| Repeatable access | Farm or trade for the non-quest key after the mechanic has been unlocked | Higher-level version with two revivals | Farm boss-exclusive rewards after the build can clear consistently |
PoE 2 Pinnacle Boss Access at a Glance
The table below covers the eight current Pinnacle encounters. It identifies the route that produces the first quest entry, the repeatable access item, and the place where that item is used. Boss mechanics, attacks, positioning, and reward decisions belong in the dedicated guides rather than this access hub.
| Pinnacle Boss | Quest route | Repeatable access | Activation point |
|---|---|---|---|
| The Arbiter of Ash | Enter the Precursor Fortress. One Crisis Fragment is already inserted on the first visit; obtain the other two from the Western and Eastern Enigma Chambers. | Ancient, Faded, and Weathered Crisis Fragments from the Iron, Copper, and Stone Citadels | The three doors inside the Burning Monolith |
| The Arbiter of Divinity | Defeat Phyx and Phya in the Fortress route, collect the Origin Spark and Origin Cradle, and combine them into the Origin Core. | Origin Spark and Origin Cradle from repeat Matriarch Halls and Patriarch Halls found on the Atlas | The apex of the Origin Tower |
| The Raven Trickster | Use a Grand Mirror, raise the affected fog bank to 100% Deliriousness, and complete the quest Simulacrum to receive Raven's Reflection. | Raven's Reflection obtained after completing a Simulacrum | The broken mirror in the Withered Willow |
| Xesht, We That Are One | Stabilise five Breaches, receive the quest Breachstone from Ailith, reveal a Breach domain, and defeat It That Was Tul and It That Was Esh in its Fortress route. | Breachlord Sac from It That Was Tul and It That Was Esh | The Dreamer's chamber in the Monastery of the Keepers |
| The Bodach | Earn An Audience with the King, defeat the King in the Mists, use the Head of the King at Caer Tarth, and complete the five-map Rite of the Nameless. | Five Call of the Shadows, also obtained from final Rite of the Nameless altars | The effigy in Caer Tarth |
| The Aberration | Use Expedition Logbooks to explore the Ocean, find Olroth on Obscure Island, and obtain the Shattered Triskelion. | Runeforge a Shattered Triskelion into The Triskelion Reforged | Speak to Makoru in the Ruins of Kingsmarch to reach the Fallen Star |
| Vessel of Kulemak | Visit the Well of Souls after the first Atlas Abyss, close the three massive Abyss wounds around it, and receive Kulemak's Invitation. | Kulemak's Invitation from Abyssal bosses | Jump into the Well of Souls to enter the Black Cathedral |
| Atziri, the Red Queen | Activate an Ancient Beacon to reveal the Vaal Ruins, enter Atziri's Temple, defeat Xipocado, complete the Royal Access Chamber, and connect Atziri's Chamber. | No separate external key. Rebuild the required Temple route for another encounter. | The unlocked door inside Atziri's Chamber |
Get any Path of Exile 2 service from ExpCarry: raids, dungeons, PvP, leveling, gold, farming, coaching, and custom orders.
Fortress Pinnacle Boss Access
The Precursor Fortress contains two consecutive Pinnacle routes. The Arbiter of Ash blocks progression through the Burning Monolith, while the Arbiter of Divinity waits at the top of the Origin Tower behind it. Their repeat keys come from different Atlas content, so completing one fragment set does not provide access to both bosses.
How to unlock the Arbiter of Ash
On the first Fortress visit, one Crisis Fragment is already installed at the Burning Monolith. The remaining two quest keys are located beyond the Western and Eastern Gateways in their Enigma Chambers. Clear both chambers, return to the Monolith, insert the missing fragments, and open the central gate. This is the quest encounter and allows unlimited revivals.
Repeat access requires all three normal Crisis Fragments. Count Geonor in the Iron Citadel provides the Ancient Crisis Fragment, Jamanra in the Copper Citadel provides the Faded Crisis Fragment, and Doryani in the Stone Citadel provides the Weathered Crisis Fragment. Primary, Secondary, and Tertiary Calamity Fragments are historical items and no longer drop. There is no separate Calamity-based Uber route in the current system.
How to unlock the Arbiter of Divinity
Continue through the Fortress after the Burning Monolith. Phyx, Sentinel of the Spark guards the Origin Spark, while Phya, Sentinel of the Cradle guards the Origin Cradle. Combine both components at the Precursor forge to create the Origin Core, then carry the Core to the apex of the Origin Tower.
For later attempts, Matriarch Halls and Patriarch Halls can appear separately on the Atlas. Phya in the Matriarch Halls drops the Origin Cradle, and Phyx in the Patriarch Halls drops the Origin Spark. Both components are required to assemble another Origin Core, so keep completed halves organised rather than buying or farming a duplicate of the component already in the stash.
Delirium, Breach, and Ritual Pinnacle Routes
These three Atlas mechanics now lead through dedicated storylines and hubs instead of the old Realmgate difficulty selector. Delirium ends with The Raven Trickster, Breach ends with Xesht, and Ritual ends with The Bodach. Kosis and the King in the Mists still appear in their respective systems, but neither replaces the current final Pinnacle encounter.
Raven's Reflection and The Raven Trickster
Complete Delirium Mirrors until a Grand Mirror appears. After its duplicated map bosses are defeated, use the Grand Mirror to spread fog from an eligible Atlas map. The affected maps start at 10% Deliriousness; killing Rare monsters and map bosses raises the entire fog bank. At 100%, one of its maps becomes a seven-wave Simulacrum. Completing the quest Simulacrum awards the quest version of Raven's Reflection. Take it to the broken mirror in the Withered Willow to enter The Withered Hollow and face The Raven Trickster. Further Simulacrum completions produce the repeatable Raven's Reflection.
Kosis can appear as a boss within Simulacrum, but the current Delirium Pinnacle is The Raven Trickster. A guide that sends players to the Realmgate with Simulacrum Splinters is describing an older access system.
Breachlord Sac and Xesht
Stabilise five Breaches to receive the quest Breachstone from Ailith. A repeatable Breachstone is made by combining 300 Breach Splinters into a Revelatory Wombgift and birthing it at the Genesis Tree. A Breachstone is used on the Atlas to reveal a Breach domain; it is not inserted at the Realmgate and it does not open Xesht directly. Progress through the domain's Breach Hives, Sky Hives, and Fortress route until you defeat It That Was Tul and It That Was Esh. Their encounter awards the Breachlord Sac needed for Xesht. Bring the Sac to the Monastery of the Keepers, enter the chamber beside the Genesis Tree, and place it at the Dreamer to open the Twisted Domain.
The Twisted Domain begins with a timed Breach that must be pushed to the boss arena. Reaching Xesht is part of the encounter, not a direct portal to an isolated boss room. Build damage and clear speed therefore affect whether the entry reaches its intended target.
Effigy pieces, Call of the Shadows, and The Bodach
After meeting Aoife, sacrifice unspent Tribute from Ritual encounters until An Audience with the King is earned. The item reveals the Crux of Nothingness on the Atlas. Defeat the King in the Mists, take the Head of the King to Aoife in Caer Tarth, and select five connected maps for the Rite of the Nameless. Each Rite map awards one quest effigy piece: Frayed Cloth, Ragged Cloth, Tangled Torso, Brittle Arm, or Mossy Arm. Attach all five pieces to the effigy in Caer Tarth to open the quest encounter.
Repeat attempts replace the five distinct quest pieces with five copies of Call of the Shadows. These also come from final Rite of the Nameless altars. An Audience with the King still belongs to the Ritual storyline and reveals the Crux of Nothingness for the King in the Mists encounter, but it is not the key for The Bodach.
Expedition, Abyss, and Atziri Pinnacle Routes
These access paths use three different structures. Expedition converts a prerequisite boss drop through Runeforging, Abyss uses an Invitation at a persistent hub, and Atziri requires a completed Temple layout rather than a standalone fragment or map key.
Olroth and The Triskelion Reforged
Olroth is now the gateway to the Expedition Pinnacle rather than the final destination of the storyline. Use Expedition Logbooks to reveal Ocean areas and find Obscure Island, defeat Olroth there, and collect the Shattered Triskelion. Repair it through Runeforging at the Verisium Anvil to create The Triskelion Reforged. Take the finished key to the Ruins of Kingsmarch and speak to Makoru to reach the Fallen Star and The Aberration.
This distinction is important when planning separate boss guides. An Olroth guide owns the Obscure Island encounter and the Shattered Triskelion drop, while The Aberration guide owns the final Expedition Pinnacle fight.
Kulemak's Invitation and the Black Cathedral
After the first Abyss encounter on the Atlas, follow the Lurking Creature to the Well of Souls. The quest route then runs through the massive Abyss wounds north, south, and east of the hub. Close all three to receive the quest Kulemak's Invitation. For repeat access, Kulemak's Invitation drops from Abyssal bosses, including Tasgul in the Lightless Void and Vandroth in the Dark Domain. Carry the Invitation to the Well of Souls and choose to jump into the Well. This opens the Black Cathedral, where the Vessel of Kulemak encounter begins.
The Vessel can be ended after a clear or revived and empowered by stealing a Lich's power. That reward and difficulty decision belongs to the dedicated Vessel guide; access always begins with Kulemak's Invitation at the Well of Souls.
Atziri's Temple access sequence
Atziri does not use an external Pinnacle key. Activate an Ancient Beacon on the Atlas to reveal the Vaal Ruins, then use the console there to enter Atziri's Temple. Connect the Temple entrance to the Architect's Chamber, defeat Xipocado, and use his console to place the Royal Access Chamber. The Royal Access Chamber becomes available through an endgame Temple at area level 75 or higher. Connect and complete that room, then build a path to Atziri's Chamber. The boss door remains locked if the Royal Access Chamber has not been completed, even when a path reaches Atziri directly.
The full room-building sequence, restricted rooms, destabilisation rules, and reward routing are covered in the PoE 2 Temple of Atziri guide. For repeat access, rebuild the required route after the relevant Temple rooms destabilise; there is no fragment set to stockpile.
Trial Boss Access and Related Endgame Encounters
The Trialmaster and Zarokh are major endgame bosses, but their access rules are tied to Ascension Trials rather than Atlas Pinnacle quest keys. The King in the Mists and Olroth are also important guide topics because they unlock or feed later boss routes. Keeping them in this hub prevents players from confusing a prerequisite encounter with the final boss of a current Atlas mechanic.
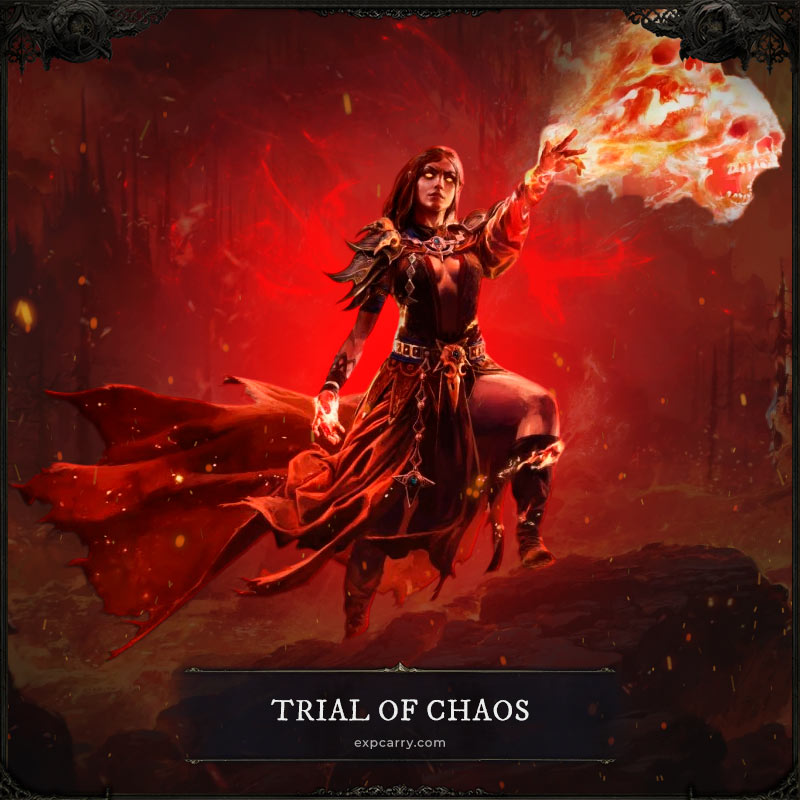
The Trialmaster in the Trial of Chaos
Use an Inscribed Ultimatum to enter the Trial of Chaos. A full endgame route requires an area level 75 or higher Inscribed Ultimatum and completion of all ten trials. Only the boss in round ten drops its associated Fate: Uxmal drops Cowardly Fate, Bahlak drops Deadly Fate, and Chetza drops Victorious Fate. The Ultimatum shows which Fate its final boss can provide, so a self-farmed complete set normally requires multiple ten-round Trials; the pieces can also be traded. Carry all three Fates to the door near the Ascension Shrine after completing round ten to enter the Trialmaster's Tower.
Zarokh in the Trial of the Sekhemas
Zarokh, the Temporal is the boss of the fourth floor, the Test of Time. A four-floor Trial requires a qualifying Djinn Barya and successful completion of the preceding floors while preserving Honour. Completing the third floor produces the Test of Time Barya that records the continuing run and opens the final floor.
King in the Mists and Olroth as prerequisite guides
An Audience with the King reveals the Crux of Nothingness for the King in the Mists encounter. His defeat advances the current Ritual storyline, but The Bodach is the Ritual Pinnacle. Olroth appears on Obscure Island and drops the Shattered Triskelion needed to create The Triskelion Reforged, while The Aberration is the Expedition Pinnacle. Both bosses need dedicated guides, but neither should replace the final encounter in the hub's Pinnacle table.
Pinnacle Boss Guide Library
This hub owns access intent: which questline to follow, which item to obtain, and where to use it. Each child guide should own one encounter's phases, dangerous attacks, positioning, recovery, build considerations, rewards, and repeat-farming decisions. This split keeps the access page current without duplicating complete fight guides.
| Guide | Page role | Primary player task |
|---|---|---|
| Arbiter of Ash Guide | Pinnacle Boss guide | Clear the Burning Monolith encounter |
| Arbiter of Divinity Guide | Pinnacle Boss guide | Clear the Origin Tower encounter |
| The Raven Trickster Guide | Delirium Pinnacle guide | Defeat Tangmazu in The Withered Hollow |
| Xesht Guide | Breach Pinnacle guide | Reach and defeat Xesht in the Twisted Domain |
| The Bodach Guide | Ritual Pinnacle guide | Complete the Rite of the Nameless boss encounter |
| The Aberration Guide | Expedition Pinnacle guide | Defeat the final Runes of Aldur encounter |
| Vessel of Kulemak Guide | Abyss Pinnacle guide | Clear and evaluate the Black Cathedral encounter |
| Atziri Guide | Fate of the Vaal Pinnacle guide | Defeat both forms and open Atziri's Vault |
| Trialmaster Guide | Trial endpoint guide | Complete the ten-trial route and final fight |
| Zarokh Guide | Trial endpoint guide | Protect Honour through the fourth-floor boss |
| King in the Mists Guide | Ritual prerequisite guide | Clear the Crux of Nothingness and advance Ritual |
| Olroth Guide | Expedition prerequisite guide | Clear Obscure Island and obtain the Shattered Triskelion |
| Pinnacle Boss Difficulty Ranking | Comparison guide | Choose a progression order after access is unlocked |
Use the Path of Exile 2 guides index to move from this access hub to published encounter, build, gearing, and endgame system guides. Unpublished child pages should remain unlinked here until their final URLs are approved; guessed or temporary URLs create broken internal routes.
Pinnacle Boss Readiness and Repeat Attempts
Use the unlimited-revival quest version to learn transitions, arena hazards, recovery windows, and the build's real damage uptime. Do not measure readiness from a stationary tooltip alone. A bossing setup must maintain damage while moving, survive a recoverable mistake, and sustain its life, mana, or Energy Shield resources across a long phase.
Before spending a repeat key, confirm that the character has capped the resistances required by the build, a reliable recovery plan, enough single-target damage to prevent phases from becoming unmanageable, and a movement option that does not consume the same resource needed for damage. If the build is still missing core gear, solve that bottleneck before converting tradable entries into two-revival attempts. Players who prefer help with the encounter or progression can review the available Path of Exile 2 services after identifying the exact boss and access item they already have.
| Failure pattern | Likely bottleneck | Action before the next repeat key |
|---|---|---|
| Death to one telegraphed hit | Insufficient mitigation, avoidable positioning error, or both | Check the attack's damage type, adjust defenses, and practise the telegraph in the quest version |
| Survive the hit but die during the next pattern | Weak recovery or depleted resources | Fix flask, life, mana, or Energy Shield recovery before adding more damage |
| Arena becomes unsafe late in the fight | Low sustained damage or poor damage uptime while moving | Improve mobile damage windows and remove unnecessary downtime |
| Repeat key lost without learning a new pattern | Build or execution issue was not diagnosed after the previous attempt | Record the exact cause of death and change one relevant variable before retrying |
Common PoE 2 Boss Access Mistakes
Most access errors come from following a guide written for an older endgame. Spending splinters at the Realmgate, inserting a Breachstone there to open Xesht directly, using Simulacrum Splinters as direct Pinnacle access, and collecting Calamity Fragments for an Uber Arbiter route are no longer current. The present system uses mechanic questlines for first access and distinct repeat keys for harder farming encounters.
- Using the wrong final boss: The Raven Trickster, The Bodach, and The Aberration are the current final Pinnacles for Delirium, Ritual, and Expedition. Kosis, the King in the Mists, and Olroth occupy different roles.
- Confusing a quest key with a repeat key: the names may match, but quest items are non-tradable progression entries with unlimited revivals. Repeatable versions are tradable and allow two revivals.
- Taking an item to the old activation point: current keys are used at mechanic hubs such as the Withered Willow, Monastery of the Keepers, Caer Tarth, Ruins of Kingsmarch, and Well of Souls.
- Spending repeat access too early: complete the quest version first and fix repeated defense, recovery, or uptime failures before using a tradable key.
- Buying half of a paired set twice: Arbiter of Divinity requires both the Origin Spark and Origin Cradle, while Arbiter of Ash requires three different Crisis Fragments.
Conclusion
Current PoE 2 boss access is built around readable progression. Quest routes provide a deterministic first encounter and room to learn; repeat keys raise the stakes only after that first clear. Choose the boss, complete its mechanic route, verify the activation point, and treat the repeat key as a farming resource rather than a practice token.
The cleanest site structure follows the same logic. This page remains the access hub, dedicated boss guides own encounter execution, and Trial or prerequisite guides remain clearly labelled. That separation gives players the right route without mixing obsolete keys, intermediate bosses, and final Pinnacle encounters.


