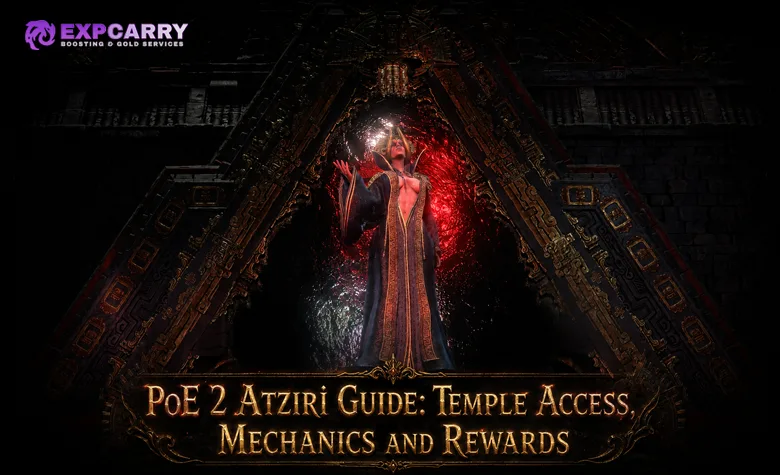
Atziri, the Red Queen is the final boss of Path of Exile 2's permanent Fate of the Vaal branch. Reaching her requires a developed Atziri's Temple, an area level 75 or higher Royal Architect kill, a completed Royal Access Chamber, and a connected route to Atziri's Chamber. The fight then moves through two consecutive forms: Atziri, the Red Queen and Atziri, the Fell Serpent. There are no Sacrifice fragments, Apex map, or mirror-clone rules from Path of Exile 1.
Fate of the Vaal became core content with the official Return of the Ancients update. This guide concentrates on the boss route, preparation, fight mechanics, recovery, and Vault rewards. Use the broader Temple of Atziri guide when the main problem is room tiers, Medallions, crafting devices, or general layout planning.
How to Access Atziri in PoE 2
Atziri does not use a tradable external key. Her access chain is built inside the Temple and may take several activations because the Architect, Royal Access Chamber, and final boss route do not have to become usable in one visit. Six Energised Crystals power each Temple Console activation, so verify the next objective before spending them.
- Unlock Fate of the Vaal by completing Ancient Beacon progression. In Endgame, the dedicated route is in Lira Vaal, northeast of the Atlas starting area.
- Energise Vaal Beacons until six Energised Crystals are available, then use the Temple Console to place rooms and open the next Temple visit.
- Build a connected path from the entrance to the Architect's Chamber.
- Raise the Temple to area level 75 or higher before defeating Xipocado, Royal Architect. A lower-level kill does not satisfy the Royal Access Chamber progression requirement.
- After killing Xipocado, interact with his console before leaving and place the Royal Access Chamber among the available Restricted Rooms.
- On a later Temple visit, connect the entrance to the Royal Access Chamber and complete it. Entering this room unlocks the sealed route to Atziri.
- Build a valid path to Atziri's Chamber, enter the room, speak with Doryani, and proceed to the first arena.
| Access check | Required state | Common blocker |
|---|---|---|
| Temple activation | Six Energised Crystals | Opening a run without enough useful room placement |
| Architect progression | Xipocado defeated in an area level 75 or higher Temple | Killing him below the required area level |
| Royal access | Royal Access Chamber placed, connected, entered, and completed | Placing the room but never reaching it during a run |
| Boss door | Connected route to Atziri's Chamber after royal access is unlocked | Pathing directly to Atziri while the royal door is still sealed |
The Royal Access Chamber is a Restricted Room and destabilises after an accessible run under the current Temple rules. Do not assume that seeing its tile on the grid means the access step is complete. The character must actually travel through the connected Temple and interact with the room before Atziri's door opens.
Temple Decisions Before the Boss Run
The route is only half of the preparation. Every active Temple modifier can change the pressure inside the boss encounter, and the Temple's area level depends on the areas that supplied its crystals. Read the complete modifier list on the Temple map before opening the final route rather than judging difficulty from an earlier visit.
- Protect the route first: preserve connections to the Royal Access Chamber and Atziri's Chamber until both progression steps are complete.
- Avoid unnecessary difficulty: do not add dangerous Temple modifiers merely to improve unrelated rooms when the first kill is the goal.
- Plan for destabilisation: defeating Atziri causes greater Temple destabilisation, so finish any valuable accessible rooms that matter before committing to the boss.
- Check the real area level: the number shown inside the active Temple is the relevant value for Xipocado's level requirement.
- Keep the route readable: a compact connected path is easier to verify and rebuild than a layout with several fragile branches.
If repeated crystal collection or Temple rebuilding is the actual bottleneck, a contextual PoE 2 hourly progression option is more relevant than buying an unrelated boss service. The encounter still requires a legal in-game route and should not be described as granting guaranteed drops.
Pre-Entry Checklist
Use a bossing setup rather than a pure clearing setup. Atziri has long periods without ordinary monsters, so recovery that depends entirely on kills can disappear when it is needed most. The character should also be able to deal meaningful single-target damage while moving because the second form ends with a dangerous execution window.
- Confirm that Fire and Lightning Resistances are capped for the current difficulty and that no Temple modifier has reduced their effective value.
- Bring enough Physical mitigation or avoidance to survive non-lethal spear, projectile, and slam mistakes.
- Prepare reliable Life or Energy Shield recovery that works against one target and does not require clearing packs.
- Include a way to remove or limit Corrupted Blood and other damaging ailments that can continue after the initial hit.
- Make sure Dodge Roll, sprinting, and any movement skill work without an empty resource pool or an unreliable setup condition.
- Test sustained single-target damage against a durable boss instead of relying on a short showcase burst.
- Refill flasks, repair the intended weapon set, activate persistent skills, and check that the correct support setup is equipped.
- Read the Temple modifiers one final time before entering Atziri's Chamber.
Explore services related to this guide, selected from our Path of Exile 2 catalog.
View All Path of Exile 2 Services


Build Readiness and Defensive Priorities
There is no useful universal damage number for Atziri because Temple area level, modifiers, class, skill uptime, and character investment all change the result. A practical readiness test is whether the build can keep dealing damage through movement, recover from one ordinary mistake, and still finish the Fell Serpent's final pressure sequence.
| Readiness area | Good sign | Needs work |
|---|---|---|
| Elemental defence | Fire and Lightning hits do not turn every small error into a death | One rune or storm marker removes most of the effective life pool |
| Physical defence | The build can recover after a spear hit or imperfect slam dodge | Any physical contact immediately ends the attempt |
| Recovery | Life or Energy Shield returns during short safe windows without kills | Recovery stops when no normal enemies are present |
| Mobility | The character can leave overlapping circles without spending every escape tool | Long animation locks or resource costs prevent a timely move |
| Boss damage | Damage continues during repositioning and is ready for the final execution window | Output exists only while standing still or during one short cooldown stack |
If several rows fail at once, the problem is the character foundation rather than one missing item. A PoE 2 build setup option can be considered in that specific situation, but the safer self-directed fix is to repair defences, recovery, movement, and sustained damage one at a time before spending more crystals.
How the Atziri Fight Is Structured
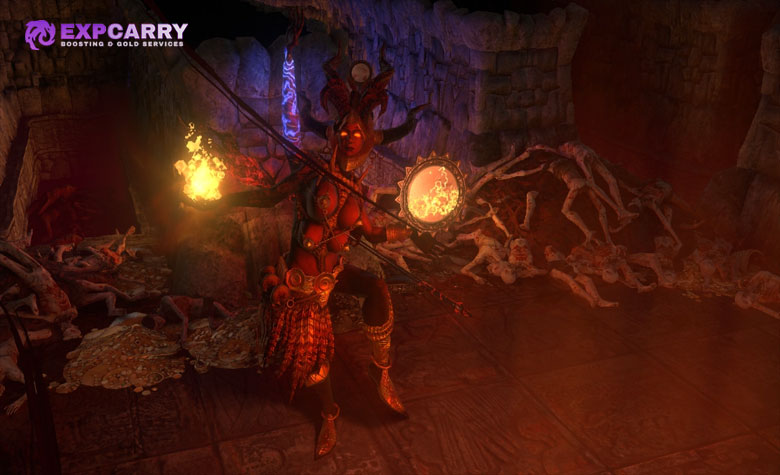
This encounter has two named forms separated by a scripted story transition, not a collection of PoE 1 mirror phases. Defeat the Red Queen, follow the sequence into the Cradle, and then fight the Fell Serpent in a second arena. Save enough recovery and major cooldowns for the transformation instead of treating the first apparent victory as the end.
| Encounter state | Main pressure | Primary objective |
|---|---|---|
| Atziri, the Red Queen | Spear attacks, Fire and Lightning runes, circular fire boundaries, storm markers, and blood projectiles | Keep a clear movement lane and learn each telegraph without crossing hazards unnecessarily |
| Story transition | Movement through the Cradle and a change of arena | Do not relax, alter gear, or assume the reward has already been earned |
| Atziri, the Fell Serpent | Empowered versions of earlier patterns, leaps, forced safe lanes, denser overlaps, and the expanding Flesh Bubble | Preserve mobility, avoid panic rolls, and keep damage available for the closing sequence |
Atziri can combine mechanics in ways that make an individually simple pattern dangerous. A fire boundary is manageable by itself, but it becomes lethal when a storm marker or blood nova removes the side of the arena you intended to use. Position for the next exit before attacking, not after the overlap has already formed.
Atziri, the Red Queen Mechanics
The first form teaches the arena language used later. Most attacks have visible ground cues or clear weapon animations, but repeatedly rolling without a destination can place the character inside the next marker. Small deliberate steps preserve Dodge Roll for projectile walls, overlapping detonations, and failed reads.
| Visual cue | Threat | Response |
|---|---|---|
| Atziri draws back or sweeps with her spear | Frontal physical thrusts and wide melee coverage | Move off her front shoulder and attack after the sweep instead of trading through it |
| A Fire or Lightning rune appears on the floor | Delayed elemental detonation | Walk out early and save the roll unless another hazard blocks the route |
| A circular flame boundary forms around the boss | Crossing the burning edge deals heavy Fire damage and may leave the character badly positioned | Choose the inside or outside before the ring closes and do not cross it for a small damage window |
| A large fiery circle contracts or charges beneath an area | A major Fire explosion, sometimes overlapping another marked zone | Leave every visible circle, then wait for the detonation before returning |
| Blue markers appear across the arena | Lightning bolts strike the marked locations | Use short continuous movement through open ground and avoid rolling into a later marker |
| A blood projectile or planted spear lands | Physical impact followed by a dense radial projectile pattern and possible Corrupted Blood pressure | Leave the landing point, identify a gap, and roll through one wave only when walking cannot clear it |
| A spear sweep releases an arc of lightning runes | Fast chained explosions across the front of the boss | Move through to her side when the path is clear, or retreat beyond the arc rather than staying in front |
Melee builds should orbit her sides and take one controlled attack sequence after a committed cast or sweep. Ranged builds should avoid backing into the edge of the arena, where a flame boundary can remove the only escape direction. The safest default position is mid-range with open space on at least one side.
Atziri, the Fell Serpent Mechanics
The second form repeats several elemental and blood patterns with greater coverage, then adds attacks that force a specific positional answer. The arena is different, so rebuild spatial awareness immediately after the transition rather than continuing the first form's movement loop by habit.
| Mechanic | What changes | Safe plan |
|---|---|---|
| Empowered Fire zones | Multiple marked detonations can overlap and remove a large section of the floor | Move perpendicular to the overlap and wait for every circle to resolve before committing to a long skill |
| Empowered flame boundary | The usable area can be forced closer to Atziri | Enter the safe side early, stay off her front, and do not cross the burning edge late |
| Red storm markers | Lightning pressure becomes denser and can continue during another mechanic | Keep moving in a shallow curve while watching the next forced lane |
| Blood projectile waves | More projectiles and overlapping waves reduce obvious gaps | Create distance from the origin, then cross one readable section instead of rolling through the entire pattern |
| Leap and slam | Atziri leaves the screen and targets a red landing marker | Move away from the marker, hold the roll until the landing direction is certain, and do not return during the impact |
| Crimson Valley | Red lightning fills most of the arena while a narrow central lane remains available | Move into the visible lane immediately and travel along it without side-to-side panic movement |
| Flesh Bubble | An expanding red field covers almost the whole arena before a lethal physical spell detonation | Commit remaining damage while the boss is vulnerable. Treat visible far corners beside the Beast as an emergency fallback, not as a permanent exploit or primary strategy |
Flesh Bubble is the critical knowledge check. Running to the ordinary outer edge is not the answer because the red field continues expanding. Enter this form with major damage cooldowns available, keep the boss targetable during the animation, and finish the encounter before the final detonation whenever possible. A build that cannot do this consistently should improve sustained boss damage before rebuilding another high-value route.
Positioning for Different Build Types
Every archetype sees the same telegraphs, but uptime and recovery differ. The goal is not to force one universal position. It is to choose a range that keeps Atziri visible, leaves an exit, and allows damage to continue without locking the character inside the next marked area.
| Build type | Main risk | Adjustment |
|---|---|---|
| Melee | Flame boundaries and frontal spear attacks can trap the character at point-blank range | Stay near a side or rear quarter, use short attack strings, and leave before the next ground cue completes |
| Ranged attack | Retreating in a straight line can pin the character against the arena edge | Circle at mid-range and maintain enough accuracy and damage uptime while moving |
| Caster | Long cast times conflict with overlapping runes and the late execution check | Pre-place persistent effects where possible and reserve instant or short casts for movement-heavy sequences |
| Minion | The player can lose track of personal telegraphs while watching minion positioning | Prioritise the player model and safe lane, keep command actions brief, and avoid standing still to resummon inside active markers |
| Damage over time | Refreshing every effect can create unnecessary exposure | Apply the minimum needed to maintain pressure, then move until a safe refresh window appears |
| Defensive or low-damage | The build may survive ordinary patterns but fail the Flesh Bubble finish | Trade a small amount of excess mapping defence for reliable single-target output only after normal mechanics are stable |
How to Recover From a Mistake or Death
A recoverable hit becomes lethal when the next action is an uncontrolled roll or an immediate damage cast. Stop attacking, move into open floor, clear Corrupted Blood or another dangerous ailment, restore the primary resource, and only then reacquire Atziri. One lost damage window is cheaper than entering the next overlap without recovery.
- Identify whether the remaining threat is a ground effect, projectile wave, or damage over time.
- Move toward known open space rather than directly away from the boss.
- Use ailment removal or a recovery flask after leaving the active hit zone, not before taking the follow-up hit.
- Wait for one complete safe animation before restarting a long attack or cast.
- Re-establish the correct range and keep one movement response available.
Old launch guides that call Atziri a strict one-portal fight are outdated. The official 0.4.0d patch notes changed Architect and Atziri deaths so players can respawn into a new Temple instance with most other content removed, similar to an Endgame map. Use the respawn option shown by the current encounter and continue in the fight-focused instance while attempts remain. Leaving voluntarily or exhausting the available attempts still means rebuilding the relevant Temple route.
Atziri Rewards and Vault Drops
Defeating the Fell Serpent drops Atziri's Medallion. Carry it back to the checkpoint at the entrance of Atziri's Chamber and use it there. The Medallion is consumed to unlock Atziri's Vault and six Royal Troves; the rewards are not obtained by opening a chest inside the final combat arena.
| Reward source | Current reward pool | Important note |
|---|---|---|
| Atziri direct drop | Atziri's Medallion and a chance at Atziri's Communion Lineage Support | The Medallion is instance-local and must be used at the Chamber checkpoint |
| Atziri's Vault unique | Drillneck, Atziri's Splendour, Atziri's Rule, Atziri's Contempt, or Flesh Crucible | The Vault contains one item from this exclusive unique pool; Splendour can have different variants |
| Additional Vault rewards | Sacrificial Regalia, high-tier unidentified rares, Atziri's Impatience, and Zerphi's Infamy | Do not assign a fixed market value before identifying the actual item and variant |
| Six Royal Troves | Currency of rare or higher quality, including Temple-specific crafting currency | Possible outcomes vary and should not be advertised as guaranteed |
The current Atziri data page records the access sequence and core Vault pool. Royal Troves can also provide Temple currencies such as Architect's Orb, Core Destabiliser, Crystallised Corruption, Orb of Extraction, Vaal Cultivation Orb, Infusers, and Vaal Siphoner. Their value depends on the live economy and the item projects available to the player.
Orbs of Sacrifice From Atziri's Vault
The official 0.5.4 update added a chance for Atziri's Vault to contain one of four Orbs of Sacrifice. Each Orb upgrades a Corruption Enchantment on an eligible Rare item and removes a random explicit modifier. This is a destructive tradeoff, not a safe upgrade, so evaluate the item after the boss run rather than applying the currency immediately.
| Currency | Eligible Rare item | Risk check |
|---|---|---|
| Yaomac's Orb of Sacrifice | Weapon or Quiver | The item must remain functional after losing any one explicit modifier |
| Kopec's Orb of Sacrifice | Armour | Do not use it when every defensive or resistance line is mandatory |
| Kamasa's Orb of Sacrifice | Amulet, Ring, or Belt | Check Attributes and Resistances against every possible removed modifier |
| Yugul's Orb of Sacrifice | Jewel | The enchantment improvement must outweigh the lost Jewel line |
There is no reliable evergreen drop rate or fixed profit per Atziri run. The Vault unique, Lineage Support, Sacrificial Regalia outcome, Royal Trove currencies, Orb of Sacrifice variant, Temple rebuilding cost, and current trade demand all affect the result.
Repeat Farming and Stop Conditions
Atziri farming repeats the Temple route rather than consuming a fragment set. After a kill, greater destabilisation can remove parts of the layout, and the Royal Access Chamber is subject to Restricted Room rules. Inspect the remaining grid, then decide whether rebuilding toward Atziri is better than collecting crystals for a reward-room cycle.
- Finish valuable accessible rooms before the boss if their loss would outweigh the expected Vault attempt.
- Kill Atziri and open every unlocked Vault and Royal Trove reward before ending the Temple.
- Inspect which paths and required rooms survived destabilisation.
- Collect another six Energised Crystals and use the new cards to restore the shortest valid boss route.
- Return to Xipocado when another Royal Access Chamber must be placed.
- Stop the boss loop when rebuilding consumes too many activations, the character fails the same mechanic repeatedly, or the current Temple has stronger non-boss rewards.
Price the actual drops before claiming that a session was profitable. A rare chase outcome should not be averaged into every run without a large current sample, and one successful Orb of Sacrifice drop does not establish an evergreen profit rate.
Common Atziri Failure Points
Most failed routes and attempts come from a small group of preventable mistakes. Correct the specific failure before spending another set of crystals instead of changing the entire build or Temple plan at once.
- Using PoE 1 instructions: Sacrifice fragments, Apex access, split clones, and reflected mirror targets do not describe this PoE 2 encounter.
- Killing Xipocado too early: the Royal Access Chamber progression requires an area level 75 or higher Temple.
- Skipping Xipocado's console: leaving after the kill without placing the Royal Access Chamber wastes the progression opportunity.
- Connecting Atziri but not royal access: the boss door remains sealed until the Royal Access Chamber has been reached and completed.
- Ignoring Temple modifiers: a previously easy pattern can become dangerous after area and modifier scaling.
- Panic rolling through runes: repeated rolls often end inside the next delayed marker.
- Spending every cooldown in the first form: the Fell Serpent needs reliable damage for Flesh Bubble.
- Running from Flesh Bubble: the field expands across most of the arena, so the intended plan is a committed finish rather than an ordinary retreat to the wall.
- Forgetting the Medallion: pick it up and return to the Chamber checkpoint to unlock the real reward rooms.
Final Verdict
Atziri is a Temple-planning test followed by a two-form execution fight. Secure an area level 75 or higher Architect kill, use Xipocado's console, complete the Royal Access Chamber, and verify the final route before spending the next six crystals. Inside the encounter, preserve open floor, respect Fire, Lightning, blood, and physical telegraphs, and enter the Fell Serpent form with enough mobility and sustained damage for Flesh Bubble. The reward is a Medallion-gated Vault containing an exclusive unique pool, additional specialist drops, six Royal Troves, and a chance at one of four Orbs of Sacrifice.