
Atziri's Temple is a permanent Path of Exile 2 Endgame system built around Ancient Beacons, room placement, Temple modifiers, crafting devices, Xipocado, and Atziri, the Red Queen. It was introduced with Fate of the Vaal, but it became core content in Return of the Ancients. The Temple now has its own Atlas Passive Tree, a permanent hub in Lira Vaal, Tier 4 room upgrades, itemised Infusers, and additional rewards added during the 0.5.x cycle.
The Temple is not rebuilt from zero after every visit. Its 9 by 9 layout persists, but rooms marked for Destabilisation are removed when the Temple is closed. Normal runs remove part of the structure, while defeating Xipocado or Atziri causes much greater Destabilisation. Successful planning therefore means maintaining routes, using Medallions at the right time, and deciding which rooms or bosses justify the resulting loss of Temple structure. The official Fate of the Vaal overview introduces the system, while the current guide explains its live core-game form.
- Six Energised Crystals are required to power the Temple Console.
- Each activation provides six Room Cards that can be placed on the Temple grid.
- Paths create access, while room combinations and Medallions improve the layout.
- Xipocado unlocks Restricted Rooms and the route required to reach Atziri.
- Tier 4 rooms require the relevant Fate of the Vaal Atlas Passive.
- Atziri's Vault can contain exclusive rewards and one of four Orbs of Sacrifice.
How to Unlock Atziri's Temple
Ancient Beacons provide access to the Temple system. Completing a Beacon encounter raises a Vaal Chest with its own rewards and advances the Temple route. The first set appears during Act 3 and leads to the present-day Lost Temple. A second set appears during Interlude 3. Completing that progression allows Doryani to open the route into the past, converting the activity into Atziri's Temple and unlocking Xipocado, Medallions, additional rooms, and the path to Atziri.
After the introductory sequence, completed Ancient Beacons grant Energised Crystals. Six crystals power the Temple Console for another construction and exploration cycle. Temple progress and stored crystals are tracked per character, so a character beginning this system must establish its own layout and access progression.
Endgame Access in Lira Vaal
In Endgame, the Vaal Ruins hub is located northeast of the Atlas starting area in Lira Vaal. Maps inside Lira Vaal provide Energised Crystals and Fate of the Vaal Atlas Passive points, making the city the intended route for players who want to specialize in Temple content. Ancient Beacons can also appear in maps, and the Temple remains accessible from its hub once enough crystals are available.
Temple Console, Room Cards, and Path Placement
The Temple Console shows a 9 by 9 grid, plus the Entrance and Atziri's Chamber on opposite sides. Activating the Console generates six Room Cards. Cards include Paths, ordinary rooms, and rooms that interact with or upgrade other parts of the layout. A valid placement is determined by the existing route and the card's permitted connections.
Paths have fixed orientations for placement, but placed Paths form connections with adjacent rooms according to the Temple rules. Many non-Path rooms also show special upgrade interactions with compatible neighbours. The placement preview is the reliable way to confirm whether a card extends the route, upgrades another room, or creates a valid new branch.
- Identify the nearest reachable target before placing a card.
- Use Paths to preserve at least one route toward Xipocado and the far side of the grid.
- Place compatible rooms together when the preview shows an upgrade interaction.
- Avoid spending every card on isolated rewards that cannot be reached.
- Review Temple modifiers before opening the instance.
At least one Room Card must normally be placed before the Temple can be opened. PC players can bypass that safeguard by holding Ctrl while selecting Run Temple, while controller users receive a confirmation. Any unplaced cards are discarded when the run begins, so cards cannot be stored indefinitely for a later activation.
Get any Path of Exile 2 service from ExpCarry: raids, dungeons, PvP, leveling, gold, farming, coaching, and custom orders.


Room Upgrades and High-Value Temple Targets
Rooms improve through specific adjacency relationships, conversion rules, or Medallions. The normal room ladder reaches Tier 3. Tier 4 upgrades become available after allocating Transcendent Progress on the Fate of the Vaal Atlas Passive Tree. A Quipolatl's Medallion can increase a selected room by one tier, but it cannot by itself push a room beyond Tier 3.
The correct target depends on the item or progression goal. A crafting room can be more useful than a generic reward room when it creates an upgrade the character needs, while a high-tier reward room may be preferable when the build is already stable. Device use can also carry corruption risk or cause the room to Destabilise, so the item should be chosen before committing to the device.
| Room family | Main purpose | Important limitation |
|---|---|---|
| Smithy and Forge rooms | Equipment quality and itemised Infusers for supported equipment types. | High-quality upgrades can corrupt the target item. |
| Thaumaturge rooms | Skill Gem sockets, quality, and advanced corruption outcomes. | Advanced corruption can destroy the gem. |
| Sacrificial rooms | Unique Items and modification of Corrupted Unique Items. | The result depends on the item and the device used. |
| Alchemy Lab rooms | Soul Cores and higher-tier Soul Core modification. | The useful outcome depends on the available Core and room tier. |
| Flesh Surgeon rooms | Transcendent limb modification at the appropriate tier. | Transcendent limbs are removed when the character dies. |
| Treasure Vault rooms | Reward chests influenced by the surrounding Temple structure. | The room Destabilises after its central Vault is opened. |
| Amplifier rooms | Increase the effect of Temple modifiers from related room families. | Repeated room types are subject to diminishing returns. |
Room modifiers apply across the Temple, but stacking four or more copies of the same room type triggers diminishing returns, with lower-tier rooms reduced first. This makes a varied high-tier layout more reliable than building an extreme stack around one modifier. Broader item fundamentals and safe stopping points are covered in the PoE 2 crafting guide.
Temple Medallions and Their Uses
Medallions become part of the system after the first completion of the Architect's Chamber. Certain Temple minibosses and bosses can then generate Medallions that change room placement, upgrades, rewards, protection, or Temple difficulty. Up to six can be stored, and each room can be affected by only one Medallion at a time.
| Medallion | Current use |
|---|---|
| Estazunti's Medallion | Adds another placement slot for a Restricted Room Card after defeating Xipocado. |
| Hayoxi's Medallion | Rerolls the reward offered by a Restricted Room Card. |
| Juatalotli's Medallion | Protects a room from its next Destabilisation. |
| Puhuarte's Medallion | Rerolls the unplaced Room Cards in hand, excluding Restricted Room Cards. |
| Quipolatl's Medallion | Raises a chosen room by one tier, up to Tier 3. |
| Uromoti's Medallion | Adds the specified Room Card shown on the Medallion. |
| Zantipi's Medallion | Adds a random Waystone modifier to the Temple, increasing danger and potential rewards. |
Medallions should solve a specific problem. Protect a room only when its survival supports an important route or reward, reroll a weak hand before opening the Temple, and avoid adding a random Waystone modifier unless the character can handle the additional risk.
Destabilisation and the Correct Temple Run Cycle
The current Temple loop is not a single construction phase followed by one final cash-in. Every visit can improve the layout, complete rooms, and earn rewards, but entering the Temple marks a selection of rooms for Destabilisation. Those rooms are removed when the Temple is closed. Some reward rooms also Destabilise after their device or central reward is used.
Defeating Xipocado removes a larger share of non-Path rooms and Paths and relocates the Architect's Chamber. Defeating Atziri causes an even larger rebuild, including removal of the Royal Access Chamber and much of the route. The correct timing decision is therefore whether the Architect or Atziri reward justifies rebuilding afterward, not whether the entire Temple should be saved until it becomes perfect.
When to Close or Continue the Temple
Players can leave through a Portal and return to the same Vaal Ruins instance. The Temple can then be re-entered through its main door, although no automatic return portal is created. Destabilisation is applied when the Temple is closed, so check every reachable priority room before selecting Close Temple.
- Complete reachable crafting devices and reward rooms before closing.
- Do not fight Xipocado only because the route is open; first decide whether Restricted Rooms or Atziri access are the current goal.
- Do not fight Atziri until the character and the rebuilt-layout cost both justify the attempt.
- Use Juatalotli's Medallion before entry when one room must survive the next Destabilisation.
- Expect part of the layout to disappear and keep alternative routes where practical.
The previous snake strategy no longer prevents required room deletion. When a room must be removed but supports other connections, it can be converted into a simple Path instead. A current guide should not recommend permanent linear layouts as protection against Destabilisation.
How to Unlock Xipocado and Atziri
Xipocado, Royal Architect appears in the Architect's Chamber, which occupies a changing position on the Temple grid. Reaching and defeating him opens Xipocado's Console. That console offers Restricted Room Cards, including the Royal Access Chamber when its conditions are met. Restricted Rooms use designated placement locations and cannot be treated like ordinary cards.
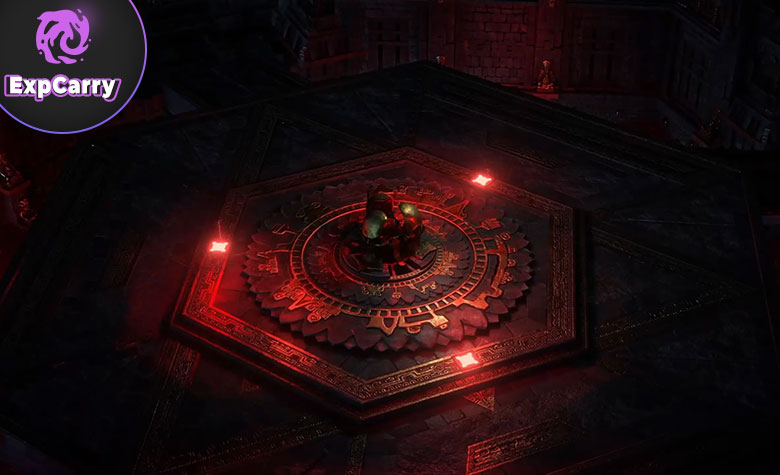
Atziri's Chamber is fixed outside the far side of the 9 by 9 grid and can connect to an adjacent room. Reaching the chamber is not enough to open the boss encounter. The Royal Access Chamber must first be placed, connected, reached, and completed.
- Create a route from the Entrance to the Architect's Chamber.
- Defeat Xipocado, Royal Architect.
- Use Xipocado's Console to place the Royal Access Chamber.
- Connect to and complete the Royal Access Chamber.
- Complete the route to Atziri's Chamber.
- Enter the encounter with Atziri, the Red Queen.
Atziri is the Pinnacle Boss of the Temple branch. Her encounter should have its own mechanics guide; this article covers access and the Temple cost of the attempt. Players comparing current Pinnacle routes can use the PoE 2 boss access guide.
Atziri Rewards, Infusers, and Orbs of Sacrifice
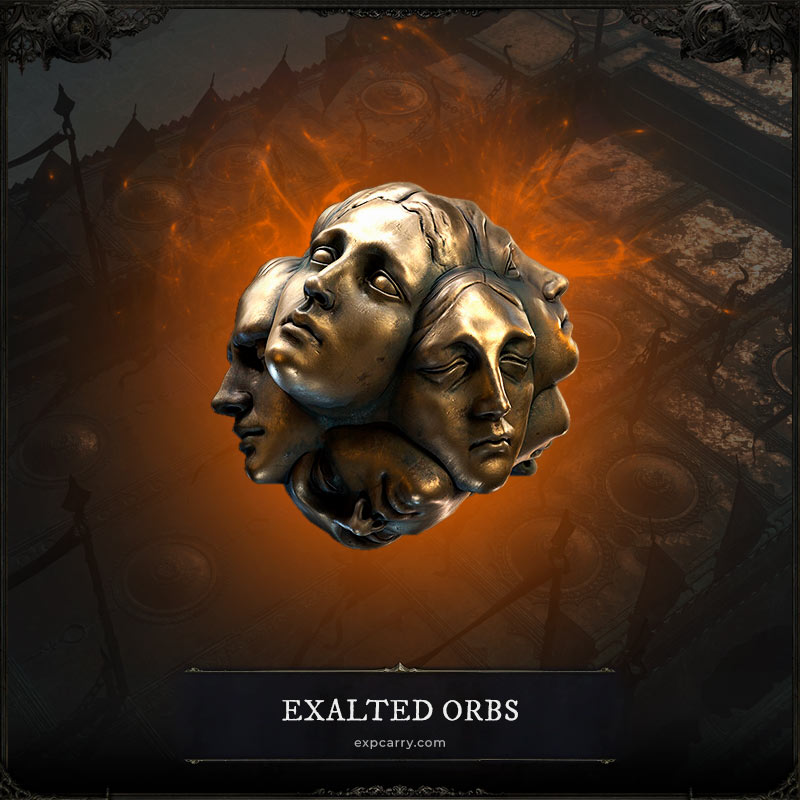
Atziri's rewards are collected from her Vault after the fight rather than treated as an ordinary boss loot pile. The Vault can contain Atziri-specific rewards and Temple currencies. Patch 0.5.4 added four Orbs of Sacrifice to this reward pool. Each Orb upgrades a supported Corrupted Enchantment while randomly removing an Explicit Modifier, so it is a high-risk crafting tool rather than a guaranteed improvement.
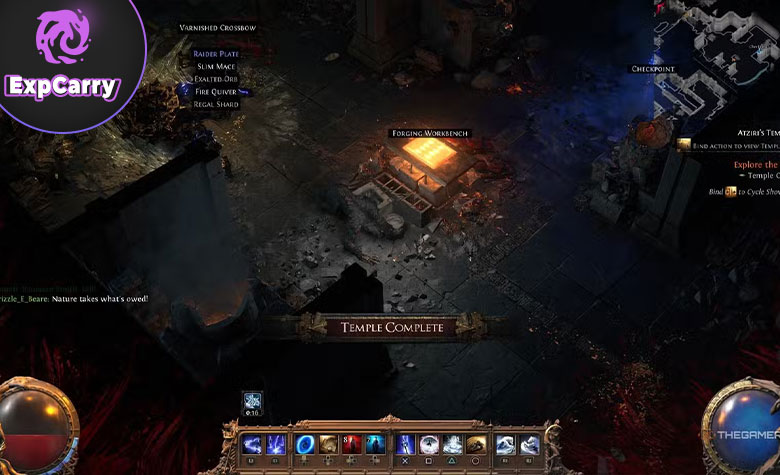
Return of the Ancients also expanded the use of itemised Infusers. Supported Temple workbenches can be used inside the room or converted into an Infuser for later use. Different Infusers apply to different item categories, and several can raise quality beyond the normal maximum with a chance to Corrupt the item. Check the currency tooltip and eligible item type before choosing an expensive target.
The 0.5.3 Temple changes also redirected Temple Currency back toward the Temple itself and adjusted Atlas passives connected to Vaal Beacons and Restricted Rooms. Farming advice written around the original Fate of the Vaal reward distribution should not be assumed to remain accurate. Current economy values should be checked separately rather than inserted into an evergreen Temple guide.
Common Temple Mistakes
Most failed Temple plans come from misunderstanding access or Destabilisation rather than from choosing the wrong theoretical reward. The following checks prevent the most expensive errors without relying on a patch-specific farming strategy.
- Building isolated rooms: a reward is useless when no route reaches it.
- Saving cards for later: unused Room Cards are discarded when the Temple opens.
- Assuming the layout resets completely: only Destabilised and consumed rooms are removed, with heavier losses after major bosses.
- Ignoring global modifiers: room and Waystone modifiers can make ordinary rooms significantly harder.
- Using a crafting device without a target: prepare the item and understand corruption or destruction risk first.
- Rushing Atziri access: the Royal Access Chamber must be placed and completed before her door opens.
- Following old snake-layout advice: current Destabilisation rules can replace required deleted rooms with Paths.
If the obstacle is character strength rather than layout planning, available Path of Exile 2 progression services can be compared after identifying whether the problem is gearing, Atlas progression, or the boss encounter itself.
Conclusion
Atziri's Temple is now an evergreen Endgame system, not a temporary Fate of the Vaal activity. Efficient progression comes from collecting Energised Crystals, building connected routes, upgrading rooms with compatible placements and Medallions, and accepting that Destabilisation is part of every long-term layout. Xipocado provides Restricted Rooms and the Royal Access route, while Atziri offers the branch's Pinnacle encounter and access to her Vault.
The strongest practical rule is to plan around the next reachable objective rather than an imagined perfect Temple. Complete useful rooms before closing, protect only the rooms that support an important route, and fight Xipocado or Atziri when their rewards justify the larger rebuild. More current Endgame and mechanic coverage is available in the PoE 2 Guides category and the Return of the Ancients hub


