




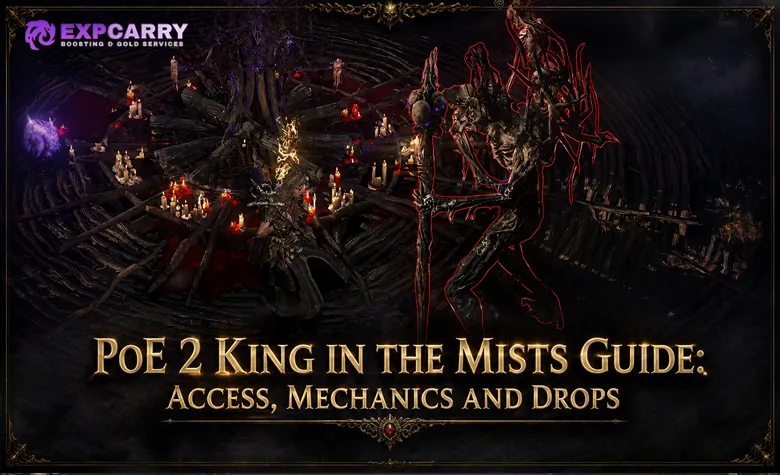
The King in the Mists is the first major boss checkpoint in Path of Exile 2's current Ritual storyline. Reaching him requires deliberate Tribute management, not a random trip through the Realmgate, and defeating him produces the Head of the King needed to begin the Rite of the Nameless. The encounter itself tests Physical and Chaos defence, precise responses to two opposite movement commands, maze navigation, and control during a crowded final form.
This guide covers the endgame King found in the Crux of Nothingness, not the campaign encounter in Freythorn. It explains building Audience access through Tribute, revealing the Crux on the Atlas, preparing a build, surviving the maze and every major arena mechanic, protecting a run after a mistake, and evaluating the current boss-restricted rewards without relying on invented drop rates or temporary market prices.
King in the Mists Quick Answer
Complete endgame Rituals, spend Tribute on rewards that matter, and sacrifice the unused balance toward the persistent Tribute to the King bar. When the bar is full, it grants An Audience with the King. Keep that fragment in the main inventory, select one of its matching Atlas markers after clearing an adjacent map, and consume the fragment to reveal the Crux of Nothingness. Defeat the King's first form, follow Sacred Wisps through the maze while resisting Branching Affliction and Followers, then kill his transformed final form.
| Checkpoint | Correct Action | Main Failure |
|---|---|---|
| Ritual maps | Clear every altar and reserve true leftover Tribute for the King bar | Buying marginal Favours and making no access progress |
| An Audience with the King | Carry it in the main inventory and use an eligible Atlas marker | Following an obsolete Petition Splinter or Realmgate route |
| First form | Remove temporary totems, obey movement curses, and leave unblockable slams | Standing on an effigy platform long enough to stack vulnerability |
| Maze | Follow one Sacred Wisp chain to the purple exit | Fighting every Follower while the damage-over-time debuff grows |
| Final form | Kite the Rat Tornado and preserve a lane through permanent arena hazards | Being rooted by a movement curse beside persistent damage |
| Victory | Collect the Head of the King and all reward items before leaving | Confusing the Head with the Audience fragment or a reliquary key |
What Changed in the Current Ritual Route
Older boss guides can be mechanically useful but wrong about access. Petition Splinters and the Realmgate belonged to an earlier endgame structure. The current route was rebuilt around Caer Tarth, a persistent Tribute contribution bar, An Audience with the King, and an Atlas reveal. Grinding Gear Games confirms in its Return of the Ancients update notes that unused Tribute advances the Audience and that the King's death now awards the key for the Rite of the Nameless.
The King is therefore an important Ritual storyline boss, but he is no longer the final Ritual encounter. His Head begins the five-map Rite, which eventually leads to The Bodach. Ritual Atlas specialization can also enable the optional Queen in the Mists encounter, but that branch does not belong in the mandatory access sequence.
| Outdated Instruction | Current Replacement | Why It Matters |
|---|---|---|
| Collect Petition Splinters | Offer unused Tribute until the Audience bar is filled | The old splinter route no longer describes current access |
| Insert access into the Realmgate | Use an eligible Audience marker on the Atlas | The fragment now reveals a route to the Crux |
| Raise a fixed boss difficulty tier | Follow the current quest or repeat encounter presented by the Atlas | Archived difficulty tables do not define today's progression |
| Finish Ritual by killing the King | Take the Head to Caer Tarth and continue into the Rite | The Ritual storyline now has a later pinnacle boss |
Building the Tribute to the King Bar
Run maps containing Ritual, complete every altar, and use the reward screen only after understanding the map's full Tribute budget. Buy an immediately useful Unique or Omen, defer an expensive target that is genuinely worth preserving, and reroll only when the remaining Tribute can support another page. After the reward decisions are complete, contribute the unused amount through Offer Tribute to the King.
For the guided endgame route, locate Caer Tarth west of the Atlas starting region and clear the surrounding Ritual maps. These areas introduce Aoife's storyline and award progression for the dedicated Ritual Atlas tree. Inside a map, locusts released after one completed altar indicate the direction of the next, reducing the chance of leaving before every Tribute opportunity has been resolved.
The contribution fills a persistent bar across maps, so a weak individual Ritual is not wasted progress. The important distinction is between Tribute spent on Favours and Tribute sacrificed to the King. Both can be productive, but one cannot be used twice. A player who rerolls repeatedly or buys low-impact rewards may clear many Rituals without moving meaningfully toward the Audience.
- Finish every altar before making the final spending decision.
- Preserve a strong deferred reward when its future cost is realistic.
- Do not sacrifice Tribute needed to secure an exceptional current Favour.
- Do not buy weak items solely because unspent Tribute feels wasteful.
- Send the true remainder to the King bar before leaving the map.
How to Reveal the Crux of Nothingness
When the Tribute to the King bar completes, An Audience with the King enters the access loop. Place it in the character's main inventory and open the Atlas. Matching Audience markers can appear in different locations. A marker becomes usable after a map beside it has been completed. Selecting the eligible marker consumes the Audience and reveals the path containing the Crux of Nothingness.
This reveal is not always an instant portal beside the Atlas start. Make sure the adjacent route is already available, keep suitable Waystones for the connecting map or maps, and do not remove the fragment into an inventory compartment that prevents its markers from appearing. Players who want a broader explanation of where every modern key belongs can use the contextual PoE 2 boss access route while keeping this guide focused on the King encounter itself.
Quest Progression and Repeat Access
The storyline gives a guided route through Ritual and the King, while repeat attempts return to the same core resource decision: produce another An Audience with the King, reveal another Crux, and complete the encounter. In a trade-enabled league, acquiring an Audience from another player can shorten the farming step, but it does not remove the need to reveal and reach the Atlas area correctly.
Do not judge an attempt only by the fragment's current trade price. A self-farmed Audience also represents the Favours declined while filling the bar and the time spent clearing altars. For repeat farming, record how many maps were required, how often the Crux was completed, and which rewards were actually useful or saleable. This produces a better decision than copying a profit estimate from another league or patch.
Crux of Nothingness Rules and Run Protection
The Crux is a dedicated boss area where experience cannot be gained or lost. This removes the normal experience penalty from learning the fight, but it does not make an attempt free. Death, leaving, or using a recovery option can still consume an available attempt, and a failed encounter still costs the Audience and the time spent producing access.
Endgame combat in the Crux does not pause when a menu is opened. Refill flasks before crossing into the arena, confirm the correct charm is active, close trade or build-planning distractions, and verify that the movement skill is on a comfortable binding. If a death occurs in the maze, returning to town does not bypass the maze in the current PoE 2 encounter; the next entry still requires the player to resolve that stage.
King in the Mists Readiness Checklist
The King primarily pressures Physical and Chaos defences. Capped elemental resistances remain a basic endgame requirement, but strong elemental numbers do not compensate for deeply negative Chaos resistance or an inability to handle Physical damage over time. The best readiness test is whether the character can move for several seconds, recover without hitting the boss continuously, and survive a short overlap after one imperfect curse response.
| Readiness Area | Practical Standard | Test Before Spending Access |
|---|---|---|
| Chaos defence | Positive, meaningful Chaos resistance with room for Wither-like vulnerability | Survive sustained Chaos ground pressure without emptying every flask |
| Physical defence | Mitigation or avoidance for hits plus an answer to Physical damage over time | Recover after a heavy map-boss hit while another hazard remains active |
| Recovery | Life or Energy Shield recovery that functions during movement | Restore resources while circling for several seconds without attacking |
| Mobility | Reliable movement speed and a controlled dodge roll or movement skill | Cross a narrow lane without colliding with terrain or returning immediately |
| Single-target damage | Sustainable output through a full transformation and interrupted uptime | Kill durable map bosses without depending on one short burst window |
| Visual clarity | Skill effects and minions leave curse colors and floor hazards readable | Identify red and purple character marks during an ordinary dense fight |
A character that fails several checks needs a general upgrade before it needs a rare boss key. A contextual PoE 2 build foundation option can be compared with self-directed gearing when the problem is weak defences, recovery, or single-target structure rather than knowledge of one attack.
Defensive Priorities for Physical and Chaos Damage
Chaos resistance has unusually high value because projectiles, swarms, ground effects, and parts of the maze pressure can stack while the player is responding to another command. Avoiding one hit does not protect against a damage-over-time field already underfoot. Bring Chaos resistance as close to the character's practical cap as the build allows, then preserve enough total Life or Energy Shield to survive an imperfect transition.
Armour helps against Physical hits but is not a universal answer to Physical damage over time. Evasion can remove some attack pressure but cannot evade a degeneration effect already applied. Block is valuable against eligible hits but must not be treated as permission to stand inside a red-flash slam. Layer the build so that one defence handles ordinary hits, another reduces sustained pressure, and recovery repairs the remainder.
Flasks, Charms, Recovery, and Movement
Use recovery flasks that solve the character's actual resource problem and do not require a long stationary attack sequence to refill their value. Movement speed on boots matters throughout the arena and becomes critical in the maze. A charm that answers a common control or damage spike can be useful, but its charges and trigger condition must be tested before the fight rather than assumed from the tooltip.
Do not spend every movement cooldown on ordinary projectiles. Walking and short strafes should solve predictable patterns, leaving the strongest movement response for Vine Slam, a closed Blood Wave lane, or a dangerous curse overlap. In the maze, movement speed and path reading matter more than aggressive damage, so a utility swap can outperform a small damage increase.
Arena Layout and Default Positioning
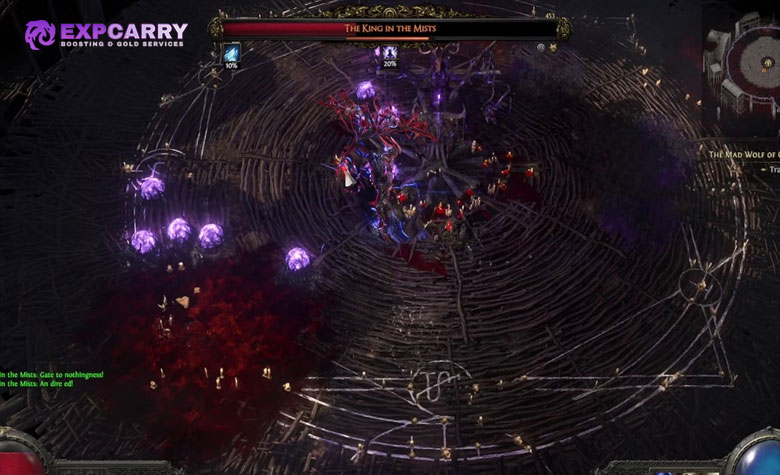
The first form uses a central fighting space with three raised platforms and their Mystic Fetishes around the edge. Middle distance is the most informative default. It gives enough space to sidestep Thorngrip and projectiles, keeps the King's red-flash slam readable, and shortens the trip to an active fetish without forcing the player to remain on a dangerous platform.
Do not permanently camp the outer wall. A wall position removes half of the available escape directions and makes the final form's Rat Tornado, waves, insects, and explosive ground much harder to separate. Circle through clean interior space, move toward a platform only to complete a specific job, and return immediately after the fetish has been removed.
First Form Fight Plan
The opening form teaches the fight's control language. The King fires basic projectiles, creates Affliction Totems, activates platform-based Mystic Fetishes, projects a cone of thorns, performs a dangerous close-range slam, and applies Ritual of Meditation or Ritual of Dance. The safest damage plan uses short actions between these reads instead of one uninterrupted combo.
Prioritize survival in this order: obey the active movement curse, leave an unblockable attack, destroy an Affliction Totem, remove an active Mystic Fetish, then resume damage. The order can change when a hazard is already expiring, but no temporary objective is worth becoming rooted in a lethal position.
Basic Projectiles and Vulnerability Stacks
The King's common ranged attack is visually modest, which makes it easy to ignore. Repeated contacts can create a vulnerability state that increases later Chaos pressure. Strafe across the projectile path and avoid retreating along its line. A single ordinary hit is rarely the defining failure; allowing several to land before stepping into a swarm or maze damage is the dangerous sequence.
Ranged builds should move after a brief cast cycle rather than waiting for the projectile to reach them. Melee builds can use the King's side, but should not stay directly in front after he teleports or raises the staff. If a vulnerability stack is already active, lower damage uptime until the debuff clears and the arena is clean.
Affliction Totems
Affliction Totems appear in the fighting area and apply escalating damage pressure while alive. They have little durability relative to the boss, so immediate targeted damage or a single area skill normally removes them. Ignoring one to finish a long boss combo is inefficient because the growing degeneration consumes recovery that will be needed for the next mechanic.
Keep the King visible while targeting a totem. If the boss begins a slam or movement curse, solve that mechanic first and return to the totem afterward. Minion and damage-over-time builds should confirm their skills actually acquire the totem rather than continuing to attack the boss by default.
Mystic Fetishes and Platform Risk
The King can move to one of the three platforms and activate its Mystic Fetish. An active fetish adds a Ritual hazard to the arena, including insect swarms, volatile creatures, or blood effects. Reach the platform, destroy the fetish quickly, and step back into the central area. Leaving several active multiplies visual pressure and turns later curses into much harder checks.
Standing on a platform applies Portent Vapors, a stacking effect that increases damage taken. The platform is therefore a short objective zone, not a safe elevated position. Approach after the King's attack has committed elsewhere, burst the fetish, and leave before the vulnerability grows. If damage is too low to remove it quickly, wait for a safer approach rather than accumulating stacks beside the King.
Thorngrip and Vine Slam
Thorngrip sends a widening cone of purple thorns in the player's direction. Its spread is easier to read from middle distance. Move laterally across the cone rather than directly backward through expanding lanes. Once the thorns have committed, the King's flank often becomes a useful short damage window.
Vine Slam is the more dangerous close-range response. The King raises his staff, flashes red, and erupts the area around the impact. Treat the red cue as a required dodge and leave the radius; block or raw armour should not be the primary plan. Melee players should reserve enough mobility to disengage whenever the staff rises instead of finishing a slow attack that locks them in place.
Ritual of Meditation
Ritual of Meditation places a red mark around the character and punishes movement. Find clean floor, stop moving for the decisive part of the debuff, and resume only after the mark ends. Moving too much causes imprisonment, leaving the character exposed to the King's next attack or an active arena hazard.
Meditation does not mean remaining still regardless of danger. If a lethal slam or wave is already aimed at the position, use the minimum movement needed to survive and accept that a root may follow. The correct preparation is to notice the red mark early, create a safe stationary pocket, and avoid forcing that trade.
Ritual of Dance
Ritual of Dance uses a purple mark and demands the opposite response: keep moving until the effect expires. Smooth circular or lateral movement is safer than repeated rolls because it preserves cooldowns and avoids returning into the same hazard. Stopping too long triggers imprisonment.
The main cause of failure is confusing the two colors under visual clutter. Use a verbal rule: red means settle, purple means travel. If color perception or skill effects make the marks difficult to read, use the debuff icon and the King's voice cue as additional confirmation. Do not guess from the previous curse because the next cast can demand the opposite action.
| Mechanic | Visual Rule | Required Response | Bad Reaction |
|---|---|---|---|
| Ritual of Meditation | Red character mark | Reach clean floor and stop for the critical end of the effect | Continuing a wide circle until imprisonment triggers |
| Ritual of Dance | Purple character mark | Maintain steady movement until the mark disappears | Stopping to cast or channel for too long |
| Red-flash Vine Slam | Boss flashes and raises the staff | Leave the impact area with a committed dodge | Trusting block or attempting to finish a combo |
| Thorngrip | Purple cone spreads outward | Cross laterally through a widening gap | Running backward along the cone |
The Maze Transition
Late in the opening health bar, the King becomes unavailable and sends the character into a large vine maze. This is an intermission, not the end of the first life and not a loot phase. On returning, the King transforms and begins the final arena form with a restored health bar.
Use the last seconds before the transition to clear an Affliction Totem if possible, recover resources, and orient the camera. Do not spend every flask or mobility charge trying to force damage into an immune transition. The maze immediately tests movement and recovery, and the final form begins as soon as the exit is reached.
How to Escape the Wisp Maze
The maze is built from thick vines that cannot be crossed. Sacred Wisps reveal the intended route in short segments. Approach a visible wisp, watch the direction in which it travels, follow that corridor, and search for the next guide. Continue until the large purple portal back to the arena is visible.
Branching Affliction stacks throughout the maze and deals Physical and Chaos damage over time. The correct strategy is forward progress, not complete monster clearing. Pause only when an enemy physically blocks the corridor or when a brief recovery action is necessary. Doubling back increases the debuff and creates more opportunities to become surrounded.
- Choose one wisp chain when several guides appear together.
- Watch the wisp's travel direction before sprinting past it.
- Use the minimap to recognize explored dead ends without staring away from enemies.
- Clear only the Followers that close the next corridor.
- Enter the purple exit as soon as it becomes reachable.
Followers in the Maze
The maze is no longer only a navigation test. The official 0.5.3 patch notes added Followers of the King in the Mists who actively try to kill the player during the escape. Their purpose is to punish hesitation and unsafe pathing while Branching Affliction continues to rise.
Use mobile area damage, crowd control, or a quick burst when Followers block a narrow turn, then continue. Chasing a rare enemy away from the wisp path is usually a losing exchange. Minion builds should move with their army rather than waiting for it to finish every target, and channeling builds should use brief casts at corners where enemies approach through one line.
Final Form Overview
After the maze, the King returns as a larger transformed creature and restores his health. The final form retains the central movement curses and several direct attacks while the arena produces persistent Ritual hazards. The three platform fetishes are no longer ordinary kill targets, so the fight shifts from temporary objective control to continuous space management.
Expect insect swarms, blood waves, volatile toads, a pursuing Rat Tornado, enhanced projectiles, and an explosive slow-moving orb. Damage uptime falls naturally because the safest action is often repositioning. Build evaluation should therefore use sustainable mobile damage, not a stationary tooltip burst that cannot be delivered during the final form.
Rat Tornado Positioning
The Rat Tornado follows the character and remains one of the most dangerous final-form threats. Kite it around the outer half of the arena while preserving a route back toward the middle. Do not drag it directly through the King unless the boss has just committed to a long animation, because the next Meditation can force the character to stop beside the tornado.
Ordinary walking should control most of its path. Sudden reversals cause the tornado to cut across the planned lane, while excessive rolling can end inside an insect swarm or explosive blister. Create distance before a movement curse arrives, then solve the curse in a section of floor the tornado cannot reach immediately.
Bug Swarms, Blood Waves, and Volatile Toads
Bug Swarms move across or occupy sections of the arena and apply Chaos damage over time. Blood Waves travel across the fighting space with Physical pressure. Volatile Toads leap until they reach a player or an obstruction and then explode. Individually these hazards are readable; together they reduce the number of safe places available for Meditation or a long cast.
Cross a wave perpendicular to its travel direction, walk around swarms instead of through their full length, and let toads expire away from the intended damage position. Do not chase a small opening at the wall if it closes the path back toward the center. The safest lane is the one that remains usable after the next hazard appears, not merely the closest clean pixel.
Explosive Spore and Purple Blisters
The transformed King launches a slow purple orb toward the player's position. It explodes on contact or at its destination and leaves dangerous blisters on the floor. Bait the projectile toward an edge or already abandoned section, move laterally after its direction is established, and avoid crossing the residual field unnecessarily.
Do not roll early in a straight line away from the orb. Its slow travel gives time to place it intentionally, and an early panic movement can contaminate the center. If the projectile overlaps Dance, keep moving in a broad curve. If it overlaps Meditation, create the stationary pocket before the orb arrives and move only if the impact will actually reach that position.
Dangerous Mechanic Overlaps
Most deaths come from incompatible instructions arriving together. Meditation asks the player to stop while the Rat Tornado or a wave approaches. Dance demands movement while explosive ground narrows the route. An ordinary projectile becomes lethal after several vulnerability stacks. Resolve the effect that will kill or imprison the character first, then rebuild position instead of immediately returning to damage.
| Overlap | Safe Priority | Recovery Position |
|---|---|---|
| Meditation plus Rat Tornado | Create maximum separation, then stop on clean floor | Middle distance with two exits after the root window |
| Dance plus Blood Wave | Keep moving laterally and cross the wave at a clear segment | Continue into open interior space |
| Explosive orb plus Bug Swarm | Bait the orb toward the already contaminated outer section | Reclaim clean floor nearer the center |
| Vine Slam plus toads | Leave the slam radius first, then avoid the nearest explosion | The King's flank after the impact resolves |
| Low resources plus multiple hazards | Stop attacking and use mobile recovery | A broad lane where the King and tornado remain visible |
Positioning by Build Style
Melee, ranged, minion, damage-over-time, and channeling builds see different damage windows, but every style must respect the same movement commands and maze timer. The correct adjustment changes where damage is applied, not whether a mechanic can be ignored.
| Archetype | Preferred Spacing | Uptime Approach | Primary Danger |
|---|---|---|---|
| Melee | On the King's side with an open retreat lane | Use short combos and leave when the staff rises | Triggering or remaining inside the close-range slam |
| Ranged | Middle distance on a diagonal angle | Move after brief cast sequences | Retreating to the wall and losing lateral space |
| Damage over time | Clean orbit with the boss inside application range | Refresh effects before movement-heavy overlaps | Reapplying too often instead of using free movement uptime |
| Minions | Where curse marks and floor effects remain visible | Direct minions without following them onto platforms or hazards | Visual clutter hiding the mark color |
| Channeling | Short safe windows near the interior | Cancel early whenever a curse or persistent hazard begins | Treating a full channel as mandatory after it starts |
Common Reasons Attempts Fail
Knowledge failures are more common than a small damage shortage. Players use the obsolete Realmgate route, enter with weak Chaos resistance, remain on a platform after killing its fetish, invert Meditation and Dance, try to full-clear the maze, or chase the boss while the final arena becomes unusable. Each error has a specific correction.
- Realize that the Audience reveals the Crux through an Atlas marker.
- Improve Chaos defence before buying more offensive gear for the attempt.
- Leave platforms immediately after the temporary objective is complete.
- Use the red-stop and purple-move rule for the two Ritual commands.
- Follow Sacred Wisps and kill only Followers blocking the route.
- Kite the Rat Tornado away before accepting a stationary damage window.
- Protect central floor by placing explosive orbs near an abandoned edge.
- Collect the Head of the King before leaving the completed instance.
How to Recover After a Mistake
A bad hit should change the next action. Stop attacking, move to clean ground, remove immediate pursuers, and use recovery before re-engaging. If a vulnerability effect is active, wait for it to fall rather than testing the remaining resource pool against another Chaos hazard. If the Rat Tornado is close, lead it away before obeying a likely Meditation window.
When imprisoned, do not spam movement into the root while ignoring the arena. Identify the next collision, use any defensive or recovery skill that can activate, and plan the exit direction for the instant control returns. If repeated attempts fail at the same checkpoint and access is becoming the limiting cost, players can compare continued practice with assistance for the King encounter. The key decision is whether the missing piece is execution, build readiness, or access time.
Head of the King and Ritual Progression
The Head of the King is the progression reward that connects this encounter to the Rite of the Nameless. After the kill, take it to Aoife and the effigy at Caer Tarth. Attaching the Head begins the map-selection sequence for the Rite. It is not a replacement for An Audience with the King: the Audience opens the Crux, while the Head proves the victory and advances the storyline.
The Head is also not a reliquary key and should not be valued like a normal trade reward. Confirm that the quest item has been collected, complete any required dialogue, and check the Caer Tarth objective before starting unrelated maps. The boss-specific guide ends at that handoff; the accumulating five-map Rite and The Bodach belong to their own encounter routes.
King in the Mists Unique Drops
The confirmed restricted rewards are Ingenuity, Beetlebite, Pragmatism, From Nothing, and The Burden of Shadows. These items serve very different builds, and a familiar name does not guarantee a valuable roll. The latest live tooltip, base values, variant, socket or charm outcome, and current demand should be checked before an item is equipped, crafted around, or listed.
| Reward | Core Identity | Evaluation Priority |
|---|---|---|
| Beetlebite | Evasion and Energy Shield boots with movement, Bleeding, and Thorns interactions | Check movement and defence rolls, then verify a real build use |
| Ingenuity | Utility Belt that amplifies bonuses from the equipped rings | Inspect ring-effect rolls, charm behavior, and the complete ring package |
| The Burden of Shadows | Staff that moves skill Mana costs to Life and scales extra Chaos damage from cost | Confirm recovery, cost, granted-skill level, and build compatibility |
| Pragmatism | Armour and Evasion body armour with resistances and charge-free Charm use | Compare the body-armour opportunity cost and actual Charm triggers |
| From Nothing | Corrupted jewel enabling disconnected passive allocation around a named Keystone | Identify the Keystone variant and model the reachable passives |
How to Evaluate Ingenuity
Ingenuity is not valuable merely because it is a famous boss drop. Its purpose is to multiply the bonuses supplied by both equipped rings, so the belt must be judged with the exact ring pair. Strong resistance, attribute, damage, or defensive modifiers on the rings can gain substantial value, while weak rings leave little worth amplifying.
Inspect the belt's rolls and current implicit outcome before comparing listings. Then calculate which ring modifiers are affected and whether losing a conventional rare belt breaks resistance, Life, attributes, or another essential stat. A high theoretical ring multiplier does not repair an incomplete character.
How to Evaluate From Nothing
From Nothing is a corrupted Diamond with a Keystone-specific variant. It permits passives within the indicated radius to be allocated without connecting them to the rest of the tree, but the named Keystone itself is not granted by that effect. The jewel's value therefore depends on its variant, the current passive-tree layout, an available socket, and the points required to buy the desired nodes.
Do not price every From Nothing as the same item. Open the passive tree, place the exact variant in a planner, identify all meaningful passives inside its radius, and compare their total cost with an ordinary path. Tree revisions can change this calculation even when the jewel text remains unchanged, making fixed tier lists less evergreen than direct planning.
Omens and the Ritualistic Reliquary Key
The King can also drop Ritual Omens. An Omen is evaluated by its precise trigger, the action it modifies, and current crafting or combat demand. Activate only the Omen intended for the next relevant event, because active inventory conditions and per-instance trigger restrictions can make careless organization expensive.
The loot can also include a Ritualistic Reliquary Key. It opens the corresponding Reliquary Vault through the Atlas interface and produces a foil version from its supported King reward pool. The key's existence does not guarantee a specific foil Unique, and it does not advance the Rite. Decide whether to use or trade it only after checking the current pool and economy.
Loot Priorities After the Kill
Collect progression before speculation. The Head of the King is mandatory for the storyline. Next, identify every boss Unique, inspect any From Nothing variant, read each Omen, and secure a reliquary key if one appears. Only then evaluate ordinary currency and rare items. This order prevents a valuable but visually modest progression or crafting item from being missed.
- Pick up and verify the Head of the King.
- Identify boss-restricted Uniques and compare their variable outcomes.
- Read Omen text instead of ranking only by name.
- Secure a Ritualistic Reliquary Key separately from normal fragments.
- Price-check only after leaving the completed encounter safely.
Avoid publishing or following fixed drop percentages. Historical samples were collected under previous difficulty structures, and rare-item weighting can be changed independently. The evergreen rule is to name confirmed sources, explain item use, and treat every individual reward as chance-based unless the current quest explicitly guarantees it.
Repeat Farming Strategy
Repeat farming begins before the boss. Optimize Ritual maps for reliable altar completion, sensible reward decisions, and steady Audience progress. A build that earns more theoretical Tribute but occasionally fails the last altar may produce fewer completed Crux attempts than a safer setup. Track full cycles from the first Ritual map through the King kill.
Inside the fight, consistency comes from standardizing movement. Use the same red-stop and purple-move callouts, the same platform exit rule, and the same maze priority every time. In the final form, place the Rat Tornado and explosive orb before committing damage. Faster damage is valuable only after it stops creating deaths through skipped mechanics.
| Metric | What It Reveals | Useful Adjustment |
|---|---|---|
| Ritual maps per Audience | Efficiency of Tribute spending and offering | Reduce low-value purchases or improve altar consistency |
| Crux reveals completed | Reliability of the connecting Atlas route | Prepare Waystones and clear adjacent maps before using the key |
| Deaths by mechanic | Whether the issue is curse recognition, maze pathing, or final-form control | Practice the repeated failure rather than buying generic damage |
| Successful kills per Audience | True access conversion rate | Lower risk until the encounter is repeatable |
| Reward value by item type | Whether Uniques, Omens, or progression justify the cycle | Compare live demand without assuming a permanent price |
Current-Version Accuracy Check
The access chain and maze behavior must be checked against current patches because both have already changed during Early Access. The 0.5.0 overhaul restored An Audience with the King as the Tribute-based route and connected the victory to the Rite. Patch 0.5.3 added hostile Followers to the maze. Later balance updates can alter boss resistance or reward weighting without changing the basic encounter language.
The official 0.5.4 patch notes include a broad correction to unintentionally high pinnacle-boss resistances. Because the note does not name every affected boss, this guide does not invent a fixed King resistance table from it. Read the live client for exact numerical planning and use this guide for the stable access, positioning, survival, and reward logic.
Pre-Entry and Post-Kill Checklist
A short checklist prevents more failed value than another speculative damage upgrade. Complete it before consuming the Audience and again before leaving the finished Crux.
| Timing | Check | Pass Condition |
|---|---|---|
| Before reveal | Atlas marker and adjacent route | The intended Audience marker is usable and the connecting map is ready |
| Before entry | Resistances, recovery, flasks, charms, and bindings | The character can answer Physical and Chaos pressure while moving |
| First form | Red-stop and purple-move recognition | Both curses are identified without guessing |
| Maze | Wisp route and Follower priority | The player advances instead of attempting a full clear |
| Final form | Rat Tornado and explosive-ground placement | Clean interior lanes remain available |
| After victory | Head, Uniques, Omens, key, and currency | Every progression and reward item is secured before exit |
Final Verdict
The current King in the Mists encounter is a control and route-knowledge test disguised as a damage check. Earn An Audience with the King by turning leftover Ritual Tribute into persistent progress, reveal the Crux through an eligible Atlas marker, and ignore obsolete Realmgate or Petition Splinter instructions. Enter with strong Physical and Chaos layers, mobile recovery, and enough visual clarity to distinguish the two opposing Ritual commands.
In the opening form, remove short-lived hazards without lingering on the platforms. In the maze, follow Sacred Wisps and fight only the Followers that obstruct escape. In the transformed form, position the Rat Tornado and explosive ground before attacking. Secure the Head of the King first, evaluate every Unique by its actual variant and build use, and judge repeat farming by completed cycles rather than old drop rates or temporary prices.


