




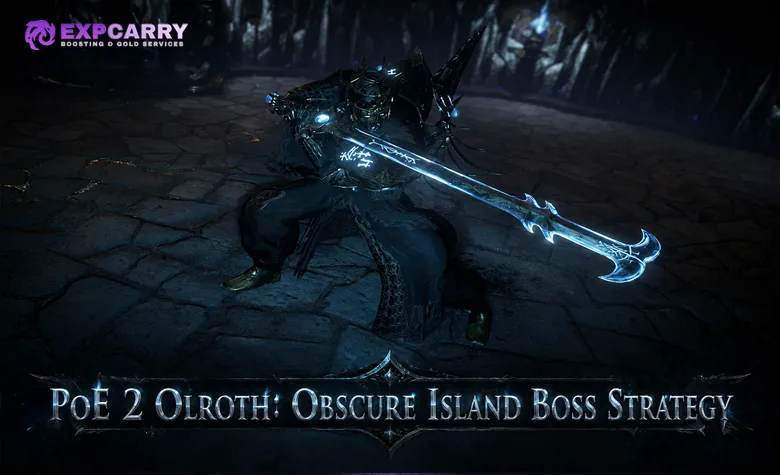
Olroth, Origin of the Fall is a two-life Expedition boss found on Obscure Island in Path of Exile 2's current Ocean exploration system. The route changed substantially with the Return of the Ancients endgame. Players now use Expedition Logbooks to reveal Ocean regions, look for the Origin of the fall rumour, enter Obscure Island and open the tomb through the island objective. Runic Splinters and the Realmgate belong to an obsolete access system. This guide covers the current quest and repeat routes, build preparation, both combat stages, Triskelion hazards, recovery decisions and Olroth's relevant rewards without borrowing historical rates.
Olroth primarily tests Physical and Cold defence, Freeze control, visual awareness and sustained output while moving effects divide the arena. His defeat also advances the Grand Expedition storyline through the Shattered Triskelion, so the encounter serves both as a reward target and as a gateway to later Runes of Aldur content. Characters should finish equipment, passive-tree and endgame preparation before committing a valuable Logbook route.
PoE 2 Olroth Quick Answer
Reach the Ruins of Kingsmarch and progress The Grand Expedition until the Olroth step becomes available. Use Olroth's quest Logbook on an Expedition Logbook node at the Ocean edge, reveal the islands and travel to Obscure Island. For repeat encounters, consume regular Expedition Logbooks and seek the matching Ocean rumour; activating Olroth's Saga before revealing a region guarantees that encounter in the new Ocean area. On the island, complete the explosive objective, enter the tomb and fight Olroth. Cap Cold Resistance, bring Freeze protection, add a Physical defence layer and keep the rotating Triskelion in view. Defeat Olroth once, survive his revival and then handle the added beams, cold projectiles, Chilled Ground and Runic Gateway monsters while finishing his second life.
| Question | Current Answer | Common Wrong Answer |
|---|---|---|
| Where is Olroth? | Obscure Island in an Ocean region revealed by an Expedition Logbook | A random room inside an old-style Logbook area |
| What reveals the encounter? | The Origin of the fall rumour or an active Olroth's Saga | Runic Splinters placed in the Realmgate |
| What damage matters most? | Physical and Cold, including Chill and Freeze pressure | Building only general elemental defence and ignoring Physical hits |
| How many combat stages? | Olroth is defeated, revived by the Triskelion and fought again | One health bar with no meaningful transition |
| What is the progression outcome? | The Shattered Triskelion continues the Runes of Aldur boss chain | Olroth remains the final Expedition storyline boss |
What Changed in the Current Olroth Route
Older guides can be accurate about Olroth's sword and Triskelion attacks while being completely wrong about reaching him. The current Expedition structure is based on Ocean exploration from the Ruins of Kingsmarch. A Logbook reveals a group of islands instead of opening a single traditional Expedition zone. Grinding Gear Games describes this overhaul, the four faction leaders and Olroth's new progression role in the official 0.5.0 endgame notes. The Return of the Ancients overview is the companion developer summary for this endgame foundation.
Do not collect Runic Splinters for this fight, do not take them to the Realmgate and do not search a legacy Logbook for a random Knights of the Sun entrance. The live access object is an Expedition Logbook used on the Atlas at an eligible Ocean edge. The destination to identify is Obscure Island. Historical difficulty tiers, their splinter costs and their exact revival counts should not be used to budget a current attempt.
| Legacy Instruction | Current Replacement | Why It Matters |
|---|---|---|
| Find Olroth randomly inside a conventional Logbook | Reveal Ocean islands and locate Obscure Island | The encounter is now a visible destination in the Ocean system |
| Insert Runic Splinters into the Realmgate | Consume an Expedition Logbook at an Ocean Logbook node | Runic Splinters are not the live access currency |
| Select one of the former pinnacle difficulties | Run the quest or repeat encounter presented by the current Logbook route | Old health, attempt and reward tables do not describe the new encounter |
| Treat Olroth as Expedition's final destination | Recover the Shattered Triskelion and continue the Grand Expedition chain | Olroth now unlocks access toward a later boss |
Quest Access Through The Grand Expedition
The deterministic first encounter belongs to The Grand Expedition questline. Establish the Ruins of Kingsmarch in the Ocean region southeast of the Atlas start, then follow the faction-leader sequence. The story sends the player through Medved, Vorana and Uhtred before Olroth. After Uhtred, return to the Ruins, speak with the indicated Expedition characters and take Olroth's Logbook from Dannig. Quest text and NPC markers should be followed rather than skipping directly to a purchased repeat Logbook, because the quest version also establishes the later Triskelion steps.
Use Olroth's Logbook at the Atlas Ocean interface, explore the revealed islands and search for Olroth. On Obscure Island, speak to Dannig when directed, place or detonate the required explosives and enter the opened tomb. Explore the interior before crossing into the boss arena. After the victory, return to the Ruins of Kingsmarch and complete Dannig's dialogue to recover the Shattered Triskelion. This last hand-in is part of the access chain beyond Olroth and should not be missed because the boss corpse alone is not the end of the quest sequence.
Repeat Access with Logbooks and Rumours
Regular Expedition Logbooks drop from Expedition monsters and can be used at a suitable Ocean edge once the adjacent Atlas route is available. Consuming one reveals several maps in a new Ocean section. The interface displays up to three rumours before the region is opened, although the resulting area may contain more special destinations than the preview shows. The relevant line for Olroth is Origin of the fall, which maps to Obscure Island.
A regular Logbook does not promise that specific rumour. If the goal is an intentional Olroth run rather than general Ocean exploration, activate Olroth's Saga in the inventory before consuming the next Logbook. The Omen changes the revealed result and guarantees an Olroth encounter within that Ocean biome. Olroth's Saga comes from specific Verisium Remnant runewords, so its acquisition belongs to the wider Expedition crafting loop rather than the boss arena itself.
| Access Method | Use Case | Important Limitation |
|---|---|---|
| Olroth's quest Logbook | First deterministic story completion | Progress the preceding Grand Expedition bosses and NPC steps first |
| Regular Expedition Logbook | Ocean exploration with a possible Olroth destination | The visible rumours may not include Origin of the fall |
| Olroth's Saga plus a Logbook | Repeat access focused specifically on Olroth | The active Omen is consumed when it changes the next reveal |
| Obscure Island already revealed | Direct travel after completing the connecting maps | The boss still requires completion of the island and tomb objective |
Ocean Route and Obscure Island Preparation
Before consuming a repeat Logbook, confirm that the intended Ocean edge is reachable and that the character can clear the maps connecting the reveal to Obscure Island. The Logbook creates an area, not an immediate boss portal. Inventory space, Waystone supply and ordinary mapping reliability therefore matter. A character that can defeat Olroth but repeatedly loses the connecting route is not ready to farm the cycle efficiently.
Obscure Island uses an Expedition objective before the tomb. Read every modifier attached to the area and any relevant Expedition effects before detonating explosives. Damage immunity to the build's primary type, severe recovery suppression or combinations that empower monsters beyond the character's defences can be more dangerous than Olroth's unmodified kit. The safe rule is to preserve access first and add optional pressure only when the build has already demonstrated consistency.
- Confirm the destination says Obscure Island and the rumour corresponds to Olroth.
- Check the island and Expedition modifiers before committing the explosive chain.
- Keep portal and inventory management outside the arena so loot does not interrupt the fight.
- Refill flasks and verify charms after the island objective but before entering the tomb.
- Do not import old Logbook assumptions about boss modifiers without reading the current instance.
Olroth Build Readiness Checklist
Olroth deals Physical and Cold damage and is resistant to those same damage types. Cold Resistance should be capped after the endgame penalty, and Freeze prevention or rapid Freeze removal is a high-priority safety layer. Chill reduction helps preserve movement during beam and ground-effect sequences. Physical mitigation, avoidance, block or another appropriate defence must cover sword slams and charged attacks. A build using Physical or Cold damage should also verify its resistance-reduction, penetration or other boss-damage plan.
No single Life, Energy Shield or damage-per-second target reliably defines readiness. The practical checks are whether the build can survive one imperfect sword read, leave Chilled Ground without losing control and kill gateway monsters without abandoning the boss for long periods. Recovery should function while moving because several of the safest windows involve circling rather than attacking. If those basics are missing, a contextual PoE 2 build setup option can help establish a usable endgame foundation before the Logbook is consumed.
| Readiness Area | Practical Goal | Pre-Encounter Test |
|---|---|---|
| Cold defence | Capped resistance with a dependable Freeze answer | Confirm the charm or gear condition activates under real Freeze buildup |
| Physical defence | A layer suited to heavy sword hits and a fast dash | Survive comparable map-boss slams without losing the whole recovery budget |
| Movement | Enough speed and roll control to cross beam lanes deliberately | Leave persistent Cold ground without becoming trapped by Slow |
| Single-target damage | Sustainable damage through two lives and repeated repositioning | Maintain output after interrupting a cast or combo for several mechanics |
| Add clear | Remove gateway warriors without losing sight of Olroth | Clear a compact rare pack while preserving an escape lane |
| Recovery | Restore resources during movement and between pulses | Recover without requiring uninterrupted hits on the boss |
Arena Positioning and Visual Priorities
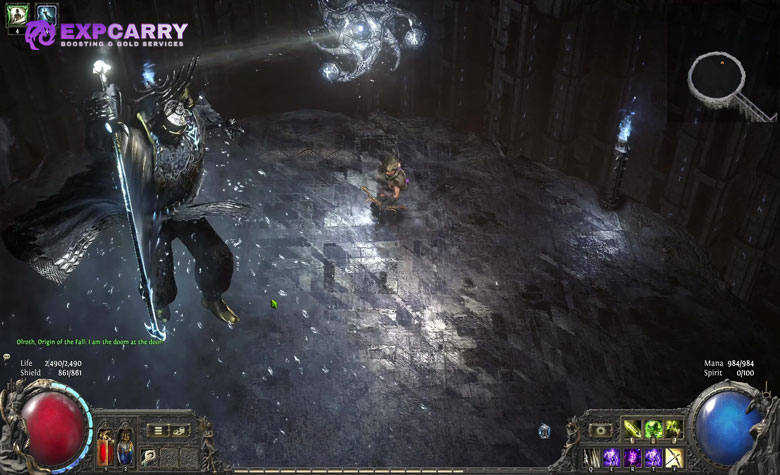
The arena asks the player to watch two sources: Olroth and the rotating Triskelion. Stay at middle distance on an offset angle where the boss animation, the artifact and a broad section of floor remain visible. Maximum range can hide the sword wind-up, while standing directly on Olroth makes the returning weapon and closing light pillars harder to read. Camping the wall also leaves fewer options when projectiles, gateways and the center beam overlap.
Use circular movement as a default, but do not follow the artifact so rigidly that Olroth charges through the chosen path. Small lateral steps handle tracking projectiles and preserve the dodge roll for a committed dash, returning sword or beam crossing. After every outward movement, reclaim useful central space when the floor is safe. The objective is not to stand in the middle at all times; it is to avoid allowing persistent Cold effects to cut off every route back inward.
First Stage Overview
During the opening life, Olroth combines broad sword attacks with the Triskelion's rotating pressure. This stage teaches the core reads before the arena gains stronger Cold effects. Keep damage cycles short enough to see his weapon leave the ground, his body align for a charge and the light pillars begin to close. Melee builds should attack from the side and exit across his turning direction. Ranged builds should maintain an angle rather than retreating in a straight line toward the wall.
The four essential reads are Sword Slam, Sword Throw, Light Pillar and Charged Attack. They punish different forms of greed. The slam leaves pulsing danger behind, so avoiding the first hit is not permission to stand on the impact. The throw threatens both its outward and returning paths. The light formation reduces available space gradually. The charge punishes a late roll or a long stationary animation.
Sword Slam and Pulsing Shockwaves
For Sword Slam, Olroth sends his weapon upward and then drives it into a targeted location. Move out of the marked impact before it lands and continue far enough to avoid the pulsing shockwaves left at the destination. The persistent pulse changes the arena layout for several moments, making an otherwise safe damage position unavailable.
Do not roll back onto the weapon immediately after the central impact. Walk around the pulsing area, keep Olroth on screen and attack from its edge only when the next animation is visible. If another hazard forces a crossing, use the shortest path and avoid stopping inside the pulse. Builds that depend on close range should wait for Olroth to move away from the contaminated position instead of following him through it.
Sword Throw and Returning Cold Burst
Sword Throw sends Olroth's weapon outward and then brings it back. The returning catch produces a Cold area around the boss, so there are two separate threats: the travelling weapon and the catch location. Strafe across the initial line instead of backing away along it, then remain outside Olroth's immediate radius until the sword has returned and the Cold burst has resolved.
This is especially dangerous for melee characters who dodge the outgoing weapon and instantly re-enter. Delay the next combo until the weapon is visibly back in Olroth's hands. Ranged characters should not cross the return line to preserve a cast. If the path becomes unclear because of adds or projectiles, prioritize a side position that avoids both directions rather than trying to time two consecutive collisions with one roll.
Light Pillars and Closing Space
Olroth can create rotating light pillars that gradually close toward him. Read the formation early and move with an open lane rather than waiting for the gap to narrow. The pattern is a space-management mechanic: it becomes dangerous when a player continues attacking from the wrong side until the only exit intersects another sword attack.
Stay calm and walk with the rotation while the gaps remain wide. Roll only if a pillar and a committed Olroth attack close the same route. Melee builds should disengage before the pillars compress around the boss. Ranged builds should avoid circling so far outward that the perimeter gateways or later Cold projectiles become the new obstacle.
Charged Attack and Sweeping Dash
Charged Attack begins with a visible preparation before Olroth dashes toward the player and sweeps the sword across the destination. A sideways response is safer than retreating directly away, because the dash already covers forward distance. Wait until his direction becomes clear, then step or roll across the charge line. Continue moving until the sweep has passed.
The common failure is rolling at the first hint of the wind-up. Olroth then finishes aiming at the new position and lands the sweep there. Preserve the roll until the attack is committed, especially when Chill has reduced normal movement. After the dash, reorient the camera before attacking; the Triskelion may already be preparing a separate hazard from another angle.
Revival and Second Stage Transition
Reducing Olroth's first life to zero does not complete the encounter. The Triskelion revives him, beginning the second combat stage with modified arena pressure. Do not move toward the body as though loot is about to appear. Use the transition to recover resources, identify gateway spawns, locate the rotating artifact and move onto clean floor.
The second life retains Olroth's core sword kit while adding Tracking Cold Beam, targeted Cold projectiles and a central beam that leaves Chilled Ground. This combination raises the value of visibility and reduces the safety of long stationary damage windows. Treat the revival as a full reset of attention, not as a short final burn phase.
Tracking Cold Beam
The Tracking Cold Beam follows the player's movement gradually. Keep walking around the arena and curve the beam away from the space intended for the next sword dodge. Sudden reversals can drag it across the character or the planned recovery lane. Because it tracks slowly, ordinary movement is usually preferable to repeated rolling.
Attack with mobile skills while the beam turns, or use brief stationary actions only after creating angular separation. Melee characters can circle Olroth as long as they remain able to see his weapon. Ranged characters should guide the beam around the outer half of the arena and then return toward a safe middle lane instead of continuing until trapped at the wall.
Cold Projectiles and Ground Explosions
The Triskelion fires Cold projectiles toward the player's current position, and each projectile explodes in a small area. Continuous lateral movement causes consecutive targets to land behind the character rather than stacking directly underfoot. Avoid doubling back through previous impacts before their effects are clear.
When projectiles overlap a sword sequence, use short diagonal steps that preserve visibility on Olroth. Do not spend every roll on the first projectile; the charged sweep or returning sword is usually the more urgent commitment. Add clear should also be directed away from fresh impact areas so the character does not stand still inside a Cold explosion while targeting a gateway warrior.
Center Beam and Chilled Ground
The Center Arena Beam cuts through the middle and leaves Chilled Ground after it dissipates. Watch the Triskelion orientation and move to one side before the line fires. If the beam divides the arena while Olroth attacks from the opposite side, remain in the safer half until the crossing is necessary. Crossing early only trades a known safe section for avoidable Cold damage and reduced movement.
When a crossing is required, choose a clear segment, move perpendicular to the beam line and avoid ending the roll inside a slam pulse or projectile marker. Chilled Ground remains relevant after the visible beam has gone, so do not immediately use the center as a damage position. Chill mitigation makes mistakes more recoverable but does not turn the ground into a safe zone.
Runic Gateways and Warrior Adds
Three Runic Gateways around the perimeter can create Unearthed Skeletal Warriors during the encounter. These adds reduce floor visibility, interfere with recovery and can surround a character already moving around a beam. They are not a reason to lose track of Olroth. Use area damage when warriors enter the boss line, and reposition before committing to a durable rare add.
| Add Situation | Best Response | Failure to Avoid |
|---|---|---|
| Small group beside Olroth | Clear it through normal boss area damage | Turning the camera away during a sword wind-up |
| Adds blocking the next beam crossing | Open the route early or choose another clear segment | Waiting until the beam forces a collision |
| Rare warrior with dangerous modifiers | Separate it from Olroth and use a controlled damage window | Standing still for a long single-target rotation |
| Several low-health warriors | Use them for on-kill recovery if the build supports it | Chasing them into the perimeter gateway lane |
| Screen becomes visually crowded | Move to clean floor and restore sight of Olroth and the Triskelion | Continuing damage through hidden ground effects |
Dangerous Mechanic Overlaps
Olroth's hardest moments come from timing conflicts rather than one isolated attack. A center beam can remove the route needed for the charged sweep. Tracking Cold pressure can follow the character toward a pulsing Sword Slam area. Adds can hide a projectile marker or stop a clean lateral dodge. Resolve overlaps by identifying the attack that has already committed and the hazard that persists longest.
- For Charged Attack plus projectiles, cross the dash line late and continue diagonally so explosions land behind.
- For the center beam plus Sword Throw, stay in one half and avoid both the outgoing and returning weapon before crossing.
- For light pillars plus tracking beam, move with the widest pillar gap while bending the beam away from the exit.
- For a slam pulse plus gateway adds, clear only the enemies occupying clean floor and let Olroth move away from the pulse.
- For any overlap that hides the artifact, abandon the damage cycle and restore visibility before the next Triskelion attack.
A practical priority is committed sword hit, major beam, persistent ground, projectile landing and then adds. The order can change with the exact position, but boss damage should never outrank an effect that is already closing the only escape lane.
Positioning by Build Type
Build range changes the preferred angle but not the need to watch both threat sources. Melee characters should use Olroth's flank and retreat before the sword returns. Ranged characters should occupy middle distance and avoid being pushed around the perimeter. Damage-over-time and minion setups can exploit movement uptime, but visual clutter must not cover projectile markers or the center beam.
| Build Style | Default Position | Damage Rule | Main Risk |
|---|---|---|---|
| Melee | Olroth's side with a clear route toward middle space | Use short combos and leave before the returning sword or closing pillars | Losing sight of the Triskelion behind the boss model |
| Ranged attack | Offset middle distance | Strafe between attacks instead of retreating to maximum range | Being trapped between the wall, adds and Tracking Cold Beam |
| Spell caster | A clear angle that shows the charge wind-up | Cancel long casts when the artifact starts a new pattern | Finishing one cast inside a committed sword or beam line |
| Damage over time | Wide circular route through clean floor | Refresh during genuine openings and let duration cover movement | Refreshing too early while a beam is about to divide the arena |
| Minions or deployables | Where boss animations and floor markers remain visible | Prioritize personal survival while persistent damage continues | Following minions into gateway or Chilled Ground clutter |
How to Recover After a Mistake
After a heavy hit, move onto clean floor before resuming damage. Remove Freeze, restore Life or Energy Shield, check the Triskelion and then reacquire Olroth. Do not run blindly along the wall because the tracking beam and gateways can turn that route into a second failure. Recovery should end in a position with at least two exits.
If Chill has made normal movement unreliable, use the relevant charm or ailment answer before attempting a beam crossing. If the dodge roll is unavailable, walk around slow tracking effects and reserve the next roll for a committed sword dash. If adds are preventing recovery, clear the closest group with a short area action rather than chasing every warrior. A missed damage window is cheaper than restarting the encounter.
The Obscure Island area does not grant or remove experience, but access and instance state still matter. Do not plan around a revival count copied from historical difficulty tiers. Check the current interface and portal state, and treat each remaining entry as valuable. When repeating the attempt, change the response to the mechanic that caused the loss rather than rebuilding several unrelated systems at once.
Olroth Rewards and Loot Priorities
Olroth has a focused unique pool, three Uhtred Lineage Supports, a Reliquary Key and the Shattered Triskelion progression outcome. No fixed drop percentages are used here because historical samples describe an earlier difficulty system and current market value changes over time. Priority should be determined by build compatibility, the exact item roll and whether the player needs to continue The Grand Expedition.
| Reward | Type | Primary Use Case | Priority Check |
|---|---|---|---|
| Shattered Triskelion | Progression item | Repairing the key used for the next Runes of Aldur pinnacle route | Secure and complete its quest or Runeforging step before treating the run as finished |
| Svalinn | Crucible Tower Shield | Runic Ward and block builds using Raise Shield, Cast on Block and Lucky block | Does the complete build benefit from its block package and blocked-hit tradeoff? |
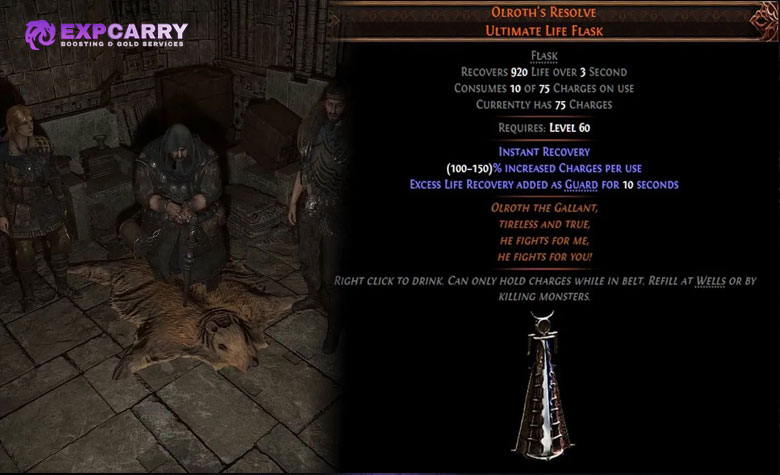
| Olroth's Resolve | Ultimate Life Flask | Runic Ward setups that regenerate Ward during flask effect and convert current Ward into Guard afterward | Is the current build designed around Runic Ward rather than the flask's obsolete legacy recovery effect? |
| Heroic Tragedy | Timeless Jewel | Passive-tree plans using seed-dependent Kalguuran transformations | Do the name, seed and chosen socket transform useful notables? |
| Keeper of the Arc | Spiritbone Crown | Armour and Energy Shield builds that can plan around alternating Hit and damage-over-time protection | Can the build tolerate a defensive profile that changes every five seconds? |
| Olrovasara | Torment Club | One-handed attack builds exploiting speed, accuracy and power-sensitive Lightning scaling | Does its boss-focused scaling outperform a stable rare weapon in the intended content? |
| Olroth's Reliquary Key | Reliquary Key | Opening Olroth's associated foil reward pool | Compare opening value with the live trade value before consuming it |
The first completion priority is the Shattered Triskelion because it advances the larger questline. For equipment, Svalinn and Olroth's Resolve are specialized Runic Ward targets rather than universal upgrades. Heroic Tragedy must be evaluated in an actual passive-tree socket. Keeper of the Arc requires timing-aware defence, and Olrovasara needs a compatible attack plan. A famous name is not enough reason to replace a coherent rare item.
Uhtred Lineage Support Drops
Olroth can also drop Uhtred's Exodus, Uhtred's Omen and Uhtred's Augury. All three support skills that have levels, but their bonuses depend on the exact number of other Supports modifying the skill. They are best understood as link-structure tools rather than generic gems to insert into a full support setup.
| Lineage Support | Required Link Structure | Current Benefit | Best Evaluation |
|---|---|---|---|
| Uhtred's Exodus | No other Support modifies the skill | Adds three skill levels | Compare a high-level minimal link with the damage and utility lost from all other Supports |
| Uhtred's Omen | Exactly one other Support modifies the skill | Adds two skill levels | Choose the single partner Support that preserves the skill's essential function |
| Uhtred's Augury | Exactly two other Supports modify the skill | Adds two skill levels | Check whether a compact three-Support package beats a conventional full link |
The restriction must be tested in the Skills Panel, including Supports applied indirectly or through unusual equipment interactions. A gem can be valuable for a level-scaling utility skill and still be inferior for a main damage skill that needs several multiplicative Supports. Judge the whole supported skill, not only the added levels.
Current Olroth's Resolve Warning
Olroth's Resolve deserves a separate warning because its function changed with the 0.5 branch. The current flask no longer provides its former instant recovery and excess Life recovery converted into Guard. It now regenerates a portion of maximum Runic Ward during its effect and grants Guard equal to current Runic Ward for ten seconds when the effect ends. A legacy tooltip, old trade listing or outdated guide can therefore describe an entirely different build item.
Evaluate the current version only in a character that owns enough Runic Ward and can preserve it until the flask effect ends. Increased charges used is also a real cost that affects sustain. Buying the flask for an old Guard setup without checking the live tooltip is one of the most expensive loot-priority mistakes associated with Olroth.
Grand Expedition Progression After Olroth
Olroth is no longer the final boss of the Expedition storyline. His progression result leads to the Shattered Triskelion, which can be repaired through Runeforging at the Verisium Anvil into The Triskelion Reforged. That finished key belongs to a later encounter and should not be confused with an Olroth repeat-access item. The Olroth guide ends with obtaining and securing this outcome; the mechanics and rewards of the subsequent pinnacle belong to their own guide.
The current Expedition Atlas Passive Tree also connects progression to the faction-leader sequence. The official 0.5.4 notes state that points for this tree are earned by defeating the bosses in The Grand Expedition questline. Consequently, a first Olroth victory has permanent progression value even when its equipment drop is not useful. Finish the related NPC hand-in before returning to unrelated mapping.
Repeat Farming Logic
A complete Olroth cycle includes finding or acquiring a Logbook, reaching a usable Ocean edge, revealing the region, connecting to Obscure Island, completing the island objective, clearing the tomb and defeating both boss lives. Olroth's Saga can focus the reveal, but it also adds another input whose live value must be considered. Measure the whole route instead of judging efficiency only by arena kill time.
| Farm Bottleneck | Practical Improvement | Wrong Conclusion |
|---|---|---|
| Logbook supply | Improve Expedition monster and Grand Expedition progression | Assuming one short sample establishes a stable drop rate |
| Olroth destination consistency | Use Olroth's Saga when its cost fits the target plan | Expecting every ordinary Logbook to reveal Obscure Island |
| Island modifiers | Read immunities and defensive penalties before the explosive chain | Believing boss damage alone guarantees route completion |
| Second-stage deaths | Improve Freeze control, central-space recovery and Triskelion awareness | Replacing several damage items before fixing positioning |
| Reward variance | Value multiple build-compatible uniques, Lineage Supports and progression outcomes | Planning around a fixed unique, key or market return |
Players who want help building Logbook supply or testing the Ocean loop before specializing can use an assisted PoE 2 farming option in context. Players who only need encounter completion can instead consider the dedicated Olroth boss assistance service. In either case, the article does not promise a particular item, rate or profit, because those outcomes remain subject to the actual run and current economy.
Common Olroth Failure Points
Most failed Olroth attempts come from an outdated access guide, insufficient Freeze control or losing track of the Triskelion while focusing on the boss. Diagnose the exact failure category before spending another Logbook or Saga. Route problems and fight problems require different solutions.
- Taking Runic Splinters to the Realmgate instead of revealing Ocean islands with a Logbook.
- Searching a conventional legacy Logbook rather than looking for Obscure Island.
- Consuming a regular Logbook while assuming it guarantees the Origin of the fall rumour.
- Entering with capped Cold Resistance but no dependable Freeze or Chill answer.
- Dodging the outward sword and immediately standing beside Olroth for its return burst.
- Rolling before Charged Attack commits and letting the sweep retarget the new position.
- Treating Olroth's first defeat as the end and being unprepared for his revival.
- Watching only Olroth while the Triskelion aims a beam or projectile sequence.
- Camping the perimeter until gateway warriors and Cold effects remove every exit.
- Evaluating Olroth's Resolve by its obsolete instant-recovery version.
- Using historical splinter tiers, attempts or drop percentages as current guarantees.
- Leaving before completing the Shattered Triskelion and Dannig progression steps.
Correct the most repeatable failure first. If the sword return causes the loss, delay melee re-entry. If the center beam traps the character, reclaim middle space earlier. If adds obscure the floor, shorten damage cycles and clear only the closest pack. If Obscure Island never appears, correct the Logbook and Saga plan rather than changing boss gear.
Final Verdict
Olroth is a disciplined two-stage encounter built around current Ocean access, Physical and Cold preparation and simultaneous awareness of the boss and Triskelion. The quest Logbook provides the first route to Obscure Island; later runs use a matching Ocean rumour or Olroth's Saga. Enter with capped Cold Resistance, Freeze control, a Physical defence layer, mobile recovery and enough area damage to manage gateway warriors.
During the fight, respect both paths of Sword Throw, leave Sword Slam pulses, cross the charged dash late and preserve central options as light pillars close. After the revival, guide the tracking beam away from clean floor, keep moving through projectile targeting and cross the center beam only when necessary. Secure the Shattered Triskelion for progression, then evaluate uniques and Lineage Supports by actual build use rather than historical rates. This method remains useful as prices change because it is based on the current access structure, readable mechanics and clear loot priorities.


